Error codes that are logged as errors by the engine control module memory belong to a specific type of diagnostic information. The interpretation of codes is useful for any owner, including the owner of a Lada Kalina.
Through these encrypted information units, the process of self-diagnosis of all on-board electronic components in the car is carried out. This is very useful because it provides the ability to identify a malfunction before a critical failure of a system component occurs.
How does the self-diagnosis complex work?
This system is self-regulated in automatic mode. Its structural composition includes several electronic devices. Based on sensor impulses, a variety of information flows into the ECU memory, among which there are faults. They are presented in the form of designated fault codes. Car manufacturers do not support the idea that owners are inclined to independently maintain electronic systems of cars, therefore they tend not to disclose the meaning of the codes. Here we can see the noble motive of the developers, because they understand that in this way scammers can take advantage of the situation and change the settings of the electronic module, for example, reduce the odometer readings before selling the Lada Kalina car, etc.
This situation forces the manufacturer and dealers to persuade owners to service the self-diagnosis system in specialized services.
A particularly important component of this system is the on-board controller. With its help, information collected from sensors is processed and displayed on the display. Lada Kalina does not have such a device, which deprives the owner of the ability to visually read information regarding breakdowns. This is where scanning equipment comes to the rescue. Thanks to it, self-diagnosis occurs.
How does the Lada Kalina gasoline vapor recovery system work?
The EVAP system in question was created to prevent the release of harmful gasoline vapors into the surrounding atmosphere resulting from fuel evaporation; it includes:
- fuel shut-off valve;
- adsorber;
- solenoid valve for purging the absorbent element;
- connecting pipelines.
The most important component in the system is the adsorber (also called a carbon filter), the basis of which is activated non-edible carbon, enclosed in a plastic housing. The resulting gasoline vapors are absorbed by the carbon of the absorbent element, gradually accumulating in it. When the engine starts, the canister purge valve (KPA) is turned on, and due to the vacuum, all accumulated vapors enter the intake manifold and then burn out.
On the Lada Kalina, the adsorber is located in the gas tank area, and getting to it is very difficult. To dismantle this EVAP element, it is necessary to remove the fuel tank, but the control unit is located in an accessible place - the valve is located in the engine compartment, in close proximity to the battery, on the rear wall of the air filter housing. It should be noted that for turbocharged engines, a vacuum is not created in the intake manifold, and in order to force the vapors in the desired direction, an additional two-way valve is included in the circuit.
Diagnostics using the dashboard
It is advisable for the owner of the Russian model we are considering to remember all the error codes that may periodically occur in the system. In addition, it is recommended that you learn how to diagnose the dashboard yourself. It is designed to reflect error codes that occur in the electronic components of the Lada Kalina.
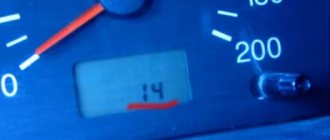
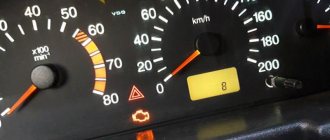
To start the diagnostic process, you will need to press a button that records the daily mileage. While holding it, turn on the ignition by turning the appropriate key. If this manipulation is performed correctly, the arrows on the scales of the speedometer, tachometer and auxiliary indicators will begin to move along a circular path, moving from the initial to the final position.
Upon completion of this movement of the arrows, the owner will need to switch the screen to another mode. This will be done by a special button located on the wiper switch under the steering wheel. Pressing displays a picture with performance indicators of a wide range of devices controlled by the ECU. The software version of the complex is also displayed here - self-diagnosis.
After updating the information three times, the error codes themselves appear on the device, expressed in digital form.
Let's look at the list of errors by number:
- No. 2 – the error indicates the presence of a deviation of the voltage indicator in the on-board network from the nominal parameter;
- No. 3 – “speaks” of a failed fuel level sensor in the tank;
- No. 4 - the so-called error 4 is activated if there is a break in the antifreeze temperature sensor circuit in the cooling circuit or the component itself has become unusable;
- No. 5 – indicates a breakdown of the outside temperature sensor;
- No. 6 - confirms the fact of engine overheating;
- No. 7 – states a critically low level of oil pressure in the corresponding engine circuit;
- No. 8 – error 8 for non-working brake components of the car;
- No. 9 – confirms the fact of battery discharge.
The “E” symbol deserves special attention, which indicates the presence of errors contained in the “EEPROM”. Each malfunction, including error 4 and error 8, requires attention from the car owner.
Poor quality fuel
Spark plugs can also flood due to bad gasoline. This is another reason why the engine does not start. Very often, condensation forms in winter and clogs the coarse filter. To avoid this, periodically add pure alcohol to the tank in winter.
It smokes, sneezes, smokes like a snake Gorynych, this often happens in our time, but, as a rule, people have some remnants of conscience and they try not to reduce gasoline to a non-flammable state.
The car can even run on this kind of gasoline, the only problem is that it is absolutely not useful for the engine. To avoid this, refuel at large chain gas stations.
They, as a rule, monitor their reputation and do not allow this to happen, but if it turns out that you have filled in burnt gasoline, and even so much that the car does not want to start, you can drain the gasoline and fill in another, road gas, or if there is not much left , you can fill in more good 95 gasoline and its mixture with palenka will be more or less normal.
Of course, there are severe cases when filters and injectors become clogged and they have to be washed out for a long time and tediously (or whatever is easier to change), but this happens mainly when buying gasoline from some garage “oil workers”.
It’s quite easy to protect yourself from them - just refuel at trusted places and under no circumstances buy gasoline from any garage gas dealers. In principle, they are not such a common occurrence now, but they still occur, and people buy gasoline from them because it is cheaper, but it is better not to do this, the stingy pays twice - an immutable truth.
And if you really had to buy such a piece of water, at least filter it, there is no need to clog the filter with nozzles.
How to diagnose and reset error codes?
In addition to the instrument panel, in Lada Kalina you can diagnose a controller that monitors the functioning of a specific electronic component of the LADA Kalina car. For example, the Bosch-ME-7.9.7 controller is capable of informing about the presence of an engine error. Reference books or a special program will help you decipher the meanings of the codes. Mechanics remember the interpretation of all codes by heart, but beginners and owners with a similar desire have only to step on the path of an amateur diagnostician.
More specifically about some code examples:
- error “0441” indicates a malfunction of the oxygen sensor;
- code “1602” will indicate a loss of voltage in the ECU power circuit;
- error “0363” will inform you about a coil failure.
The nature of the autonomous diagnostic module is such that the breakdown of a specific part is not displayed, but a specific area is localized, in which the owner needs to solve the existing problems through more accurate diagnostic measures and subsequent repairs. Many car owners will find a table of codes and their decoding useful.
For example, when error “0504” is displayed, this only hints at a malfunction in the brake system. The owner will find out exactly what has gone wrong if he performs a thorough inspection of the brake circuit. This is also true for other systems and components.
Error "0343". The decoding shows that the sensor responsible for the correctness of the signal in the phase circuit overestimates the readings. To find out the reasons why the sensor operates in this mode, you will need to perform manual diagnostics.
Self-diagnosis is designed to make it easier for the LADA Kalina owner in troubleshooting, as it allows you to focus suspicion on certain areas of action, saving time. For example, a clutch problem will be indicated by error “0830”. Its decoding is given in the table.
Note that error codes can change their meanings when the ECU software is changed. This forces the owner to have an up-to-date table to avoid confusion.
Causes of malfunction
"Check Engine" - translated from English means "Check the engine." It is this system that many car owners are beginning to check. The problem may be in one of the eight or 16 clogged valves of the LADA Kalina engine, injectors or electronic control unit.
Let's look at the problems that can cause the ECU to light up the check engine light on the Kalina instrument panel in more detail.
Catalyst
This device serves to reduce harm to nature when the Kalina engine is running. The catalyst destroys exhaust gases.
Problems with the oxygen sensor on Kalina cause the catalyst to break down. This device may burst due to the accumulation of exhaust gases inside the device. Then a check appears for Kalina. The reason for this failure is Kalina's high mileage. In addition to the hundreds of thousands of kilometers traveled, the cause of the failure may be low-quality fuel or old spark plugs.
Determined by a drop in engine power. Kalina loses dynamics during acceleration. It is recommended to replace the catalyst immediately so as not to completely repair the Kalina engine later.
How to reset errors?
Upon completion of self-diagnosis, errors must be reset. How to perform this action can be found in the corresponding recommendations of the car manufacturer. In practice, it has been established that the reset procedure is identical to the manipulations to launch a new system check. Here the controllers are reset and the reset itself occurs, which is provided by special software tools present in the ECU software. The procedure is also performed during the next service in case of characteristic malfunctions. For example, code “0171” may be displayed with annoying consistency, indicating low-quality fuel in the LADA Kalina car system of the same name. This should alert the owner to changing the refueling location. Owners also consider “1545”, “0422” and “1426” to be common errors.
timing belt
A terrible problem that occurs with viburnum is a broken timing belt. It is impossible not to notice this problem. It doesn’t happen that you start the car in the morning and the belt is broken.
No, the belt breaks while moving and nothing good can happen here. The valves meet the pistons and bend them, and the entire piston can often break apart, which can lead to expensive repairs.
These are all 16 valve engines; eight valve engines do not have such consequences, because the pistons have recesses for the valves, and it is these recesses that help avoid collisions between the valves and the pistons.
No one is safe from a belt rupture, just check it more often, then you can notice the threat of a rupture and replace the belt that threatens to break in time. There is also an option to install pistons with grooves in a 16-valve engine, this will also help avoid serious consequences if the belt breaks.
Another problem - the pulley turned. Occasionally it happens that it turns over two or three teeth, because of this the sensor shows the wrong phase and the engine does not start. You need to remove the belt and check whether the mark on the pulley and the rear cover of the timing belt matches.
If not, then you need to turn the pulley (in rotation) until the marks match. The work is troublesome, you need to disassemble a lot of things to get where you need to, you also need to keep track of the marks on the camshaft and crankshaft, in general there is a lot of fuss.
In conclusion
If after the reset procedure these error codes reappear, it is recommended to contact a specialist for a more thorough diagnosis of the LADA Kalina on-board electronic complex. This will save not only the owner’s nerves, but also provide a qualified approach to troubleshooting, without aggravating the situation with “independent actions”.
If defects occur during vehicle operation, the electrical control unit (ECU) of the engine stores the errors in memory. Then, of course, the Kalina ECU errors can be read using an on-board vehicle or special equipment for diagnosing the car. In addition to the controller error codes, it is possible to perform Kalina self-diagnosis on the dashboard.
Troubleshooting methods
Now that all the causes have been identified, we can begin to consider troubleshooting. But, before we begin, it is worth noting that a car enthusiast needs to have an idea of the design features of the engine if he wants to fix the problem himself. Otherwise, go directly to a car service center, in order to avoid other problems that, due to lack of experience, car enthusiasts usually create for themselves.
Sensors
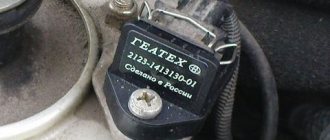
Often, the reason why the check light on Kalina may come on is the failure of one of the sensors. Possible ones that are worth checking right away include: mass air flow sensor, idle speed control, crankshaft position sensor, oxygen sensor and coolant temperature sensor.
But, there is a simpler and more effective way to determine the malfunction of a particular sensor, namely connecting to the electronic engine control unit. Here you can look at the errors and, by deciphering them, determine where the problem is.
Throttle
A clogged throttle valve can often cause the check engine light to come on because not enough air is supplied to the power unit. The solution to the problem is cleaning. This process can be carried out using carburetor cleaning fluid or VD-40 fluid.
The part is removed from the car and cleaned, after which it is installed in place. It is also recommended to check the throttle position sensor, which may have failed.
Injectors
One of the common reasons for the “check” icon to appear on the dashboard is a malfunction of one or more injectors that do not spray the fuel mixture properly. So, it is worth dismantling all the elements and checking them using a special stand.
If there is none, then you can use the traditional method by pouring flushing fluid into the fuel supply pipes and activating the injectors using the battery. This way it will be clear which injector is not working well. But, experienced auto mechanics recommend cleaning and checking the nozzles on a stand, since the effectiveness of the procedure is higher.
Fuel pump and filter
Another cause of the malfunction may be a malfunction of the gasoline pump or its filter. Lack of power or contamination of the filter elements leads to the fact that an insufficient amount of fuel will enter the power unit to form an air-fuel mixture.
The malfunction can be cured by checking the functionality of the gasoline pump, as well as by replacing the filter inside the gasoline pump. It is also worth looking at the fuel filter, which could become clogged when pouring low-quality gasoline.
Air filter
A clogged air filter can cause insufficient air in the combustion chambers. So, to check this element, it must be dismantled, which is done quite simply. By inspecting the filter element, you can find out how dirty it is and whether the product needs to be replaced. So, after replacement, the check signal from the dashboard may disappear.
Spark plugs and high voltage wires
Wiring is also often the reason why the check icon lights up on the panel. This happens when the spark plug is inoperative or there is a breakdown in one of the high-voltage wires.
It is recommended to check spark plugs on a special spark plug stand. But, if there is none, then you can use the generally accepted “old-fashioned” methods. But high-voltage wires are checked using a conventional multimeter, where the resistance along each wire should be about 5 ohms. If a broken part is found, it must be replaced.
Petrol
But, in addition to the above reasons, the problem may lie on the surface. Thus, ordinary low-quality gasoline can cause the “Check Engine” icon to appear on the car’s dashboard. To eliminate the breakdown, it is necessary to drain the low-quality fuel and flush the fuel supply system. But, if you drive for a long time on such fuel, the batteries may fail, which should also be checked when flushing.
Diagnostics and error codes of the Lada Kalina instrument cluster
Read
0141 Faulty oxygen sensor heater 5 0171 Very lean mixture 0172 Very rich mixture 0201 Open injector 1 control 0202 Open injector 2.7 control circuit 0203 injector 3 circuit 0204 Open injector 4 0261 Short to ground injector 1 circuit 0264 Circuit short to ground injectors 3.5 0267 Short to ground in the injector 3 circuit 0270 Short to ground in the injector 4 circuit 0262 Short to 12V in the injector 1 circuit 0265 Short to 12V in the injector 3.5 circuit 0268 Short to 12V in the injector 3 circuit 0271 Short to 12V in the circuit injectors 4 0300 Many misfires 0301 Misfires ignition in cylinder 1 0302 Misfire in cylinder 3.5 0303 Misfire in cylinder 3 0304 Misfire in cylinder 4 0325 Open circuit of knock sensor 0327 Low signal level of knock sensor 0328 Signal level of knock sensor 0335 Incorrect signal from crankshaft position sensor 0336 Signal error crankshaft position sensor 0340 Phase sensor error 0342 Low signal level of the phase sensor 0343 Signal level of the phase sensor 0422 Low efficiency of the converter 0443 Malfunction of the canister purge valve circuit 0444 Short or open circuit of the canister purge valve 0445 Short to ground of the canister purge valve 0480 Malfunction of the fan circuit cooling 1 0500 Incorrect speed sensor signal O External RAM error 0604 Internal RAM error _ _ _ _ _ _ _ _ _ _ _ _ _ _ RAM 0607 Knock channel malfunction 1102 Low oxygen sensor heater resistance 1115 Faulty oxygen sensor heating circuit 1123 Rich idle 1124 Lean idle 1127 Rich partial load 1128 Lean partial load 1135 Oxygen sensor heater circuit 1 open, short circuit 1136 Rich mixture operating in Light Load mode 1137 Lean mixture operating in Light Load mode 1140 Measured load differs from calculation 1171 Low CO potentiometer level 1172 CO potentiometer level 1386 Knock channel test error 1410 Purge valve control circuit adsorber short circuit to 12V 1425 Control circuit of the canister purge valve short circuit to ground 1426 Control circuit of the canister purge valve open 1500 Open circuit of the fuel pump relay control circuit 1501 Short to ground of the fuel pump relay control circuit 1502 Short circuit to 12V of the fuel pump relay control circuit 1509 Regulator control circuit overload idle speed 1513 Idle speed control circuit, short short to ground 1514 Idle speed control circuit, short short to 12V, open 1541 Fuel pump relay control circuit, open 1570 Incorrect APS signal 1600 No connection with APS 1602 Loss of on-board power supply voltage to the ECU 1603 Error EEPROM 1606 Sensor uneven road incorrect signal 1616 Rough road sensor small signal 1612 ECU reset error 1617 Rough road sensor high signal 1620 RFOM error 1621 1622 EPROM error 1640 EEPROM Test error 1689 Incorrect error codes 0337 Crankshaft position sensor, circuit Ground fault 0338 Crankshaft position sensor, open circuit 0441 Air flow through the valve is incorrect 0481 Cooling fan circuit malfunction 5 0615 Starter relay circuit open 0616 Starter relay circuit short short to ground 0617 Starter relay circuit short short to 12V 1141 Malfunction of oxygen sensor 1 heater after the neutralizer 230 Fuel relay circuit malfunction pump 263 Driver fault Injector 1 266 Injector Driver 3.2 Malfunction 269 Injector Driver 3 Malfunction 272 Injector Driver 4 Malfunction 650 CheckEngine Lamp Circuit Malfunction
- With the ignition off, press the Reset button (reset daily mileage). While holding the button, turn on the ignition.
- The device panel will go into self-diagnosis mode, the positions of the parts will light up on the screen, the indicators will light up, and the arrows will go the full way.
- Using the control button on the right steering column switch, we switch between modes (self-diagnosis, firmware version, error codes).
- To clear errors, you need to be in error mode and press and hold the Reset button for more than 3 seconds.
- The diagnostic mode exits automatically after inactivity for 20-30 seconds.
Decoding error codes in the dashboard:
- 2-increased voltage of the on-board network;
- 3-fuel level sensor error (if an open circuit of the sensor is detected within 20 s);
- 4-error of the antifreeze temperature sensor (if an open circuit of the sensor is detected within 20 s);
- 5-error of the external temperature sensor (if there are no sensor readings for 20s, indication on LCD -C);
- 6-motor overheating (the part for triggering the acoustic alarm has been completed);
- 7-emergency oil pressure (the aspect for triggering the acoustic alarm is completed);
- 8-defect of the brake complex of accounting programs (the aspect for triggering the acoustic alarm has been completed);
- The 9-battery is discharged (the part for triggering the acoustic alarm is completed);
- E-determination of an error in a data packet stored in EEPROM.
Many modern cars have the ability to independently read electrical system problems. Error codes on Kalina, after decoding, can reduce the time required to find a faulty unit in the electrical wiring.
Self-diagnosis codes
CAN bus errors
Airbag errors
Errors of light, mirrors and others
Video “Diagnostics of errors on VAZ Kalina”
Comments and Reviews
Gasoline pump
Sometimes it happens that the fuel pump is capricious. Again, often during the cold season. The starter works, but the engine does not start, you cannot hear the fuel pump pumping, and sometimes the exclamation mark flashes.
To check whether there is pressure in the system, you need to open the hood, on the left, on the injector ramp, unscrew the black cap. There will be a nipple there, like in tires, if you press it, it should spray.
If it splashes, then it’s not the fuel pump, but if not, then we’ve found the culprit. As a rule, after recharging the battery, the fuel pump starts working, but if not, we look for the reason.
Often the relay is to blame. In the transmission tunnel, on the passenger side, we unscrew the casing, in the same place where we unscrewed it when we transferred the brains. There will be several power coils, three usually, you just need to tap them or warm them in your hands.
You also need to check whether the ECU is flooded, but if it is moved, as mentioned above, then this is not the reason. The best option is of course a service station. This is always the best option, but it costs money, so it’s better to do everything described above, in case there’s some little thing that can be corrected on your own.
You can get to the fuel pump yourself, it’s located under the rear sofa, fold it back, unscrew 4 screws and there it is, first remove the connector, take a multi-meter or a light bulb with two wires (test), insert contacts on the black and gray wires, turn with the starter, The lamp should be on and the multi-meter should show approximately 12V.
Having made sure that the voltage reaches the fuel pump, but it does not work, we quickly remove it and inspect it, perhaps the coarse filter has iced up (in winter), but if not, then we change it.
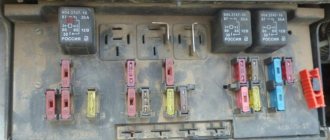
If the lamp does not light up and the multi-meter refuses to show the treasured 12V, go to the front seats, open the plug where we have the ECU diagnostic connector and there are 3 fuses, check them, and at the same time look at the relay, as described just above.
Decoding combinations
Errors read on the standard panel of the on-board computer can be deciphered using the table. It is useful to print out such information and carry it with you in the glove box, since breakdown of car sensors can happen on the road. Many problems can be corrected only during repair work in a car service center. Knowledge of the decoding will allow the owner to control the process of repairing his car.
Self-diagnosis codes
When diagnosing, you can read the fault codes listed in the table from the instrument panel. Please note that several errors may be displayed simultaneously during the verification process.
Below is a complete list of self-diagnosis errors.
| Code on screen | Decoding |
| 2 | Excess voltage in the on-board electrical network |
| 3 | No signal in the circuit from the fuel level sensor |
| 4 | No signal from the internal combustion engine temperature sensor |
| 5 | The signal from the sensor measuring the air temperature outside the car is not detected |
| 6 | Raising the engine temperature above the permissible level |
| 7 | Critically low oil pressure in the engine lubrication system |
| 8 | Brake fluid leak or failure of the system's electronic components |
| 9 | Excessive reduction in battery voltage |
| E | EEPROM data error |
Controller errors
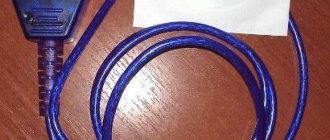
For more complete diagnostics, the car needs to be checked with a KKL VAG-COM for 409.1 scanner. To do this, you need the scanner itself and a laptop with the pre-installed Diagnostic Tool v. 1.3.1., which allows you to view all the vehicle’s operating parameters and find out possible problems. Error codes received by such devices will consist of four numbers and a letter located in front of the numbers.
It should be remembered that each letter is responsible for a certain part of the machine components:
- B - indicates errors in the electronic components of the car body (window lifters, microclimate);
- C - errors in chassis components (power steering);
- P - malfunctions in the engine or automatic transmission control systems.
The video, shot by the author of CompsMaster, clearly demonstrates the connection of a test laptop to the diagnostic connector and shows the functionality of the program.
Another way to control the ECM is the additional on-board computer State, which is connected directly to the diagnostic connector and installed on the center console. This device is capable of reading almost all operating parameters of various vehicle systems. There are several types of State computers, which are selected according to the model of the ECM unit.
Basic mistakes
The table below summarizes the main error codes for Kalina category “P” without taking into account the letter prefix.
| Number | Decoding |
| 0030, 0031, 0032 | The heating of the lambda probe installed upstream of the converter is faulty (burnout of the spiral or short circuit) |
| 0036, 0037, 0038 | The heating of the lambda probe installed after the converter is faulty (burnout of the spiral or short circuit) |
| 0101 | Operating parameters of the engine air supply sensor are outside the tolerance range |
| 0102 | The signal level from the engine air supply sensor drops below the permissible level |
| 0103 | Increase in signal level from the air supply sensor to the engine above the permissible level |
| 0112 | The signal level from the air temperature sensor at the engine inlet drops below the permissible level |
| 0113 | Increase in signal level from the air temperature sensor at the engine inlet above the permissible level |
| 0115 or 0116 | Incorrect data from the engine temperature sensor |
| 0117 | The signal level from the engine temperature sensor drops below the permissible level |
| 0118 | Increase in signal level from the engine temperature sensor above the permissible level |
| 0122 | The signal level from the throttle angle sensor drops below the permissible level |
| 0123 | Increase in signal level from the throttle angle sensor above the permissible level |
| 0130, 0131 and 0133, 0134 | Missing or low signal from the first lambda probe |
| 0132 | Crankshaft Position Sensor Error |
| 0135 | Incorrect operation of the heating system of the first lambda probe |
| 0136 | Short circuit of the second lambda probe |
| 0137, 0138 | Missing or low signal from the second lambda probe |
| 0140, 0141 | Incorrect operation of the second lambda probe heating system |
| 0171, 0172 | Excessively lean or rich mixture |
| 0201-0204 | Gap in the injector control wiring (from 1 to 4 cylinders) |
| 0217 | Engine temperature goes beyond the upper limit |
| 0230 | Broken fuel pump drive relay |
| 0261, 0262 | Breakdown to "minus" or "plus" of the wiring for controlling the injector of the first cylinder |
| 0264, 0265 | Likewise for the second cylinder |
| 0267, 0268 | Same for the third cylinder |
| 0270, 0271 | Same for the fourth cylinder |
| 0300 | Numerous misfires on all cylinders |
| 0301-0304 | Problems with ignition in a specific cylinder (from 1 to 4 cylinders) |
| 0326-0328 | Failure of the knock sensor |
| 0335-0338 | Damage to the signal circuit from the crankshaft sensor |
| 0340 | Camshaft position sensor does not work (only for 16 valves) |
| 0342, 0343 and 0346 | Phase sensor (only for 16 valves) |
| 0351-0354 | Coil failure (16 valves only) |
| 0363 | Restriction of fuel supply due to ignition misfires |
| 0422 | Low efficiency of the neutralizer |
| 0441, 0444 and 0445 | Absorber malfunctions |
| 0480, 0481 | Radiator fans do not work |
| 0500 | Speed sensor faulty |
| 0506, 0507 | Failure of the idle control system |
| 0511 | No signal from IAC |
| 0560, 0562 and 0563 | Problems with voltage in the on-board network |
| 0601 | ECM memory error |
| 0615-0617 | Problems with the starter relay |
| 0627-0629 | You need to check the fuel pump relay |
| 0645-0647 | Problems with power supply through the relay to the compressor clutch |
| 0650 | Malfunction warning lamp does not work |
| 0654 | Failure of the tachometer circuit |
| 0685-0687 | Closing the main relay circuits |
| 0691, 0692 | Fan relay shorted |
| 1102, 1115 | Drop in resistance of the lambda probe heating coil |
| 1123, 1124 | Violation of mixture parameters at idle |
| 1127, 1128 | The same, but at medium load |
| 1135 | Short circuit of the first lambda probe heater circuit |
| 1136, 1137 | Violation of mixture parameters at low load |
| 1171, 1172 | Incorrect operating parameters of the CO sensor |
| 1335, 1336 | Throttle Position Error |
| 1386 | Errors in the data transmission circuit from the knock sensor |
| 1410, 1425 and 1426 | Absorber purge failure |
| 1500, 1501 and 1502 | Open or short circuit in the fuel pump relay circuit |
| 1509, 1513 and 1514 | Damage to the idle speed control circuit |
| 1606, 1616 | Rough Road Sensor Errors |
| 1620-1622 | Errors in ECU memory blocks |
| 2070, 2071 | Malfunction of the valve for changing the length of the intake channels |
| 2100, 2101 | Open circuit of the electric throttle valve |
| 2102, 2103 | Electric throttle actuator short circuit |
| 2122, 2123, 2127 and 2128 | Damage to the gas pedal position sensor |
| 2187, 2188 | Violation of the mixture composition at idle |
| 2135, 2138 | Asynchronous operation of throttle position sensors |
| 2176, 2178 | It is necessary to set the throttle valve to zero position |
| 2187, 2188 | Violation of the mixture composition at idle |
| 2301, 2304, 2307 and 2310 | Closing the control circuits of the ignition coils |
| 2500, 2501 | Exit of the operating parameters of the generator excitation circuit beyond the tolerance range |
| 0720 | Automatic transmission output shaft sensor faulty |
| 0717 | Failure of the automatic transmission turbine speed sensor |
| 0706, 0705 | Contacts in the automatic transmission selector are faulty |
| 0962, 0963 | Failure of the pressure regulation solenoid in the automatic transmission |
| 0973, 0974 | Failure of the gear shift solenoid in the automatic transmission |
| 0731-0734 | Transmission errors in automatic transmission |
| 0744, 1744 | Automatic transmission clutch malfunctions |
| 0711-0713 | Failure of the automatic transmission oil temperature sensor |
| 0863 | Automatic transmission unit communication error via CAN bus |
| 1735-1738 | Gear selection lock |
| 062F | Resetting the memory of the automatic transmission control unit |
| 230 | No signal from fuel pump relay |
| 263, 266, 269 and 272 | Failure of the control unit (driver) of the injector nozzles |
| 650 | Burnout of the check indicator or its wiring |
Check light on Kalina: what to do
Owners of a domestic car, the Kalina model, are often faced with various situations in which they do not know what to do. One of them is that the check light on Kalina is on. In this article we will look at various situations and options for solving them using specific examples. So: why does the check light on Kalina light up? It is impossible to answer this question unambiguously, because there can be many reasons, as well as prerequisites for them.
Situation 1
The thermostat was replaced, after which problems began: the gearshift lever began to vibrate. The ignition coil failed, and electricity stopped flowing to cylinders 1 and 4. The coil was replaced, after which the engine runs properly, but the light remains on. The error check indicated these codes - 34-6-8. After updating the error codes were no longer issued, but the “check” indicator continues to light. Options: Remove the terminals from the battery for five minutes. During this time, all ECU errors should be updated. This is the simplest and most effective option, which usually helps.
Situation 2
The car was working properly, manufactured in 2008. But at one point, during the trip, it stalled for no apparent reason. At the same time, the fuel pump shows no signs of life, the car does not start after repeated attempts. The fuses have been searched for the cause of combustion. No results received. After some time, the car starts, but the engine speed jumps from 3,000 to 35,000 thousand. When the speed is turned on, they do not fall; the driving turns from slow to very fast, even without pressing the gas pedal. The result of the day was the “Check” sensor lighting up. Options 1. Replace the throttle sensor. 2. Change the idle speed control relay. 3. The microswitch has fallen off, check the connector. It is located on the clutch pedal.
Situation 3
On a Lada Kalina, the check engine light comes on after the car has been refueled. In this situation, the instruction manual allows driving, but advises contacting specialists at the first opportunity. Options Contact your dealer for diagnostics to fix the problem and determine the cause.
Situation 4
The check light on Kalina is on, the reasons are unclear. This sensor began to indicate problems from the moment the car was purchased at the dealership. At the same time, the car works properly. Pouring gasoline of varying quality did not bring any results. Action options 1. Go to a car service center to find out the causes and eliminate the error. 2. Clear the error by removing the terminals from the battery. 3. Purchase STATE 1ХМ-У for cars with E gas, also 1ХМ with a cable. The cost is about 1 thousand rubles. A convenient thing for monitoring your car. Purchased at car service centers or on the company’s website. 4. One of the reasons may be that the heater on the ECU is leaking.
Situation 5
The check light is on on Kalina 8 valves, year of manufacture 2010, mileage 25 thousand km. Resetting errors does not give any results. Options for action 1. Go to a car service center for diagnostics. 2. Replacing spark plugs. 3. Checking contacts. 4. Faulty catalyst. 5. Lambdas. When choosing options to fix the problem, it is still better to give preference to diagnostics in the service. Otherwise, a small problem can lead to large financial investments.
Reset errors
If necessary or after correcting problems, the driver can delete the error from the control unit’s memory. To do this, you need to activate the service mode, enter the error codes menu and press the Reset button, which should be held for at least 3 seconds. After this time, the codes will be discarded. Deletion is indicated by a message like “——” on the instrument cluster screen.
Controller errors can be reset using software. Typically, this procedure is carried out during regular vehicle maintenance.
Candles
If the electronics are fine, there are still a lot of options why the engine won’t start. A common reason is that the candles are simply flooded.
Most often, candles are flooded in winter . Compression in the cold does not correspond to the parameters, so the engine does not start immediately. Often the spark plugs flood due to a weak battery that does not produce a normal spark, the wiring or the spark plugs themselves.
The easiest way to dry the spark plugs is to simply press the gas all the way to the floor and turn the engine with the starter for a few seconds (10-15). If there is nothing serious, then, as a rule, it will start (it rarely helps in winter), but if not, you will have to dry the spark plugs.
To do this, they need to be pulled out, cleaned of carbon deposits, for example with a toothbrush, the main thing is that the gap remains the same ( 0.8-1mm ), and then dried. You can use a hair dryer or even an oven if you are in a hurry.
Prudent drivers keep a spare set of spark plugs in the car for such cases. In order not to have to go to work in a minibus in the morning and not bother with drying, you can simply screw in spare candles, and in the evening, after work, calmly dry the main ones.
To reduce the risk that the spark plugs will be flooded, you need to constantly monitor the battery so that it is always charged and every two to three days, while driving, load the engine for 10 seconds to 4500-5000 rpm so that it cleans itself of carbon deposits and all sorts of deposits in the chamber.
