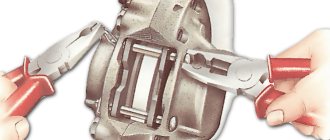
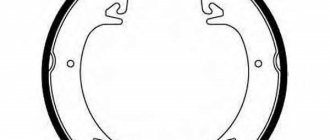
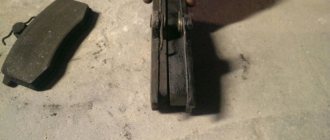
To stop the VAZ 2110, front disc and rear drum brakes are used. Their effectiveness directly depends on the pads. Low-grade consumables rattle, squeak and knock during operation, and are also not able to brake the car intensively enough. Therefore, it is important to purchase only high-quality pads and replace them in a timely manner, which is not difficult to do with your own hands.
Original disc pads VAZ 2110
Original VAZ 2110 disc brake pads have article number 21083501080. Their price is 280-380 rubles. The service life directly depends on operating conditions and driving style, and therefore is not standardized by the automaker.
Official recommendations are to control the size of the friction lining every 15 thousand km. If it turns out that the thickness has become less than 1.5 mm, then the pads need to be replaced. According to reviews, the average resource of original pads is 15-50 thousand km.
Article number and cost of good front brake pads for VAZ 2110 from third-party manufacturers
The front axle of the car experiences the greatest load on the pads when braking. Therefore, the efficiency of stopping the car and the safety of the driver directly depend on them.
Original consumables have mediocre characteristics. They are enough for moderate driving without intensive stops and prolonged braking on descents. There are many third party products that are better than the originals. Experienced car owners recommend installing analogues of the original pads shown in the table below.
Table - Good analogues of the original front pads
| Manufacturer | vendor code | Approximate cost, ruble |
| Ferodo | TAR527B | 550-700 |
| Road House | 222102 | 820-970 |
| TRW | GDB1446 | 1000-1200 |
| ATE | 13046029652 | 930-1100 |
| Profit | 50001325 | 480-600 |
Rear brake mechanism diagram (brake drum)
Let's say we are sure that the rear pads have died and need to be replaced with new ones. Ten to fifteen years ago, no one even thought of throwing away old worn-out pads; they scrupulously changed the linings, riveted them and put them on special glue.
Now this is easier, the public has become richer and can afford to replace the entire element. In order not to forget what the rear brake mechanism looks like, below is a diagram.
Brake mechanism diagram
Article number and approximate cost for original rear pads of VAZ 2110
The original rear drum pads have article number 21083502090. Their cost is higher than that of the front ones and amounts to 400-770 rubles. During braking, they perform only an auxiliary role, since most of the force falls on the front axle. This has a good effect on the resource. Also, there is less wear on the rear consumables due to the design of the drum. Debris and abrasive particles do not reach the friction surface of the pads.
Checking the remaining life of drum pads
The service life of rear axle consumables is also not standardized by the automaker. The average value for maintaining the performance of the pads is a mileage of 60 to 120 thousand km. In this case, the manual recommends monitoring the remainder of the friction linings, which should not be less than 1.5 mm.
Signs of a Replacement Needed
However, there are several signs that suggest a replacement is on the horizon. Of course, we won’t remove the wheels every day and check the condition of the linings visually, but when replacing a wheel, it doesn’t hurt to look at the brake caliper.
Disc wear of 2 mm for a VAZ-2112-3 mm pad is considered critical
The minimum thickness of the friction lining should not be less than 3-4 mm . Two is already dangerous, although this is exactly the permission AvtoVAZ gives. But he doesn’t know which pads were installed before us. Let's pretend that we don't know either, so when we see a lining less than 3-4 mm , we buy a set of front brake pads.
Definitely on both sides. They change only synchronously - on the right and left calipers.
Video when the pads are new and the discs are old
Symptoms of Needed Replacement
As for the indirect diagnosis of the condition of the brakes, the following symptoms will indicate their wear:
- on cars of the tenth family (not all), VAZ-2112, including, a front pad wear indicator is installed and when the warning light on the dashboard lights up , it makes sense to look at the pads in person;
- when braking, you will hear a creaking, knocking, grinding noise , and this is the second sign of worn out pads;
- If the steering wheel shakes when braking, then pay attention to the condition of the brake discs.
- the first is a weak car response to braking , pedal failure in the absence of an air lock in the system.
You shouldn’t rely too much on the sensor, since the designers did not take into account that water can sometimes get on the brake caliper, the sensor rusts, and therefore may often not work correctly.
Article number and cost of good analogs of original rear brake pads for VAZ 2110
The original drum brake pads squeak at times when braking. To eliminate extraneous sounds, many car owners are switching to products from third-party manufacturers. The best consumables that can be supplied to replace the original ones are shown in the table below.
Table - Recommended analogues
| Pad manufacturer | vendor code | Approximate price, ruble |
| Delphi | LS1323 | 400-500 |
| Profit | 50010240 | 550-650 |
| TRW | GS8210 | 840-970 |
| Bosch | 0986487813 | 770-920 |
| ATE | 03013702312 | 1080-1200 |
Brake pad selection
There are so many people, so many opinions, so talking about which pads are better is like arguing about the advantage of a pear over an apple. We have already written in more detail about choosing front brake pads earlier.
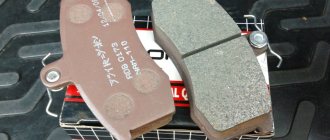
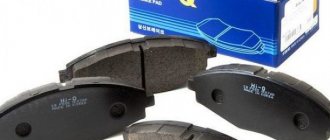
This is what the packaging looks like
Remove from packaging
Compare with what was
For example, many people install Ferodo Premier on standard calipers. They say that they run well and their service life is many times longer than the stock VAZ ones. With active driving, they should be enough for 20-25 thousand, if you don’t end up with a fake.
Lukas are also praised , although they are noisier and therefore tougher. The price is practically the same as Ferodo.
Brake pads Lada Sport, also known as TIIR-295
And if there are no special complaints about the brakes, then it is better to save money and buy ordinary factory TIIR, but you need to be prepared for the fact that after 8-10 thousand they may squeal. Repair correctly and use less emergency braking.
When to change brake pads?
For comparison, new and old brake pads. The old one would still be similar, but for reliability it was replaced
The ordinary procedure for replacing brake pads on Ladas of the tenth family should not cause any difficulties, but for this it is worth taking into account some nuances, which we will talk about.
Don't let the pads get that bad
Looking at the odometer and changing pads based on mileage is practically useless.
That's why - their quality is so different, and the compositions may not be intended for long-term use, so there is little point in relying on the resource declared by the pad manufacturer.
And everyone has their own driving style. Some people drive more aggressively and the brakes wear out faster, while others are fans of a phlegmatic driving style; such drivers may not change their pads for years.
Replacing front pads on a VAZ 2110
Replacing the front pads on a VAZ 2110 is carried out according to the step-by-step algorithm given below.
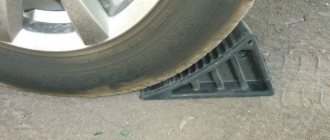
- Jack up the front of the car. Provide support.
- Remove the wheel.
- Bend back the locking plate.
Bend the locking plate
- Unscrew the lower fastener.
Unscrewing a bolt
- Remove the bolt together with the plate.
Removing fasteners
- Pry the caliper and lift it up.
Caliper opening
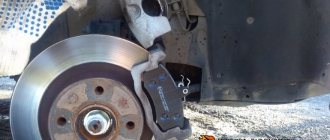
- After you have managed to separate the caliper bracket, you need to remove the brake pads.
Removing the pads
- Pump out the brake fluid to the minimum level.
Brake fluid reservoir
- The piston will press in.
Pressing the brake piston into the cylinder
- Cut the wire going to the wear sensor.
Wire cutting process
- Disconnect the connector.
Terminal block disconnection
- Remove the rest of the wire.
Old wire
- Connect a new wear sensor.
Connection
- Reassemble in reverse order.
- Check the effectiveness of the brake system.
Parsing order
It is better to carry out the repair operation on an overpass (you can use an inspection hole), or just a flat area with a hard surface, because you will have to remove the rear wheels, naturally, first jacking up the car.
So:
- Remove the wheel and disk;
- We unscrew the guide bolts, of which there are 2, and remove the drum;
- A common problem is the drum sticking, so sometimes it is not so easy to remove it. The problem has long been solved by tapping a drum with a hammer (through a board);
- Using pliers, remove the tension spring;
- After this, a fixing guide spring holding the block;
- We remove the block from the support bar that is not connected to the handbrake rod. To do this, pull its free edge to the side and along the shield;
- Loosen the upper spring. To do this, you need to turn the block to the side until you can disconnect the spring;
- We do the same with the spring of the second pad;
- Remove the spacer bar;
- Disconnect the handbrake rod from the cable;
- We note to ourselves or sketch how the connection to the rod is made;
- Unhook the spring, remove the cotter pin, and disconnect the brake pad.
Using a 12mm wrench, unscrew the two guide pins
Scroll the drum evenly and apply light blows to its end with a hammer
or the edge of the mounting blade
Use a screwdriver to disconnect the end of the upper tension spring from the block
We take out the spring
Use a screwdriver to remove the guide spring from engagement with the block.
After disconnecting the lower tension spring, remove the front block
Remove the lower tension spring
Removing the expansion bar
Having disconnected the guide spring from the rear brake pad, remove the manual brake pad drive lever from the cable end
To replace the pad guide spring, remove it from the hole in the brake shield
Thus, the disassembly process is completed.
