Payment for goods and downloading of the book in electronic form (PDF format) is made on the website.
To do this, you need to find the book you are interested in and click on the “Buy” button. The price of the book is indicated on the button.
For convenience, the price on the website for residents of Russia, Belarus and Kazakhstan is presented in rubles.
For residents of Ukraine in hryvnias, and for all other countries - dollars.
After clicking on the “BUY” button, a payment window will open where you can select a payment system with which you can pay for the selected book using any bank card (Visa, MasterCard, MIR, etc.)
When you click on the “Pay by bank card” button, the Portmone payment system will open, which is the easiest way to make a payment.
In addition, the website offers four payment systems for payment:
- Yandex (payment from any bank cards, Yandex Money account, QIWI Wallet, terminals, etc.);
- Portmone (payment from any bank cards, Portmone account);
- PayPal (payment from any bank cards, PayPal account);
- WebMoney (payment from any bank cards, payment from WebMoney wallets).
Payment via Yandex Cashier
After selecting payment via Yandex, the Yandex Cashier payment system will launch, where you need to select a convenient payment method (bank card, QIWI, Yandex Money account, etc.)
After specifying payment details and confirming payment, payment for the goods will occur.
If you have a bank card in a currency other than the ruble, then the money will be debited from the card at the rate of the Central Bank of Russia at the time of the purchase.
This payment method is optimal for residents of Russia, Kazakhstan and Belarus.
Official website of the Yandex Kassa payment system https://kassa.yandex.ru
Functions of Renault Logan steering column switches
The functions of the left switch include:
- Turning off and adjusting external light sources;
- Turning on the dimensions, lighting the control panel and license plate;
- Switching between low and high beams;
- Turning on the fog lights (PTF);
- Turning on the rear fog lamp;
- Horn button;
- Switching direction indicators.
The functions of the right element include controlling the windshield wipers and windshield washer, as well as displaying information on the on-board computer.
Due to the fact that the functions and their number of parts differ, the breakdown of the right switch occurs much less frequently than the left one, and accordingly, its repair is not carried out as often.
An important parameter when replacing a spare part is its catalog article - a code, taking into account which the part is purchased for subsequent replacement. The price of a new element is usually high, so car owners prefer not to replace the switch, but to repair it. The most common cause of breakdown is burnout of electrical elements.
Payment via Portmone
After selecting payment through Portmone, the payment system will launch, where you need to select the payment method: bank card or Portmone account.
The price in the Portmone payment system is converted into dollars at the exchange rate of the Central Bank of the country where you are located.
If you have a bank card in a currency other than the dollar, then the money will be debited from the card at the rate of the Central Bank of your country at the time of the purchase.
After specifying payment details and confirming payment, payment for the goods will occur.
Official website of the Portmone payment system https://www.portmone.com
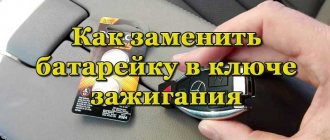
When to change the battery
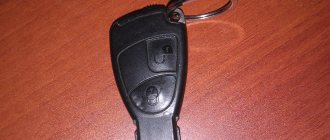
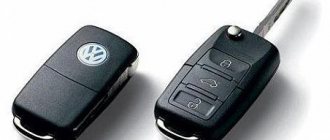
The battery life in the key fob depends on the type of installed energy sources. If the key is equipped with rechargeable batteries, they will last 3-4 years. They need to be charged periodically. If the key fob contains regular batteries, then their service life is much shorter.
The service life of the batteries is individual and depends on how often the owner uses the car, opens, closes, and starts it. It is recommended to use the key fob only in the immediate vicinity of the car. This way, less power is wasted, which extends the life of the battery.
The Toyota Land Cruiser “Keyless Go System” notifies the driver that the battery in the key is low and that it needs to be replaced.
A dead battery in a key fob is often a problem that takes drivers by surprise. They think there is still time for a replacement, but in reality there is none left. Because the key does not work, the owner cannot either lock the car or get inside and start it. In this case, you need to replace the battery in the key on a Toyota Prado 150 or TLK 200.
If the battery is discharged and there is no way to change it, then you can try several ways to temporarily bring the battery back to life:
- lightly tap it on something hard;
- press the edges of the battery with pliers, a chair leg or other object, thus activating the energy reserves that remain in it without harming the case;
- if there is nothing suitable at hand, then you can use your teeth to press the ends of the body;
- resuscitation of the battery with a short-term charge from the battery;
- warm up the battery a little by friction (on trousers, seat, etc.).
If the key fob is powered by a battery, then any attempt to restore its functionality independently using “folk” methods will lead to its breakdown.
Payment via PayPal
After selecting payment via PayPal, the PayPal payment system will launch, where you need to select the payment method: bank card or PayPal account.
If you already have a PayPal account, then you need to log into it and make a payment.
If you do not have a PayPal account and you want to pay using a bank card via PayPal, you need to click on the “Create an Account” button - shown with an arrow in the picture.
PayPal will then prompt you to select your country and provide your credit card information.
After specifying the information required to make the payment, you must click on the “Pay Now” button.
Official website of the PayPal payment system https://www.paypal.com
Disassembly of parts
The sliders, mechanism and casing are not needed yet; you need to move on to removing the signal button. It is secured with two locks. To remove it, you will need a thin object (for example, a scalpel or knife) that should be inserted into the groove. Having done this, you need to release one of the locks and remove the button from the groove.
Now you can proceed to removing the first slider (this element is responsible for turning on the low beam). It is recommended to place the lever in your left hand, and take the slider with your right hand and pull. This Renault element should come out with a slight crunch.
Important: when pulling out the slider, it can easily be damaged, so you need to act carefully during repairs.
After this, the contact pin along with the wires are removed. It is from this that the wires must be desoldered during repairs. Instead of bad steel wires from Renault Logan, which flew into the trash after soldering, it is best to use 0.5 mm2 copper wires.
During repairs, the wires need to be threaded through the hole and soldered to the contacts. At the end of the process, it is necessary to check for a short circuit with a tester, since molten tin can easily damage the plastic insulation of the contacts.
After the soldering process, everything is assembled in reverse order.
Important: when putting an element such as a light switch on a contact pin, you must act with extreme caution, since there is a high risk of breaking the lever that controls the contact slider.
As for the wires, it is recommended to solder them when the Logan steering column element is fully assembled. This will allow you to accurately determine the size of the wires.
By following these recommendations, the car enthusiast will be able to solve the problem with the steering column mechanism on Logan.
Payment via WebMoney
After selecting payment via WebMoney, the payment system will launch, where you need to select the payment method: bank card or WebMoney wallet.
If you already have a WebMoney wallet, then you need to log into it and make a payment.
If you do not have a WebMoney wallet and you want to pay in another way, you need to select any of the methods that WebMoney offers and make the payment
After specifying payment details and confirming payment, payment for the goods will occur.
Official website of the WebMoney payment system https://www.webmoney.ru/
How to determine a breakdown?
If you find signs of broken tie rod ends, be sure to try to fix the problem. If this is not done on time, the resource of the elements will decrease several times. Main signs of failure:
- Difficult car control, this is clearly expressed during sharp turns.
- Uneven tire tread wear.
- Extraneous sounds while the car is moving. They can come from both sides at the same time, or from one.
It is imperative to check the operation of the VAZ-2110 tie rod ends; replace them only after diagnostics. Similar symptoms may appear when other elements of the car’s suspension fail.
Downloading a book
After successfully completing the payment (by any method) and returning to the KrutilVertel store from the payment system website, you will be taken to the successful payment page:
On this page you need to indicate your e-mail, where access to download the book will be sent.
If you are already registered on our website, then simply follow the link to your personal account.
The book you purchased will be in your personal account, from where you can always download it.
Please note that after making the payment, you need to return back from the payment system website to the KrutilVertel website.
If for some reason you did not return back to the site and closed the payment system tab with a message about the successful completion of the payment, please let us know - we will send you a letter indicating access to download the book.
Causes of malfunctions and diagnostics
Failure of rubber-metal joints can be determined by a number of signs:
- Steering wheel play. The steering wheel turns with greater effort, and its free play also increases.
- Alarming sounds that appear every time you turn the steering wheel.
- Difficulty controlling the car in turns.
- Uneven wear on the right and left front tires.
It is better to start inspecting the steering tips on the left side of the car. To do this, turn the steering wheel to the right all the way. It’s best if the car is standing on an overpass - it’s more convenient to inspect the part.
The first thing to check is the condition of the steering tip boot. If there is even the slightest crack on it, then the hinge must be replaced without question. Otherwise, dust that gets inside through it will simply make normal car control in corners impossible.
To examine the condition of the ball joints in more detail, place the car on a jack, lifting the left side so that the left front wheel rotates freely, and check the tip play. If a part is loose, this also indicates that it needs to be changed.
Problems when paying with bank cards
Sometimes difficulties may arise when paying with Visa/MasterCard bank cards. The most common of them:
- There is a restriction on the card for paying for online purchases
- A plastic card is not intended for making payments online.
- The plastic card is not activated for making payments online.
- There are not enough funds on the plastic card.
In order to solve these problems, you need to call or write to the technical support of the bank where you are served. Bank specialists will help you resolve them and make payments.
That's basically it. The entire process of paying for a book in PDF format on car repair on our website takes 1-2 minutes.
If you still have any questions, you can ask them using the feedback form, or write us an email at [email protected]
Installation of tie rod ends
In order to ensure the most accurate alignment of the front wheels, it is necessary to calculate how many revolutions the old steering tip is twisted. But in this case, you can only roughly establish the toe-in. More precise adjustments can only be made on special stands. Installation of tips is carried out in this order:
- Install a new tip. It is desirable that the distance from the squeegee to the center of the tip be the same as on the old element.
- The hinge pin must be inserted into the hole in the steering knuckle.
- Tighten the nut and secure it with a cotter pin.
- Tighten all threaded connections.
After replacing the steering tips of the VAZ-2110, it is necessary to carry out the procedure for adjusting the camber and toe of the front wheels. It is quite difficult to do this on your own; it is better to use the services of a car repair shop.
- Replacing the steering rack on a VAZ-2109 21099 Photo instructions on how to change the steering rack on a 2109
- Replacing the steering rack of a VAZ 2110 Photo instructions on how to change the steering rack of a VAZ 2110
- How to replace thresholds on a VAZ 2110
- Replacing the distributor on a VAZ 2107 with your own hands Photo instructions on how to change the distributor on a VAZ 2107
Let's get started
First of all, we remove the wheel bolts. Next, jack up the car and remove the disc. We find our tip. It will be dirty (even after we wiped it with a rag), so we treat the joint of the part with universal grease VD-40. To make it convenient to remove the tip, turn the steering wheel to its extreme position until it stops.
Next, use the keys to unscrew the entire mechanism. Using pliers, remove the cotter pin from the hinge nut. Next, unscrew the fixing bolt. Using a puller or pry bar, press the rod so that the tip moves up. This way the bolt will come out of its seat. After this, we unscrew the hinge from the steering rod. It is important to remember the number of revolutions made clockwise (so as not to do a wheel alignment later). Next, take the new tip in your hands and twist it counterclockwise. The number of revolutions should be the same as that of the removed element. We tighten the nuts with a force of 50 Nm. After this, we install the cotter pin in place and assemble the wheel.
Let's go for a short test drive. If you did not guess the number of turns, the car will move to the side. In this case, it is better to go to the wheel alignment, since setting the angles at random will take a very long time.

