Payment for goods and downloading of the book in electronic form (PDF format) is made on the website.
To do this, you need to find the book you are interested in and click on the “Buy” button. The price of the book is indicated on the button.
For convenience, the price on the website for residents of Russia, Belarus and Kazakhstan is presented in rubles.
For residents of Ukraine in hryvnias, and for all other countries - dollars.
After clicking on the “BUY” button, a payment window will open where you can select a payment system with which you can pay for the selected book using any bank card (Visa, MasterCard, MIR, etc.)
When you click on the “Pay by bank card” button, the Portmone payment system will open, which is the easiest way to make a payment.
In addition, the website offers four payment systems for payment:
- Yandex (payment from any bank cards, Yandex Money account, QIWI Wallet, terminals, etc.);
- Portmone (payment from any bank cards, Portmone account);
- PayPal (payment from any bank cards, PayPal account);
- WebMoney (payment from any bank cards, payment from WebMoney wallets).
Payment via Yandex Cashier
After selecting payment via Yandex, the Yandex Cashier payment system will launch, where you need to select a convenient payment method (bank card, QIWI, Yandex Money account, etc.)
After specifying payment details and confirming payment, payment for the goods will occur.
If you have a bank card in a currency other than the ruble, then the money will be debited from the card at the rate of the Central Bank of Russia at the time of the purchase.
This payment method is optimal for residents of Russia, Kazakhstan and Belarus.
Official website of the Yandex Kassa payment system https://kassa.yandex.ru
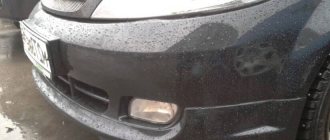
Front bumper
Replacing the front bumper of a VAZ 2114 with your own hands takes a little time. If it is necessary to replace the radiator or grille, the procedure takes longer. Removing the body kit for all VAZ 2113-2115 models is carried out in the same way.
Tool
To replace the body kit you will need the following tools:
- Screwdriver Set;
- open-end wrenches 8 and 10 mm;
- 13 mm ratchet head with crank.
Step-by-step removal
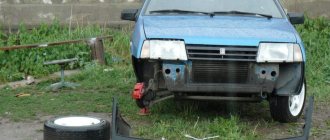
To remove the front bumper of a VAZ 2114, place the car on a viewing hole or a lift.
The algorithm for dismantling the body kit is as follows:
- The electrical connections to the license plate and fog lights must be turned off before any work can be done.
- The fastening bolts and nuts are treated against rust, as well as for better loosening, with VD-40 aerosol.
- Unfasten the front wheel fenders.
- Unscrew the fender liner mounting plate with a 10 mm wrench.
- Remove the 3 screws that are attached to the body kit.
- Using a 8 key, remove the 6 screws securing the fender liner to the front fender.
- Pull back the fender liner.
- Remove the radiator and headlight trims.
- Using a 10 mm wrench, unscrew the 2 nuts securing the left side of the bumper.
- Pull it a little to the side so that the studs come out of the body bracket.
- In a similar way, you need to unscrew the right side of the bumper.
- Using a Phillips screwdriver, remove the mounting screws under the license plate and unscrew the 2 screws located below. Disconnect the license plate.
- Remove the bumper.
If the amplifier is damaged, replace it. Using a 13 mm socket, unscrew 2 nuts on each side. The amplifier is adjusted during installation using shims.
Installation
Before installing a damaged body kit, it is necessary to repair it and paint it. Installation of the front bumper on a VAZ 2114 is carried out in the reverse order of dismantling. Remember this rule: when we install the bumper in place, it is necessary to check all the gaps between the amplifier, fender, body, headlights, grilles and only then attach it.
Payment via Portmone
After selecting payment through Portmone, the payment system will launch, where you need to select the payment method: bank card or Portmone account.
The price in the Portmone payment system is converted into dollars at the exchange rate of the Central Bank of the country where you are located.
If you have a bank card in a currency other than the dollar, then the money will be debited from the card at the rate of the Central Bank of your country at the time of the purchase.
After specifying payment details and confirming payment, payment for the goods will occur.
Official website of the Portmone payment system https://www.portmone.com
Reinstalling the rear bumper
Regardless of whether the product is being replaced with a new one or an old one is being installed, it must be adjusted. Vertically, this is done by screwing it into the fasteners, then the gap from the lights is reduced. Horizontal adjustment is made by changing the number of shims.
Attention! Before you begin installation on the “tag”, you need to install the terminals for the license plate illumination. There is a fine for driving without illuminated license plates.
The installation itself is carried out in the reverse order of removal.
Payment via PayPal
After selecting payment via PayPal, the PayPal payment system will launch, where you need to select the payment method: bank card or PayPal account.
If you already have a PayPal account, then you need to log into it and make a payment.
If you do not have a PayPal account and you want to pay using a bank card via PayPal, you need to click on the “Create an Account” button - shown with an arrow in the picture.
PayPal will then prompt you to select your country and provide your credit card information.
After specifying the information required to make the payment, you must click on the “Pay Now” button.
Official website of the PayPal payment system https://www.paypal.com
Repair or tuning of the VAZ-2115 bumper
Removing the rear bumper is not always necessary to replace it. Very often, car enthusiasts tune this part or restore it after minor damage using special adhesives.
If we are talking about changing the shape of the bumper, increasing its strength characteristics, then we can recommend using materials such as polystyrene foam or polyurethane foam. They have a number of advantages:
- easy to process, which makes it possible to create any suspension configuration;
- light weight, almost complete absence of load on the car;
- resistance to high temperatures;
- durability, retention of shape for a long time;
- resistance to moisture.
In order to change the appearance of the bumper, you must first draw a sketch of the future part on paper. The next stage is preparing the product, cleaning it from dirt, washing and thoroughly drying it. After this, you need to use plywood to determine the boundaries of filling with foam or polystyrene foam and carry out the necessary work. After drying, the rear bumper will take on a completely new look to suit your taste preferences.
In addition, you can install a rear bumper reinforcement, which is made of durable plastic that is resistant to mechanical damage. This product is quickly attached to the part and significantly increases its strength characteristics.
Payment via WebMoney
After selecting payment via WebMoney, the payment system will launch, where you need to select the payment method: bank card or WebMoney wallet.
If you already have a WebMoney wallet, then you need to log into it and make a payment.
If you do not have a WebMoney wallet and you want to pay in another way, you need to select any of the methods that WebMoney offers and make the payment
After specifying payment details and confirming payment, payment for the goods will occur.
Official website of the WebMoney payment system https://www.webmoney.ru/
Step-by-step removal
To remove the front bumper of a VAZ 2114, place the car on a viewing hole or a lift.
The algorithm for dismantling the body kit is as follows:
- The electrical connections to the license plate and fog lights must be turned off before any work can be done.
- The fastening bolts and nuts are treated against rust, as well as for better loosening, with VD-40 aerosol.
- Unfasten the front wheel fenders.
- Unscrew the fender liner mounting plate with a 10 mm wrench.
- Remove the 3 screws that are attached to the body kit.
- Using a 8 key, remove the 6 screws securing the fender liner to the front fender.
- Pull back the fender liner.
- Remove the radiator and headlight trims.
- Using a 10 mm wrench, unscrew the 2 nuts securing the left side of the bumper.
- Pull it a little to the side so that the studs come out of the body bracket.
- In a similar way, you need to unscrew the right side of the bumper.
- Using a Phillips screwdriver, remove the mounting screws under the license plate and unscrew the 2 screws located below. Disconnect the license plate.
- Remove the bumper.
If the amplifier is damaged, replace it. Using a 13 mm socket, unscrew 2 nuts on each side. The amplifier is adjusted during installation using shims.
Downloading a book
After successfully completing the payment (by any method) and returning to the KrutilVertel store from the payment system website, you will be taken to the successful payment page:
On this page you need to indicate your e-mail, where access to download the book will be sent.
If you are already registered on our website, then simply follow the link to your personal account.
The book you purchased will be in your personal account, from where you can always download it.
Please note that after making the payment, you need to return back from the payment system website to the KrutilVertel website.
If for some reason you did not return back to the site and closed the payment system tab with a message about the successful completion of the payment, please let us know - we will send you a letter indicating access to download the book.
Step-by-step instructions for removing bumpers from a VAZ 2113-2115
Most owners of passenger cars of the Lada Samara 2 family are wondering how to remove the front bumper on a VAZ 2114/2113/2115 on their own. For drivers who are well versed in technology, removing and replacing the part is not difficult. If the bumper is damaged, they do not go to specialized auto repair shops or service stations; such repair work is performed with their own hands.
This review is intended for new car enthusiasts who want to understand the mechanics of a car, save money and carry out minor repairs on their car themselves.
Problems when paying with bank cards
Sometimes difficulties may arise when paying with Visa/MasterCard bank cards. The most common of them:
- There is a restriction on the card for paying for online purchases
- A plastic card is not intended for making payments online.
- The plastic card is not activated for making payments online.
- There are not enough funds on the plastic card.
In order to solve these problems, you need to call or write to the technical support of the bank where you are served. Bank specialists will help you resolve them and make payments.
That's basically it. The entire process of paying for a book in PDF format on car repair on our website takes 1-2 minutes.
If you still have any questions, you can ask them using the feedback form, or write us an email at [email protected]
How to remove the rear bumper on a VAZ-2114, 2115
First you need to dismantle the fender liners. They are usually attached to self-tapping screws that need to be unscrewed with a screwdriver.
Removal occurs in several stages:
- Unscrew the 2 nuts (key “10”) securing the left cover.
Left pad fastening nuts
Attention! On Lada-2114 and 2115 cars, dismantling is identical, but on the sedan, in addition to all the steps, it is necessary to disconnect the license plate illumination terminals so that they are not damaged.
- Unscrew the screws on the left trim.
Left trim screws
- Dismantle it, first removing the studs.
Remove the left trim
- Removing the right one occurs in the same way.
- See which beam is installed. If it is made of metal (reinforced), you need to unscrew 3 nuts with a socket head “10”; on a plastic one, remove 2 screws that secure the product to the body, and 2 that hold the license plate.
Attaching the bumper to the body
- Carefully dismantle the part without damaging it.
Rear bumper parts
The bumper is removed together with the beam to install a new spare part. If the amplifier is made of plastic, you need to unscrew 6 screws and remove it, then on each side, using a socket head set to “13”, unscrew 3 nuts to remove the brackets. On a metal beam, the brackets are secured only with nuts.
We install it in place
After the rear body kit has been repaired or replaced, it must be put back in place. All procedures for installing the rear bumper on a VAZ are performed in the reverse order of removal.
The bumper is attached carefully so as not to damage it. Structural elements must be installed correctly, without changes in the gaps between parts. When performing work, be careful, follow the recommendations and you will be able to complete the procedure without special skills and knowledge.
Didn't find the information you are looking for? on our forum.
Dismantling
The rear bumper on VAZ 2115, 2114 and 2113 is mounted on the rear beam using brackets. To remove the rear bumper of a VAZ 2114, you must perform the following steps:
- Remove the rear wheel fenders.
- Use a metal brush to clean off dirt, grease, and oil, and inject VD-40 aerosol while working.
- Using a 10 mm socket with a wrench, unscrew the 4 bolts on which the bumper should be attached, 2 bolts on each side.
- Unscrew the 3 nuts of the bracket for fastening the reinforcement beam using a 13 mm wrench.
- The beam with the bumper must be dismantled.
- Unscrew the screws and disconnect the beam.
The damaged bumper is ready for repair or replacement.
