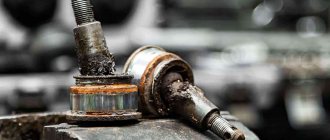
When driving at low speed, a worn ball joint manifests itself as a knocking or squeaking sound. The car's handling also deteriorates and the rubber on the outer edge wears intensively.
To check the ball joint on a VAZ 2110 and other models, place the car in a pit. Next, hold the pry bar by the lever and, resting against the plane of the ball mounting, try to swing it. If play is felt, the part needs to be replaced. You can also ask an assistant to turn the steering wheel in place and while doing this, listen to the sound that the ball makes during operation. If you hear a knocking or squeaking noise, the ball joint is worn out.
Fault diagnosis
When driving at low speed, a worn ball joint manifests itself as a knocking or squeaking sound. The car's handling also deteriorates and the rubber on the outer edge wears intensively.
To check the ball joint on a VAZ 2110 and other models, place the car in a pit. Next, hold the pry bar by the lever and, resting against the plane of the ball mounting, try to swing it. If play is felt, the part needs to be replaced. You can also ask an assistant to turn the steering wheel in place and while doing this, listen to the sound that the ball makes during operation. If you hear a knocking or squeaking noise, the ball joint is worn out.
Step-by-step replacement process
- Loosen the wheel bolts, jack up and remove the wheel.
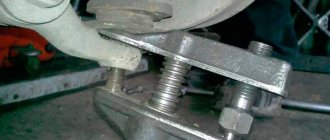
- Apply penetrating lubricant to the lower ball pin mounting nut, as well as to the two bolts securing the support to the steering knuckle.
Unscrew the nut securing the ball joint pin using a nineteen wrench.
Install the puller and press the ball pin out of the fist. To remove a pin without a puller, hit the eyelet where it is inserted with a hammer. After two or three hits the finger will pop out.
Using a 17mm wrench, unscrew the two bolts securing the support to the knuckle.
Move the steering knuckle to the side and remove the support.
Clean the landing area and install a new support.
Install and tighten the bolts securing the support to the knuckle. The bolt threads must first be cleaned and coated with copper grease.
Apply copper grease to the threads of the ball pin and tighten the fastening nut.
- Ball joint pin nut - 70 Nm.
- Bolts securing the support to the knuckle - 55 Nm.
The procedure for replacing the ball joint for VAZ 2110, 2111, 2112 is clearly shown in this video:
Replacing a ball joint on a VAZ 2110, VAZ 2111, VAZ 2112
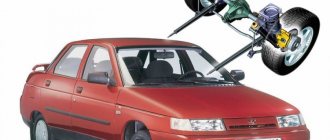
Welcome! Ball joint - it connects the lever to the wheel hub due to which the lever is subjected to less load when driving, in addition, the support holds the wheel and does not allow it to deviate too much from the horizontal plane when hitting a bump, that is, when hitting a bump, the wheel usually falls a little to the side and so that on the horizontal plane, the wheel also did not go to the side, the support holds it in one position, therefore, when it fails, the first thing problems begin with are the tires because the wheel itself falls a little when the support fails and thus the tires begin wear out at the edges, which is very noticeable, but the supports fail in not too much time, and therefore if you change the support for the first time, then remember what you are doing, because sooner or later you will have to change it again for a new one, and all this thanks to the Russian roads on which not only the ball joint quickly fails, but literally all the suspension elements, including the metal levers themselves, which must essentially run for a very long time.
Note! To replace the ball joint, you will need to stock up on: A wrench and a socket head; if you don’t have one, then take a set of spanners instead; in extreme cases, use wrenches to unscrew the bolts, but just wrenches can strip the threads, so we don’t advise you, or if you are planning to do this, then do it carefully, then you will need WD-40 or something like it, the bolts just turn sour over time and sometimes it is so difficult to unscrew them that you either break the threads, or you simply spend a lot of time and effort on it, except for this lubricant or ShRB-4, or you will also need Litol-24 (This is mandatory and you need very little lubricant, so it doesn’t make sense to buy a lot) and a special puller with which you will remove the ball joint, but if you don’t want to buy it and your friends don’t have any, then just a crowbar will do one hammer for that!
Summary:
Where is the ball joint located? Firstly, let's start with the fact that there are two of them, both placed one at a time on the front wheels of the car, for clarity, just below in the above photo the location of the support is shown with a red arrow, as you can see it is located at the very bottom and thanks to it, the lever, which is indicated by the blue arrow, attached to the wheel hub using this support.
When do you need to change the ball joint? We have already noted the fact that the supports quickly fail due to our bad roads, so if you operate a car in rural areas where there are a lot of holes and potholes, you can already count on the fact that you will often change the supports, but that’s not the point now, Let's talk about the symptoms, in the beginning, when the support fails, it will knock when you hit a bump at low speed, but if the support is severely deformed, then when driving on a straight, level road, try to remove your hands from the steering wheel and see if the car pulls to the side or no, if it pulls away, then perhaps the support is damaged or there is a problem with the levers (In principle, if the car is drifting, then there are many reasons why this could be a problem), pay special attention to how the tires wear out, if not exactly so It is possible that the support is damaged or other elements of the suspension, in addition, if it fails, the steering wheel becomes harder to turn and even squeaks may occur when turning the steering wheel, so take this into account too.
Results
If you follow the above recommendations, you can fix the problem and change the ball joint yourself. Do not allow the ball joint to wear out completely. In this case, it may lead to an accident.
When operating a car on bad roads, the ball joint can quickly fail. At low speeds, a worn part will create a knocking noise, and at high speeds the car will become difficult to control . Also, a worn part will cause the tire to wear unevenly. It also affects the fact that other suspension parts will begin to wear out heavily.
It would be dangerous to drive such a car.
How to replace a ball joint on a VAZ 2110-VAZ 2112?
Removal: 1) There is really nothing complicated about this, the main thing is that there is a desire, in general, to remove it, first hang the desired wheel and then remove it from the car, if you do not know how to remove the wheel correctly, then in this case, read our detailed article on its replacement, it is called: “Correct replacement of a wheel on most VAZ cars.”
2) Then climb under the bottom of the car and there completely unscrew the central nut securing the lever to the ball joint (Indicated by a blue arrow), then loosen the two side bolts slightly, which are indicated by red arrows (Unfortunately, one bolt is not visible, but you will immediately find it when you replace the support on your car) and a little later you will have to completely unscrew these bolts, so remember their location.
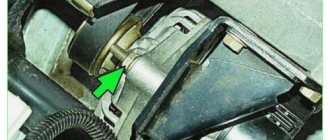
3) Now install a special puller (Indicated by a red arrow) in exactly the same way as shown in the figure below, or install it in the same way as it is written in your instructions for it, then screwing the lower nut of the puller, make sure that the ball joint pin is pressed out of the lever and so that the ball joint can be easily removed from the car, by the way, as soon as the pin is pressed out, completely unscrew those same two side bolts and then completely remove the support from the car.
Note! If you don’t have such a puller, then in principle you can do without it, but only for this you will need a hammer and a crowbar, in general, insert a crowbar between the lever and between the CV joint as shown in the two photographs below (In the small and large photos, by the way, a crowbar indicated by green arrows), and one more thing, screw the lower nut back into place (Just a little) if you are removing the ball joint in this way (It is indicated by a red arrow in the small photo), then use the crowbar as a lever and press it , wait until the ball joint pin is pressed out of the lever and only then remove it, but there is one more But! During this operation, hit the place indicated by the blue arrow with a hammer until the ball pin comes out of engagement with the lever and until the lever itself rests on the nut, which is indicated by the red arrow in the small photo; as soon as the lever rests on the nut, unscrew it and then completely remove the support by unscrewing in addition those same two side bolts securing the ball joint to the steering knuckle!
Installation: Everything is installed in its place in the reverse order of removal, but without any pullers. By the way, when installing a new ball joint, be sure to lubricate it inside; to do this, apply grease like ShRB-4, or Litol-24, to the ball end of the pin (see photo 1) and then place it in the inside of the boot itself.
Additional video clip: So that you can clearly understand how the ball joint is removed, carefully watch the video just below in which all this is shown in detail, but only in that video the removal of the support occurs with the lever removed, while the lever itself will be present and therefore not much wonder why in the video the car is missing one part, but you have it.
Source
Replacement Tools
To make repairs you will need:
- Head and collar.
- Liquid WD-40 or similar. It will help unscrew the mounting bolts.
- A puller for removing the ball joint itself.
Removal process (exact algorithm) on a VAZ-2112
There are two ball joints in the car. They are located on the front wheels at the very bottom of the rack. It is recommended to change them in pairs!
- Initially, you need to hang the wheel on the side where the ball is worn. Then it will need to be removed from the car.
- Then you need to unscrew the central nut that secures the support to the rack. To do this you need to crawl under the car.
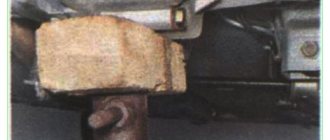
Ball mounting bolts
Example of using a ball puller
In the event that a puller is not at hand, you can use a regular crowbar.
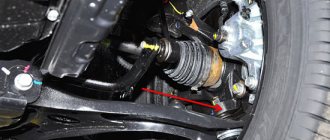
Instead of a puller, use a crowbar or chisel
It will need to be inserted between the CV joint and the lever. In this case, the crowbar should be used as a lever. You need to press on it until the finger comes out of its seat.
Also, during this procedure, you can lightly hit the place where the finger sits with a hammer. This must be done sensitively so as not to damage the hub.
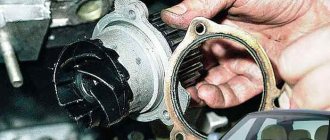
Installing a new ball joint
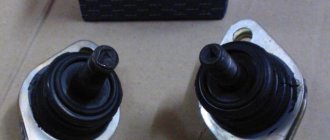
Old and new ball joint for comparison. So simple.
Next, the ball is replaced with a new one and assembly is performed. There is no need for a puller here.
To install the pin in place, it must be placed in the socket and pressed with the central bolt until the pin fits into place. To facilitate the landing procedure, you can use lubricant. You also need to lubricate the inside of the ball joint first.
Change the ball joint on time!
When this spare part fails, severe wear of the tires begins, the car stops holding the road, the wheel can fall on its side, making it difficult to drive the car.
If you do not replace a worn-out spare part in time, it will negatively affect the entire operation of the chassis, and will also cause other components to fail.
Ball selection (survey)
Tools for work.
To replace the ball, you will need to prepare. To do this you need:
- Keys and gates.
- Liquid WD-40.
- Litol or ShRB lubricant.
- Puller.
- Hammer and crowbar.
Ball location
The ball joint connects the lever and the steering knuckle.
They are located on both sides of the car on the bottom of the lever.
It is used to attach the lever to the hub.
Replacement time
When driving a car on a bad road, you will need to change the ball joints often.
- Initially, when it fails, a knock will be heard.
- Then the car will begin to pull to the side even when driving on a good road.
- Then the tires will begin to wear unevenly.
- When turning the steering wheel, squeaks may appear.
- It will become more difficult to turn the wheels.
If the finger moves freely with little hand force, the ball joint requires replacement.
Replacement
The whole process is carried out in the following stages:
- Removal . Hang the wheel, unscrew the nut on the pin, then knock the rod out of the socket.
Unscrew the 2 bolts securing the ball to the knuckle.
If there is no puller, insert the assembly and knock out the lever with a hammer.
When the bolts are tight to unscrew, you can use WD-40.
Installation
Installation is carried out in reverse order. There is no need for a puller here.
Before installation, fill the case with lubricant.
You just need to insert your finger into the socket and tighten the nut on it. You should definitely lubricate the ball inside under the boot.
VAZ 2112: replacing the ball joint - how to do it
Today we are replacing ball joints on a VAZ 2112
Time passes and technology improves along with it. So, the pivot system was replaced by ball joints. But any equipment breaks down over time and needs to be repaired - with your own hands or for a fee, but it needs to be done. This instruction tells in detail how to carry out the process of replacing a ball joint in a garage, the video will show this process in detail, and the photos will help you imagine it more realistically.
- How to diagnose a ball joint?
- Aurally
- To the touch
- Dynamic diagnostics
- What should a new ball joint be like for a VAZ 2112?
- Technical description of the ball joint
- Ball joint manufacturers
- Tool
- Changing the ball
- Preparing a new ball joint
- Removal
- Installation
How to diagnose a ball joint
This can be done in two ways - listening and feeling. Let's look at each separately.
- This method does not require any additional equipment.
- Place the car on a level surface and in as quiet a place as possible so that sounds can be heard better.
- Place your foot on top of either front wheel.
- Rock the car from side to side.
- If, when rocking, the car makes dull metal impacts on one side, then there is a possibility that the ball joint on the side of the emanating sound has become unusable.
Advice! Of course, the words “there is a possibility” only indicate a possible malfunction. To diagnose an exact breakdown, it is best to use the second method.
- First, the car should be raised so that the front wheel can rotate freely.
- First, lift it with a jack, then support something and lower the car onto this object.
- You can substitute bricks, a wooden block or other thing at hand.
- Rock the wheel from top to bottom.
- Again, when rocking, dull sounds should be produced.
- To be sure, you need to place your hand (two fingers) at the junction of the lever and the ball joint.
- With your fingers you will feel the knock that the ball joint pin creates.
Advice! If there is even a slight knock in the ball joint, it is better to replace it. Never delay car repairs - in the end, even your life may depend on it.
- Do the same operation with the second wheel. If any problems are found, make appropriate repairs.
- In this case, it is necessary to listen to extraneous sounds directly while the car is moving.
- The malfunction of the ball joint will be especially audible when the wheel hits the slightest hole on the road.
- A knock will be heard from the side of the faulty ball joint.
- In this way, you can determine whether the VAZ 2112 ball joints need to be replaced or not.
- But this method also does not fully guarantee that it is the ball joint that has failed!
Bad roads - a method for diagnosing ball joints and the cause of their failure
Malfunctions
The ball is not particularly friendly with dirt, so getting it on the part can lead to unpleasant consequences. To protect against contamination, the design of the element includes a boot, with the help of which dirt and sand practically do not penetrate inside.
Actually, it is the boot that is the weakest point of the ball joint, due to which it is often necessary to completely replace it. This is all due to the poor quality of the material from which the boot is made and the harsh operating conditions. As a result, the boot cracks, bursts, dirt gets inside, and the support fails.
Worn element
Verification methods
To determine that the ball joint is the culprit for your car’s slightly “inappropriate” behavior on the road, you need to check this point.
To do this, there are three main verification methods, each of which has its own characteristics.
Way
Actions
The car is being jacked up
In this case, firmly grasp the wheel and wobble it. If there is noticeable play, the ball is worn out and requires replacement.
Place the car on the inspection pit
A pry bar is inserted into the gap between the suspension arm and the ball from below. By the movement of the wheel, you can immediately notice the presence of play. Replacement required
Send your car to a service center
Specialists using the appropriate equipment will conduct diagnostics, determine the degree of wear of the support, and come to the appropriate conclusion about the need for replacement. You can change it there too
Why is replacement required?
Operating a vehicle with a faulty ball joint can not only reduce ride comfort, but also seriously affect the safety of the driver, his passengers and other road users.
Initially, a faulty ball joint only makes unpleasant knocking noises, but at any moment you can simply lose the wheel. You understand what consequences this can lead to if you drive at high speed.
If you find signs of a suspension malfunction, immediately go to a service station or look for the cause and fix it yourself.
Spare part selection
So, to start replacing the ball joint on your VAZ 2110, you will first need to purchase a new part. This is not difficult to do, since the current range is very diverse and wide.
Although it is this diversity that often becomes the reason for difficult choices. Among so many options, you need to settle on just one. But your task is to find the highest quality and reliable spare part that can serve for more than one season.
In this regard, we invite you to familiarize yourself with the principles for choosing a high-quality ball in our table.
Element
Requirement
The ball body is welded in two parts. Moreover, on one side the seam should be noticeable, and on the other - not
Inspect the ball pin. It should be hardened, gray in color with scale. Make sure there are no traces of paint on the part. On quality parts, rolled threads are used
When scrolling, you need to apply a lot of force and watch for the absence of snagging. This is a sign of a quality part. It is not uncommon that turning by hand is too difficult and requires a wrench. This is normal and even good
In addition to the ball itself, responsible manufacturers include a nut and boot in the packaging. If these elements are not available, you should refuse to purchase.
In fact, there are many good manufacturers, but most VAZ 2110 owners choose supports manufactured by Trial-Lux, BelMag, and the most popular ones are Trek
Which of the options on the market is better is up to you to decide. But be sure to focus on the selection criteria presented above.
What should the new ball joint be like for the VAZ 2112?
We all don't want to drive a car that has low quality parts and have to make frequent repairs. Therefore, replacing ball joints on a VAZ 2112 requires a serious approach. Let's list the characteristics of a really good ball joint.
Technical description of the ball joint
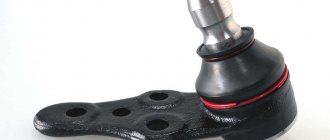
Type of good ball joint
- The ball joint housing must be welded in two parts.
- Carefully inspect the ball body for cracks and chips.
- The ball joint pin must be hardened, not painted.
- The finger should not dangle loosely in the body - in a good ball joint it is difficult to turn it by hand. Only using a crank will it turn.
- Modern ball joints come with a nut and boot.
- The nut should not be weak and have a Teflon insert, or a ball nut should be made with a cotter pin hole and a castle nut.
- The boot must be intact, without cuts, cracks, or scratches. There should be a metal retaining ring inside the boot.
- Well, the price, of course, for a good, decent ball joint is not the cheapest.
Manufacturers of ball joints:
- Each car owner chooses the ball manufacturer himself.
- There is only one principle - do not buy ball joints that are too cheap. There is a very high probability that they will not be of good quality and will have to be replaced again after a very short mileage.
- Among many motorists, ball joints are considered the best.
Track – for VAZ 2112 ball joint
Puller for VAZ 2112 ball
- Set of heads
- Vorotok
- Hammer
- Crowbar or crowbar
- Lubrication
- Metal brush
- Rust Cleaner
- Jack
- Car stand
As you can see, the price of a replacement tool is low, since most of the list is available to every motorist.
And now the choice itself!
Theoretically, we already know how to choose a support, now let’s pay attention to brands and listen to reviews. Let’s make a reservation right away: we consider only original products , no fakes, and we already know how to identify them - fakes are turned on machines, without heat treatment, and by default they do not have stamps, logos or signs of compliance with quality standards.
Supports Track
Ball joints Track with silicone protective cover.
Some of the most popular on the market.
They came into demand because of their reliability and durability for one simple reason - the domestic company Trek produces and develops only ball suspension and steering elements. There are several series on sale, one of which, Champion, was developed for fans of extreme driving on roads of not the best quality, that is, ours.
Ball joints BelMag
The BelMag ball joint of the “Original” series is covered by a warranty of 40,000 km.
Some of the highest quality supports on the market. The company has developed several series for operation in different conditions:
All supports from this manufacturer do not require additional lubrication.
Cedar supports
Ball joint Cedar.
Balls of a special design with an all-metal rolled body.
Due to the technology of rolling the pin into the body, the highest accuracy of matching of the sphere of the pin and the body is achieved, which affects durability. The pin sphere is processed using special technology, and the boot is made of rubber material using ERDM technology, which contributes to a high degree of elasticity.
Changing the ball
Let's start looking at the process of “replacing ball joints on a VAZ 2112” by preparing a new ball joint for installation on the car.
Preparing a new ball joint
Note! It is best to prepare the support in a vice.
- Holding the ball joint housing in a vice, remove the nut from the pin.
- Remove the ball joint boot.
- Place a small tube on the ball pin and rotate it in a circle.
Attention! Do not use pliers to turn the finger - do not knock off the thread!
- The finger should turn with effort, but should not get stuck or bite.
- For better performance of the ball joint, add lubricant to the housing.
- While rotating the finger, press the grease into the body with your finger and press it down by rotating the ball joint finger.
Using this little trick, replacing the VAZ 2112 ball joint will happen much less often!
Removal
- Raise the car on a jack and place it on a stationary object (as for diagnosing a ball joint).
- Set the car's hand brake or place bricks or other anti-roll bars under the wheels.
- Remove the wheel from the side of the broken ball joint.
- Turn the steering wheel so that the best access to the connection between the lever and the ball joint is provided.
- Clean the joints with a metal brush.
- Spray your finger with a rust ball and wait a few minutes.
- Then, using a 19mm wrench, unscrew the ball joint pin nut and remove it.
- Now we need a ball joint remover.
- If you use a puller, as in the photo, then insert the lever-ball connection inside the puller, and use the bolt to press out the ball joint pin.
- During this procedure, it is advisable to tap the lever with a hammer so that the ball disengages faster.
- If you use a different puller, ask others how to use it.
- In general, you can remove the ball joint without using a special puller.
Replacing ball VAZ 2112 - easy removal
- First, you need to rest the mount so that when you press its end, pressure is created on the suspension arm (see Repairing the suspension - how to do it correctly) down. You can rest the pry bar against the steering knuckle.
- You can also spray with rust remover.
- Having created the necessary pressure on the lever, hit the lever sharply with a hammer at the junction with the ball joint.
- As soon as the ball joint is freed from the lever, you should press the lever with a pry bar and move the steering knuckle away.
- Using a 17mm socket, unscrew the two bolts securing the ball joint to the steering knuckle.
- Remove the ball.