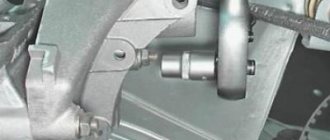
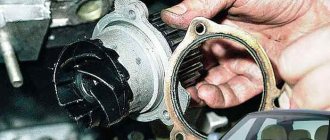
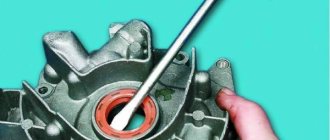
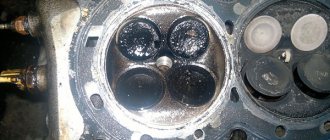
Adjusting the valve mechanism of the 16-valve VAZ-2112 engine is a rather complicated operation, but can be done with your own hands. Thus, many motorists have come across the concept of hearing valves ringing, especially when moving from low to medium speeds. In this article, we will look at how to properly adjust the valves on a car, and also talk about some of the nuances of the process.
Video about adjusting valves on the front-wheel drive family of VAZ cars (2110-2112)
The video will tell you how to properly adjust the valves on a 16-valve engine, as well as give some tips and tricks.
Guide to adjusting valves on VAZ 2110-2115
If you are the owner of a VAZ 2110-2115 with a conventional 8-valve engine, then you probably know about such a procedure as adjusting the thermal valve clearances.
Of course, if you have a 16-valve engine, then you don’t need to do this, since you have hydraulic compensators installed and no adjustments are made. So, for conventional internal combustion engines, which are not much different from the VAZ 2108, this procedure is not carried out so often. After purchasing a new car, you can drive about 100,000 km without it, but this is not always possible and not every owner is so lucky. This type of maintenance of the VAZ 2110 can be performed either at a service station, having paid a certain price for the work, or independently, having understood this work. If this is your first time doing this, the guide below will help you with this.
The main noticeable consequences of incorrect clearances are increased fuel consumption, poor traction and noisy engine operation.
Due to incorrect clearances, the load on the valves and catalyst increases. The valves cool less well and the engine does not operate at full capacity.
Increased and decreased thermal gap
The thermal gap may increase or decrease over time.
With an increased thermal gap, the camshaft hits the valve mechanism. The valves do not close completely and at the wrong time. Because of this, not all of the fuel-air mixture burns, and the engine produces noticeably less power.
With a reduced clearance, the valves do not close tightly, and the combustion chamber ceases to be sealed. Because of this, compression drops. The valves cool less well and may burn out over time. The load on the catalyst also increases.
In both cases the motor does not work properly. Fuel consumption increases, engine power decreases and the load on parts increases.
Setting rules
Any owner of a VAZ-2110 8-valve injection machine can familiarize yourself with the standard regulations specified in the operating instructions. It is worth noting that the adjustment of the VAZ-2110 valves and the 8-valve injector is carried out during the production process of the car. The car owner must perform the first adjustment after the car has completed the first 10,000 km, and this procedure is usually called running-in. After this, the procedure will need to be repeated regularly until the next 45,000 km are reached, but in some cases, engine operation does not require any additional manipulations even before 80,000 km have been traveled.
Adjustment procedure
The procedure for adjusting the valves on all modifications of the 8-valve vase is the same. There are differences only in injection Grant cars, Kalina 2 with a Grant engine. They have a lightweight piston group and metal-ceramic seats. In this regard, the gaps differ upward by 0.05 mm. Knowing the order and adjustment scheme, you can adjust the valves yourself. The downside is the lack of a set of washers for adjustment. It’s expensive to go to the market to buy them every time, and it’s also expensive to buy the entire range.
Here is a detailed diagram of valve adjustment for VAZ 2108, 2109, 2114, 2115
- First you need to cool the engine. You can use an additional cooling fan from any VAZ car. Place it on top so that the airflow is towards the internal combustion engine and turn on the 12 V power supply;
- When adjusting 8 valve engines (11186, 11113 oka, 1118, 1111) with a mechanical throttle assembly, unscrew the throttle cable from the intake manifold receiver;
- Disassemble the valve cover, timing belt side casing. Disconnect the large and small breather hose going to the throttle body pipe;
- Pump out the oil near the valve cups using a syringe or bulb. It is most convenient to use a regular medical syringe with a white silicone hose at the end;
- Install a device for adjustment - a rack for pressing the valve, also called a ruler;
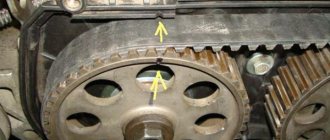
- Set the first adjustment position. Turn the camshaft clockwise to the mark and tighten 2-3 teeth. For cars with a lightweight piston group (Granta, Kalina 2, Priora), turn strictly by the crankshaft. If you turn the camshaft, the timing belt may slip, and if this is not noticed and the engine is driven, the valves may bend;
- Adjust in the following sequence: 1 outlet and 3 inlet valves;
- Rotate the camshaft 90 degrees. Adjust 5 outlet and 2 inlet valves;
- Rotate 90 degrees. Adjust 8 exhaust and 6 inlet ports;
- We make the last turn by 90 degrees and adjust the 4th exhaust and 7th inlet valves;
- Reassemble in reverse order. We install a new gasket under the valve cover to prevent oil from leaking out.
- On carburetor engines, everything is done in a similar order. First you need to unscrew the filter housing and the suction cable. The frequency is the same as on the injector 30,000 km.
On engines with 16 valves, adjustment is not required, since thermal clearances are selected automatically using hydraulic compensators.
Checking the gaps is also required after repairing the cylinder head. Especially after replacing the guides. When replacing bushings, the seats are countersunk with a special tool and deliberately recessed into the head. Accordingly, you need to follow the sequence, set the optimal gaps and repeat after 1000 km.
Adjusting the 8kL engine for gas increases the mileage between adjustments. If the engine is not intended to operate on gas equipment, the seats and valves will quickly burn out, and in order to somehow extend the service life, the clearances should be made a little larger than standard. Usually they do +0.05 mm. If the gap is not set, that is, does not expand, then the saddle is sunk a decent distance into the head. In this case, you need to measure how much the gap needs to be increased, disassemble the cylinder head and file the end of the valve. The second option would be to replace the seat or the cylinder head itself.
Preparing the workplace for the phase control unit setup operation
Techniques aimed at adjusting the operation of a heat engine should be carried out in a room with an air temperature of about 20-30 degrees Celsius. In addition, you should arm yourself with:
- probes;
- a table reflecting the dependence of the intake/exhaust processes in certain cylinders on the relative position of the marks on the pulley and the housing;
- calibrated washers;
- a set of heads and a wrench;
- a device for pressing and fixing the pusher;
- sealant.
Types of valve clearance adjustment
There are several types of adjustment of thermal clearances of valve mechanisms .
The first type is automatic clearance adjustment using hydraulic compensators. A hydraulic compensator is a device that, due to oil pressure, maintains the required thermal gap. Such a mechanism does not need adjustment, and if it has not failed, then the gap is always normal.
The second type is screw adjustment of thermal clearances . The most convenient and comfortable option, from a regulatory point of view. The gaps are adjusted with special screws, and there is no need to buy any parts for the procedure. All you need is new gaskets. Also, in most cases, significant disassembly of the cylinder head is not required for the procedure.
The third type is adjustment using washers or pushers . A fairly common and problematic option. The difference between a washer and a pusher is that in the case of a washer, the washer and the pusher are two separate parts, and only the washer changes. In the case of the pusher, it’s all one part, and the whole thing changes. The complexity of this method lies in the fact that to set the required gap, the old pusher is removed and a new one with a different size is installed in its place. Several difficulties arise here: to replace the pusher you need (almost always) to remove the camshafts (washers can sometimes be replaced without such disassembly), not all sizes of pushers are available in Ukraine, and you often have to order them and wait, and the last thing is the price of the pusher. As a rule, the cost of pushers is hundreds of hryvnia, and there are as many of them in the engine as there are valves. The budget for such adjustment of valve thermal clearances can be very large. But if this is not done, sooner or later, the engine will stop working.
The camshafts have already been removed from the cylinder head to remove the valve lifters. One of the pushers lies on the cylinder head.
Basics of the design and operation of a hydraulic compensator
Configuration
The idea of automatic regulation of thermal clearances can be implemented in two versions: a conventional hydraulic pusher and a hydraulic support. The latter is used in gas distribution modules with rocker arms. On the Lada Priora in the sixteen-valve version, the intake and exhaust are equipped with individual camshafts. The optimal solution for this arrangement is the use of a hydraulic pusher.
The Priorov hydraulic compensator on the 126 engine consists of the following parts:
- A plunger pair, including a cylindrical cage and a piston with a ball valve.
- The outer housing is a pusher.
- System of grooves and holes for oil supply.
Principle of operation
The oil composition enters the internal cavity of the piston and, overcoming the resistance of the spring, pushes the ball away to fill the closed cylinder. When filling the liner, oil pushes the piston out and the hydraulic tappet rests against the cam. Next, the ball valve is locked and the assembly unit works like a regular pusher on motors with an adjustable valve mechanism.
Valve adjustment process
The process of adjusting valves on an engine
Before moving directly to the adjustment process, it is worth noting that this operation is carried out only on a completely cooled engine. Experienced VAZ drivers recommend waiting at least one night.
To make the adjustment, you will need a few tools, namely a set of keys and sockets, as well as a valve cover gasket and a special feeler gauge.
So, let's proceed directly to the operation:
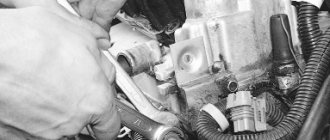
- We disconnect and move to the side the tip of the throttle valve drive.
We dismantle the cable and bracket for fastening the throttle position
Unscrew the clamps and remove the crankcase ventilation hoses.
Remove the valve cover and bearing caps to adjust the valves
We dismantle the timing belt protective cover to get to the crankshaft pulley
Turn the crankshaft clockwise
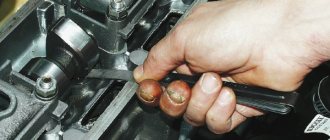
We adjust the gaps using feeler gauges
Special tool for adjusting valves and replacing shims
Using tweezers, remove the adjusting washer
What types of shims are there?
A set of adjusting washers for all occasions
For cars of the VAZ family there are 125 sizes of shims, but not all are used.
Therefore, let’s consider the most popular sizes of spare parts that are installed on these engines (if you don’t want to run to the auto store again later): 3.30, 3.35, 3.40, 3.45, 3.50, 3.55, 3.60, 3.65, 3.70, 3.75, 3.80, 3.85, 3.90, 3.95, 4.00, 4.05, 4.10, 4.15, 4.20, 4.25, 4.30, 4.35, 4.40, 4.45, 4.50;
Adjusting washers in two sizes: 3.95 and 3.30
What are the consequences of untimely valve adjustment?
When the entire replacement process is considered, it is worth recalling what the consequences of untimely adjustment of the valve mechanism may be:
- Wear of camshafts. Thus, incorrect clearance can lead to premature wear of the camshaft cams.
- Damage to valve tappets when adjusting washers hit them.
- General wear of all elements of the head and timing mechanisms.
- In some cases, it may happen that the timing belt breaks and bends the valves.
see also
- 16 valve engine for VAZ carburetor
What to do to prevent valve bending on a 16 valve engine- 16 valve engine 124
- Parking with the engine running in a residential area
Engine resources of foreign cars table- Why is a throttle valve needed in an engine?
- VAZ 21124 engine mounts
- Niva engine modification
- How to flush the engine cooling system
- What is the best way to flush the engine cooling system?
- What is the best way to flush the engine cooling system?
VESKO-TRANS.RU
AutoNews / Reviews / Tests
Adjusting Valves on a 16 Valve Engine
Are the valves adjustable on a 16 valve engine?
March 19, 2004 Posts: 42 From: Orenburg Auto:
Published: Friday, September 24, 2004, 2:57 pm Message Title
: a question about the valve will prompt you
to adjust
the valves on a car with 79,000 miles (never been adjusted before), otherwise the call is to leave our client as is? Return to top Viktor_21102
March 11, 2003 351 posts From: Khanty-Mansiysk Auto:
Published: Friday, September 24, 2004, 15:12 Post title
: If the engine is 16
valve
. not required if there are 8 valves. It's been a long time, it's strange that the engine is still running. _ Happiness in family life, success. personally. Return to top alex
September 19, 2003 886 messages
Published: Friday, September 24, 2004 3:24 pm. Post title In the sense that at 16V there are none at all.
The only ones that have multi-valve gaming slots. improved ventilation of the combustion chamber. this is noticeable at high engine speeds. You can use this main advantage of slots in slots in a narrow rpm range (3000 to 4000 rpm, in fact). So the engine becomes unpleasant and elastic.
there is no bottom difference in the top 8 cells. loses. So who will have to switch more often? Compare engines 124 and 114 as an example. More thrust | band 124 spectrum width | range 114, spectrum width | 110 nm | 1550-6000, 4450 | 1450-4600, 3150 120 nm | 2000-5300, 3300 | 2200-3950, 1750 130 nm | 2700-4900, 2200 | 2600-2700, 100
As we've already learned, 8 cells operate in much narrower spectra, which means moving to them more frequently.
This message was edited by Transparent Pepper: May 9, 2011.
In this case, only valve adjustment is considered on a VAZ 2110 with an 8-valve engine, since this is not done on a 16-valve engine, since hydraulic compensators are installed for them. So, if you are the owner of a 10 with a sixteen-valve engine, then when detonation occurs, you only need to change the “hydraulic system,” but if your VAZ 2110-12 has an eight-valve engine, you need to adjust the thermal valve clearances.
This procedure can be done independently if you have the right tools. We will help you with a step-by-step annotation for the photo.
Self-regulating valves included VAZ 2110 looks like this:
Remove the valve cover;
Install a special adjustment device (many do without using 5 massive flat-head screwdrivers);
Set cylinder 1 to TDC. To do this, place a mark on the crankshaft and camshaft (8 engine cells; 16.
Some owners are not yet aware of the dilemma of timing belt failure before purchasing a car, and therefore, on some engines, the pistons collide with the valves and are bent by them. This problem occurs not only on Russian cars, but also on modern foreign cars, and all this can lead to quite expensive repairs. This problem existed in older Lada models, unfortunately, at the moment we are interested in modern engines, we can get to know each other. And the consequences of this problem are only shown on the left of the picture, so read the information below carefully to avoid such a picture, because they say that for this reason no one is immune.
Why and is this necessary? ADJUSTING VALVES? BE WANTED!
Probably, beginners do not understand why adjust the valve
by car, but what if they went
to regulate
in general.
Control valve for VAZ 2110, 2114, Kalina, Granta, 2109, 2108
Video summary on regulation of thermal clearances of valves
on VAZ cars front-wheel drive from 2108 to.
Bends valves on the following engines
Just recently I received two letters from AUTOBlog, both letters about Lada Priora engines and, in particular, about the valve.
First letter: “Hello. I have a question. a year earlier I bought a Priora, had a long trip and on the road the timing belt broke, most of the valves were bent. He hired a tow truck and pulled the car to the official station. They looked and said that they would not pay anything, no repairs, no tow truck. And they said I was guilty! To the nuts! How can I control the timing belt? But how to go without it breaking? Andrey "
2nd letter: “Good current time of day, I would like to know what are the priorities for the valve not bending? Thanks in advance, Kazbek"
You see, the question is really about one topic. Let's think, if the valve changes on a Priora, if your belt breaks and the valve bends, who is to blame? Read more.
Is the valve bent in priority?
First I will answer the second question that Kazbek asked. Which priors are not depressed.
Sanya: In principle, the car is excellent, reliable. For 3 years of work, he did not stand in the way. Of course, the breakdowns were unfortunately minor. Front-wheel drive with good tires performs well in mud, snow and ice. in general, it's better to think about Ferrari in the 10s than about the big one! 09: 01/01/2011
whitefish: it's normal that in my 10th gear it comes out normally at a very low speed and a little faster than the scratch answer 23:30 01/29/2011
Vovan is their problem, I advise you to pedal fully and wait 2-4 seconds and then stick with it Reply 18:39 May 23, 2011
Vadim, I have the same thing and I’m not doing anything. such a box is the answer
Arteta: Tell me, who has the car from the Cherkasy meetings? What is the quality of the car? Answer 10: 02/14/2011
The invited men say that you need to take Cherkasy 21104 or better take 2115 Answer 19: 02/21/2011
Kalbasoff I have a Circassian collection, although she claims.
Site navigation
Types and properties of viburnum engines, their pros and cons
Various types of engines are installed on Kalina, the first one is installed with a conventional 8 valve
with a displacement of 1.6 liters under 11183, in the end they began to install 11194 engines with the smallest 1.4, but with 16 valves, on more expensive cars such as Kalina Sport, they also install the Priorovsky engine under No. 21126, which has a volume 1,6 and 16 valves.
In 2012, AvtoVAZ released a new engine number 21116 with 8 valves and a displacement of 1.6, the main difference from 11183 is a lightweight piston (due to this power, unfortunately, the engine was included). Although this engine was only installed on a grant that came in exchange for a Kalina car, unfortunately, I think that in the future it will be installed on a Kalina.
Main pros and cons of engines
VAZ 11183 (1.6-8cl):
The engine has been recognized and tested (repaired).
Completely on all classic engines, including the VAZ 2106, sometimes it is necessary to adjust
. Otherwise, some valves will gradually tighten, or, conversely, the gap will be large and they will knock. To avoid this, you need to make timely adjustments. First of all, I will give you a list of tools that will be useful for this VAZ 2106 job.
13 key open end wrench for 17 keys Probe set, to be precise we will need one probe 0.15mm wide. Additionally, there is a list of tools needed to remove the valve cover.
Step-by-step guide to adjusting the thermal clearance of valves on a VAZ 2106
As you continue this work, keep in mind that the car's engine must be cold, in other words, its temperature must be very close to room temperature. It is also worth noting that the timing circuit voltage will be.
Technical characteristics of VAZ engines
VAZ 2110 engine
VAZ 2111 engine
VAZ 2112 engine
Ivan: The car is no problem, convenient, in good working order. I’m driving for the 3rd year, usual pre-sale preparation, timely service, mileage about 40 thousand. During this time, only the main muffler, which stalled in the 2nd year, and one rear brake light were replaced. And spark plugs with our cheap Ukrainian cheap gasoline need to be changed every 10,000 km. The gas system should be cleaned after 10,000 km by pouring modern chemicals into the gas tank and then replacing the fuel filter. The engine has 1.6 and 16 valves, and fuel consumption is within 5-6 liters. in the suburban cycle and 6-10 liters. in the city. Reply 08: 05/23/2008
How to eliminate the knocking of hydraulic pushers on Lada Priora
Timely and high-quality maintenance of the engine oil system is the key to flawless operation of the hydraulic compensator mechanism. After all, the unit is designed for use throughout the entire resource of the power plant.
Use of recommended lubricant
When the hydraulic pushers just start knocking, the manufacturer recommends changing the lubricant to a proven option. Therefore, when the question arises of what kind of oil to pour in principle, it is worth analyzing reviews to determine the acceptability of a certain model of oil product for hydraulic compensators.
Of course, the best choice for Lada Priora will be the composition recommended by the manufacturer, specified in the instruction manual. However, not all current popular products are included in the list.
An analysis of opinions shows that, indeed, with the universal viscosity of 10W-40 or 5W-40 specified by the factory, not every oil is suitable. For example, Shell Helix Ultra 5W-40 causes knocking already at 15,000 km, while on Liqui Moly Optimal Synth 5W-40 the hydraulics are silent even at 80,000 km.
Reviews show that it is optimal to choose the following lubricants:
- Total Quartz 9000 Energy 5W-40.
- Mobil Ultra 10W-40.
- Wagner Windigo 10W-40.
Flushing
Many owners, in advanced cases, resort to general engine flushing. However, the effectiveness of such an event in the fight against knocking GCs is low. This is explained by poor oil pumpability in the area of the hydraulic pusher chambers. If changing the lubricant does not help, the best solution is to remove the cylinder head cover and find which hydraulic compensators on the Lada Priora 16-valve engine are knocking and determine the reason for this. Defective parts are identified by diagnosing running resistance with a wooden wedge. A fast movement speed in comparison with other hydraulic supports indicates wear of the hydraulic module, the presence of a constant gap indicates its coking.
Attention! The wooden wedge must be pressed against the non-working surface of the cams.
Effective removal of carbon deposits inside the cylinders is their local washing. Worn assembly modules cannot be repaired.
Additives
Additive compounds help delay identifying the causes and cleaning the timing belt. There are several products available in the market. The most popular products are from Liqui Moly and XADO. The effectiveness of substances depends on the specific case. Fans of motor additives often equate this class of chemistry with a waste of money.
Tool for work
In addition to the everyday set of sockets and spanners, which the owner of a VAZ 10 should already have, a few more tools will be required:
- A device that presses out pushers for removing adjusting washers from them. You can get by with a couple of powerful screwdrivers, but the price issue here is not so great that you pay for the savings with less convenience. You can completely remove the camshaft - but then you will have to remove the timing belt as well, again there is no gain in time.
- A set of feeler gauges - we will use them to measure the gaps.
- Micrometer - This is not necessary, but is very useful. When adjusting, the thickness of the new washer is calculated based on the thickness of the old one and the measured gap, but what to do if the thickness marking on the washer is erased (and no one has canceled the wear?). You can borrow a 0-25 mm micrometer, fortunately you can trust it by simple mixing without calibers.

