The rear window of the VAZ-2114 car has a length of 1210 (mm) and a width of 656 (mm).
Standard dimensions of the rear window of the VAZ-2114:
Dimensions are given in length/width format.
- 1210x656 (mm).
- The glass thickness is 3 (mm).
VAZ-2114 (LADA Samara) is a five-door hatchback, produced at the Volzhsky Automobile Plant, an improved version of the VAZ-2109, the unofficial name is “Samara-2”.
Important: in the production of the rear window on the VAZ-2114, “triplex” technology was used; the product consists of several layers glued together.
| General view of the rear windows |
| General parameters of VAZ 2114 rear windows | |||
| Drawing General schematic drawing of rear windows | Length min (mm) Minimum length of the rear window for different modifications of VAZ 2114. | ||
The measurement is taken along the widest bottom part of the glass, on the outside.
The measurement is taken along the widest bottom part of the glass, on the outside.
| Length max (mm) Maximum length of the rear window for different modifications of VAZ 2114. | Modifications Number of modifications of the model in our database |
| Parameters of rear windows VAZ 2114 | |
| Parameter Rear window parameter | |
Caution: in data after which a letter designation is indicated in brackets (for example: Upper length (AB)) indicate the size of the glass opening, in all other cases the data refers to the glass dimensions.
The windshield on a VAZ 2114 cracks twice as often as the rear one, as it is more susceptible to mechanical stress. Replacing it does not require Herculean efforts or special education. You can do this yourself without contacting a service station.
Rear window size of VAZ 2114 for tinting
The rear window of the VAZ-2114 car has a length of 1210 (mm) and a width of 656 (mm).
Dimensions are given in length/width format.
- 1210x656 (mm);
- The glass thickness is 3 (mm).
VAZ-2114 (LADA Samara) is a five-door hatchback, produced at the Volzhsky Automobile Plant, an improved version of the VAZ-2109, the unofficial name is “Samara-2”.
Important: in the production of the rear window on the VAZ-2114, “triplex” technology was used; the product consists of several layers glued together.
Other designations for the VAZ 2114 hatchback on the Russian market: VAZ 2108, VAZ 2109, VAZ 2113, Lada Samara.
Important: years of production of all modifications of the model: 2001-2013.
| General view General view of the rear windows |
Disclaimer: Although the data represents official manufacturer figures, the information above is for reference only and is not guaranteed to be absolutely accurate.
Source
What kind of windshield wiper should be on a VAZ-2114
VAZ 2113, 2114 and 2115 cars have factory windshield wipers with a length of 51 cm. If replacement is necessary, you can use wipers whose length is 53 cm. In this case, you must leave a standard size blade on the passenger side. It is noteworthy that these cars also have rear wipers of the following sizes:
- They are generally 30 cm long (11-12 in inches).
- It is possible to replace it with 33 cm.
- Products 40 cm long are also suitable, but for this you will need to move several teeth on the electric motor brush.
It should be noted that all cars from the AvtoVAZ plant are the progenitors of the Lada Samara, therefore they have symmetrical washers, like their descendants, and their average length is 53 cm.
Rear window size of VAZ 2114 for tinting
VAZ VAZ 1111- OKA rear VAZ 1111 REAR GLASS EO 1074x438x3 rear VAZ 1111 REAR GLASS EO TZ 1074x438x3
VAZ VAZ 1117 — Kalina (station wagon) rear VAZ 1117 REAR GLASS EO TTZ 1169x522x3 rear VAZ 1118 REAR GLASS EO TTZ 1170x653x3
VAZ VAZ 1119 — Kalina (hatchback) rear VAZ 1119 REAR GLASS EO OTV TTZ 1134x542x3
VAZ VAZ 2104 rear VAZ 2104 REAR GLASS EO 1056x465x5 rear VAZ 2104 REAR GLASS EO TZ 1056x465x5
VAZ VAZ 2106 rear VAZ 2106 REAR GLASS EO 1360x512x5 rear VAZ 2106 REAR GLASS EO TZ 1360x512x5
VAZ VAZ 2108, 2113 KhBK 3 doors. rear VAZ 2108 REAR GLASS EO 1210x656x3 rear VAZ 2108 REAR GLASS EO TTZ 1210x656x3
VAZ VAZ 2109, 2114 KhBK 5 doors. rear VAZ 21099 REAR GLASS EO 1288x534x3 rear VAZ 21099 REAR GLASS EO TTZ 1288x534x3
VAZ VAZ 2110 — Sedan rear VAZ 2110 REAR GLASS EO 1213x676x3 rear VAZ 2110 REAR GLASS EO TTZ 1213x676x3
VAZ VAZ 2111 — Station wagon rear VAZ 2111 REAR GLASS EO 1190x418x3 rear VAZ 2111 REAR GLASS EO TZ 1190x418x3 rear VAZ 2111 REAR GLASS EO TTZ 1190x418x3
VAZ VAZ 2112 — Hatchback rear VAZ 2112 REAR GLASS EO OTV 1076x820x3 rear VAZ 2112 REAR GLASS EO OTV TTZ 1076x820x3
VAZ VAZ 2170 — Priora (sedan) rear VAZ 2170 REAR GLASS EO TTZ 1174x683x3
VAZ VAZ 2171 — Priora (station wagon) rear VAZ 2171 REAR GLASS EO TTZ 1114x462x3
VAZ VAZ 2172 — Priora (hatchback) rear VAZ 2172 REAR GLASS EO TTZ 1089x717x3
VAZ VAZ 2190 — Granta rear VAZ 2190 REAR GLASS EO TTZ 1178Х644Х3
VAZ VAZ 2120 — Nadezhda rear VAZ 2120 REAR GLASS EO OTV 1224Х450×3
VAZ VAZ 2121 1977-1994 rear VAZ 2121 REAR GLASS EO 1112x438x5 rear VAZ 2121 REAR GLASS EO TZ 1112x438x5
VAZ VAZ 2123 — Niva-Chevrolet rear VAZ 2123 REAR GLASS EO 1093x587x4 rear VAZ 2123 REAR GLASS EO TZ 1093x587x4 rear VAZ 2123 REAR GLASS EO TTZ 1093x587x4
Source
Other parameters of VAZ 2114:
The rear window of the VAZ-2114 car has a length of 1210 (mm) and a width of 656 (mm).
Standard dimensions of the rear window of the VAZ-2114:
Dimensions are given in length/width format.
- 1210x656 (mm).
- The glass thickness is 3 (mm).
VAZ-2114 (LADA Samara) is a five-door hatchback, produced at the Volzhsky Automobile Plant, an improved version of the VAZ-2109, the unofficial name is “Samara-2”.
Important: in the production of the rear window on the VAZ-2114, “triplex” technology was used; the product consists of several layers glued together.
| General view of the rear windows |
| General parameters of VAZ 2114 rear windows | |||
| Drawing General schematic drawing of rear windows | Length min (mm) Minimum length of the rear window for different modifications of VAZ 2114. | ||
The measurement is taken along the widest bottom part of the glass, on the outside.
The measurement is taken along the widest bottom part of the glass, on the outside.
| Parameters of rear windows VAZ 2114 | |
| Parameter Rear window parameter | |
Caution: in data after which a letter designation is indicated in brackets (for example: Upper length (AB)) indicate the size of the glass opening, in all other cases the data refers to the glass dimensions.
The windshield on a VAZ 2114 cracks twice as often as the rear one, as it is more susceptible to mechanical stress. Replacing it does not require Herculean efforts or special education. You can do this yourself without contacting a service station.
Glass transmittance standards
To avoid administrative penalties, you should listen to recommendations on the permissible degree of light transmission of the film.
It’s worth mentioning right away that mirror tinting is prohibited. Even if the owner really wants to improve the appearance of his VAZ 2115 in a special way, he will have to give up the DSLR.
It is allowed to stick a strip of transparent sun protection film up to 14 cm wide on the windshield (light transmittance is not regulated). Windshield - light transmittance is preferably up to 85%, front side windows - up to 70%, rear windows are not installed (only mirrored ones are prohibited). These indicators correspond to GOST 5727-88 “Safe glass for land transport. General technical conditions".
Design and dimensions
Consumables that do not match in size are one of the reasons for rapid breakdown. To prevent troubles, take the choice of a new part more seriously.
Head-on
The dimensions of the windshield of the VAZ 2115 are 1400×662 mm. The dimensions of the windshield on the VAZ 2114 and 2113 have the same dimensions, which makes it easier to find a new spare part.
It is multi-component: two glass layers and a film between them, the so-called triplex. This structure prevents fragments from scattering when damaged.
Rear
Cracks or chips on parts are rare. The size of the rear window of the VAZ 2114 is 1210x656 mm.
The parameters need to be known if the driver wants to tint the car.
Lateral
The front left side glass is 858 mm wide and 528 mm long. Consult with a salesperson at your auto store before purchasing.
Possible washer malfunctions
In order for the wipers to work properly, a constant supply of water is necessary. To automate this process, a washer was made. There may be the following reasons for its failure.
- The steering column switch has failed. To check this, you need to close the two contacts located under the steering wheel. Front contact 53ah-w, rear contact 53ah-wh. After this, measure the resistance. In case of low resistance or breakdown, the switch must be replaced with a new one.
- The washer pump does not supply water. It needs to be changed.
- The wire connecting the switch to the pump has broken.
- The injectors are clogged with dirt. They can be cleaned with a sharp needle.
- Relay K3 does not work.
- The hose broke.
As you can see, even simple parts have enough problems and breakdowns. However, following the operating rules will help avoid repairs and increase their service life.
How to choose
Don't buy cheap copies. Products with a suspiciously low price are either made of low-quality materials or are sold as disassembled parts. An inexpensive consumable will require replacement after just six months of use.
It is advisable to find an original spare part. It will definitely fit the car, and the quality will be higher than that of its analogue.
Inspect the part carefully. The surface must be smooth, without scratches, even and transparent. The reflection must be clear and clear. If it is cloudy, do not rush to shell out money.
Check markings, manufacturer and type. Information must be clearly written. Blurred markings are one of the main signs of a fake.
The price of consumables ranges from 1000 to 3000 rubles.
Economy segment
Xyg (China) - the best Chinese parts on the market. Pass ultraviolet rays. The material is not of the best quality: poor visibility, the image is distorted. Weak structure. This consumable will have to be changed twice a year. Overall, the price is reasonable.
Borovskoye KMK (Bor, Nizhny Novgorod region). The spare part is made of soft material, chips and scratches quickly appear. Doesn't take punches well. Cheap, but short-lived.
Premium segment
Pilkington (UK). European quality. Resistant to scratches, chips do not appear the first time. Will last a long time.
Borovskoye AGC-glass (the plant was purchased by the Japanese Company AGC-Glass). Decent choice. Japanese quality, quite high price. The company provides energy-saving, multi-layer shock-resistant and colored lacquer-coated glass.
Frameless wipers: features
This design does not have its own skeleton. Basically, frameless wipers are a kind of tape that has a steel plate inside. Their appearance harmonizes perfectly with any car, which cannot be said about the skeletons of frame wipers.
These models do not belong to the economy segment. For different brands of cars, such wipers are selected individually. The curvature of the windshield of any car is formed according to aerodynamic parameters. Therefore, the curvature of the wiper must also be appropriate.
This is why low-cost windshield wipers do not press well and the glass does not clean. It is impossible to fix such brushes. You just need to install new, better ones. Premium brushes will work perfectly, regardless of the car model. However, they cost more than 1000 rubles.
A positive quality of frameless models is the ease of cleaning the windshield wiper from ice in winter. You just need to bend them a few times for the ice to instantly fall off. These wipers have excellent aerodynamics. At high vehicle speeds, their downforce increases.
Causes and consequences of damage
Driving on poor quality roads in Russia forces car owners to look for a new windshield at least once every year and a half. Even a very small pebble flying from under the wheels of a car can lead to damage to the part.
There are two types of damage:
- Chips. If only a chip appears on the surface, the driver is lucky. This means that the first layer is damaged; it is not necessary to install a new spare part.
- Cracks. You can't hesitate. At any moment, glass can crumble into pieces due to a hole in the road, and this will lead to an accident.
What can you do
If the driver fails to change it in time, there are several popular tips:
- Using a glass cutter, make perpendicular cuts 0.5 cm long along the edges of the “web”.
- Drill small holes with a thin diamond drill bit. The work requires accuracy, patience and attention.
- “Weld” the crack. It's better to contact specialists. Without experience it will be difficult.
We tint a VAZ 2115 on our own: choosing a film and procedure
Increasingly, Zhiguli car owners perform tuning, such as tinting, with their own hands. The availability of the necessary materials and tools makes this possible. The owners of the VAZ 2115 also want to improve the appearance of their car, bring the glass to an almost pristine condition. The work can be undertaken by an amateur master who, in addition to the desire and necessary materials, also needs to arm himself with knowledge on the issue, familiarize himself with tips and recommendations. And then the tinting of the VAZ 2115 car will be completed without a hitch using your own efforts.
Replacement
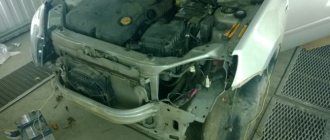
There are two options for replacing the windshield on a VAZ 2114:
Contact a car service. Fast, simple, but expensive. On one's own. If you have experience in repair work of this kind, time, patience, and an assistant, then dismantling is possible in your own garage.
How to remove
The work begins with the fact that we remove all unnecessary things. Side trims, wipers - this interferes with dismantling. Now we remove the old glass: starting from the top corner, squeeze it out along with the rubber. It is advisable to have someone help. If you pry the seal with a flat screwdriver from the inside, it will be easier to remove the headband.
You need to work with gloves, taking safety precautions.
Clean the grooves. The replacement now needs to be replaced with a seal. If the rubber is cracked, it is also advisable to replace it.
How to replace frames and seals
Replacing the windshield frame requires more effort, but this operation can be done at home.
We measure the frame. Its width is 680 mm in the center and 1378 mm diagonally. Further actions:
- We weld the fasteners on the sides.
- We make an amplifier, weld it to the frame from the outside.
- We clean the frame and the cavity for the wipers.
- We prime it twice.
- Apply adhesive sealant.
- We evenly coat the frame and cavity with paint and weld it.
The seal needs to be replaced as it wears out. If it has shrunk in places and lost elasticity, then it is advisable to install a new one in the near future. To replace the front window seal of a VAZ 2114 you will need:
- a set of flat screwdrivers;
- stationery knife;
- putty knife;
- solvent for nitro paint;
- adhesive sealant.
To make installation easier, apply lubricant to the rubber seal and soap solution to the lower groove. You need to put a thin, strong rope inside the seal. Place the new seal on the glass. We pull the ends of the cord in the center of the bottom of the material. It is advisable to soak the cord with detergent.
Tinted glass. — Lada 2114, 1.5 l., 2004 on DRIVE2
Hello everyone, another weekday of the pelvic floor. :"D Today we will talk about tint. I was already tired of the standard tinting due to its transparency, so I decided to make a bunker at the back. Accordingly, as I believe, there can be only one tint - 5% (a nickel in common parlance).
I started by studying tinting. As it turned out, the American woman was the coolest, they said either suntek or mtf, like good ones, but oh well. At first I wanted to take Suntek, then they said take MTF, it’s a good film, it sticks well, like an American one.
I come to the store and pick up this type of American MTF. And immediately what do I see? There is no smell of American here. Anyway. Everyone recommended it, they say it’s very good and sticks well.
Then I started reading manuals on how to apply tint. I myself have never in my life even held tinting in my hands, much less glued anything like that.
First of all, I went to the Start hardware store. There I bought a set of 4 plastic spatulas (40 rubles), a sprayer for 89 rubles, and a couple of stationery knives.
Then I went to the garage to do all the operations. I poured water and 3 drops of feri. I opened the package with the film and saw the instructions. I started reading it.
How to put
During installation you will have to resort to outside help. The glass is inserted into the lower groove, and only then carefully around the entire perimeter. As you insert the windshield, pull out the cord to fit the seal tightly and efficiently.
Be careful when pulling the rope at bends! In the side parts it slides with difficulty and can tear; press harder from the outside of the car.
It is advisable to fix the rubber with glue-sealant, and attach the glass to the roof and sides with tape overnight.
Replacing the rear window of a VAZ is carried out in the same way. If you installed a windshield, you can install this, although removing the rear window is a more difficult task. To insert the rear window, ask a friend for help, as you will have to pull the rope and press on the consumable at the same time.
Conclusion
Replacing damaged glass is not difficult, although it will require some skill. This is easy to do with your own hands using tools. It is advisable to have someone help you; it will be inconvenient to carry out the installation alone.
A selection of body dimensions, data on the body geometry of the VAZ 2115 and control points of the VAZ 2115, VAZ - 2114 from the factory documentation. A significant part of the repair work on cars, especially those received after road accidents, falls on body repairs. In most cases, repairs require checking the geometry of the attachment points of components and assemblies of the vehicle chassis.
VAZ 2115 body dimensions: 0 – base lines; 1 – axes of the front bolts for fastening the front suspension braces; 2 – center of support of the front suspension of the power unit; 3 – center of the support of the left suspension of the power unit; 4 – centers of the upper hinges of the front telescopic struts of the front suspension; 5 – centers of the hinges of the front suspension arms; 6 – points of intersection of the axes of the welded bolts for fastening the steering mechanism with the surfaces of the brackets; 7 – attachment points for the rear suspension support of the power unit; 8 – points of intersection of the axes of the rear welded bolts for fastening the rear suspension arms with the surfaces of the rear side members; 9 – centers of the upper supports of the rear suspension shock absorbers
Damage to car body can be very different. Therefore, the repair rules in each individual case must be different, most suitable for these damages, and it is necessary to make maximum use of the possibilities of straightening damaged panels. If possible, it is necessary to avoid thermal effects on the metal so as not to disrupt the factory welding and anti-corrosion protection of the body. Remove the front body panels only in extreme cases, to determine the location of damage, straighten or align the body. In cases of significant body damage, it is recommended to remove all interior trim to facilitate measurement, inspection and installation of hydraulic and screw jacks to correct distortion and damage to the body.
By editing it is necessary to restore the original linear dimensions and locations of the power units, the dimensions of the openings of the wind window, hood, and doors. Protrusion of the front surfaces and removable parts relative to adjacent panels is eliminated by fitting and adjusting them.
Control body dimensions, data on Lada 2115 geometry and VAZ 2115 control points from various repair bases.
Cost of downloading the file: 10.00 usd The link will be available within 16 hours after payment. After payment, a link to download the file will be sent to the specified email, or you can click the 'Buy' button again and the file download will start automatically.
How to replace a VAZ 2114 windshield
- VAZ repair
- VAZ 2114
- Other
- Main characteristics of the VAZ windshield
- Types of damage
- Glass replacement
- Useful video
Sometimes, as a result of an accident or a simple hit by a stone, the windshield of a car is severely damaged and completely fails. You can solve the situation that has arisen, despite the complexity that may seem at first glance, with your own hands. Today we will talk about how to correctly replace the windshield of a VAZ 2114, as well as which glass is better to choose.
Replacing the windshield of a VAZ 2114
Replacing a VAZ windshield wiper motor
Sometimes the gear motor fails. The brushes are constantly working, the shutdown relay does not work. When the motor control is turned on, the wipers do not function. In some cases they do not turn off. To eliminate such breakdowns, the motor must be replaced.
The windshield wiper gear motor is a very ordinary three-speed electric motor. Similar to standard geared motors, it has a bimetallic fuse located directly on the housing or hidden inside. Replacing the motor is quite simple. It is necessary to unscrew the four mounting bolts. However, the following difficulties may arise:
- poor engine location;
- the need to mark the location of the crank.
The crank refers to a curved rod that connects the motor and the trapezoid arms. If the crank is installed incorrectly, the teeth of the new motor can be broken. The replacement technology is as follows.
- The fuse box is turned off.
- A mark is made on the location of the crank.
- The crank mount is released.
- The trapezoid mounting bolts are unscrewed.
- The gear motor is removed.
Design and dimensions
Consumables that do not match in size are one of the reasons for rapid breakdown. To prevent troubles, take the choice of a new part more seriously.
Head-on
The dimensions of the windshield of the VAZ 2115 are 1400×662 mm. The dimensions of the windshield on the VAZ 2114 and 2113 have the same dimensions, which makes it easier to find a new spare part.
It is multi-component: two glass layers and a film between them, the so-called triplex. This structure prevents fragments from scattering when damaged.
Rear
Cracks or chips on parts are rare. The size of the rear window of the VAZ 2114 is 1210x656 mm.
The parameters need to be known if the driver wants to tint the car.
Lateral
The front left side glass is 858 mm wide and 528 mm long. Consult with a salesperson at your auto store before purchasing.
What size are the wipers on the VAZ-2114
Any part for a car must be selected correctly. Washers in this case are no exception. Their choice also needs to be approached responsibly so that there are no problems during operation. It is important that they match the size of the machine, otherwise there is a risk that the clamping force will drop, resulting in a decrease in the quality of cleaning. The excessively large size of these products can cause them to “climb” onto the sealing rubber during operation, which will reduce the surface area that is in contact with the wipers. And too small ones, due to the limited cleaning area, will significantly reduce the effectiveness of the brushes. Thus, the size of the windshield wipers is important, so when choosing, it is important to pay attention to this nuance.
A crack has appeared: what to do?
A damaged windshield on a VAZ is a source of increased danger for the driver and passengers; it can finally crack and fall out due to vibration and the car’s wheels getting into holes. It is better not to delay the purchase of new glass, but at first the growth of the crack can be delayed.
The fact is that the VAZ windshield is a three-layer glued structure (hence the name - triplex) made of glass and a transparent film that keeps the structure from crumbling upon impact. If only the first layer is damaged due to mechanical stress and a small crack appears, then its growth can be stopped in the following ways.
- A small crack can be carefully trimmed on both sides with a glass cutter. Using a glass cutter, cut 5 mm long marks perpendicular to the direction of the crack. This will help prevent further cracking for a while.
- At the ends of the crack, a hole can be made in the first layer of glass using a thin diamond drill bit. It’s a very delicate job that requires attention and patience, but if successful, it will definitely give results: for some time the crack will not spread beyond the hole.
When choosing a new windshield, you should not lean towards the cheapest options; you must remember that your safety depends on it. When purchasing, you need to check the product for scratches, cracks and chips along the edges, the surface must be absolutely smooth, and your reflection in the glass must be clear and not blurry.
DIY glass tinting
Since car tuning is not cheap, many owners prefer to do it themselves. To work they will need:
- quality material;
- soap solution and spray bottle;
- rubber spatula;
- sharp knife;
- lint-free napkin;
- hairdryer
Before starting work, it is necessary to dismantle the windshield of the VAZ 2115, although not everyone does this; in principle, you can glue the film right away. If the glass remains in place, then the seals should still be removed. To stick the strip on the top of the windshield, you also do not need to dismantle it. The surface is thoroughly washed, paying special attention to corners and places where more dirt collects. After degreasing, wipe dry with a non-woven lint-free cloth and check to see if there is any dust left.
Spray the surface with a solution from a spray bottle and apply a pre-cut film blank, gradually separating the transparent layer. When the film is placed on the glass, movements from the center to the edges begin to remove air bubbles, as well as excess water. In this case, use a rubber spatula and/or your own hands.
If the glass has a curved shape, it is advisable to use a hair dryer. With its help, the film can be given the desired shape, and the pasting will be of better quality.
When the tint is applied, the protruding edges are trimmed. A sharp knife is held at an angle of 30 0, while acting slowly.
How to choose
Don't buy cheap copies. Products with a suspiciously low price are either made of low-quality materials or are sold as disassembled parts. An inexpensive consumable will require replacement after just six months of use.
It is advisable to find an original spare part. It will definitely fit the car, and the quality will be higher than that of its analogue.
Inspect the part carefully. The surface must be smooth, without scratches, even and transparent. The reflection must be clear and clear. If it is cloudy, do not rush to shell out money.
Check markings, manufacturer and type. Information must be clearly written. Blurred markings are one of the main signs of a fake.
The price of consumables ranges from 1000 to 3000 rubles.
Economy segment
Xyg (China) - the best Chinese parts on the market. Pass ultraviolet rays. The material is not of the best quality: poor visibility, the image is distorted. Weak structure. This consumable will have to be changed twice a year. Overall, the price is reasonable.
Selection of film material
High-quality tinting will be obtained by those who do not skimp on purchasing high-quality film. There are a lot of Chinese-made materials on the market that are of very low quality. This film has low light transmittance, which can seriously increase the risk of accidents.
When dismantling cheap material, some of the tinting paint often remains on the glass, since it was initially mixed with glue. Professional films produced on special equipment do not have such a flaw, since only one layer is painted.
When choosing materials, car owners and workshop workers should give preference to proven brands known for their quality. Their products also have a protective layer that protects the film from scratches, cuts and other troubles.
If the glass is damaged
Apart from the case when the glass is completely broken, there are two main types of damage:
Each one needs to be repaired differently, giving the driver a wider variety of problems. But first it should be noted that triplex is used for the VAZ. This is glass consisting of three layers: two glasses, between which there is a protective film. The latter prevents the glass from simply shattering from an impact. Therefore, when the pebble described above hits the glass, a chip (or crack) forms on it. This is evidence that the first ball of glass is damaged.
Of course, this type of damage cannot immediately completely destroy the glass. But still, repairs cannot be delayed.
Replacing one layer can be inexpensive and quite quick. But if you start this process, the crack can ruin the tightness of the window, and you will have to replace the entire windshield.
Car enthusiasts' expectations
So, when deciding on tuning a VAZ 2115 with your own hands, the owner assumes that he will receive:
- protection of personal space from prying eyes.
- protection of interior parts from exposure to sunlight (the parts heat up 60% less, which means they do not emit harmful substances, and the paint does not fade).
- Reducing glare from headlights of oncoming cars and reflections from snow.
- protection during a possible accident from crumbling small glasses.
In order for these expectations to be fully met, you need to carefully select the material, having first studied its features. It is also worth paying attention to the fact that it is not advisable to have the transparency coefficient of the film below 85%, otherwise the car owner may be fined.
Causes and consequences of damage
Driving on poor quality roads in Russia forces car owners to look for a new windshield at least once every year and a half. Even a very small pebble flying from under the wheels of a car can lead to damage to the part.
There are two types of damage:
- Chips. If only a chip appears on the surface, the driver is lucky. This means that the first layer is damaged; it is not necessary to install a new spare part.
- Cracks. You can't hesitate. At any moment, glass can crumble into pieces due to a hole in the road, and this will lead to an accident.
What can you do
If the driver fails to change it in time, there are several popular tips:
- Using a glass cutter, make perpendicular cuts 0.5 cm long along the edges of the “web”.
- Drill small holes with a thin diamond drill bit. The work requires accuracy, patience and attention.
- “Weld” the crack. It's better to contact specialists. Without experience it will be difficult.
Temporary protection
Temporary protection of glass can be carried out in several ways that will preserve the integrity of the windshield until it becomes possible to purchase a new spare part.
- First, you need to “break” the structure of the crack and the directions along which it goes. Using a glass cutter, make cuts about 0.5 centimeters from each edge across the crack.
- Drill several thin holes along the edges of the crack. To do this, use a diamond drill. These measures will prevent the crack from going further.
- Enlist the help of auto repair shops that are qualified in this matter. In good workshops, cracks that have arisen can be welded so that they are not even visible from the outside.
Having taken temporary measures, you should start searching for and purchasing a new part as soon as possible, otherwise the scale of the problem will increase. Temporary measures are called temporary because they cannot completely eliminate the problem.
Replacement
There are two options for replacing the windshield on a VAZ 2114:
Contact a car service. Fast, simple, but expensive. On one's own. If you have experience in repair work of this kind, time, patience, and an assistant, then dismantling is possible in your own garage.
How to remove
The work begins with the fact that we remove all unnecessary things. Side trims, wipers - this interferes with dismantling. Now we remove the old glass: starting from the top corner, squeeze it out along with the rubber. It is advisable to have someone help. If you pry the seal with a flat screwdriver from the inside, it will be easier to remove the headband.
You need to work with gloves, taking safety precautions.
Clean the grooves. The replacement now needs to be replaced with a seal. If the rubber is cracked, it is also advisable to replace it.
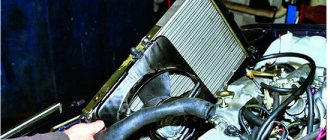
Windshield wiper trapezoids
The main reason you need to replace your windshield wiper arm is when your windshield wipers are running slowly. The trapezoid is also replaced in case of serious mechanical damage. To replace it, you must adhere to a certain technological sequence.
- Under the hood, the wires connected to the fuse block are disconnected.
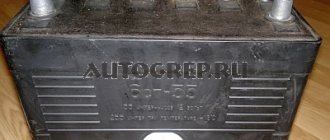
- The protective casing covering the heater fan is removed.
- The stove filter is removed.
- The heater motor is disconnected. You just need to move it to the side, there is no need to remove it.
- The decorative trim is removed from the wipers.
- Under the protective rubber cover there is a nut that secures the windshield wiper. The cover lifts slightly and it unscrews. The janitor is removed.
- The wiper shaft is freed from rings and gaskets.
- The second windshield wiper is removed in the same way.
- Under the hood, the bolts securing the trapezoid to the body are removed.
It will not be possible to immediately pull out the released trapezoid. The fuse box will interfere, as well as the heater motor. To remove the trapezoid, you can use two exits.
- Remove the fuse box by unscrewing the nuts securing it, and remove the heater motor.
- Disconnect the gear motor from the trapezoid. Remove the gear motor one by one, and then the trapezoid.
When disconnecting the gear motor from the trapezoid, it is necessary to remember and mark the location of the crank. A marker will be useful for this purpose. Only after this can you unscrew the mounting bolts and disconnect the motor from the trapezoid.
Selection and replacement of glass
When purchasing a windshield for a VAZ 2114 car, you need to take into account several important circumstances that influence the choice of a high-quality and durable product.
There are two ways to directly replace any damaged car part:
- With the help of specialists at the service center;
- Independently, with the help of others.
It is recommended to change the windshield yourself only with the help of others and only when you have at least some experience in this matter.
If you are not confident in your abilities, do not skimp on installing a windshield and trust the professionals.
If you nevertheless decide to use a more complex but budget option, that is, you are going to install the windshield yourself, you should remember that replacing the windshield of a VAZ 2114 is carried out approximately in the following order.
- Free the removable windshield from the antenna, mirror, alarm, video recorder and other foreign objects that may be on it or glued to it. Remove the side trims on both sides.
- Remove the old windshield using gentle pressure from the inside. Start squeezing the “lobovka” outward from any angle convenient for you.
- Make sure that the seal is also removed from the car along with it. Take a closer look; if the parts are difficult to remove manually, use a flat-head screwdriver made of reliable metal. Pry up the part using the tool as a lever, this will make the glass come out faster. Squeeze the rubber seal over the metal edge of the body.
- At the same time, it will most likely not be possible to remove the triplex intact, since it is already damaged. There is no particular need for this, since using a windshield with numerous cracks poses a danger to the life and health of people in the car. But for your own safety, when removing old glass, use protective gloves to prevent cuts and be extremely careful.
- After removing the old windshield from the groove, the opening must be thoroughly cleaned and get rid of any remaining sealant. Even if the old seal remains intact after dismantling the windshield, it is still recommended to purchase a new seal and use it to install a new spare part.
- Pay attention to the corners of the seal. At the bend points there must be special holes for water to escape - “drains” or drainage holes. The drainage holes of the seal and the car body must match, otherwise water, if it gets on the glass, will end up in the car interior.
- The new seal should be well lubricated, for example with sealant or silicone, which will simplify the installation of the new glass. Some experts believe that the use of sealant or silicone, although it makes the glass fit stronger, nevertheless complicates its removal in case of damage. So in this matter, rely on your own opinion.
- Place the lubricated seal on the new windshield
- On the inside of the seal, it is necessary to place a thin thread of nylon around the entire perimeter so that the edges of the thread are in the middle at the bottom of the glass.
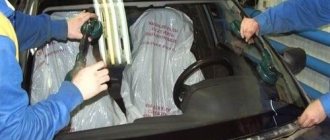
- Enlist the help of a friend: grab the “lobovuha” from different sides and insert it into the opening of your car, and then carefully press it to the seat. Lead the ends of the nylon cord inside the car, that is, into the interior.
- Next, one person should press the “lobovka”, while the other should carefully pull out the nylon thread from under the seal. When approaching corners, be especially careful, since it is at the bends that the nylon thread is most difficult to remove.
In car services, the process of replacing a windshield generally takes no more than half an hour, while replacing it yourself will take much more time. To make installation easier, special handles with suction cups are used, with which it can be easily lifted and inserted into the opening.
Only you can decide how to replace your windshield - yourself or with the help of specialists. One way or another, the presence of cracks on the windshield indicates the need to replace it as soon as possible. Don't risk your health and the health of your passengers!
Didn't find the information you are looking for? on our forum.
Rear window replacement
Replacing the rear window of a VAZ 2109
You can replace the rear window of a VAZ 2109, as mentioned above, yourself. Before installing new glass, you must remove the old one.
Removal
To do this, you should:
- Take a screwdriver and insert it into the seal that holds the glass. It should be inserted approximately 5 mm.
Note: it will be possible to insert the screwdriver deeper, but you should not do this, as you may make a hole that is too deep.
- Push the seal out. First you need to pull out a small piece. The downside is that you cannot pull out the entire seal by pulling it. It's just quite fragile, so it breaks quickly.
- Carefully move the screwdriver a few cm. Tear off another piece of the seal.
- Step by step you can get rid of everything.
Note: since the glass is secured with a seal, as soon as it is gone, it will begin to wobble. Therefore, you need to get rid of the seal slowly and carefully so that the glass does not fall out before it is needed.
- After the seal has been removed to the upper side corner, you can begin to remove the glass itself.
Replacing glass on a VAZ 2109
Don't try too hard when removing the glass. Usually it cannot be kept completely intact.
It certainly cannot be reused. The main thing is not to damage the body of the vases, otherwise additional repairs will be required.
Preparing for installation
Before you begin installing new glass, you must do the following:
- Wipe the edges with degreaser to make it easier to install the seal. That is, the cleaner the glass, the better the seal will fit.
Note: If the old seal was removed carefully, it can be reused. However, in order to remove it carefully you will have to suffer. Therefore, it is advisable to use a new seal.
- Put on the seal. First, it is distributed in the corners, and then pressed against the sides of the glass.
- After this, you should install a lock, which is a small wedge that looks like the letter P. It needs to be inserted so that it is in the center of the seal, but runs along the entire perimeter.
Note: The wedge should be stretched slightly before installation. If you don't do this, then there simply won't be enough. Usually you can stretch it up to 20 cm!
- The wedge is installed as follows: first you need to insert the long part, then the short one. This needs to be done around the entire perimeter of the glass. If a small part of the lock remains intact (that is, it is redundant), then it must be cut off, otherwise it will interfere with subsequent actions.
How to put
During installation you will have to resort to outside help. The glass is inserted into the lower groove, and only then carefully around the entire perimeter. As you insert the windshield, pull out the cord to fit the seal tightly and efficiently.
Be careful when pulling the rope at bends! In the side parts it slides with difficulty and can tear; press harder from the outside of the car.
It is advisable to fix the rubber with glue-sealant, and attach the glass to the roof and sides with tape overnight.
Replacing the rear window of a VAZ is carried out in the same way. If you installed a windshield, you can install this, although removing the rear window is a more difficult task. To insert the rear window, ask a friend for help, as you will have to pull the rope and press on the consumable at the same time.
Windshield H > Posted by ICE, Jul 27, 2010 09:44
#1 ICE
The native lobacher began to crack from the left edge to the right... after being “shot” with stones from under a Kamaz truck))).
I thought about the idea of installing a heated lobacha, the price is 5500 rubles (usually around 800-1500 rubles)
In my opinion. + better visibility in winter (because sometimes the anti-freeze + heater can’t cope), small savings on the anti-freeze, in winter at -30 it gets boring to defrost the windshield for half an hour (even though the engine is warmed up).
I'd love to hear feedback.
#2 connecting rod
#3 ICE
Taking into account my mileage in the region of 80k-100k per year in Moscow, the region and long-distance travel, and every 3 months there is a consistently new crack in the front. It will be a bit expensive.
On the other hand there is safety. When at night in winter you drive along a curved road where there are no lights or markings (it feels like you’re walking across a field) + the left anti-freeze system is frozen at -10, the stove manages to heat a radius of 50 cm from the center and the wipers are uselessly scraping frozen ice on the glass, then it’s worth it.