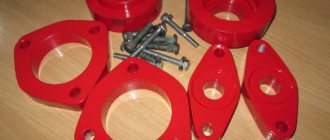
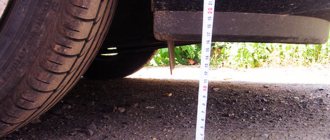
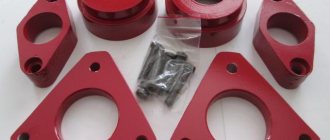
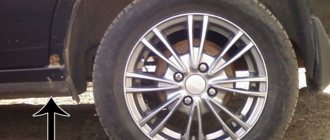
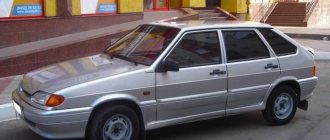
VAZ 2114 ground clearance or ground clearance, as for any other passenger car, is an important factor on our roads. It is the condition of the road surface or its complete absence that makes Russian motorists interested in the ground clearance of the Lada 2114 and the possibility of increasing ground clearance using spacers.
To begin with, it’s worth honestly saying that the real ground clearance of the VAZ 2114 may differ significantly from that declared by the manufacturer. The whole secret is in the method of measuring and where to measure ground clearance. Therefore, you can find out the real state of affairs only by arming yourself with a tape measure or ruler. The official ground clearance of the VAZ 2114 is 165 mm and the manufacturer indicates this figure in a “loaded” car.
Some manufacturers use a trick and declare the amount of ground clearance in an “empty” car, but in real life we have a trunk full of all kinds of things, passengers and a driver. That is, in a loaded car the ground clearance will be completely different. Another factor that few people take into account is the age of the car and the wear and tear of the springs—their “sagging” due to age. The issue can be resolved by installing new springs or purchasing spacers for sagging VAZ 2114 springs . Spacers allow you to compensate for spring subsidence and add a couple of centimeters of ground clearance. Sometimes even an inch of curb parking makes a difference.
But you shouldn’t get carried away with “lifting” the ground clearance of the VAZ 2114, because spacers to increase ground clearance are focused only on springs. If you do not pay attention to the shock absorbers, the travel of which is often very limited, then independently upgrading the suspension can lead to loss of controllability and damage to the shock absorbers. From the point of view of cross-country ability, high ground clearance in our harsh conditions is good, but at high speeds on the highway and in corners, serious sway and additional body roll appear.
At the rear of the “fourteenth”, so-called “houses” or “heels” are traditionally used to increase ground clearance (pictured just above). Which simply lift the entire rack assembly. This method is suitable for almost all front-wheel drive Ladas. For example, we suggest watching a video of installing spacers to increase ground clearance on a VAZ 2114.
Any car manufacturer, when designing the suspension and choosing the ground clearance, looks for a middle ground between handling and cross-country ability. Perhaps the simplest, safest and most unpretentious way to increase clearance is to install wheels with “high” tires. Changing wheels makes it easy to increase the ground clearance by another centimeter. Do not forget that a serious change in ground clearance can lead to damage to the CV joints of the Lada 2114. After all, the “grenades” will have to work at a slightly different angle. But this only applies to the front axle.
What is clearance?
Ground clearance (or ground clearance) is a value that characterizes the distance from the lowest point of the car (most often, the threshold) to the road surface. Ground clearance is measured in millimeters and can vary depending on the purpose of the car. For example, SUVs have higher ground clearance than a regular passenger car. Increasing the ground clearance allows you to increase the vehicle's cross-country ability, but at the same time, its resistance to rollover on the road decreases.
Description
- Aligns the position of the lever to the horizon when lowering the car.
- Used on cars with a maximum lowering of -50.
Product height: 10 mm. Material: Steel. Weight: 0.35 kg.
The kit includes: — Spacer for ball +10mm — 2 pcs. — Bolt M10x1.25x35 — 4 pcs.
How to increase ground clearance (clearance)
Increasing ground clearance is most often done by off-road driving enthusiasts, hunters and other people who like to go out of town. Roads in the city are significantly different from country roads. That is why increasing the clearance for cars unsuitable for these roads is one of the most important procedures.
- First method. An increase in ground clearance is achieved by installing wheels with a larger diameter. This is especially true for cars with basic equipment.
Among the disadvantages of this method are the appearance of a speedometer error and the limitation of the diameter by the wheel arches. This means that if you install a wheel that is too large in diameter, it will hit the arches on sharp turns.
- Second method . Installing spacers under the fastenings of suspension parts to the body, for example, springs, also allows you to increase ground clearance. Complete with spacers, you should purchase shock absorber extensions, or new extended shock absorbers, since when entering a deep hole, the shock absorber may fly out of the cup.
The disadvantage of this method is that the rear spacers are much thicker than the front ones and the increase in ground clearance occurs unevenly. In this regard, the brake force regulator, or “sorcerer” as it is called, receives incorrect information. However, the “sorcerer” has the ability to regulate.
- Third method. It is reminiscent of the second method and consists of replacing standard springs with springs with a large number of turns. In this way, a significant increase in ground clearance can be achieved. However, as in the second method, it is necessary to lengthen or replace the shock absorbers for the same reasons.
Technical options for increasing ground clearance
If, after mature reflection, you have nevertheless come to the conclusion that it is necessary to increase the ground clearance of your car, you have a choice of three options.
- Radical modernization of the car with the installation of shock absorbers and springs from a third-party manufacturer.
- Alteration of the suspension with installation of spacers in the places where the shock absorbers are attached to the body.
- Use of oversized tires with replacement of rims.
Let's consider how and what can be done.
| Option | How it’s done and what it gives |
| Radical modernization provides almost unlimited possibilities for tuning the VAZ 2114. | It is possible to lower the car until it touches the road. Or you can install swamp buggies, raising the Lada a meter above the ground. But it will be a completely different car, which you won’t drive very much on public roads. But in the swamps - as much as you like. Such modernization requires serious experience and professional equipment; it cannot be done on your knees. |
| Installing limited height spacers is a conservative alternative to extreme plans. | Sets of spacers made of aluminum alloys are sold in car dealerships. If you have known experience and technical infrastructure, you can even try to do the installation yourself. |
| The preferred option from a safety point of view is to install new wheels on rims of increased diameter. | Instead of standard 165/70R13 tires, you can install 185/65R14 wheels. If you use cast or forged wheels, then in addition to the physical increase in ground clearance, you will achieve a noticeable visual effect of increasing the wheel and ground clearance. |
Video - How to increase the clearance of a VAZ
In conclusion, it is worth saying that taking into account all the advantages and disadvantages of different methods, the driver himself decides how to increase the car’s ground clearance. In addition, it is possible to combine different methods, which significantly increases the effect, but it is not recommended for this “tuning” of the chassis to go beyond the technical characteristics of the car, as this can increase wear on the remaining parts of the suspension.
Many motorists are thinking about how to lift a VAZ 2114. This is due to the fact that a car with increased ground clearance has better cross-country ability and greater load capacity. We will talk about how to perform this simple operation in today’s article.
How to replace the “Crab” with a VAZ 2115 yourself
Specialized fastenings in the VAZ 2115 car, more popularly known as “crab”, quite often require replacement or repair in cars of this brand. The mechanism is a kind of bracket for fastening the extension. The original name comes from its shape. The product consists of a bracket with holes for bolts, which is why this mount looks like a crab.
Today, such a mechanism can only be found in cars of several brands. Quite often, various situations happen with VAZ 2115 cars, resulting in deformation or breakage of the element. Experienced professionals who repeatedly deal with the repair of these car brands recommend that owners treat the car with care so as not to damage the specialized bracket. However, given the state of our roads, this is quite difficult to do.
Emergency situations and their solutions
Quite often, quite experienced owners of a VAZ 2115 car install a “crab” made of titanium alloys. This solution is highly durable and guarantees a high level of safety at various speeds under conditions of high loads. If damage or cracks occur, it is recommended to move slowly or call a tow truck to deliver the vehicle to a service center.
If the crab is completely torn off, it is necessary to call a tow truck and go directly to the service station so that experienced professionals can weld or completely replace such a spare part. An important condition for operating a vehicle in various situations is the level of damage that determines the ability of the vehicle to move independently.
Features of performing repairs and self-replacement of the crab on a VAZ 2115
In order to begin independently replacing this part or repairing it, you must have the following tools and materials:
- Standard set of sockets or spanners;
- Specialized liquid VD-40;
- A reinforced pipe, which may become necessary if the fasteners, that is, the bolts on the bracket, are too oxidized.
If the owner wants to carry out independent repairs, then it is necessary to have a specialized welding machine and some experience in using such a unit.
Step-by-step instruction
Experienced service center professionals have created successive steps that will help the owner of a VAZ 2115 independently replace the “crab”:
- place the vehicle on the pit;
- turn on the handbrake;
- install wheel chocks;
- use a jack to raise the front of the car;
- dismantle the protection;
- remove the front bumper;
- unscrew the rod nut;
- unscrew several mounting bolts;
- dismantle the mechanism;
- install a new element (or a restored old one);
- tighten the bolts;
- carry out installation according to the previous principle, but in reverse order.
Why are spacers needed?
As mentioned above, spacers allow you to independently and without much effort change the vehicle’s ground clearance. Such an operation may be necessary if the car is often used loaded, for example, to transport 4 passengers and cargo in the trunk. In this case, the car sags greatly and the wheel arches touch the rear wheels.
In addition, increasing the ground clearance will also be beneficial if you often have to drive on country roads that are not in the best condition. A higher ground clearance in this case, albeit slightly, will increase the vehicle’s cross-country ability.
The only thing you should not forget about is that installing spacers will lead to a change in the behavior of the car on the road. That is why, immediately after increasing the ground clearance, you should visit a car service center to check the camber/toe.
Let's improve the VAZ 2110
To raise the rear suspension on a VAZ 2110 you need to:
- Put the car on the handbrake.
- Using a jack, raise the rear of the car so that the wheels are in the air and rotate freely.
- Remove the wheel.
- Unscrew the shock absorber mounting bolt. To do this you will need a key “19”.
- Get the bolt. Perform a similar operation with the opposite shock absorber.
- Take the spacer and determine on which side the distance from the base to the first hole is greater. The side where it is larger should be directed inward. The same spacer can be installed on both the right and left shock absorbers, since these devices are mirror symmetrical.
- Install the spacer so that a line is drawn from the center of its lower hole to the upper hole, which falls into the vertical of the rack. You can install the spacer so that it is not adjustable in height by screwing the shock absorber into a single hole.
- By unfolding the spacer, you can adjust the suspension height by screwing the strut into the upper or lower hole, but the device will then need to be placed on the opposite rear shock absorber.
- When installing a spacer on an eye, it is important to install a bolt spacer so that the mechanism does not break during operation. You don't need to tighten the bolt too much, just make sure it fits snugly and doesn't wobble.
- Install the strut mounting bolt into the holes in the spacer and shock absorber. The height can be adjusted by selecting the top or bottom holes.
- Also install a spacer on the opposite shock absorber.
- Adjust the rear brake pressure regulator by unscrewing its mounting bolt. Next, you need to move the bracket with something until the distance between the lever and the spring becomes 2 millimeters.
- Check the functionality of the brake system. When braking hard at low speed, the rear axle should lock a little later than the front. If the rear wheels brake much later, then you need to reduce the distance from the lever to the mounting spring, and if it is too early, increase it.
Installing spacers for front shock absorbers
To begin with, we will look at how to raise the front of a VAZ 2114. But before you start increasing the car’s ground clearance, you should prepare all the necessary tools. So, you will need a set of keys, a hammer, as well as a lift or inspection hole (without them it will not be possible to complete the installation procedure).
The process of installing spacers is carried out in the following order:
- Place the car in the pit.
- Raise the front end using a jack.
- Remove the tie rod pin from the front strut (you may need a hammer and pry bar for this).
After the ground clearance of the front rings has been increased, spacers should also be installed under the rear pillars.
Let's improve the VAZ 2110
To raise the rear suspension on a VAZ 2110 you need to:
- Put the car on the handbrake.
- Using a jack, raise the rear of the car so that the wheels are in the air and rotate freely.
- Remove the wheel.
- Unscrew the shock absorber mounting bolt. To do this you will need a key “19”.
- Get the bolt. Perform a similar operation with the opposite shock absorber.
- Take the spacer and determine on which side the distance from the base to the first hole is greater. The side where it is larger should be directed inward. The same spacer can be installed on both the right and left shock absorbers, since these devices are mirror symmetrical.
- Install the spacer so that a line is drawn from the center of its lower hole to the upper hole, which falls into the vertical of the rack. You can install the spacer so that it is not adjustable in height by screwing the shock absorber into a single hole.
- By unfolding the spacer, you can adjust the suspension height by screwing the strut into the upper or lower hole, but the device will then need to be placed on the opposite rear shock absorber.
- When installing a spacer on an eye, it is important to install a bolt spacer so that the mechanism does not break during operation. You don't need to tighten the bolt too much, just make sure it fits snugly and doesn't wobble.
- Install the strut mounting bolt into the holes in the spacer and shock absorber. The height can be adjusted by selecting the top or bottom holes.
- Also install a spacer on the opposite shock absorber.
- Adjust the rear brake pressure regulator by unscrewing its mounting bolt. Next, you need to move the bracket with something until the distance between the lever and the spring becomes 2 millimeters.
- Check the functionality of the brake system. When braking hard at low speed, the rear axle should lock a little later than the front. If the rear wheels brake much later, then you need to reduce the distance from the lever to the mounting spring, and if it is too early, increase it.
Installing rear spacers
Installation of spacers under the rear shock absorbers is carried out according to the following scheme:
- Unscrew the fasteners of the lower part of the shock absorber.
By carrying out such a simple operation, you can significantly increase the vehicle's ground clearance in just a couple of hours compared to the factory version.
Before installing spacers on the VAZ 2114, it is worth remembering that an increase in ground clearance will lead to a change in three important parameters at once: the direction of the headlight beams; brake pressure regulator position; the angle of inclination of the front wheel axis. Considering that the last parameter affects the stability and controllability of the car on the road, after changing the clearance value, it is recommended to visit a car service center to set it up.
It should also be noted that after the changes have been made, the car should have the following toe-in/camber angles (with a load of 4 adults in the cabin and 40 kg of payload in the trunk):
- camber - 0°±30';
- toe - 0°00'±10' (0±1 mm);
- castor (rotation axis angle) - 1°30'±30'.
Without load, these same values must be within the following limits:
- camber — 0°30'±30';
- toe - 0°15'±10' (1.5±1 mm);
- castor - 0°20'±30'.
If the specified parameters go beyond the above acceptable limits, then you cannot operate the car - you should correct them yourself or at a service station.
Step-by-step instructions for adjusting headlights on a VAZ 2114
Individual setup is done in stages:
- determine the location of the work - flat surface, length 10 m, smooth vertical wall;
- mark the wall;
- prepare lamps;
- adjust low beam.
Attention! Be sure to set the VAZ 2114 headlight hydraulic corrector to the zero position.
Individual adjustment of headlights on a VAZ 2114 is done in stages
Step by step instructions:
- prepare the site;
- place the car at a distance of 5 meters from the wall;
- turn off the engine;
- lines “1”, “2”, “O” were drawn on the wall, recording the results of the adjustment;
- place a load of 80 kg on the driver’s seat;
- move back 2.5 m;
- on straight line “1” mark the centers of the lanterns;
- draw lines “A”, “B” through the intersection points;
- set the hydraulic headlight range control to “0”;
- open the hood;
- turn on low beam;
- cover the non-correctable optical device with an opaque material;
- We adjust the headlights using the adjusting screws one by one. Screw “1” – vertical plane, “2” – horizontal;
- achieve the light beam directions accordingly
Adjusting the headlights of the VAZ 2114 is completed when the boundaries of the light beam spots and lines coincide. The left coincides with line “2”. Vertical “A”, “B” pass through points “E1”, “E2” - the intersections of inclined and horizontal sections of the contour of light spots.
Adjusting the headlights of the VAZ 2115 is carried out similarly to the adjustment instructions for the VAZ 2114.
If the boundaries of the spots of the light beam coincide, the adjustment of the headlights of the VAZ 2114 is completed
Additional recommendations
p, blockquote 46,0,0,0,0 –>
When choosing spacers to increase ground clearance, you should be guided by the following principles:
p, blockquote 47,0,0,0,0 –>
- they must be performed on factory equipment. You cannot purchase spacers of dubious origin;
- the installation instructions must indicate the car models to which this design is suitable;
- When determining the maximum thickness of the spacers, it is necessary to measure the vehicle's ground clearance. Then, using reference books, find the standard value (factory value) of ground clearance. For example, the measured value was 200 mm, found in reference books - 210 mm. In this case, the maximum thickness of the spacer will be 210 - 200 + 50 = 60 millimeters, that is, 6 centimeters;
- it is advisable to install front and rear spacers at the same time, since such installation minimally disrupts the stability of the car;
- It is necessary to check the technical condition of the installed inserts at least once every six months before the start of the winter and summer seasons of car operation.
How is engine braking performed on a manual transmission, what gears to choose.
By what parameters and how should you choose a radio station for your car?
Video - is it worth installing spacers to increase ground clearance (review from a Ford Focus owner):
p, blockquote 49,0,0,0,0 –> p, blockquote 50,0,0,0,1 –>
What are there
p, blockquote 13,0,0,0,0 –>
Spacers for increasing ground clearance differ in the material from which they are made.
p, blockquote 14,0,0,0,0 –>
Metal
They have sufficient strength and do not lose their mechanical properties over time. Such spacers can be made of aluminum, copper and its alloys, and less often of steel. A disadvantage of such structures is the possible increase in corrosion due to electrolysis processes at the interface of two metal elements: the body and the spacer.
p, blockquote 15,0,0,0,0 –>
p, blockquote 16,0,0,0,0 –>
Rubber
Due to their elasticity, spacers help increase the smoothness of suspension movement and reduce noise effects. The disadvantage of the rubber structure is a limited resource, increased wear, especially under conditions of large temperature changes.
p, blockquote 17,0,0,0,0 –>
p, blockquote 18,0,0,0,0 –>
Polyurethane
Such spacers have a high degree of compression and are easily deformed, which, under conditions of high mechanical loads, negatively affects the rigidity of the structure and can lead to deformation of the suspension.
p, blockquote 19,0,0,0,0 –>
p, blockquote 20,0,0,0,0 –>
Plastic and composite
High-quality spacers made from such materials adapt to the car’s suspension design as much as possible and have minimal negative impact on the car’s components.
p, blockquote 21,0,0,0,0 –>
Typically, metal structures are used for the front suspension. Rubber, polyurethane and composite spacers are more suitable for rear suspension.
p, blockquote 22,0,0,0,0 –>
Structurally, spacers are made in the following form:
Higher, and higher, and higher: how and why to raise the car body with spacers
Looking at the cars that drive around Russian cities, you might think that all the car manufacturers have colluded and are producing cars of the wrong height. How else can we explain the fact that a huge part of our population has a desire to either lower the car or raise it to an unattainable height? Let’s put aside the questions of lowering for now and talk about how and why car enthusiasts lift their cars with spacers.
What is clearance?
If you think that a car's ground clearance, also known as ground clearance, is the distance from the lowest point on the bottom of the car to the supporting surface (road surface), then you are mistaken... This lowest point is not sought for measurement over the entire area of the bottom of the car, but only on its so-called “central part”. The concept seems vague, but there are simple formulas for calculating it. There is no point in delving into them. For ease of understanding, the “central part” of the average sedan, used to determine ground clearance, looks something like this (marked in red):
As we can see, many points of the lower part of the body (suspension elements in the wheel area, marked with arrows, mudguards, sill plates, muffler tips and some others) are not taken into account when determining ground clearance and can (and do turn out to be!) noticeably closer to the asphalt than that point , which is taken as a reference when determining the official value of ground clearance. And if you consider that the factory clearance figures for foreign cars are most often valid only for an empty car, without cargo or passengers, then you shouldn’t be surprised when a city car scrapes its bottom on a completely harmless dirt road on the way to the country.
As a result, many car owners, who are not ready to buy an SUV or at least a crossover, seek to “raise” their sedan in order to make it more versatile. By installing tires with a larger diameter from the list of sizes allowed by the manufacturer, an honest centimeter and a half height is gained, however, purchasing new wheels is expensive, and some sizes are even rare. Therefore, the method of raising the body with spacers has gained significant popularity. Let's look at its features, pros and cons.
Spacer design
Spacers are divided into front and rear, differing in design. For a full “lift”, necessary to increase the vehicle’s cross-country ability off asphalt, all four are installed. But sometimes they make do with a pair of rear ones for partial lifting, which is usually required when there are frequent suspension breakdowns and the bottom touches uneven roads from carrying heavy loads in the trunk or three passengers on the back seat.
Front spacers (we are talking about MacPherson suspension) are installed between the shock absorber strut support and the body. They are rings made of hard plastic or aluminum. Rear spacers are installed between the body and the spring of the rear axle or beam. They look like “steering wheels” made of dense rubber or polyurethane with a diameter corresponding to the diameter of the spring.
What does a spacer change?
A spacer mounted above the A-pillar mount raises the body above the A-pillar, thereby increasing the angle of the lower A-arm. As a result, the body and those “clinging” parts that were actually lower than the official ground clearance figures (sills, bumper edges, mudguards, etc.) “rise” above the road by the size of the spacer (value “B” in the picture). It is important to note that the position of point “A”, located on the lever in the area of the ball joint, does not change. Where you would have caught a stump or cobblestone under the lever on a non-lifted car, you will catch it on a lifted one. The lift of point “A” can only be increased by installing wheels of larger diameter.
conclusions
Selecting and installing a spacer for VAZ-2114 shock absorbers to increase ground clearance is quite simple. Even a novice motorist can cope with this task.
Russian roads have special requirements for vehicle clearance. Therefore, production cars often lose bumpers or mufflers, or puncture the gearbox or engine crankcase. After reading the article, you will learn how to use spacers to increase the vehicle's ground clearance, how to install them yourself and what consequences this will lead to.
