The wheel is attached to the rear hub of the VAZ-2108 using four bolts. There is also a brake drum here, with the help of which the car stops. The hub itself fails very rarely; it is usually replaced when the inner surface or threads into which the wheel mounting bolts are screwed are damaged.
It is much more common to remove the hub to replace the bearing. This is the most vulnerable element of the structure. Driving with a broken bearing will not bring much pleasure, as extraneous vibration and noise will appear, which intensifies when accelerating and cornering.
What is a hub and why is it needed?
In mechanics, a hub is the central part of a part with a hole (usually it looks like a keyway) for fitting onto a shaft, in particular onto a trunnion. Also, spokes are attached to the hub.
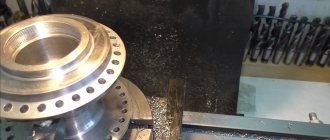
This is what the hub looks like. The part is made of cast iron or steel, turning and milling.
This important spare part ensures the movement and controllability of the car. Its main functions:
- wheel mount;
- its rotation;
- transmission of torque from the transmission to the wheel, that is, the connection between the shaft and the disk.
Hubs are divided into two types - front wheel hubs and rear wheel hubs. They differ in location: the former can be found in the front wheels, and the latter in the rear.
Rear wheel hub
Wheel bearing: 4 simple ways to check before it’s too late - Advice from experts
Many people know that there are certain bearings in the wheel area called wheel bearings, and from time to time they wear out. But this is where the ideas about the subject end. No problem! Today we’ll talk in detail about what it is and, most importantly, how to determine the need for replacement. And first, a little theory.
Without abstruse definitions, a wheel bearing is a bearing on which the wheel rotates. Of course, we all removed the wheels (or at least were present at this sacrament) and saw that there were no bearings on the wheel itself, and they were also not visible on the one from which they were removed. Right. Because this bearing stands between the fixed axis of rotation and what the wheel is screwed to . The part that acts as a fixed axis is called a fist
or
trunnion
.
A small clarification: the concept of “axis” in this case is used precisely as the geometric axis of rotation, and not as the shape of the part. For example, in the steering knuckles of a front-wheel drive car, this axis is hollow, and the drive shaft passes inside it. See pictures below.
In turn, the part to which the wheel rim is directly attached is called the hub.
. Thus, if you strain your head a little and imagine everything written above, then the following picture emerges: a bearing is put on the fixed axle (or inserted into it, if there is a drive), and a hub is put on the bearing, to which the wheel is screwed. This is such a simple nesting doll. Now about malfunctions and self-diagnosis.
Since today’s hero is not highly complex, the symptoms of the malfunction will be quite clear.
Symptom No. 1
Noises . Those who have ever heard the noise/hum of dry or worn bearings will understand what we are talking about. Those who don’t know shouldn’t despair either. If you have doubts about the serviceability of any hub, simply hang up two wheels of the same axle, put the box in neutral and spin both. I’m sure you can spot a noisy hub right away. The main thing is not to confuse the noise of the bearing with the friction of the pads on the brake disc, so as not to change all four in a fright. ?
Symptom No. 2
Once you have hung the axle with the suspected wheel, shake it in all directions. A heavily worn bearing will give a play that can be clearly detected by hand . Again, do not confuse the bearing play with the play of the steering tips (if they are also tired). If you lack experience, it is better to call a friend: one will rock the wheel in all directions, the other will look at it from the inside. I’m sure the two of you can easily determine whether the wheel is loose relative to the axle (then it’s a hub wheel), or whether the entire axle assembly is loose relative to the steering rod - then you need to change the tips.
Symptom No. 3
Noticeable heating. Very often the wheel bearing begins to jam and, as a result, heats up. After the trip, touch the wheel (not the brake!?) disc with your hand and compare the temperature on the wheel in doubt with the second wheel of this axle. If the hub jams, the temperature will be noticeably higher. And you definitely won’t need thermometers to determine the difference. But again, we take a situation where we are confident in the serviceability of the brake mechanisms: a soured brake caliper can also cause overheating.
Structure
The part has a fairly simple structure. Essential elements:
- outer rim (used for screwing in bolts);
- internal part (for bearings);
- holes with slots (for CV joint);
- protective caps;
- sensor (it is sometimes included in the design).
CV joints are constant velocity joints; their main task is to transmit torque.
Note! The set of fasteners for this part consists of two nuts and one washer.
Hubs for different purposes have different technical characteristics. Hubs for passenger cars have the form of a hollow, lightweight cylinder, while for “heavyweights” the diameter of the part is larger.
Standard disk sizes
The main technical characteristics of the rims of any car, including the VAZ-2109, are expressed by the following parameters:
- Diameter. This refers to the size of the rim in inches, excluding the tire.
- Rim width is the size of the tire seat in inches.
- The size of the central hole for the hub.
- Bolt pattern is a parameter indicating the number of holes and the diameter of the circle connecting their central points.
- Overhang is the distance between the hub mounting surface and an imaginary plane passing vertically through the middle circumference of the disk.
For the VAZ-2109, two parameters were always the same:
- The central hole is 58.5 mm.
- Bolt pattern - 4x98.
The wheels are manufactured in three versions: R13, R14 and R15. Other factory parameters, taking into account the corresponding tires, are shown in the table.
Causes of problems
The hub is a very durable part of a car disk, so breakdowns rarely occur. But still sometimes deformation of the spare part occurs. In addition, the rear hub is more wear-resistant than the front hub, since it is less subject to heavy loads.
"Road factors"
Ingress of moisture and dust eventually displaces the lubricant, and the disc begins to overheat as a result of excess friction.
Insufficient lubrication
It ranks first among the causes of failure of this spare part.
Important! Sometimes it is caused by poor-quality lubricant material.
Excessive loads
In the average area this is unlikely. Usually found in mountainous areas.
Strong “tightening” of fasteners
It often happens that the bolts are screwed in more than necessary - this is how the threads wear out.
Important! If the hub and bearing are an inseparable connection, then there is almost no risk of wear of such a structure.
Instructions for removing the hub assembly from the rear axle
- We turn off the engine, put the car in gear, and install stops under the front axle.
- We jack up the wheel we need.
- We tear off the mounting bolts and remove the removed wheel.
- Now we have access to the brake drum. Using a “12” wrench, unscrew the pin guides and remove it. The brake drum may be firmly in place. Then WD-40 universal lubricant will come to the rescue. And if the knot is stuck too tightly, you can remove it with a hammer or mallet, gently tapping it around the perimeter.
- Unscrew the hub nut.
- We remove the hub using a special two-jaw puller. If you don’t have one, you can simply screw the wheel to the axle and then quickly pull it off.
How to recognize malfunctions
There are many signs that help identify a breakdown:
- uneven wear of tires;
- increased vibration;
- the appearance of extraneous noise;
- overheating of the disk (this means that the bearing is not working properly);
- the car deviates to the side from a straight path and the body sways (these signs are explained by the fact that a working wheel ensures smooth movement, and when a breakdown occurs, imbalance occurs).
Important! The most characteristic “pattern” is the sound in the rear chassis.
The easiest way
If all of the above is not picked up by the hearing and vestibular apparatus, then there is an optimal method. You need to push the tire with your foot to identify any play.
Note! This method is very effective in the initial stages, when the symptoms are least pronounced.
Parameters of standard nuts
Fastening the cast disk to the hub involves the use of special bolts or nuts. It should be noted that nuts from stamped disks are unacceptable here. Firstly, because in cast specimens the conical or spherical part of the fastener is more pronounced than in stamped ones.
For example, the conical part of a bolt or nut has an angle of 60 degrees. This is done in order to increase the area of their contact with a material softer than steel. Secondly, the stamp is thinner than the casting, and when replacing the disk, the length of the bolt simply will not be enough.
It is better to immediately use the fasteners that correspond to the light-alloy wheel used, otherwise deformation of the holes, crumbling and scratches are possible.
By saving on the necessary nuts or bolts, you can irreversibly damage a more expensive element.
The softness of the metal also means regularly checking the tightness of the fasteners, especially at first and with new discs, when the material has not yet become compacted from work loads. Otherwise, under the influence of cyclic shock and vibration, the nuts may spontaneously unscrew.
Nuts must have conical or spherical washers. It is necessary to ensure that the profile of the washers exactly fits the corresponding recess in the hole of the disk being installed. Some disc models are designed to use cylindrical fasteners with flat washers.
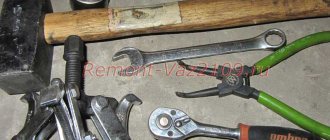
Tools
The “package” of tools includes:
- hammer, pry bar;
- socket wrenches (for drum pins), spanner wrench;
- passages (for rings).
Note! You can use an additional wooden block to soften the blow, and it’s good to add a long pipe to the socket wrenches.
Appearance of socket wrenches
Downloading a book
After successfully completing the payment (by any method) and returning to the KrutilVertel store from the payment system website, you will be taken to the successful payment page:
The book you purchased will be in your personal account, from where you can always download it.
Please note that after making the payment, you need to return back from the payment system website to the KrutilVertel website. If for some reason you did not return back to the site and closed the payment system tab with a message about the successful completion of the payment, please let us know - we will send you a letter indicating access to download the book
If for some reason you did not return back to the site and closed the payment system tab with a message about the successful completion of the payment, please let us know - we will send you a letter indicating access to download the book.
How to remove a rear wheel hub and install a new one
The replacement procedure looks like this:
1. The car is installed on a lift. 2. Next, unscrew the nuts and remove the caliper. 3. Remove the hose, brake disc, and steering lever. 4. Release the hub from the ball joints and remove the strut fasteners. 5. Install a new bearing, return all parts to their place.
Important! For diagnostics, you can contact a service station, but according to reviews from car owners, the quality of the repair will depend on the responsibility and skill of the specialist, so in some cases you can repair the part yourself, but you should be extremely careful.
Maximum and minimum acceptable parameters of non-standard disks
The size of the wheel arches on the VAZ 2109 limits the possibility of installing wheels with a diameter larger than R15. It turns out that any non-standard specimen must fit into the dimensional frame of 13-15 inches. It is impractical to look for something smaller, and to install a larger diameter, you will need to increase the wheel arch, that is, change the body structure.
Limiting yourself to the given parameters of the arch, you need to look at the other indicators of the non-standard disk. To connect parts with different bolt patterns, you can use adapter spacers. In this case, the problem of incompatibility of the disk with the hub according to the holes is quite easily solved.
The main thing is to choose suitable fastenings. The width of the rim, according to the limits set by VAZ designers, is limited to 4-7 inches. Exceeding these parameters may impair vehicle handling and raise questions during registration.
The permissible disc overhang is directly related to its width and design. In the factory assembly, this figure ranged from 30 to 45 mm. You can change the offset using spacers.
But you need to remember that as the offset decreases, the track width increases, and wide tires may exceed the established overall dimensions of the vehicle. The central hole of a non-standard disk must be at least 58.5 mm.
Although the options for replacing disks on a VAZ-2109 are limited to certain parameters, there are still quite a lot of them. But, first of all, you should still pay attention to original products that are maximally adapted to the given car. This is simpler, safer, and more profitable from a financial point of view.
Kinds
The following types of hubs exist:
- driving unsteered wheels;
This type is suitable for rear-wheel drive cars and is installed on the rear wheels.
- driven uncontrolled;
Designed for the rear wheels of front-wheel drive vehicles.
- leading managed;
Used in the front wheels of front-wheel drive cars.
- slave managed;
This type is needed for the front wheels of rear-wheel drive cars.
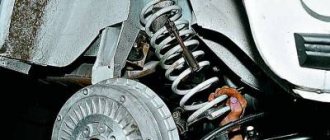
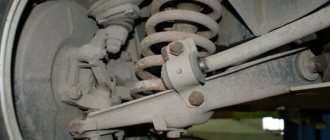
Rear suspension parts
1 – wheel hub; 2 – suspension arm mounting bracket; 3 – silent block; 4 – shock absorber casing; 5 – compression stroke buffer; 6 – casing cover; 7 – support washer; 8 – shock absorber cushions; 9 – spacer sleeve; 10 – shock absorber; 11 – rubber gasket; 12 – rear suspension spring; 13 – lever connector; 14 – lever of the rear suspension beam; 15 – shock absorber mounting bracket; 16 – lower spring support cup; 17 – rod; 18 – upper spring support cup.
Hub for VAZ-2108
The spare part for the VAZ-2108 is fundamentally no different except for the size. Clip diameter: internal - 30 mm, external - 60 mm. Width - 37 mm, weighs 400 grams. The tools that will be useful are head 30, keys 12, 13, 14.
Manufacturers
The main manufacturers of spare parts are factories in the cities of Saratov, Samara, Kursk, Vologda.
Important! All specifications need to be clarified with sellers, because factories periodically update production standards.
Approximate drawing of a hub for a VAZ-2108
Design Features
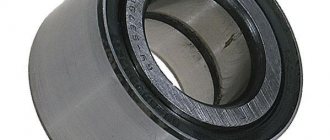
The rear hubs of the V8 are equipped with sealed angular contact ball bearings. Each of them has two rows of balls. This makes the structure as resistant to loads as possible, and also allows them to be distributed with the greatest efficiency.
The rear wheel bearing of the VAZ-2108 is made of heavy-duty steel. Its service life, declared by the manufacturer, is 90-120 thousand kilometers. By the way, these are not empty statements. Oddly enough, VAZ wheel bearings actually last a very long time and, if used correctly, can last twice as long as the stated mileage.
Which hub to buy
Hubs are presented in two categories on the market:
- branded;
- specialized brands SNR (France, satisfactory reviews*), SKF (Sweden, ranked second after SNR), FAG (Germany) and others.
Important! In addition to direct manufacturers, there are also packaging companies on the market - CX (China), QH (has low ratings), Optimal (you can find many negative reviews about this packer), Ruville (average quality).
Prices
The cheapest option for domestic cars will cost 200-300 rubles**, the average price is 1500-2000 rubles.
For imported ones the cost is about 5000-7000 rubles.
The hub is the main element of the chassis of any car. No matter what revolutions occur in the history of cars, the hub has been and will remain the main element that ensures movement.
*Data on reviews and ratings are taken from the Internet.
**Prices are current as of February 2022.
ROUNDED FIST
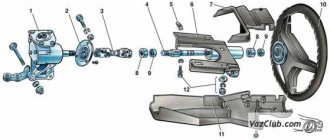
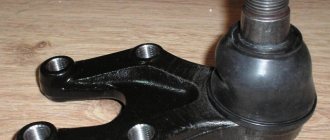
The steering knuckle, mentioned above, is another important element of the VAZ 2107 suspension. Its purpose is easy to guess from the name. This part ensures smooth turning of the car's front wheels. The knuckle has two eyes with which it is attached to the paired suspension arms. On the reverse side of the knuckle there is a kingpin onto which the hub is placed along with the wheel bearing.
The steering knuckles on the "sevens" have a long kingpin for attaching the hub
The hub, placed on the knuckle pin, is secured with a nut. It should be said here that turning the wheels is not the only thing the fist is responsible for. It also has an additional function: it limits wheel rotation. For this purpose, special protrusions are provided on the fists of the “seven”. When turning too sharply, the suspension arms hit these ridges and the driver can no longer turn the steering wheel. The knuckle must have a huge margin of safety, since it bears most of the shock loads that occur when the car is moving, especially on uneven roads. However, sometimes the fist becomes deformed (as a rule, this happens after the front wheels fall into a very deep hole or after an accident). Here are the main signs that something is wrong with your fist:
- when driving, the car pulls strongly to the side, and this becomes more pronounced with increasing speed;
- the driver suddenly notices that the turning radius has become smaller, and it has become more difficult to “fit” into very sharp turns. This indicates a decrease in the angle of rotation of the wheels. And this phenomenon occurs after a serious deformation of one fist;
- turning the wheel out. There are situations when one of the knuckle eyes breaks. This is very rare, but it cannot be ignored. So, when the eye breaks, the wheel turns out almost at a right angle to the body of the “seven”. If this happens while driving, the car instantly loses control.
Replacing the rear wheel hub bearing on a VAZ 2108, 2109, 21099 and their modifications
A failed rear wheel wheel bearing indicates a problem with a constant, often ear-piercing howl. It comes from the rear and does not go away when driving in neutral. As bearing wear increases, this sound may become increasingly louder. The rear wheel bearing needs to be replaced.
This work can be done most quickly using special devices (pullers). If they are not there, then to achieve the goal, you should use available materials. Let's consider replacing the bearing with this particular slope.
Checking the rear wheel bearing
We hang the wheel on the bearing of which there are suspicions. We rotate it by hand. A wheel with a working bearing rotates almost silently. A faulty bearing reveals itself by noise and a sound “as if balls are rolling in the bearing.” The degree of noise and rolling depends on the degree of wear of the wheel bearing itself. For comparison, you can hang a wheel with a working bearing and listen to the sound it makes.
Required Tools
— An extended 30mm head with a long wrench, or a curved box wrench of a similar diameter (or a similar socket wrench, etc.)
To loosen the wheel hub nut.
— Thin chisel, center punch
To bend back the jammed edge of the hub nut.
— Three-legged puller (optional)
To remove the hub from the wheel axle.
— Two-legged puller, or a special semicircular one (optional)
To remove the inner bearing race from the wheel axle.
— Puller – pliers
To remove and install the retaining ring
— Puller for pressing the bearing out of the hub/pressing the bearing into the hub (optional)
— Open-end or any other key for 12 (11, 8, 7, depending on the type of pin)
For unscrewing the guide pins securing the brake drum.
— Key for 13 (14)
To loosen the parking brake adjusting nut.
- Hammer
We purchase a bearing with a nut.
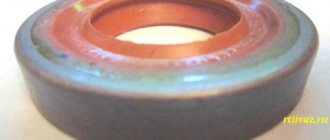
Rear wheel bearing for VAZ 2108, 2109, 21099 cars with nut
Preparatory work
It is best to carry out work in a pit (inspection ditch), it is more convenient. But if there is no hole, you can do without it.
— We fix the car by placing it on a level surface, in first gear, placing wheel chocks under the wheels.
— Under the bottom of the car, loosen the handbrake tightening nut.
If the car is not installed in a pit (inspection ditch), then to perform this operation you will have to jack up one of the wheels, put a safety stop under the car and lie down to get to this very nut.
The procedure for replacing the rear wheel hub bearing on VAZ 2108, 2109, 21099 vehicles and their modifications
— Remove the protective cap on the wheel hub
— Removing the dent on the side of the hub nut
Using a thin chisel or core and hammer, straighten the jammed edge. For greater clarity, the wheel in the image has already been removed.
Wrinkled edge of wheel hub nut
- Loosen the hub nut
To do this, use a 30 mm socket with a long wrench (or a special wrench) to unscrew the nut. You may have to apply considerable force and extend the handle of the wrench with a metal pipe, as it may become stuck or rust over time. Also, to prevent the wheel from turning, an assistant inside the car can press the brake pedal.
Loosen the rear wheel hub nut
— Remove the wheel
Loosen the rear wheel mounting bolts, jack it up, place a safety stop, unscrew the bolts, and remove the wheel.
- Remove the brake drum
Using a 12 wrench (11, 10, 8, 7 - the pin size may be different), unscrew the two guide pins securing the brake drum. If they don’t want to turn away, lightly tap them with a hammer.
Unscrew the two wheel disc guide pins on the brake drum
Since we have already loosened the parking brake, the brake drum should come off without much difficulty. We rotate it left and right with our hands and at the same time pull it towards ourselves. If it goes badly, tap the drum in a circle from behind with a rubber mallet. This should help.
Brake drum removed
— Finally unscrew the hub nut
Remove it and the washer underneath it.
— Remove the rear wheel hub with bearing
We install a three-legged puller on the hub and rotate its nut to pull the hub off the wheel axle.
Removing the rear wheel hub of VAZ 2108, 2109, 21099 cars using a puller
If you don’t have a puller, take the wheel, turn it over with its back side facing you and fasten it to the hub with wheel bolts. We do not tighten the bolts all the way, but several turns (it is advisable, of course, to use elongated bolts, but if they are not available, you can use regular ones). We will use the wheel as a reverse impact hammer. With a sharp movement we move it towards ourselves. If it was not possible to remove the hub from the axle one time, we perform this operation several times.
— Remove the inner race of the bearing from the wheel axle
You can use a two-legged or semicircular puller, or you can simply place a large chisel on the back of the ring and hit it with a hammer. The ring will move along the axis, then you can pry it off with a mounting spatula or a large screwdriver and finally remove it. If after working with a chisel there are nicks left on the axle, we clean them with a fine file.
Removing the rear wheel bearing inner race
— Remove the retaining ring securing the bearing in the hub
We use puller pliers for this. If it is not there, remove the retaining ring with a screwdriver.
Removing the bearing retaining ring in the hub using a puller
— Remove the bearing from the hub
Using a special puller, squeeze it out of the hub body. If there is no puller, knock it out with a piece of pipe of suitable diameter. The diameter of the pipe must be equal to the diameter of the inner ring of the bearing. We strike at him.
Knocking out the old bearing from the hub
— Clean and lightly lubricate the inside of the hub
— Press the new bearing into the hub
We do this using a puller or a vice, or simply hammer it in there using a wooden spacer and hitting it in a circle with a hammer. At the final stage of this driving, you can use the old bearing as a spacer.
Driving a new bearing into the hub
— Install the retaining ring in the groove on the hub
You can use a pliers puller for this, or just a screwdriver.
Rear wheel bearing retaining ring
— Install the hub with the inserted bearing on the axle
With effort we move it as far along the axis as possible with our hands. If it does not move, you can use a mandrel to tap the INNER ring of the bearing inserted into the hub.
Fitting the hub onto the rear wheel axle
— We put on the washer and hub nut.
Install the washer and hub nut
— By tightening the nut, press the hub until it stops on the axle.
Tighten the hub nut
— Replace the brake drum and wheel
Installing a new bearing
Before installing a new element, it is necessary to inspect the entire internal surface. There should be no nicks or damage on it. To make installation a little easier, you can place the new bearing in the freezer for several hours and warm up the hub. But please note that it should not be heated to very high temperatures.
Otherwise, when installing a new bearing, its seals will melt, which will significantly reduce the life of the element. The bearing must be pressed in using a puller or using a clip from an old element. Be sure to secure the position of the bearing with the circlips, making sure they fit into their grooves.
