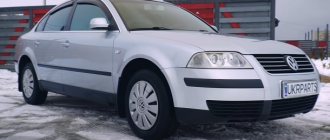
Compact car Renault Fluence
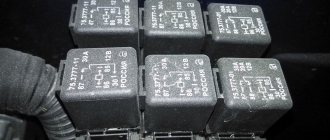
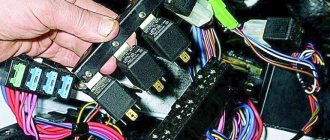
introduced in 2009. Delivered to Russia and CIS countries in 2010, 2011, 2012, 2013, 2014, 2015, 2016, 2022, 2022. During this period, the Fluence model was restyled twice. The exterior has changed a lot. We provide complete information about Renault Fluence fuses and relays. We will show you where the blocks are located, their photographs and diagrams with a description of their purpose, and we will also highlight the cigarette lighter fuse separately.
There may be deviations in the presented material and your blocks. The manufacturer may make changes depending on the electrical equipment, engine and year of manufacture of the vehicle.
Renault Fluence fuse diagram
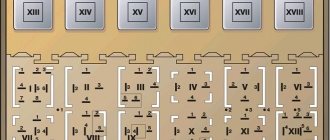
Below is a diagram of each mounting block separately and it is explained which circuits the elements are responsible for.
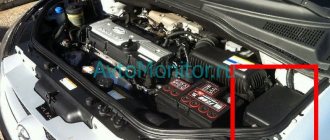
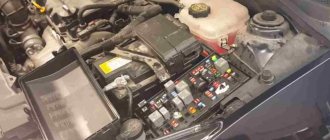
Main module of the engine compartment.
| Number | Decoding |
| 1 | Right side light, license plate light, cigarette lighter, navigator, tidy switches, power window keys. |
| 2 | Right side of the dimensions, left side of the trunk light |
| 3 | Headlight washer pump |
| 4 | PTF |
| 5/6 | Headlights in high beam mode for the left and right sides, respectively. |
| 7 | Diagnostic connector, headlight range control, automatic handbrake, window dimmer. |
| 8 | ABS and ESP control module |
| 9 | Front wiper |
| 10 | Airbag control system. |
| 11 | Not applicable |
| 12/15 | Automatic transmission control unit,/module power line |
| 13 | ECM module |
| 14 | Oxygen concentration sensor heater. |
| 16 | Brake lights, electric power steering |
| 17 | Headlight range control, reversing lighting, gearbox sensors |
| 18 | Electrical Control Module |
| 19 | Starter power |
| 20 | Reserve |
| 21 | Fuel pump, ignition coils |
| 22 | Air conditioning compressor magnetic clutch |
| 23 | ECU module and injection system. |
| 24/25 | Low beam of the left and right headlights respectively. |
Next we need to consider the auxiliary block.
| Number | What is he responsible for? |
| A | Reserve |
| IN | Fuel filter heater relay |
| WITH | Reverse light relay |
| D | Not applicable |
| 1 | Heating system module |
| 2 | Pre-heating of injectors |
| 3 | Transmission electronics |
| 4 | Heating system interface |
| 5 | Turning on the cooling fan in high speed mode |
| 6 | Fuel filter heater |
| 7 | Not applicable |
| 8 | Electric fan relay monitoring |
| 9 | Reserve |
The following are the power fuses installed on the battery.
| Serial number | Description |
| 1 | Starter power line |
| 2 | Power supply for the cabin unit. |
| 3 | Power supply for relays and fuses under the hood and under the dashboard of the car. |
| 4 | Generator set and engine compartment relay panel |
| 5 | Electric power steering column. |
| 6 | ECU, powering the safety circuits under the hood. |
| 7 | Switching unit located near the motor. |
There is also another panel here.
| Number | Description |
| 1 | Auxiliary interior heater. |
| 2/3 | Power supply to the under-dash mounting panel. |
| 4 | Likewise for the engine compartment. |
| 5 | Auxiliary heating |
| 6 | ECU module, ABS and ESP. |
The largest number of fuses are installed inside the car.
| Serial number | Description |
| 1/2 | Reserve |
| 3 | Cigarette lighter |
| 4 | Rear socket |
| 5 | Auxiliary socket in luggage compartment |
| 6 | Radio tape recorder |
| 7 | Heated exterior mirror system |
| 8 | Signal lamp for doors not closed |
| 9 | Automatic parking brake |
| 10 | Power supply |
| 11 | Seat adjustment drive, steering wheel paddle shifters |
| 12 | Heated passenger seat |
| 13 | Reserve cell. |
| 14 | Front passenger door window regulator |
| 15 | Brake light switch, brake pedal position, ABS and ESP module sensors. |
| 16/17 | Rear door windows |
| 18 | Illumination of the glove compartment, doors, rain sensor. |
| 19 | Dashboard clock, thermometer, radio, seat belt warning lights. |
| 20 | Air conditioning system. |
| 21 | Illuminated mirrors in the visors. |
| 22 | Interior lighting, rain and light sensor |
| 23 | Trailer group contactor |
| 24 | Rear wiper |
| 25 | Rear view mirror in the cabin |
| 26 | Navigation, radio. |
| 27 | Radio, parking brake |
| 28/29 | Reserve inserts. |
| 30 | Turn signals |
| 31 | Instrument panel power supply |
| 32 | Driver's door window regulator |
| 33 | central locking |
| 34 | Stock |
| 35 | Clock, thermometer, standard phone display. |
| 36 | Diagnostic bus, horn relay, alarm control module |
| 37 | Brake lights, electrical control module |
| 38 | Automatic handbrake |
| 39 | Reserve |
| 40 | Climate module fan. |
| 41 | Electric sunroof. |
| 42 | Rear window defroster power supply |
There is also a relay here
| Number | Purpose |
| A | Powered by battery |
| IN | Similar purpose |
| WITH | Rear window heating relay |
| D | Klaxon |
Cigarette lighter fuse
The power supply system for the socket on cars of 2010, 2011, 2012 and 2013 is no different from the first modifications. The cigarette lighter is controlled by fusible element 2, mounted in the cabin.
If necessary, some users install an additional socket and connect it to a separate line.
Renault Fluence heater fuse: where is it located?
Insert 7, installed under the hood, is responsible for powering the main heater motor. The control relays of the device are mounted nearby, under numbers 1 and 4.
The motor drive for the additional interior space heater is protected by relays 1 and 5 mounted in the cabin.
Starter fuse and relay
Installed in the engine block at number 19. The corresponding relay is mounted on the positive terminal of the battery at position 1.
Windshield washer fuse
The windshield washer of the car is protected by the interior insert number 8. Another element is responsible for the operation of the windshield wiper.
Pull-in relay Fluence
It is installed on the car in a classic way - in the starter housing. The average price at which you can find a device ranges from 2,500 rubles.
Fuse and fuel pump relay: where is it located?
Power is supplied to the fuel pump through insert 21. The relay is mounted separately. Usually it is installed on the starter.
ABS fuse
The ABS system is powered by two elements. The power part is connected through a fuse element 30 in the motor part. The control controllers are connected to insert 15 of the cabin module.
Fuse for radio
The voltage supply for the standard car radio is provided through modules 19, 26 and 27 located in the passenger compartment.
Reverse
The lamps are protected by fuse 17. The design also includes a power relay C, mounted in the vehicle interior.
Low beam
The headlight power supply system is divided into two parts. Inserts 24 and 25 of the engine compartment are responsible here.
Number plate illumination
The license plate light is connected to the overall vehicle system and is connected to fuse 1.
Trunk fuse
The compartment lid is illuminated through a second element installed in the engine compartment.
Heated rear window
Insert 7 of the motor is responsible for heating. The switch is powered by fuse 42, and the power relay is located in position C under the instrument panel.
Seat heating
The heating system for the front passenger and driver seats is routed through inserts 11 and 12.
Cooling Fan
The system relay is installed in close proximity to the drive.
Renault Fluence: headlight fuse
Fog lights, if present, are protected by insert 4. If there are no additional lights on the car, they are used as a backup.
Voltage regulator
Mounted inside the generator on the drive shaft. To remove it, you will need to disassemble the entire module.
Dimension fuse
Lights are installed separately for each side of the car. The right and left sides are powered from inserts 1 and 2.
Signal fuse
The power part of the line is routed through element 15. The power supply for the push button is routed to insert 16. There is also a brake light relay here. It is also responsible for powering other illuminators.
Air conditioner fuse Fluence: where is it located?
The air cooling system in the car is routed through element 22. From here comes the control of the switches and drives.
Turn signals
The fuse is installed in the car interior under the dashboard at position 30. The relay is mounted there (for the first modifications). Subsequent versions are designed according to a different principle. Here, the comfort unit mounted under the hood is responsible for turning.
Window lifters
For ease of maintenance and simplification, the window lift systems are divided into several branches. The rear lifts are protected by 16/17 inserts. There are also two fuses for the front zone. The driver's side is covered with element 32. The passenger section is routed to insert 14. All parts of the structure are connected through the interior module.
liputrik.ru
Renault Scenic II
“Secret” fuse box on Renault Scenic II
Renault
Scenic II
arrived today .
Background:
Some time ago, LEDs were inserted into the front side lights instead of standard lamps, but they do not last forever. The right gauge was the first to lose ground, and literally a week later it was followed by the left.
The car owner decided to change the burnt out LEDs. No sooner said than done.
Changed it. As a result, the right one burns, the left one does not. In addition, the rear left marker and instrument lighting on the instrument panel disappeared.
I looked at the fuses in the passenger compartment on the left under the steering wheel. All are intact, and besides, on the cover, where it is indicated which circuit the fuse protects, there is nothing similar to the designations of the lamps, except, perhaps, the brake lights.
- In the instruction manual, apart from the fuses indicated above, there is nothing else that would help solve the problem.
- And now Renault Scenic II
is our guest. - By all indications, the fuse for the left side dimensions has blown.
- But where is he, how to find him?
- In the engine compartment there is another relay and fuse box, which bears the proud name “ protection and switching unit ”.
Of course, I understand the manufacturers of this car. They are so confident in the reliability of all components that they remove fuses in places that simply cannot be reached without a certain skill.
The table shows the circuits that these “hidden fuses” protect.
Fuse protection circuits
Fuse location
And on the way, on the road, anything happens.....
Well, enough lyrics, let's get to work.
Open the hood. To the right of the battery is the box that we need.
We unscrew 2 screws, lift the protective casing up and remove it.
Unscrew these screws and remove the cover
Removing the terminals
Here it is - the protection and communication unit, but in order to pull it out and get to the blown fuse, you have to do a little work.
Remove the terminals from the battery. Be careful! Don't forget to remove the keys from the ignition and store them in the interior. There were cases when, during assembly, you put the terminals on, and the central locking clicked and all the doors were closed. This is how some alarms behave when power is applied.
I also removed the indicated wire from the negative terminal; it is short and prevents me from moving the terminal to the side in the future. Remove the battery mounting bracket and take out the battery. It is necessary to remove the connectors from the brake fluid level sensor and the mass air flow sensor. When removed there is more freedom of movement for the tourniquet.
Removing the battery mounting bracket
Remove 2 connectors
Unscrew the engine control unit mounting bracket. We remove the upper connector from the control unit and move the unit along with the bracket to the side.
Unfastening the engine control unit
Removing the top ECU connector
We unscrew 2 more bolts and a nut (it holds the wiring harness), remove the platform for the battery. In front of us is the air filter housing, you can change the filter. (Not a bad idea; to change the air filter, you need to remove the battery, engine control unit, battery platform).
We move the ECU to the side
We remove the platform for the battery. Next, we disconnect and remove to the side the 2 connectors above the block we need.
We unscrew the bolt securing the supply of the positive bus to the block. Slightly squeezing the back wall, there is a latch, and pull out the block. It turns out that the fuses that we need are located upside down and in order to change them or simply check them, it was necessary to carry out all the work described above. We remove the connectors. We pull out the block. Having released the latches on both sides, we remove the protective casing. We remove the casing. The latches are disconnected. Here we are! We replace the burnt fuse with a new one and begin the return journey. This fuse protects the left side of the dimensions. Here it is - a blown fuse. Collected. We put on the terminals and check. Everything works great. Presumably, the cause of the blown fuse could be a short circuit in the left front side lamp socket. Additional fuses Well, we've sorted out the “secret” fuses. Let's hope there are more on the Renault Scenic II
Replacing Fluence fuses
To perform the operation, you will need to follow a certain procedure.
- Disconnect the car. If you do not remove the voltage, you can cause a short circuit.
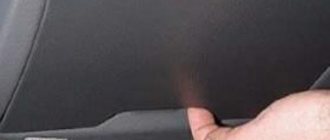
- Open the cover of the mounting block and find the required element. To make it easier to find, a schematic diagram of the module is printed on the inside of the protective panel.
- Using special forceps or tweezers, remove the damaged element and install a new one in its place.
- After replacement, reassemble everything in reverse order.
Tips for motorists
Owners of Renault Fluence cars, who use the cigarette lighter socket as a socket to power additional devices (navigator, tire inflator, etc.), often encounter the problem of a blown fuse protecting this electrical circuit. This happens mainly for two reasons: either the maximum power of the connected device is greater than that which the fuse can withstand, or the plug of this device is of a size that does not correspond to the cigarette lighter socket.
The fact is that the F3 fuse installed during vehicle assembly is designed for a current of only 10 amperes. This means that the total power of devices connected to this socket should not exceed 120 watts (10A*12V=120W). If, for example, you turn on a compressor to inflate tires, the power of the electric motor is 140 W, receiving power from this cigarette lighter socket, then fuse F3 will immediately blow out. To replace it, you need to get into the mounting block located on the front panel to the left of the steering column. Fuse F3 is second from the bottom in the far right row of fuses.
Some drivers, instead of a blown 10-amp fuse F3, install a new 15-amp fuse, since some operating manuals for this car indicate that F3 (15A) should be in this socket, but there is no explanation for this anywhere . After all, when installing a more powerful fuse, the wires of a given electrical circuit, designed for a current of 10 amperes, may begin to heat up, which can lead to melting of the insulation, followed by a short circuit.
The second problem is associated with the plugs of some additional devices, which must be installed in a strictly defined manner, otherwise it is unlikely to be able to avoid a short circuit in the cigarette lighter socket. This is due to the fact that today there is no single global standard for the diameter and depth of the cigarette lighter socket, therefore the plugs of additional devices have different sizes. If a smaller plug is inserted into this socket, then under the influence of vibrations caused by the movement of the car on uneven roads, it can turn, which leads to contact of its negative contacts (antennae) with the positive contact of the cigarette lighter socket, causing a short circuit and blowing of fuse F3.
Modern cars are distinguished by the highest reliability, but during operation, breakdowns and malfunctions occur in them. Some can only be dealt with at a service station, while others can be solved independently and without spending a lot of time.
Problems that you can solve yourself include replacing fuses. They rarely fail, but they do happen. For example, the safety elements of the cigarette lighter and lighting burn out more often than others. This may be due to the high voltage passing through them. If for some reason one of your consumers stops working, then you should not immediately go to a service station; you can try to solve the problem yourself. To do this, it is enough to know the location of the fuse blocks and be able to navigate the circuit. This is not difficult and even a novice motorist can do it.
Video “How to change the electrical protection element in a Renault car”
This video shows how to correctly change the protective element in the Renault engine compartment.
The French car Renault Fluence was released in 2009. However, many years have passed since that time and the car has undergone various modifications. Along with the restyling of the model, the exterior of the interior also changed.
But this did not in any way affect the location of the car's fuses and relays.
The electrical equipment of this car is made at a high professional level. Electronic systems work properly, and in the event of a failure, the driver is immediately notified of the occurrence of a breakdown.
Reliable protection against increased current in the system is provided by special inserts - fuses installed in the mounting block. If a short circuit occurs, the insert will burn out and be replaced with a new one.
Advice. There is a category of car enthusiasts who temporarily install a “bug” in the form of a wire instead of a fuse. This is not recommended, as there is a risk of failure of the entire mounting block. Experienced drivers always have one more block in stock for replacement. At the same time, it must be designed for the same current strength so that the electronics do not break.
Subscribe to news
KUZOV magazine is one of the Russian auto magazines for professionals in the auto repair business. On its pages you can find the information you are interested in on all aspects of the activities of auto repair enterprises, body technologies, methods of painting and preparing various types of car surfaces, information on paint and varnish and other consumables, auto service equipment, as well as learn about the latest trends in the modern automotive market.
Today, due to the fact that automobile sites have begun to appear more and more often on the Internet, Russian auto magazines have also become very popular among enthusiasts. And it is often so difficult to find among all these online notes something worthwhile that at any moment will help you not only find all the necessary information, but also become a real guide in the world of cars.
Agree, if you own a car, then it is so important for you, more than anyone else, to know everything about your car. You can learn about all the nuances of the work and pitfalls from our magazine.
Our specialists also conduct regular visits to events and conferences related to both new cars and retro cars.
We invite sophisticated car enthusiasts to pay attention to the business side of the issue - the auto business. How is the training of car service personnel currently taking place, what new capabilities do modern car mechanics have. We will help you not to make a mistake and choose the most correct car service. We tried to highlight all the most important and interesting things from the world of cars. After all, every car enthusiast is interested not only in, for example, the technology for removing dents from his car, but also in what new products in the auto business are currently relevant.
In the “Press Center” section you can find the latest news and both current and future events from the world of the auto business. In the Season Premieres section there is a selection of the most anticipated new products on the automotive market. The most interesting shots from various automotive events are in the Photo Gallery section. Repair work can be seen in action in the Video section.
The publication has been known in the professional print media market for more than 8 years. Intended for automotive market professionals, it talks not only about the most current news and problems of the industry, but also offers ways to solve them based on the experience of active participants in this market segment.
Wide advertising opportunities are provided by the magazine’s clearly defined target audience, the optimal structure of its distribution in Russia and the CIS countries, as well as professional editorial content and high quality printing.
Incandescent lamps - replacement (Renault Scenic 1, 1996-2003) - "Electrical equipment/Headlights and lighting."
- A - Not used
- B - Fuel heater relay (450)
- C - Reverse light relay (602)
- D - Not used
- F1 - 80A heater interface unit (1550)
- F2 - 70A preheater (257)
- F3 - 50A Transmission ECU (119)
- F4 - 80A heater interface unit (1550)
- F5 - 60A Electric fan (188) via high speed fan relay (234)
- F6 - 20A Fuel heater (449)
- F7 - Not used
- F8 - 30A - Electric fan relay control (234)
- F9 - Not used
