What kind of light bulbs are in the shades?
The manufacturer installed C5W (AC12-5-1) incandescent lamps with a power of 5 W in the interior lighting of the VAZ 2107.
Lamps used in the interior lighting of the VAZ 2107
There are two such lamps in total, since there are two lamps, they are located on the racks between the front and rear seats and are equipped with built-in mode switches (see section “Connection diagram”).
You can see the types of all lamps used in the VAZ 2107 in the article “Which bulbs are in the headlights of the VAZ 2107 and which ones are better to install”
Possible malfunctions and their elimination
The connection diagram for interior lighting on a VAZ 2107 is quite simple, and therefore there will be few malfunctions, and all are relatively easy to fix. Here are those that you can eliminate on your own:
- the light bulb burned out;
- fuse is blown;
- one of the limit switches located in the door pillars has failed;
- the switch built into the lampshade has failed;
- wiring fault.
We will eliminate them all, starting with the simplest ones.
How to replace lamps
First, let's look at replacing light bulbs in lampshades - this is the simplest procedure, and the malfunction is the most common.
For work we will need:
- small flat screwdriver;
- replacement C5W bulbs.
The interior light is mounted on two spring latches located at the top and bottom. We take a screwdriver, pry up the upper or lower part of the lampshade and gently press it until the latch comes out of the groove in the body.
Release the bottom latch
After this, the lamp can be easily removed and hangs on three wires
Removed interior lamp of VAZ 2107
We find the light bulb and remove it by pushing it to the side.
Removing the light bulb
We put the new one in place, check it, and snap the lantern into place.
Reinstalling the interior light Important! Regardless of the position of the switch and the state of the doors, on-board voltage (+12 V) is constantly present at one of the terminals of the flashlight, so before replacing the lamp, you must disconnect one terminal of the battery or turn on the ground switch.
Fuse location
The next most difficult problem to troubleshoot is failure of the fuse (insert). You just need to know which one and where to find it. The fuse responsible for interior lighting is located in the mounting block, and the block itself is located in the engine compartment, immediately behind the windshield opposite the passenger seat. In the photo below it is marked with the number 5 and covered with a protective cover.
Location of the mounting block in the VAZ 2107
Depending on the modification and year of manufacture, the car can be equipped with one of two types of mounting blocks. The old-style device looks like this:
Mounting block VAZ 2107 old model
And the new one is like this:
New model VAZ 2107 mounting block
The fuses (there are 17 in total) for the old model are numbered in order from left to right:
Numbering of old-style mounting block fuses
It is not clear what guided the developers of the VAZ 2107, but in the new model it is quite difficult to find logic in the numbering of inserts.
Numbering of fuses in the new type mounting block
In both modifications, the F11 insert with a rating of 8 (old block) or 10 (new block) amperes is responsible for interior lighting.
But before we get into the mounting block, let’s try to determine the serviceability of the insert logically. In addition to the interior lighting, the insert powers the brake signal lamps (brake lights) and the trunk lighting lamp.
If they work, then the fuse is probably good, and you don’t have to go under the hood for now. If they don’t work, we climb under the hood, open the mounting block and check the serviceability of the insert.
If we change, then only for an insert of the same denomination.
Switches malfunction
Now let's move on to checking the switches. There are 6 of them in total: two in the lampshades, four end ones in the doors. But, of course, you don’t have to check all 6 - just understand the power supply circuit for the room lights and think a little to logically figure out the faulty switch.
Backlight connection diagram
The power supply circuit for the VAZ 2107 interior lighting lights is quite simple, and anyone familiar with the basics of electrical engineering can understand it:
Electrical diagram for connecting interior lights
The numbers on the diagram indicate:
- 1 – mounting block;
- 2 – switches (limit switches) located in the front door pillars;
- 3 – switches (limit switches) located in the rear door pillars;
- 4 – lampshades with built-in switches.
We are not interested in the remaining positions. As can be seen from the diagram, all door switches are connected in parallel and one contact is connected to the middle terminal of both lights, and the other to the car body. The lights are connected to the body by the second terminal, and +12 volts are constantly supplied to the third terminal, regardless of the position of any switches, including the ignition switch.
How does the scheme work? We move the lamp switch to the right position according to the diagram, the lamp is connected to the car body, the light comes on. We move it to the left - the door switches are connected in series with the light bulb. Now the lamp will light up only if one of the doors opens. That's the whole algorithm.
Checking and replacing door limit switches
Which limit switch is faulty? If both interior lights work in the right position according to the diagram, but do not light up when any of the doors is opened (the switch is in the left position), then the problem is in the switch of this door. If they always light up when the doors are closed, you will have to check all 4 door limit switches. This is not difficult to do. We open the door and find the limit switch. It is located on the door pillar.
Door switch location
Using a Phillips screwdriver, unscrew the fixing screw and remove the switch
Removing the door switch VAZ 2107
If before this the lamp was constantly on, and we pulled out the faulty limit switch, then the lamp should go out. Fault found. We buy a new one and change it.
If the flashlight did not respond to the opening of a door, then dismantle its limit switch, pull off the wire from it (it is on the blade connector) and connect this wire to an unpainted part of the body.
Did the lantern light up? Fault found. We buy a new limit switch and change it.
Checking and repairing the lamp switch
If the interior lighting lamp does not react to open doors at all and does not turn on with the right lamp switch according to the diagram, and the second one works as expected, then you will have to check this switch in the “dead” lamp.
We remove the lampshade (see the section “How to replace lamps”), disconnect the three blade blocks. Using two pieces of wire, we apply voltage from the battery to the terminals, as shown in the photo:
Diagram for connecting the interior light to the battery for testing
When “minus” is applied to the middle terminal, the lamp should light up when the switch is moved to the upper position.
If “minus” is applied to the lower contact, the lamp lights up when the switch is moved to the lower position. If everything is so, the flashlight is working.
If not, then buy a new one or disassemble this one and clean the contacts.
Important! Before disconnecting the wires from the lampshade, you need to mark them or write down the colors, so that later you can correctly assemble the circuit and not confuse anything.
If we chose the second option, then we will need:
- soldering iron;
- stationery or mounting knife;
- fine-grained sandpaper.
Theoretically, the interior lighting lamp is non-separable - it is assembled with plastic rivets. But nevertheless, you can open it. Turn on the soldering iron, place the lampshade with the rivets facing up and heat the riveted part of the rivets with the soldering iron.
Soldering rivets
Before the plastic hardens, we cut it off with a utility knife, but without fanaticism - we still have to solder them back. Turn the lampshade over with the rivets facing down and remove the side trim.
Removing the side cover from the lampshade
We carefully examine the insides of the switch so that we can assemble it later, and take out the switch button, pushing it down.
Important! At the end of the button pusher there is a spring-loaded ball, which, like a sparrow, flies out - you won’t catch it. We remove the key with extreme caution, making sure that the ball and the spring do not fly away in an unknown direction.
There is a spring-loaded ball on the key follower
Using fine-grained sandpaper, we clean the contacts: both the movable one and the two fixed ones. We assemble the lantern and solder the rivets. We check the operation of the switch, as described above, and install it in place.
Replacing an old-style fuse block with a new one
To dismantle the mounting block, you will need to remove the glove box:
- To gain access to the four nuts that secure the device, disconnect the connectors from the fuse box, as well as the chips that are located in the engine compartment.
- Also disconnect all chips and connectors that are located in the vehicle interior behind the glove box.
- Unscrew the four nuts securing the device and remove it from its seat.
- Take a new PSU and install it instead of the removed one. It installs without problems and fits into the mounting points, just install a gasket before installation. Otherwise, the unpleasant smell from under the hood will enter the cabin. Also, its absence will contribute to an additional draft.
- Reinstall all connectors and chips, and then tighten the nuts. The chips are marked with a specific color, so you won’t be able to mix them up.
- Close the unit cover and replace the glove compartment.
Possible problems
What problems may a car owner encounter after replacing the device:
- The horn on the steering wheel stopped working;
- there is no excitation of the generator device;
- The cooling system fan operates after starting the engine without interruption.
Installation of a new interior lamp for VAZ 2107, VAZ 2105, VAZ 2104
Tuning the interior of a VAZ 2105 with your own hands, internal tuning of a VAZ 2107, tips for modifying the interior of a VAZ 2104, VAZ 2105, VAZ 2107. Tuning is a change and modification of the factory settings of a car. Tuning a VAZ with your own hands is a labor-intensive task, so we decided to share some instructions for modifying a VAZ 2104. Tuning can be cheap and expensive, superficial and deep.
The modification of the VAZ 2107 is considered in sections: interior tuning, suspension and steering tuning, braking system and body tuning, as well as engine tuning and gearbox tuning. First of all, when tuning a VAZ 2105, you should pay attention to the ignition system. The classic is a popular car that provides its owner with a wide range of tuning and modifications.
It's no secret that standard interior lighting - lampshades in the side pillars - is absolutely not enough. There is practically no sense from them. One lampshade was purchased from Lada Kalina
We remove the safety visor cover (Unscrew the rear view mirror, unscrew the sun visors, and two bolts on the sides (one under the handle cover on the passenger side, the second just under the cover on the driver’s side)). We remove the cover and take it home.
Remove the lid from the lampshade and draw the outline of the lampshade on a piece of paper.
And cut out the template. I cut the template 5 mm smaller than the contours of the ceiling - it’s better to cut the hole later than make a hole in the ceiling. We attach the template and cut out a hole with a knife. We try on the lampshade of the VAZ 2104 and see that due to the iron back side of the trim, the lampshade does not fit into the hole. Take a jigsaw and cut a hole in the metal along the contour.
We try on the lampshade while cutting the hole in the right places
We will also have to trim the front legs of the lampshade so that they are just below the metal level
The lampshade has a stop on the back side, but we need to secure it on the front side. To do this, I used a strip of iron and these screws with spacers instead of washers so that the spacers would not slip down (in your case, washers.). I made these fastenings from wire.
I simply heated the wire with a lighter and pierced the plastic with it. Then, inserting screws into the grooves, I screwed them to the iron spacer strip.
The entire lampshade is tightly secured. We insert the light bulbs and put on the cover.
And we take it all to install in the car. I took the power from the side lamp, laying a wire under the door seal of the VAZ 2105. (Be careful, 3 wires on the lamp are TWO MINUSES and one permanent plus) Well, the end result.
The central light burned so brightly that when it was turned on, the car windows became like a mirror. So I replaced it with a triple blue LED. The light from the side lamps is more than enough; by their light, you can read a book quite comfortably. You can also put aside a regular light bulb.
- And this is if you don’t install an LED, but leave the standard VAZ 2107 lamp.
Source: https://vazclub.com/vaz/2104-2105-2107/tyuning/salona/modernizatsiya-sistemi-osvescheniya-salona.html
Choosing a belt for the machine
I will try not to pour water, but will briefly look at what to look for when choosing an LED strip.
LED Matrix Type
Firstly, we get an average power of 4.4-4.8 W per linear meter with a luminous flux of about 250-300 Lm. With such power, LEDs do not require heat dissipation and the LED strip can be easily mounted on plastic elements. And the luminous flux is sufficient to fully illuminate any interior elements.
If you don’t have enough brightness, take 120 pcs/m.
Secondly, this is the most common tape on sale, we buy it in the first store we come across.
Options like SMD 5050, 5630, 5730 are not suitable due to their high power. Unpleasantly high brightness and the need to mount a heat sink make them not the best choice for LED car interior lighting.
Exterior car lighting. Here we turn on the head. If there is LED lighting under the bottom of the car, you can choose more powerful LEDs - SMD 5050 30/60 pcs/m. The aluminum profile will be our heat sink (more about installation later). For LED illumination of license plates or (God forbid) headlights, this is a bad choice. Such LED lighting will be a bait for traffic police inspectors (read about installation rules and fines at the end of the article).
Regular LEDs or RGB - there is no difference. RGB is a little more expensive, it is more difficult to connect and requires an additional control controller (read more about connecting an RGB strip). But it allows you to change the backlight color.
Protection class
There are mainly three protection classes on sale - IP20, IP65, IP68.
- IP20 – open tape without protective coatings, suitable for use indoors in dry rooms. Afraid of moisture, dust, and any mechanical influences.
- IP65 – with a protective silicone layer that can protect against condensation.
- IP68 - sealed, waterproof LEDs that can be placed on the bottom of the car.
LED class IP68
For LED illumination of the glove compartment or the bottom of the dashboard, IP20 is also suitable if no one pulls it or pours water on it.
For illumination of other elements, IP class 65-68 is desirable.
Interior lighting of VAZ 2107
With all the advantages of the VAZ 2107 car, which is still popular today, the design of its interior and, in particular, the state of lighting, leaves much to be desired. The dull side lamps clearly do not cope with their main task and therefore it is understandable that many owners of this car model over time have a desire to improve the original design.
Meanwhile, tuning the interior lighting of a VAZ 2107 can be done with minimal effort and money by installing a more advanced lamp, for example from the VAZ 2108 model.
You also don’t need any special tools or equipment - just have a Phillips screwdriver, a 12-mm open-end wrench, a sharp knife (preferably a construction knife with a thin blade), a sheet of thin cardboard, a marker, adhesive tape, a few meters of wire and several connecting terminals on hand.
As a preliminary technological operation, using a Phillips screwdriver and a 12mm wrench, you should first remove the visor, and you should be careful and attentive, since the visors of early cars are reinforced with sheet iron and such a design, if dropped, can cause a lot of trouble.
Next, the most optimal place to place the new lampshade is determined, for which it is recommended to make a full-size template and then, based on it, make markings directly on the visor.
At the initial stage, it is better to cut out the seat along a contour of a slightly smaller size than required, and only after that do the fine finishing of the hole, filling in uneven cuts with a thinner and more precise tool.
When connecting the lampshade to the network, it is most correct to extend the wires to the glove compartment (laying them behind the trim and through the right pillar).
Content
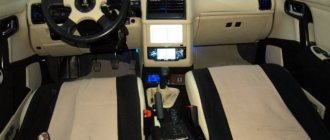
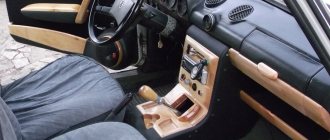
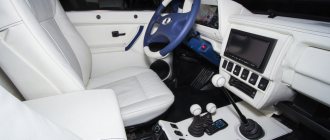
The interior of VAZ 2107 cars today cannot be called modern. At one time, it was a classic of the Soviet automotive industry. But those days are long gone and today the interior needs significant improvement. Owners of these cars very often turn to the services of various workshops. Some people prefer to do the tuning of the VAZ 2107 interior with their own hands. In this article we will talk about what can be done and how to “modernize” the interior of the car.
Tuning the interior of the VAZ 2107
The good old “seven” - well, who isn’t familiar with this car? It is brutal, angular and easy to tune. In this article we look at the materials and procedure for tuning a VAZ with your own hands naturally.
Introduction
One of the most popular cars produced during the USSR and modern times is the VAZ 2107 or simply “seven”. The start of production of these cars dates back to 1982, and the end of production in 2012. Although in many countries the production of this car continued until 2013-24.
The slightly archaic design, which was typical of those times, does not make this car popular now. However, we offer an article in which you will learn new approaches to tuning the interior of a VAZ 2107 with your own hands
, which will allow you to breathe fresh life into your car and please your friends with an unusual design.
This will make your “seven” stand out from many others.
Soundproofing of the VAZ 2107 interior
One of the first things that tuning specialists undertake is soundproofing the car. Indeed, the ergonomics and exterior of the seven leaves much to be desired. While driving on our roads, there is noise from the wheels and suspension, as well as noticeable rattling of trim elements and much more. At the moment, there are many approaches to sound insulation, which we will talk about right now.
As a rule, the order of work begins with door structures
. You need to remove their casing using a regular screwdriver and a selection of spanners.
By the way, if you seriously decide to start tuning a VAZ 2107 with your own hands
, then we recommend acquiring several sets of tools. This will reduce your time and nerves while performing various tasks.
Fortunately, there are many kits on the market now that will be useful in your garage.
When removing old siding, you should be extremely careful. The fact is that the surface of the plastic and some of its elements are very susceptible to fractures and damage.
.
When you remove the trim, be sure to insulate the screwdriver or knife with electrical tape. This lifehack will help maintain the integrity of the door's paintwork.
When the “door card” is removed, do not rush, because there is wiring inside and it can be damaged. Be careful and remove it carefully.
This is the first step in soundproofing the cabin. When the doors are processed and the special material is installed, you can begin deeper tuning. The dashboard and car seats should be removed.
From the factory, the floor of the seven is treated with a special material, which you need to completely remove using a sanding machine or regular sandpaper. After this, the floor is treated with insulating mastic.
The first layer of polyethylene foam
– a special material that has a noise-absorbing effect. Choose the number of layers and thickness of this material yourself. For a seven, experts recommend about ten millimeters.
This will be enough for normal sound insulation. The process of fastening polyethylene foam is carried out with a special construction adhesive
, which can be purchased at any automotive store.
Let us briefly consider the nuances of soundproofing the engine compartment
. Any network of automotive stores provides the opportunity to buy ready-made kits. Each element is the correct size and shape for your car's hood.
Before gluing, you need to thoroughly degrease the surface using any solvent.
The fact is that the engine compartment is a place where a high concentration of oil and dust
, so you need to get rid of it efficiently.
When the inner surface of the VAZ 2107 hood is clean, proceed with the installation of the soundproof film
. This is done with a special hairdryer. There is glue on the Shumka elements, so you can easily install it.
All you have to do is smooth it out and that’s it. This will not only keep the heat under the hood, but will also create additional comfort inside the car.
After all, sometimes the roar of the engine causes some discomfort to the driver and passengers.
One of the significant points to improve the interior space of a car and its comfort is upgrading the seats. The “Seven” has original factory ones, which, to put it mildly, are inconvenient, especially if you need to travel frequently. Fortunately, there are a lot of options and one of them is seats from a Ford Scorpio car. They fit perfectly, are cheap and do not require specific actions.
Updated seats will make life easier for the driver and passenger, because they have electric drives and excellent mechanisms. If compared with standard seats, then this is heaven and earth. However, the main drawback is that you need to work hard to find an old Ford with normal seats.
To install the new seats you will need a regular drill. It is also necessary to make 4 brackets from steel with a thickness of three to five millimeters. When the old seats are removed, you should attach the manufactured brackets to the “legs” of the new ones. You will need bolts size M8x25. Each seat will require two fastenings. Next you need to make holes in the floor.
We start work from the driver's seat, and then symmetrically drill for the passenger. We take M10x40 bolts and fasten the brackets. Don't forget to use washers on both sides of the bolts
. This will help strengthen the structure and the reliability of its fixation. After installation, we coat the connections with a special mastic that has anti-corrosion properties.
In principle, the work is completed and now your VAZ 2107 has become even better and more modern, and most importantly, it has given you convenience and comfort while driving.
Probably every owner of a VAZ 2107 noticed how poorly the standard door locks work. Sometimes they close poorly or make characteristic sounds. In general, you want the doors to work perfectly and with the least noise.
There is a way out of this situation and let's look at it. Below is a brief instruction on how to replace standard locks with modern ones, similar to those of a foreign car, using the rear doors as an example.
Similar operations are performed for the front doors.
You should prepare in advance:
— Locks from figure eight (they are cheaper and of higher quality) — A set of silent locks, which are popularly called chocolates.
— There are four bolts. — A drill and a set of drills for it.
— A hacksaw for metal — A set of files — A couple of meters of cable — Rods from the “Constructor” set — Aluminum or plastic plates 10 x 6 cm. Thickness two millimeters.
— Tools for cutting threads in metal.
Source: https://avto-moto24.ru/14-tyuning-salona-vaz-2107.html
Noise insulation
One of the first recommendations for tuning the interior of this car is proper sound insulation. Why do it? Firstly, most of these cars already have significant mileage. Many modern cars cannot withstand domestic roads and require additional sound insulation after just a few years.
What can we say about the VAZ 2107. Important information! mental isolation is necessary for the following reasons:
- the higher the mileage, the more extraneous sounds appear in the cabin;
- when installing a new speaker system;
- to eliminate external noise associated with the operation of the engine and other components.
In addition, noise isolation is needed if you plan to install a high-quality acoustic system. You will not be able to appreciate the sound if there is extraneous noise in the cabin. Where to start and what are the main elements needed for such an operation? First of all, it is recommended to prepare the doors, the inside of the hood and the luggage compartment. But often, this is not enough. Many experts recommend additional soundproofing of the floor, seats and central tunnel.
Important information! Soundproofing is never superfluous. You may want to change the standard audio system. Extraneous noise will prevent you from fully enjoying the sound quality. In order to soundproof the floor, it is necessary to remove all seats and coverings from the interior. Sheets for sound insulation are laid directly on the metal. Before this, the bottom is treated with a special mastic. The first layer is already placed on it. As for the thickness, it is determined by specialists (or by you, if the sound insulation is carried out independently). In principle, one layer is enough to tune the interior of a VAZ 2107.
To prepare the inside of the hood and luggage space, you can use ready-made kits. This makes the task much easier, since the sheets are cut to the size of the parts on which they are laid. Before the material is glued to the surface, it must be degreased. The sheet itself is laid using a hair dryer. The kit usually comes with two layers. The second is a noise absorber. It is placed on the first sheet. At this point we can consider that the first stage of tuning the VAZ 2107 interior is completed. Now you will be much more comfortable inside the car. Extra sounds and noise will no longer cause you discomfort and you can safely buy a good speaker system. We'll talk about it a little later. Finally, one more important point. Over time (and perhaps this moment has already arrived), the dashboard may begin to rattle. This is especially noticeable on used cars. Domestic roads and build quality are the two main reasons for the appearance of extraneous noise.
In order to eliminate it, it is necessary to treat the dashboard both from the inside and the outside. The most rattling part is the central air duct. To eliminate noise, it is removed from the dashboard, disassembled into two parts and carefully glued (you can use ordinary thin rubber and sealant). By the way, it is recommended to coat the seat of the air duct in the heater with sealant. Another part that can make noise while driving is the heating system control cables. Of course, they do not do this themselves, but in contact with other parts. The simplest option is to wrap them in foam rubber, after smearing them with glue.
Connection diagram for interior lighting lamps of VAZ 2105
- Connection diagram for interior lighting of a VAZ 2105 car
- Description of the connection diagram for the interior lighting of the VAZ 2105 car
— Plus is supplied to the electrical circuit of the lamps for the interior lighting of the VAZ 2105 from output “30” of the generator. They are constantly powered, regardless of whether the ignition is on or not. The circuit is protected by fuse No. 11(8A) - mounting block 15.3722 with finger fuses or F11(10A) - mounting block 40.3722 with blade fuses..
— “Ground” has two wires: one from the lamp switches (“limit switches”), the other from the car body.
— “Limit switches” (switches) are installed in the pillars of all four doors. They are connected by one wire (black and white in the diagram). When the doors are closed, their contacts are recessed and the electrical circuit is open. After opening at least one door, the circuit is closed and ground is supplied to the lampshades.
— You can forcefully turn on the interior lights with the doors closed by pressing the lamp button. In this case, the “ground” to the lamp will be supplied not from the “limit switches”, but from the car body.
- Notes and additions
- — An AC12-5-1 (C5W) lamp is installed in the interior lampshades.
- More electrical circuit diagrams for the VAZ 2105
Scheme for connecting the direction indicators of a VAZ 2105 car
Diagram of the contact ignition system of VAZ 2105, 2107
Source: https://twokarburators.ru/shema-osveshenia-salona-vaz-2105/
Electrical diagrams for turning on headlights on a VAZ 2107
- block headlights with side light lamps;
- engine compartment lamp;
- mounting block;
- glove box lighting lamp;
- instrument lighting switch;
- rear lights with side light lamps;
- license plate lights;
- outdoor lighting switch;
- external lighting indicator lamp located in the speedometer;
- ignition switch;
- A - to terminal “30” of the generator;
- B - to instrument lighting lamps and switch backlight lamps
- block headlights;
- mounting block;
- headlight switch in three-lever switch;
- outdoor lighting switch;
- rear fog light switch;
- rear lights;
- rear fog light circuit fuse;
- fog light indicator lamp located in the indicator lamp unit;
- high beam indicator lamp located in the speedometer;
- ignition switch;
- P5 - headlight high beam relay;
- P6 - relay for turning on the low beam headlights.
- low beam plug;
- high beam plug;
- ground plug;
- side light plug;
- B - to terminal “30” of the generator.
- to ground;
- to the brake light lamp;
- to the side light lamp;
- to the fog lamp;
- to the reversing lamp;
- to the turn signal lamp
1 — block headlights with front direction indicators; 2 — side direction indicators; 3 — mounting block; 4 - ignition relay; 5 — ignition switch; 6 — relay-interrupter for direction indicators and hazard warning lights; 7 - turn signal indicator lamp located in the speedometer; 8 — rear lights with direction indicator lamps; 9 — alarm switch; 10 — direction indicator switch in a three-lever switch;
- A - to terminal “30” of the generator;
- B - numbering of plugs in the hazard warning switch;
- B - the order of conditional numbering of plugs in the relay-interrupter of direction indicators and hazard warning lights.
Relay-interrupter 6 is designed to receive an intermittent light signal from the direction indicators both in the emergency mode and in the turn indication mode, as well as to monitor the serviceability of the direction indicator lamps.
If the lamps are working properly, then in the turn indication mode it causes warning lamp 7 to blink at the usual frequency.
If the lamps are faulty (burnout or break in the lamp circuit), then the breaker relay ensures that the control lamp blinks twice as fast.
The breaker relay is mounted under the instrument panel on a bolt welded to the wall of the air supply box. A faulty breaker relay cannot be repaired and should be replaced with a new one.
The breaker relay must ensure blinking of the direction indicator lamps with a frequency of 90±30 cycles per minute at a rated load of 92 W, an ambient temperature of –20 to +50°C and a voltage of 10.8 to 15 V.
Until 1985, the 23.3747 relay-interrupter, assembled on integrated circuits, was used. It created a constant lighting of the control lamp in the event of any of the turn signal lamps burning out or an open circuit in its power supply.
Since 1985, a relay-interrupter 231.3747, made of discrete elements, has been installed.
The characteristics of both relay interrupters are the same. The only external difference is that relay-interrupter 231.3747 does not have plug “5”. The supply voltage is supplied only to plug “1”. Therefore, there is no need for the brown wire that previously connected plug “5” of the breaker relay with plug “6” of the alarm switch 9.
In 1995, the hazard warning switch was slightly modified. His terminals “5” and “6” were eliminated, as well as the connection diagram of the control light inside the switch was changed.
↑ Diagram for turning on headlights and fog lights in the rear lights with a breaker relay
1 — block headlights; 2 — mounting block; 3 - headlight switch in a three-lever switch; 4 — external lighting switch; 5 — rear fog light switch; 6 — rear lights; 7 — rear fog light circuit fuse; 8 — fog light indicator lamp, located in the indicator lamp block; 9 — indicator lamp for high beam headlights, located in the speedometer; 10 — ignition switch;
- P5 - headlight high beam relay;
- P6 - relay for turning on the low beam headlights.
↑ A - view of the headlight plug connector
1 — low beam plug; 2 — high beam plug; 3 — ground plug; 4 — side light plug;
- B - to terminal “30” of the generator.
↑ B – terminals of the rear light printed circuit board (numbering of terminals from the edge of the board):
1 - to ground; 2 - to the brake light lamp; 3 - to the side light lamp; 4 - to the fog light lamp; 5 - to the reversing lamp; 6 - to the turn signal lamp
To turn on the headlights, relays P5 and P6 of type 113.3747 are used, installed in the mounting block. The same relays are used to turn on the engine cooling fan motor and to turn on the heated rear window and sound signals.
The relay switching voltage at a temperature of (23±5)°C is no more than 8 V, and the winding resistance is (85±8.5) Ohm at 20°C.
Instead of relay 113.3747, you can use new interchangeable relays type 90.3747-11, which have a plastic cover and slightly increased dimensions. And instead of relays 113.3747-10, which have a mounting bracket on the cover, you can use relays 90.3747-10 (with bracket). The characteristics of the new relays are the same as those of relay type 113.3747.
Relays of type 902.3747-11 (without bracket) and 902.3747-10 (with bracket) are also produced.
These relays are primarily used on vehicles with fuel injection systems and are distinguished by the addition of a noise suppression resistor that is connected in parallel with the relay coil.
For these relays, the resistance between terminals “85” and “86” is (72±8) Ohms. The specified relays can also be used instead of relays of type 113.3747.
Source: https://ovaze.ru/96-osveschenie-i-svetovaya-signalizaciya.html
Determining what doesn't work
Before you begin work on removing the instrument panel and changing light bulbs, you need to visually determine which of them are out of order. If the panel is not illuminated at all, there are several options for where to start checking.
Circuit breakers
First, check the fuses; they are located in the mounting block under the hood on the right side (in the photo under No. 5).
Fuse F10 is responsible for the instrument panel.
Brightness control
This is a variable resistor, located to the right of the steering wheel, near the clock. With its help, the intensity of illumination of instruments and control lamps is changed. It rarely fails, but sometimes it fails.
To check the regulator, you need to remove the plastic insert where it is located along with the clock and cigarette lighter. Pry it off with a flathead screwdriver. After this, disconnect the power supply and remove the plastic round handle by pulling it towards you. Using a socket wrench, unscrew the nut securing the regulator to the liner and remove it.
The functionality of the regulator can be checked using a multimeter. If the resistor is faulty, replace it with a new one.
It should be borne in mind that when working with electrical equipment, it is necessary to disconnect the power supply from the battery.
Faulty incandescent lamps
If everything you did above did not produce results, you need to remove the panel and check all the light bulbs.
Failure of incandescent lamps involves burnout of the tungsten filament. In another case, there may be physical impact on the lighting device, after which it will not be able to function.
You can check it visually, one by one removing the electronic board from the sockets and inspecting the integrity of the tungsten filament. Or using a multimeter.
To eliminate all the reasons why lighting and signaling devices may not work, it is worth checking the integrity of the conductive paths printed on the electronic board.
Due to environmental influences, they oxidize and break down. It's not difficult to fix. It is necessary to find, clean and solder. It is also worth checking the terminals connecting the wires.
How to make interior lighting for a VAZ-2107 with your own hands
Modern materials make it possible to illuminate almost the entire interior. LED strips are usually used for this. If you often move in the evening, it is worth replacing the main lighting lamp with a more powerful one. Let's figure out how to modernize the interior lighting of a VAZ-2107 car.
How to change standard lighting
Standard lamps can be replaced with more powerful and modern ones. The most suitable option is considered to be the main lamp for interior lighting, borrowed from Priora. To install it you will need to have:
- masking tape;
- sharp knife (can be a stationery knife);
- wrench 12;
- Screwdriver Set;
- pencil or marker for making marks.
Carefully remove the visor next to the rearview mirror. Please note that its weight is quite high, so if you are not careful, the ceiling may collapse completely. Outline the place of the new shade on the visor with a pencil, cut a hole along the contour. Secure the new lamp in this hole using sealant.
Since the old wiring does not work with more modern devices, make a new one. You will need to throw at least 2 wires - “minus” to the body and “plus” to the contact of the new lamp. In foreign cars, the light comes on when the doors are opened, this is very convenient. If you want to do the same, then place the third wire on the limit switch in the door. Route the wiring along the right pillar.
Pros.
The advantage of the tape is that it has better illumination qualities compared to neon lighting. Thanks to a wide range of color shades, you can choose the necessary product of the desired color that matches the body of your car. Some lighting models come with controllers that allow you to control the entire system with 1-2 keys. One of the main advantages is the ability to install it yourself, since to carry out such an operation it is not necessary to be a master. The usual skills and knowledge that a car enthusiast usually has will suffice.

