The VAZ-2106 car came off the assembly line in 1975 and was a modernization of the three that consumers liked. In comparison with this model, the manufacturer has made a number of changes to it, relating not only to the power and engine size, but also to the design. The appearance of the body has improved somewhat, and the interior has also become more spacious and functional. In addition, high-quality materials were used in its casing, which were easily cleaned from dirt.
Today, the interior of the Six, modernized in those distant years, looks too old-fashioned. Therefore, many owners of this model do tuning themselves. Fortunately, the car is easily amenable to such modifications and allows for maximum comfort for both drivers and passengers.
How to do tuning of a VAZ-2106 interior with your own hands
The VAZ-2106 car came off the assembly line in 1975 and was a modernization of the three that consumers liked. In comparison with this model, the manufacturer has made a number of changes to it, relating not only to power and engine volume, but also to design. The appearance of the body has improved somewhat, and the interior has also become more spacious and functional. In addition, high-quality materials were used in its casing, which were easily cleaned from dirt. Today, the interior of the Six, modernized in those distant years, looks too old-fashioned. Therefore, many owners of this model do tuning themselves. Fortunately, the car is easily amenable to such modifications and allows for maximum comfort for both drivers and passengers.
DIY dashboard
Reconstruction of the VAZ-2106 (including interior tuning) can be carried out on your own in the garage or near the house in the open air. For example, it is not too difficult to make white panel dials with your own hands. Find the model you like and reprint it on paper. The signs can be painted in a dark tone using varnish or paint, and holes can be made where they are needed. The panel itself can be covered with leatherette. To do this, first of all, the old surface is cleaned, degreased, and then special glue is applied and the material is laid. After which they give it some time to dry.
At the end of the procedure, trim the edges of the remaining substitute. In the same way, you can update the entire interior of the car.
Vibration and noise protection
How to do interior tuning on a VAZ-2106 car? If you intend to bring your car into full compliance with modern standards, you have to perform a whole range of work. We recommend starting with improving the sound and vibration insulation characteristics, which will immediately make using the car much more comfortable.
If you intend to install new seats, as well as perform any welding work, it is better to insulate the interior after they are completed.
We also recommend pre-treating all metal parts of the body with an anti-corrosion compound - this will avoid the need to dismantle the sound insulation if even small traces of rust appear.
The modern market offers a wide selection of insulating materials for every taste and color. To attach them to the internal surfaces of the body, you can use special adhesives. To reduce the level of noise coming into the cabin from under the wheels, you can attach a carpet carefully cut to size to the floor.
"Six": tuning
You should not be afraid that major interior repairs will alter some characteristics of the car, because such improvements will not affect the performance of the car, but, on the contrary, will improve it. And the driver will be much more comfortable and pleasant to drive his “iron horse” from a brand new and modernized interior.
Most of the work on restoring the interior of a car can be done on your own at home, and only some of it may require the intervention of specialists in workshops.
Before starting reconstruction, you should thoroughly examine the “field” of activity and make a list of the necessary parts and materials for the VAZ-2106. Tuning the interior should not begin with thoughtless purchases of various things, which may later be either superfluous or not suitable for the car at all. After a thorough examination and drawing up a list of everything you need, you can begin to work independently.
However, before describing the steps to update the interior space, you should familiarize yourself with some parameters of the car.
Improving the appearance and functionality of the dashboard
After all the necessary insulation work has been carried out, you should also pay attention to the dashboard. To change its appearance, car enthusiasts today use the following technological solutions:
- painting a torpedo using liquid rubber. This is the cheapest type of tuning, which will be affordable for car owners with any financial capabilities. The only drawback is the need to restore the layer of liquid rubber from time to time in order to eliminate any scratches and chips that appear;
- installation of decorative inserts made independently from polymer materials. In the process of selecting them, it is necessary to pay attention to the strength characteristics in order to avoid breakage of the original design elements in the future;
- reupholstery of the torpedo with artificial leather. The variety of materials on the market today allows you to give the dashboard absolutely any look that suits your taste preferences;
- use of vinyl films for covering torpedoes. Another inexpensive tuning method, which, despite the low price, allows you to radically change the appearance of the panel;
- installation of new instrument lighting. As you know, the standard system uses ordinary light bulbs, which draw a lot of energy and do not provide sufficiently bright lighting. If you replace them with modern LEDs, the effect will be amazing. Especially with the use of multi-colored filters;
- installation of a new scale on each of the devices. You can choose the desired color yourself, as well as the gradation that suits your requirements.
After transforming the dashboard, you can work on other parts of the interior of the VAZ-2106.
Tips for changing the front panel
If a person completely wants to change the appearance of the panel and install something different, then he must carefully think through all the nuances of such an action. First, you should decide for yourself what exactly is missing on the panel, what you would like to add, what signs and devices to install. Each future button and lever should be carefully calculated, since then removing the panel and re-equipping everything is very problematic, troublesome and time-consuming.
Interior reupholstery
The next stage is reupholstering the seats, as well as the ceiling, doors, gear lever, steering wheel and other parts. This procedure is quite complex and requires a competent selection of materials and their colors. But after its completion, the car interior will fully correspond to your taste preferences.
You don’t have to limit yourself to covering all the parts with faux leather or beautiful thick fabric. To improve the appearance, it makes sense to use additional decorative accessories, which include, for example, neon lamps, multi-colored LED lamps and much more.
Body weight
ATTENTION! A completely simple way to reduce fuel consumption has been found! Don't believe me? An auto mechanic with 15 years of experience also didn’t believe it until he tried it. And now he saves 35,000 rubles a year on gasoline! Read more"
Let’s say right away that the “six” weighs exactly 1045 kg. Its mass is decomposed as follows:
- The weight of the power unit together with additional equipment is 140 kg;
- The gearbox weighs about 26 kg;
- Shaft – 10 kg;
- Rear axle – 52 kg;
- Radiator – 7 kg;
- Body – 280 kg.
It turns out that the body is the heaviest part of the car. It is exactly twice as heavy as the engine. The remaining parts of the machine have approximately the same mass.
Improving the functionality of the salon
If your goal is not just to change the appearance of the car, but also to increase its functionality to a modern level, you can also perform a number of additional works:
- replace the seats with large, wide chairs used in sports cars;
- install a completely new dashboard, introducing the most modern audio systems, navigators and other equipment into it;
- replace mechanical window regulators with a set of products with an electric drive. Today they can hardly be called a luxury, since these parts can be purchased as a complete set in any specialized store.
Tuning the interior of a VAZ-2106 car allows you to solve many different problems. It expands the functionality of the vehicle and provides protection for individual elements from damage and corrosion processes. In addition, you will be much more comfortable using a car that meets the latest trends not only in appearance, but also in the availability of modern options.
The work can be carried out by specialists from various companies that offer interior modernization services at very reasonable prices. But if you have the appropriate experience, tools and the desire to make a real “candy” out of your old “six”, it is better to do everything at home and on your own. Then driving a reborn car will be much more pleasant.
Source
First steps to upgrade
You can start tuning the interior of a VAZ-2106 with your own hands by installing power windows on the windows. This process is quite labor-intensive and troublesome. Most car enthusiasts opt for mechanical lifts, as they are easy to install and operate. But if you want to have an electronic mechanism for controlling the side door windows, this can be done by carrying out special work. Several years ago, such a device was a luxury for a car, but now every driver can install it in his car.
There are several types of electric windows for car interiors. The first group is headed by a cable device, which is distinguished by its slow operating mode. It is widespread due to its inexpensive price, as well as the ease of replacing a failed motor.
The second group is articulated lifts. They are noticeable for their speed, power and low noise level. Such mechanisms are good in winter, when windows freeze and are difficult to open.
The last group is the rack and pinion design. It is weaker than all of the above and requires special care.
VAZ 2106 - do-it-yourself interior tuning, photo
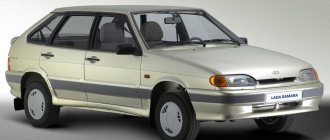
This car first left the assembly line in 1975. Taking the third model as a basis, the manufacturer modernized it, making a number of changes that affected not only engine power, but also design. The appearance of the body part has improved slightly, the interior has become more spacious and functional. Good quality materials that are easy to clean began to be used as cladding. And yet, the interior of the “six” looks somewhat old-fashioned. For this reason, most owners perform tuning work themselves.
You will be surprised how high-quality and stylish the interior of this VAZ-2106 is made
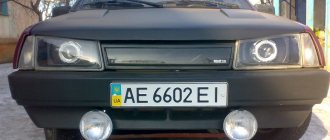
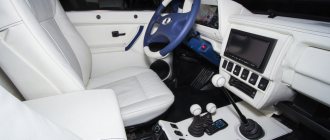
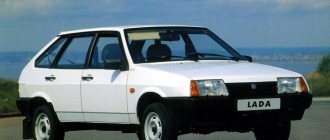
For quite a long time, VAZ cars have been treated with some disdain. This is especially evident in relation to the “classic” line of this manufacturer - in general, models of this series lasted on production lines for more than 44 years. And all because of the low quality of materials used in the production of the car, as well as the outdated design.
But does this mean that a good tuner will not work on it? Of course not! This snow-white 2106, which you can see in the photographs, lives in the glorious city of Tolyatti - the birthplace of the Volzhsky Automobile Plant. And with its condition, as well as the interior decoration, it will be able to surprise anyone without any problems, I’m telling you for sure!
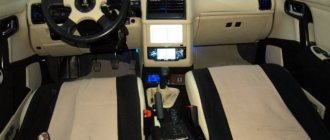
In its interior itself, apparently, there is not a single element left that has not been touched by the hand of tuners - now it is all done in black and white, and it looks surprisingly good and even stylish in a sense. At least it doesn’t make you want to get out as quickly as possible, as often happens with such cars.
The appearance of the car can also be characterized by the words “strict” and “without unnecessary details.” The only thing that confuses me is the silver wheels. Wheels either chrome or white would be perfect here - this combination would look very advantageous.
In all other respects, this car is not much different from its counterparts, but at the same time it manages to look better than 95% of similar cars. Maybe simplicity is the recipe for proper tuning?
carakoom.com
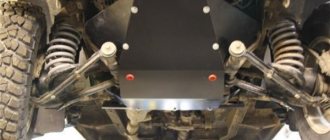
Getting rid of noise and vibration
If you are planning to do interior tuning for a VAZ 2106 with your own hands, photo examples of which are presented below, then get ready to carry out a whole range of activities. You need to start with noise and vibration insulation, which will immediately improve the comfort of the car. When planning to replace seats, which will require welding work, insulation of the interior should be carried out after welding is completed.
Experienced craftsmen recommend treating the metal elements of the body part with anti-corrosion agents so that in the future you do not have to dismantle the soundproofing layer to remove rust. Today on the car market there are a lot of materials with which you can create good noise protection. To fix them, it is recommended to choose high-quality glue. To reduce the level of noise entering the cabin from the wheels, you can lay a carpet on the floor, carefully adjusted to size.
How to get started?
For a VAZ-2106 car, interior tuning begins with preparation. First of all, turn off the power to the machine completely. If you wish, you can not turn it off completely, but disconnect the backlight and cigarette lighter from the power supply. Next, the door trim is carefully removed.
After this, you can begin installing electric windows, dismantling the old mechanism. To make it easier to get to the main structure, it is necessary to fix the glass in the raised position. The glass support can be made using an ordinary screwdriver. Then unscrew all the bolts that are in the lifting system, make sure that all components, such as nuts, brackets, bolts and jumpers, are removed. Otherwise, they may interfere with the removal and installation of glass.
Panel tuning
Having completed the isolation, you can move on to this element. There are a number of ways to change the appearance of the dashboard:
- The torpedo is painted with a liquid rubber compound. This option is the cheapest, but has one drawback - the rubber layer must be renewed periodically to remove the resulting scratches and chips;
- decorative inserts are installed, which are made from polymers. But the material must be durable in order to avoid damage to the original elements during operation;
- The torpedo is covered with artificial leather. Its diversity will help you turn any idea into reality;
- The torpedo can be covered with vinyl films. This inexpensive method makes it possible to significantly change the appearance of the panel board;
- New instrument lighting is being installed. A simple lighting system uses ordinary light bulbs, which consume a lot of energy and do not create much effect. Many people replace them with modern diodes, thus creating a good effect. It looks especially beautiful when light filters of different colors are used;
- New scales are installed on the instruments. You can choose the colors you want.
Sheathing reupholstery
The next working stage is changing the trim on the seats, ceiling, door panels, gear shift lever, steering wheel and other parts.
This process is quite labor-intensive and involves a competent selection of materials according to their shades. But upon completion, the car’s interior will fully meet your wishes.
To reupholster the interior, you can use not only beautiful fabrics or artificial leather. You can improve your appearance by using additional accessories in the form of neon bulbs or multi-colored LEDs.
Increased functionality
If you want to not only change the appearance, but also improve the functional features of your vehicle, then you can take some additional measures. For convenience, the seats are replaced with those used in sports cars. A completely new instrument panel is installed, modern audio systems, navigation aids and other equipment are installed in it. Mechanical window lifts are replaced with similar sets with an electric drive. Nowadays, this is no longer considered an element of luxury, since such components can be purchased at any spare parts store.
Tuning the interior of the “six” makes it possible to solve a huge number of different problems. With its help, the functional features of the car are expanded and security is created for its individual elements.
Source
Cost of the car after tuning
Now the car can only be bought in used condition, since it is no longer produced. It costs between 60-90 thousand rubles, sometimes 100 thousand, depending on the availability of major repairs and safety. However, if the car has undergone external and internal upgrades, then its cost may be at least twenty percent more. For example, a VAZ-2106 car, the price of which is on average 70 thousand rubles, after tuning can cost 100–110 thousand. It all depends on how updated the car is.
In conclusion, I would like to add that tuning any car is a good thing for both passengers and the driver. It's like renovating an apartment. Something breaks in it, then you have to replace the equipment or thing, and it happens that you want to change the decor, update the walls, ceiling and floor, furnish your apartment with new furniture, and so on.
This is not surprising, since a person cannot stay in the same environment for a long time; he needs some changes and innovations, even the most insignificant ones.
Tuning the interior of the VAZ 2106
All car owners know that tuning the interior means giving it a new look, improving functionality and safety. With its help you can create an individual and unique style.
Interior tuning consists of several stages:
- torpedo tuning;
- instrument panel tuning;
- beard tuning;
- replacement or reupholstery of seats;
- installation of a radio;
- steering wheel tuning;
- tuning the gear knob.
Let's look at each of these points in more detail.
Torpedo tuning
The top front panel of a car is called a torpedo. It is a solid metal structure covered with polymer foam and film. It contains an instrument panel, glove compartment, interior heater, air duct deflectors, and a clock.
The front panel is an important element of the interior, which can be tuned in different ways: replace the dashboard completely with a new one, paint it with liquid rubber, cover the smooth surface of the dashboard with leather, film or flock. Before starting tuning work, you need to remove the panel.
Torpedo dismantling
Removing the console occurs as follows:
- After unscrewing the four fastening screws, we remove the storage shelf.
Tuning options for the VAZ 2106 torpedo
There are several options for tuning a torpedo:
- You can replace the standard torpedo with a new one from domestic or imported cars. It is installed entirely with devices. Since the parts in the “classic” are interchangeable, panels from the VAZ 2105, VAZ 2107 are suitable for the “six” ;
- cover the torpedo with liquid rubber. This option is labor-intensive, and such a coating is short-lived and will begin to crack over time. It will need to be updated periodically. The big advantage of this method is its low cost;
- reupholstering the dashboard with vinyl film, flock, automotive leather or leatherette. This method of improvement is the most effective, but scrupulous and time-consuming. To carry out the work, it is necessary to dismantle the torpedo and take measurements from it. It is best to make a pattern from non-woven fabric. Using the pattern, cut out the component parts. Sew all the pattern pieces together with strong threads. It is advisable to work carefully so that folds do not form on the material, which will spoil the appearance. Then treat the surface of the console with hot glue and pull on the cover. And, using a hair dryer, glue the cover.
Tuning recommendations from experts
Many professionals who regularly upgrade their own and other people’s cars advise paying attention to the heating system during the renovation process. The standard instrument panel has only two deflectors, which is very small for a car, and in damp and cool weather the windows constantly fog up. Some craftsmen cut additional slots in the panel and run air ducts to the side windows. Those who have money often install a dashboard from other car models. Both methods are not very good, since when passing a technical inspection questions may arise from the inspection authorities.
Experts also advise removing the standard clock from the panel and instead installing an ammeter from the UAZ, which fits perfectly into the VAZ. Connect it to the glove compartment lighting wires.
A good tuning option would be to install equipment for heating the engine and autonomous heating of the interior. This will allow you to go about your business or to work within a couple of minutes after starting the car in winter without prolonged warming up.
When replacing the front seats in a car, it is advisable to install new ones from the VAZ-2107, but always with a cover that has the functions of heating, ventilation, massage, and also with lateral support. This replacement will allow the driver and passenger to feel more comfortable and convenient on the road.
Instrument panel tuning
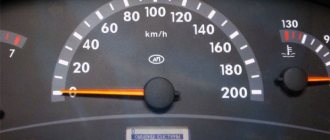
Modernization of the VAZ 2106 dashboard consists of replacing the backlight and decorative parts of the scales.
Replacing instrument panel scales and arrows
This process is quite simple and you can do it yourself:
- At the start of work, we dismantle the instrument panel panel of the “six”
- We gain access to the sensors and remove all indicator arrows, starting with the tachometer.
- After this we remove the scales.
- To remove the speedometer needle, unscrew the bolts and turn the scale to the left. After this, the instrument needle will drop slightly and begin to oscillate. As soon as it finally freezes, this position must be marked with a marker. All this is necessary so that the speedometer then indicates the correct speed.
Installation of the removed parts is carried out in reverse order. After which the panel is mounted in its original place.
Instrument panel lighting
Many car enthusiasts know that the “six” has weak instrument lighting. When upgrading the panel, you can add LED lighting. Before starting electrical work, be sure to disconnect the negative terminal from the battery.
- Having dismantled the panel, we remove the devices one by one.
- We take each of them apart.
- We glue the links of the LED strip into the body. For small devices, one link of three diodes is enough. For larger ones you will need 2 or 3 links, depending on what lighting intensity you like.
Be sure to wipe the inside of the glass of the devices so that there are no fingerprints left.
Beard tuning
The center of the car interior is the console, which is called the beard. It acts as a continuation of the torpedo and attracts the attention of all passengers.
When tuning, you can place in your beard:
- watch;
- radio;
- pocket for small items;
- armrest;
- USB sockets;
- switches;
- backlight
Typically, the beard for “classics” is made from plywood, fiberglass, or from spare parts from foreign cars.
Beard drawings can be found on the Internet or taken measurements from an old console. For the pattern, thick cardboard is used, which holds its shape well. The template is transferred to plywood and, after carefully checking the dimensions, cut out along the contour. Next, the parts are connected with self-tapping screws. The finished frame is covered with leatherette or other material in the color of the upholstery. The material is secured with a furniture stapler and glue.
Seats
Tuning VAZ 2106 seats can be done in two ways:
- change the upholstery;
- replace the seats by taking them from another car.
Seat reupholstery
To reupholster the upholstery yourself, follow the instructions:
- Remove the seats from the interior. To do this, move the chair back all the way and unscrew the bolts in the runners. Then slide it forward and also remove the bolts. Remove the seats from the interior.
Installing seats from another car
Updated seat upholstery will decorate the interior, but will not make them ergonomic or comfortable. To do this, seats from another car are placed in the “six”. Seats with a distance between the runners of approximately 490 mm are suitable here. Many car owners say that seats from Ford Scorpio, Hyundai Solaris, VAZ 2105, VAZ 2107 fit well into the cabin . But to get a good result, you cannot do without replacing the fasteners.
Replacing seat fastenings
The slides on which the seats in the “six” are located are not located at the same level, so the old fastening requires replacement. To do this you need:
- Move the seat back all the way and unscrew the front bolts. Then move it forward to the dashboard and remove two more screws from the runners.
Radio tape recorder
No upgrade of the “six” is complete without installing a speaker system or at least a simple radio. A standard place for a radio receiver in the beard of a small-sized “six”. It should be trimmed to standard 1DIN. This can be done with a metal file. Then sand the edges with sandpaper.
Installing a radio
The radio tape recorder is attached to the beard using a metal case. Radio installation steps:
- Having bent all the tabs, use special spatulas to remove the radio from the case.
- The metal base is inserted into the prepared hole.
- We fix it using special tongues.
Cables are included to connect the player. The most commonly used are:
- black - “earth”;
- red and yellow (often wound together) - ignition “+”;
- blue - power for the active antenna;
- white - front left (FL) speaker;
- gray - front right (FR) speaker;
- green - rear left (RL) speaker;
- purple - right rear (RR) speaker.
You can connect the radio to the ignition switch to the free INT terminal. Then it will only work when the engine is running and the ignition is on. This connection scheme will protect forgetful car owners from completely draining the battery.
If you twist the red and yellow wires together, the radio will no longer depend on the ignition. You can listen to music with the ignition off too.
Typically, a connection manual comes with the audio system. Following the instructions and color scheme, installing audio equipment in the “classic” will not be difficult.
Speaker installation
A good place to place the speakers would be the front door panels. If you choose the right size speakers, they will fit here very well. To install, perform the following steps:
- Remove the trim from the doors.
- On the casing we cut a hole for the speaker. A hole of the required size can be made using a template. To do this, trace the speaker on paper. You need to work carefully so as not to miss the size.
- We attach the column and screw it to the casing using the fastening that comes with the kit.
- We carefully lay the wires in the cavity of the doors so that they do not sag or fall out.
- We install the casing in place.
Don't forget to buy new fasteners for the door trim. Often, when removing the casing, the fasteners break.
Additional speakers are placed on the dashboard or on the side pillars of the windshield.
If the car owner changes the entire beard, creating it himself to his own size, then he can place a 2DIN radio in it. A player with a large screen will add charm to the appearance of the car.
Some craftsmen insert speakers instead of air ducts. But from personal experience I know that the standard “six” torpedo does not have side window blowing. In humid and cold weather, windows fog up and freeze. If you remove the air ducts for the windshield, the airflow will worsen even more. Therefore, I do not recommend this installation of speakers.
Video: installing speakers and Shumka
Antenna installation
The “six” did not have a standard antenna installed, but a place for it was provided on models before 1996. Adherents of original spare parts can find their original antenna on the car market. It is attached to the front fender of the car.
To do this, you will need to make a hole in the wing, install the antenna, tighten the bolts and connect the wires to the radio and ground. This installation method is quite complicated and not every car owner will decide to make holes in the body.
The ease of installation is distinguished by the interior active antenna, which is attached to the windshield. It is not exposed to precipitation, does not require additional care, and does not interfere with aerodynamics when the car is moving. When purchasing an interior antenna, please note that the kit should include instructions, fasteners and stencils to simplify installation. There are two ways to install a radio antenna inside the cabin:
- The housing is attached to the glass behind the rear view mirror, and the whiskers are glued in opposite directions at the top of the glass.
- The antenna body is secured to the top of the windshield on the passenger side, and the poles are glued along the edges of the glass at right angles to each other.
Body size values and checking compliance with specified parameters
There are engineering definitions of such concepts as body and geometric dimensions of a car. These include benchmarks between key points, as well as the shape and spatial arrangement of window and door openings. Now let's consider the issue of checking compliance with the parameters.
Vehicles that have been involved in road traffic accidents are checked. During the procedure, body parts and vehicle elements are checked for violations of symmetry, alignment and parallelism to each other. The following elements are examined with special attention: car diagonals, pillars, roof (diagnosed by the relative position of parallel doorways), symmetry, parallelism and correspondence of the front and rear windows of the vehicle.
The nominal dimensions between body parts are as follows.
- The distance between the front pillars is 889 mm, between the rear pillars - 819 mm with a tolerance of 2 mm.
- The diagonal dimensions between the front doors are 1273 mm, between the rear doors - 983 mm. Tolerance 2 mm.
- Window openings should reach 1375 mm for the front view and 1322 mm for the rear view, respectively. Tolerance 4 mm.
- The diagonal dimensions of the hood are 1594 mm with a tolerance of 3 mm.
- The diagonal of the trunk lid should correspond to 1446 millimeters. The boundary discrepancy should be within 4 mm.
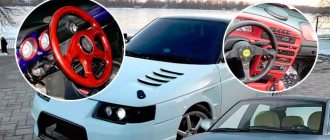
Steering wheel tuning
A comfortable and beautiful steering wheel contributes to comfortable driving. To achieve this, in the “six” you need to update the steering wheel in the following ways:
- install a steering wheel from another VAZ model;
- replace with sports one;
- retighten the steering wheel.
Installing a steering wheel from another VAZ model
The simplicity of the Zhiguli allows you to replace the steering wheel with a steering wheel from other VAZ models. Many car owners believe that it is not worth the work and effort that needs to be put in.
The steering shaft of the chisel is thinner than the classic one, and not by much, that is, it is not very easy to make an adapter for the hub. Plus the steering wheel is higher, normally it won’t engage the turn signal bump stop. In a word, you need to suffer a lot to install it properly. As for me, it’s not worth it, if you really want a normal steering wheel, then you need to go and buy it, the choice is very rich right now, but you need to look at them carefully, there are so many leftists that it’s just terrible.
https://autolada.ru/viewtopic.php?t=26289
Replacing with a sports steering wheel
A sports steering wheel will give the car a beautiful and aggressive look. You just need to know that the “six” is not intended for sudden maneuvers. The sports steering wheel has a smaller diameter and is more difficult to make turns with, so you need to get used to it.
Steering wheel reupholstery
In an auto store you can find braiding on the steering wheel for re-upholstering with your own hands. Such kits include the braid itself made of genuine leather, strong threads for sewing and a special needle.
Video: dismantling the steering wheel
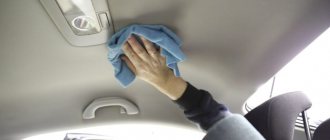
Other interior design improvements
The next step in upgrading the car will be to enhance sound insulation. Unfortunately, it is impossible to completely eradicate the problem of rattling and rumble, but it is possible to reduce the strength of the sounds. To solve this issue, 8 mm noise and vibration insulating material is taken and pasted throughout the cabin. The entire carpet in the car is also replaced.
For the VAZ-2106 car, interior tuning can be continued by installing electric windows, as described above, and replacing outdated seat belts. To do this, some install inertial belts from the “five”, which is more convenient and practical.
Then you can install a new sporty-looking steering wheel. It is smaller in size than the “native” one, and is much more comfortable in girth.
Many experts also advise changing the lighting in the cabin. To do this, you can use lampshades from the VAZ-2109.
You can also remove the old chairs and install new ones. The VAZ-2106 car has seats that are considered a relic, so it is better to replace them with new, sporty design seats.
The tinted glass (windshield) of the VAZ-2106 also looks good, which adds style and practicality to it.