Chevrolet Aveo T300 and 24 error codes warn the owner that there is a problem in the vehicle systems. Knowing and being able to decipher the error codes that are displayed on the on-board computer display, you can easily decide what to do in such a situation. In some cases, you should stop moving, in other situations you can continue, but then fix the problem.
Error 24 Chevrolet Aveo. Trends, reviews, videos
The content of the article:
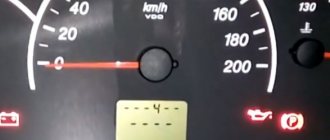
Up. Chevrolet Aveo Sedan (SONIC) LT › Logbook › Error codes T in the book there are these codes, but I already had 24 and 18.
After some time of operation, owners have questions about what error codes Chevrolet Aveo T and On-board computer installed on modern cars.
This is interesting! The most popular Chevrolet model is rightfully the Camaro. The history of Camaro begins in 1966. The name is taken from the word “Komrad” - comrade. The powerful car quickly conquered the market in this segment. The car turned out to be not only powerful, but also aesthetically attractive. It’s not for nothing that the Camaro is constantly seen in various films.
Forum Chevrolet Aveo Club (Chevrolet Aveo Club) Our news and announcements. ! Attention - these are not check engine error codes. (IMG: register to view) Messages are issued in the driver information center (panel.
Error code 89 Chevrolet Aveo Mator 1. The radiator has a coolant leak. It is set to a current of 10 Amps, so this device is checked first. Models have appeared in which a message is displayed instead of a code.
Error 24 - Logbook Chevrolet Aveo Sedan Aveoliner of the Year on DRIVE2
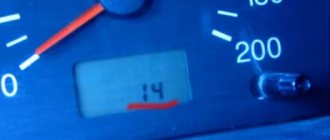
Code Description 15 High brake light faulty 16 Service brake lights 18 Low beam faulty. Error codes - decoding - chevrolet aveo club forum. Issue 18 chevrolet aveo sonic t - interior lighting part 2.
Deciphering Chevrolet Niva error codes. The most popular Chevrolet model is rightfully the Camaro. The Camaro story begins with a year.
The powerful car quickly conquered the market in this segment. The car turned out to be not only powerful, but also aesthetically attractive. It’s not for nothing that the Camaro is constantly seen in various films. II generation Information message codes that are displayed on the Chevrolet Aveo 2 instrument panel.
We also ask you to let us know if you have any problems playing the video. While driving, the traction disappeared, the dashboard began to flash, the automatic transmission went into emergency mode. Search this forum only?. It is an error related to temperature. The radiator has a coolant leak. I still have not told me if the warranty covers repair. Brother y lo llevaste a la agencia y fue termostato? I used my scanner but shows no error code.
If this error causes the fan in the motor to turn on, it means the thermostat is closed. I have the same problem. As soon as I stopped by the OD, the first question from the technician was about whether the fan turns on or not, to which a problem was found in the thermostat. Un Abrazo desde Colombia. Report a problem with playing the video. Is there a problem if I move so.
We will be very grateful to you if you find an error or problem with video playback on our website, please let us know! Similar videos in the “Tips” category.
Oil change for VW Polo sedan. Volkswagen Polo removal of protection. Ford S Max, oil change and service interval reset. Caps for alloy wheels Mercedes Benz silver barrel. Airbrush varnishing Snow Leopard. The question is interesting - how many horses are there in two liters? What does the author think about the firmware? Error code 89 Chevrolet Aveo Mator 1.
How are the codes deciphered?
As already noted, with each new car model, the number of codes increases. It is simply impossible to talk about all possible combinations in this article, so we will focus on some of them. There are a number of errors that occur most often, and some of them occur in extremely rare cases. It is advisable for car owners to print them out and take them with them in order to decide on the course of further actions at the right time.
An example is error
P0300
, which reports multiple misfires. To get rid of this problem, you need to check the entire ignition system of the car. Control sensors are located in all major vehicle systems, so any malfunctions that arise do not go unnoticed.
Description and meaning of error P0597
Chevrolet aveo t300 error 89
This is a generic powertrain diagnostic trouble code (DTC), which means it covers all makes/models 1996-newer. However, specific diagnostic steps will vary depending on the vehicle. Codes P0597, P0598 and P0599 all refer to the engine's electronically controlled thermostat. They are general codes, meaning they apply to all vehicles using this type of thermostatic control, however only a small number of manufacturers use this type of system. So this trouble code article is basically identical for all three codes. The P0597 engine code indicates that a fault has occurred with this system where the control voltage is non-existent. For the most part, German manufactured vehicles like BMW, Mercedes, Audi, Mini, Volkswagen, Opel and Jaguar use this system. An electronically controlled thermostat consists of various temperature and load sensors, a computer program and a control housing with a built-in thermostat. ConceptBy monitoring coolant flow or engine temperature electronically, the throttle part increases fuel economy and reduces emissions, while reducing temperature under load increases power.
Car diagnostics
With the release of each new version of a Chevrolet car, be it Aveo, Niva, Lacetti, Cruze or Blazer, it becomes increasingly difficult to decipher the codes, as their number is steadily growing. In order to decipher a combination of numbers unknown to you, it is necessary to diagnose the vehicle: without this there's no way around it.
Chevrolet Cruze car interior
The easiest way to diagnose is to check the messages on the dashboard. In Chevrolet cars, not combinations of numbers, but messages may appear on the dashboard. The owner may not know the translation of the phrases that pop up before his eyes, but these messages are important. Therefore, we invite you to familiarize yourself with their designation. Such messages are typical for the Cruze, Lacetti and Blazer models.
| Message | Designation |
| Change Engine Oil Soon | The engine fluid needs to be replaced soon. |
| Low Engine Oil Level | The engine fluid level is low. It is necessary to check the oil level in the engine and top up if necessary. |
| Oil Pressure Low - Stop Engine | Engine fluid pressure is low. You need to turn off the car. |
| Program Cluster | The instrument panel needs to be reprogrammed. As a rule, such a message pops up after replacing elements on the “tidy”. |
| Service Vehicle Soon | The message warns the motorist that a service is approaching. Usually it pops up when problems are detected in the motor control unit. |
| Vehicle Overspeed | Vehicle speed limit exceeded. |
To learn more about the errors present in the system of your car, you can use a special scanner. This device is a compact computer with software installed in it, designed to check a car on your own.
Diagnostics of a Chevrolet car using a special scanner
There are two types of scanners:
- Universal device. Such gadgets are used at most service stations. Such computers cannot be called full-fledged technical equipment for diagnostics, since they cannot always decipher all the errors present in the car.
- Dealer device. You will not find such a scanner on the open market: it can only be purchased from a dealer. However, these devices can flash the car’s on-board computer, program chip keys and detect breaks in electrical wiring. If you have such a scanner, then you can easily decipher errors in the BC (on-board computer) of your car.
Replacing the sensor
First you need to diagnose the problem.
You can try to fix the wiring by replacing the affected areas, as well as restoring the connection. Other cases involve the use of drastic measures. Temperature sensor.
Removal and subsequent installation of the outside temperature sensor in the Aveo T300 does not require specific tools. You can buy a new part in a store or from a familiar supplier.
Sometimes even a used part produces data correctly. But car owners with bitter experience advise spending money only on a new sensor for the Chevrolet T300 model. Its price will be about 10-15 USD.
Causes of malfunction:
- incorrect installation;
- mechanical damage;
- short circuit;
- circuit break.
The absence of correct digital values is the first sign of a breakdown. Installing a temperature sensor close to a radiator will lead to serious deviations in its readings. Jumps in readings to 40 or −40 are also observed during a short circuit.
Installing the sensor will take about 30 minutes. Detailed instructions will allow you to eliminate the possibility of errors during removal and installation:
- We remove the lower engine protection.
Remove the crankcase protection... - It is also necessary to remove the right fender liner.
...and the right engine splash guard. - Find the location of the sensor.
Release the wire block clamp... - Disconnect the sensor power supply connector.
.and disconnect the connector from the outside temperature sensor. - Turn the sensor counterclockwise.
Turn the sensor all the way counterclockwise... - We take out the sensor.
...and remove it from the hole in the front bumper trim.
Typical set of tools and accessories for replacement:
- set of heads;
- extension cord with ratchet;
- pliers;
- flat blade screwdriver;
- sealant;
- a socket for removing the sensor or a suitable wrench;
- container for draining liquid (5-6 l);
- coolant for topping up (0.4-0.5 l).
Sequence of steps for replacement:
- Cool the engine to a comfortable temperature.
- Place a container and drain the coolant from the radiator. To access the drain valve, you may need to remove the engine crankcase protection or plastic mud flaps. Some vehicles require removal of the heating system pipe.
- Disconnect the wiring plug from the sensor. Inspect the terminals, clean them from dirt and traces of oxidation. Check the condition of the wires going to the plug. If the insulation becomes cracked or otherwise defective, the worn area must be replaced. Connecting new wires must be carried out in compliance with polarity.
- Unscrew the faulty sensor. It is not recommended to apply a lot of force, as there is a risk of breaking the radiator. To facilitate the process, the use of liquids such as WD40 is allowed. To access the sensor installation location, it may be necessary to remove the battery, its platform, or engine air ducts.
- Lubricate the threads of the new sensor with sealant designed for use in elevated temperatures.
- Install a new O-ring on the sensor. Reusing gaskets is not recommended since the joint is not sealed.
- Screw the sensor into place and tighten to the required torque.
- Install the wiring plug onto the sensor.
- Restore the coolant level in accordance with the vehicle service instructions.
- Warm up the engine to operating temperature and check the operation of the new device. During the first days of operation, carefully monitor the coolant temperature. This applies mainly to domestically produced cars, since the sensors are often defective or set to the wrong response temperature.
On some cars, after turning on the ignition, a new sensor is diagnosed, which consists of turning on the cooling fan for 15-20 seconds (on a cold engine).
Thermostat Chevrolet Aveo T300. Checking the heater
However, before such work it is worth checking the thermostat heater. We carry out testing in this order:
- Turn off the ignition and disconnect the connector from the thermostat heater.
- Turn on the ignition. We check whether the ECU supplies power to the heater. There should be voltage between the second pin of the connector and engine ground. To check, you can use a test lamp or a multimeter. If there is no voltage, first of all we check the wiring for an open or short circuit.
- The low signal circuit (pin #1) should show no signs of voltage.
This is how to check the circuit of the heating element in the antifreeze distributor housing - Turn off the ignition. We disconnect the contact block from the ECU and check the resistance between contact No. 43 and ground. Resistance should tend to infinity.
- We check the resistance between contact No. 43 of the ECU connector and contact No. 1 of the thermostat heater connector. The nominal value is a minimum of 5 ohms.
- If all circuits pass the test, replace the thermostat heater. It is sold separately from the case.
Or we do as described above - throw away the heater and install a Borg Wagner thermostat valve without a heating element. If it is not possible to flash the ECU, install a resistance (150 Ohm) or a relay between the contacts of the heater block.
In this case, a relay is installed; it allows you to avoid having to flash the ECU, although the firmware is more reliable
Engine fan runs constantly while driving
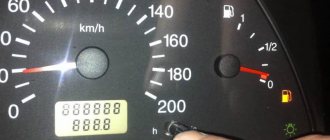
In the presented generation Chevrolet Aveo II, a problem with the fan appeared one morning. When the engine started, the fan immediately turned on, even if the engine was completely cold. The owner was further alarmed that the fan was running all the time while driving and a yellow engine light appeared on the clock. "Check the engine." He decided to return the car to our mechanic Pavel, who immediately began a basic check of the car's technical condition.
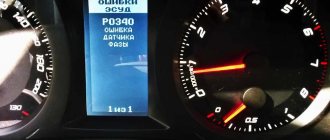
The first thing he decided to do was check the coolant temperature sensor. It sends a signal to the motor controller to turn the fan on or off. To confirm his assumptions, Pavel connected a diagnostic scanner to check for errors recorded by the engine controller. It soon became clear that his diagnosis was correct. The computer detected a P0117 error code, which indicates a problem with the coolant temperature sensor.
Fan switching sensors are located on the cooling system elements. The installation point is located in the path of the fluid flow supplied from the engine jacket to the radiator. This is due to the fact that the liquid in this line will have the highest temperature.
VAZ car sensor installed at the bottom of the radiator
More about Aveo: Turbocharger (turbine) for CHEVROLET AVEO / KALOS sedan (T250, T255) of any model.
Possible installation locations:
cylinder head;
On some vehicles, the sensor is combined with a coolant thermometer. The fans are turned on by the control unit based on temperature data. In this case, there is an additional sensor on the radiator that is used to operate the climate control or air conditioning. Triggering of any of the devices turns on both fans (on the engine and air conditioner radiators). A similar solution is found on Japanese cars.
On cars, two fan switching sensors can be used, located at the inlet and outlet of the radiator pipes. This scheme allows you to maintain the temperature in a narrow range.
Varieties
On cars, the following types of sensors are used to turn on the fan:
- bimetallic;
- waxy;
- thermistor;
- a sensor that operates on a circuit break or short circuit.
The first two types of sensors have an electromechanical operating circuit and can be of two varieties:
- single-speed, equipped with a single contact group that controls the fan in one temperature range;
- two-speed, equipped with a pair of contact groups configured to operate at different temperature ranges.
Regardless of the type, the sensors are a metal housing equipped with a thread. The body material used is non-ferrous metals based on copper (bronze or brass), which provide increased thermal conductivity. There is a hex key on the body that is used for installing the part. The wiring connector is located on the top of the sensor.
A bimetallic sensor contains a metal plate. In normal condition the contacts are open. As the plate heats up, it deforms and closes the circuit, supplying a control signal to the impeller motor turn-on relay. There are sensors that activate the fan motor directly without a relay. When the liquid cools, the plate returns to its original shape and the current supply to the motor stops.
The principle of operation of the sensor on a carburetor engine
Wax sensor
Sensors were produced for which wax or ceresite (or another substance with a significant coefficient of thermal expansion) was used as a working substance. As it warmed up, it expanded and shifted the metal membrane associated with the contacts. As it cooled, the volume of the wax decreased, and under the action of the spring the contacts opened.
Sensor with wax element
Thermistor sensor
The thermistor sensor works on the principle of changing the resistance of a resistor installed in the fluid flow. The temperature change is recorded by an electronic unit, which recalculates the temperature value in accordance with the schedule.
Sensors that operate on open circuit or short circuit
Devices that turn on the fan when the circuit breaks are often found on Japanese-made cars. You can check the sensor type by removing the plug. When the block is removed from the tensile sensor, the fan will turn on.
At what temperature does the fan switch trigger?
The temperature range of the sensor response depends on the type of engine power supply. On carburetor cars, devices with a switching range of 82-110 ºС are used. The activation temperature is stamped on the body of the part. On cars of the same model, there may be sensors calibrated for different temperatures.
According to the standard, sensors are divided into four groups according to operating temperature:
- 82-87 ºС;
- 87-92 ºС;
- 92-99 ºС;
- 104-110 ºС.
Russian cars use sensors of the first three groups. The engines of foreign cars are designed for more severe temperature conditions, so devices of the fourth category are often found on them.
When you start using distributed injection systems, the temperature at which the fan turns on is determined by the settings of the engine control unit. The sensor simply transmits temperature information to the control unit, which decides to turn on the fan according to the programmed program.
On injection machines, you can program temperature thresholds at which the fan switch on sensor will work. This should be done carefully, since it is easy to disrupt the temperature regime and damage the engine.
In the Plenty Car online store you can buy auto parts for Japanese cars (Toyota, Mazda, Honda, Isuzu, Lexus, Mitsubishi, Nissan, Subaru, Suzuki), European cars (Ford, BMW, Citroen, Peugeot, Alpha, Lancia, Fiat, Land Rover, Mercedes, Opel, Renault, Rover, Volkswagen, Audi, Skoda, Seat, Volvo, Saab, Jaguar), American cars (Chevrolet, GM, Chrysler, Cadillac, Hummer, Infiniti, Jeep, Pontiac) and Korean cars (Daewoo, Hyundai, Kia, SsangYong). If you were unable to find spare parts for your car yourself, contact our specialists. All information on the site is for reference only and is not a public offer as defined by Article 437 of the Civil Code of the Russian Federation.
What is the reason for the errors?
There are a lot of reasons, but it’s worth noting that they are not always critical, so you shouldn’t buy spare parts right away!
Precisely a smart one with a good scanner, who understands your Chevrolet or Opel, because if you connect a cheap scanner like ELM 327, then it simply may not detect the error!
SO, what problems there may be, I’ll start with, perhaps, the most harmless one:
Not enough coolant. Trite - YES? But for a couple of people, after replenishing the antifreeze, the errors went away. I attribute this to the fact that the coolant pipes pass through the throttle; it can be seen that if air begins to appear there, this causes an error. I did the same, my level was really low, but it didn’t help me!
Probably intrigued. To be honest, the diagnostician struggled with the car for almost a day. But I found a problem.
Air supply system
A malfunctioning or clogged throttle body can cause your vehicle's check engine light to flash. In this case, in order to fix the problem, you will have to dismantle the air distribution unit and clean it.
It is worth noting that car mechanics recommend cleaning with a special liquid, but motorists can also use a regular carburetor cleaner. Also, along with the throttle, it is worth cleaning the corrugations that supply air to the unit. As practice shows, it is also often clogged.
Troubleshooting Methods
Now that the main reasons have been identified - why the Chevrolet Aveo Check Light caught fire, you can move directly to methods for solving the issue. Of course, it is best to contact a car service to solve the problem, but many motorists, due to expensive repairs, try to solve the problem themselves.
So, before you start looking for a problem, you should connect to the electronic engine control unit and conduct a comprehensive diagnosis of all systems. To do this, you will need a laptop computer, a cable for connecting to the OBD 2 car and software that is suitable for this electronic control unit.
Having connected to the vehicle, it is necessary to carry out a comprehensive diagnosis of all systems, and then determine which errors have popped up and decipher them in order to determine the fault point. When everything is deciphered, you can proceed directly to troubleshooting.
Poor quality fuel
One of the most common reasons why the Check icons light up is low-quality fuel, which can often be found at gas stations. Thus, bad gasoline or diesel can clog fuel lines and its elements, which leads to effects such as tripping or stalling of the engine.
To fix the problem, you will have to drain the fuel from the entire system. It is worth noting that this process is quite labor-intensive and requires some knowledge in car design. Thus, you will have to remove the fuel tank and wash it, as well as replace elements that have become unusable.
Fuel pump and filter
Along with low-quality fuel, the fuel pump and filter suffer. Basically, the contamination of these elements leads to the fact that fuel does not flow in the required quantity, and this in turn leads to the appearance of a lean mixture, which can lead to high consumption or poor engine starting.
To eliminate the problem, you will have to replace the fuel filter. As for the gasoline pump, you will have to remove it from the car and replace the filter mesh, which is probably clogged. This procedure must be performed carefully, since you can accidentally damage the elements of the fuel pump.
Injectors
Another fuel element that is susceptible to low-quality fuel is the injector. Clogged elements can cause the engine to run rough. That is why this element occupies a high place in diagnostics.
In order to diagnose and eliminate the malfunction, you first need to remove the elements from the vehicle. Of course, some motorists recommend diagnosing and cleaning injectors directly on the car. But, to perform this operation, there is a special stand for washing injectors.
The injectors are disassembled and the nozzles are removed from them and installed in the stand. First, using different pressures, it is checked whether the nozzle is suitable for use. Then, if necessary, the element undergoes a cleaning process or is replaced with new ones.
Instructions for replacing the regulator
Replacing the fan switch almost always follows the same pattern:
- We need to prepare the “ground”. In some cars, this happens as follows: you need to rid the system of cooling liquid if the fan is installed at the bottom of the radiator, or, if the system has enough, remove water from the expansion tank. If the antifreeze needs to be completely drained, then you need to open the heater tap so that there is no residue. Important: do not pour the remaining liquid onto the ground, because antifreeze is quite poisonous.
- After this, you can remove the sensor by disconnecting the connected wires. Then, using the key, you need to remove the housing and unscrew it by hand. The new fixture must be tightened by hand, then a wrench can be used to apply the finishing touches. To prevent leakage, you can use a special thread tape, which will make the connection tighter and more reliable. After this, you can restore the contacts by returning all the necessary wires to their place, and fill the system with coolant.
More about Aveo: Aveo T300 corrugation
Price issue
In the photographs below you can see what the device looks like, as well as estimate the cost of various models.