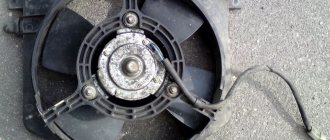
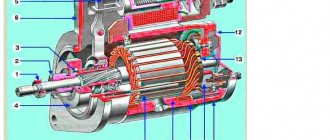
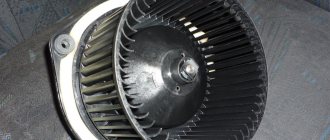
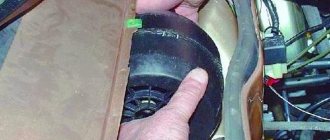
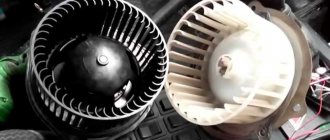
An electric motor driven fan is used to force air flow into the internal heating system. Thanks to this fan, the efficiency of the heater increases.
The fan is the most complex element of the entire furnace design, since it uses an electric motor. The DC motor itself is excited by permanent magnets. Despite the simplicity of the design, the engine gradually wears out, stops working or fails, which affects the operation of the internal heater.
Basic heating system malfunctions
If the stove stops supplying hot air to the cabin, or if this air is supplied with great difficulty, then the fan is not always to blame.
Thus, we can distinguish the following main types of malfunctions of the electrical component of the heater:
- contacts in the common block are oxidized;
- Additional resistance has burned out.
- The heater switch has failed;
- blown fuse;
The first step is to start looking for a problem with the fuse, designated in the general block as F7 and designed for a current of 30 A. It should be carefully removed from the block, it rings and, if necessary, replaced with a new one designed for the same current.
VAZ 2114 fuse box
Since fuse F7 protects not only the VAZ 2114 heater engine, but also devices such as mirror heaters, glove box lighting and the cigarette lighter, the failure of the safety element can be judged by their performance.
The second thing you need to check (in case the fuse is working) is its contacts at the point of attachment to the common block. If you notice oxides or severe contamination, they should be removed with a cloth moistened with VD scrub or kerosene, or simply with very fine sandpaper. Most often, such basic repairs allow the fan to return to normal operation.
Poor contact of the VAZ 2114 mounting block
The third stage of control should be a switch, for easy access to the contacts of which the central console should be disassembled. Next, you should take a device, which is a 12 V car light bulb with wires soldered to its terminals, and alternately connect its positive wire to pins 1, 2, 3 of the switch.
In this case, the minus wire must be connected to the body ground and the ignition must be turned on. If the lamp lights up with different brightness in all modes, the switch is working; if not, it needs to be replaced.
Sometimes a failed additional switch resistor causes the stove to operate incorrectly, which can be indicated by the fan turning on only in mode 3.
Having checked all these components (in addition to the continuity of all the wires connecting them), it is also necessary to check the VAZ 2114 stove engine itself. Most often, the same oxidized contacts are responsible for its inoperability, which should be cleaned in the same way as the contacts in the mounting block or soldered wires, to be soldered.
To check the fan for sure, it should be connected directly to a 12-volt voltage source: if its impeller remains motionless, the device has failed and must be replaced.
Recommendations and tips for repairing the stove fan
In order for the car heater motor repair to be successful, you should prepare in advance and take on board a few useful tips:
- If repair kits for your motor are available for sale, it is better to buy all the replacement parts (bearings, bushings, brushes) at the same time. Firstly, it’s cheaper than taking them separately, and secondly, it’s better to change everything at once in order to forget about problems with noise or improper operation of the stove for a long time.
- In some cars (for example, BMW, Mercedes), the climate control unit is located directly in the blowing area of the heater fan. If the flow is weak, it overheats, so if the motor operates intermittently or does not blow, there is no need to delay repairs. The climate control unit can burn out from overheating, which will result in repairs to the car's heater motor and climate system being much more expensive.
- In order not to replace a worn armature commutator, it can be machined by clamping the rotor in the chuck of a lathe. But after this, due to the reduction in diameter, you will need longer armature brushes or install slightly longer springs.
- If the journal of the shaft under the bearing is worn out and its inner ring does not fit tightly on the shaft, you can clean the shaft and build up a layer of metal by galvanizing (this can be done with a battery, as when removing saffron milk caps on the body).
- To extend the life of the motor, it is advisable to maintain and lubricate the bearing or fan bushing every time you replace the cabin filter, every 30,000 km.
After the repair of the car heater motor is completed, you need to check it, first by manual rotation, and then by connecting it to a 12-volt power source (battery). If the electric motor works normally, does not howl and does not catch anything anywhere, you can begin to install it in place. So that later you don’t have to disassemble the panel again, because it is often quite difficult to remove the stove fan.
How to replace a heater motor
Due to the fact that the fan is mounted on the heater housing and is accessible from the engine compartment, replacing the VAZ-2114 heater engine is a simple process and does not require disassembling the internal heating system and draining the coolant. Therefore, you can replace the fan yourself, without turning to a service station for help.
To replace the motor, the tools you will need are screwdrivers and a 8-10 wrench. The algorithm for disassembling the heater fan on a VAZ-2114 is as follows: 1. Turn off the power to the on-board network by removing the “positive” terminal from the battery. 2. In the cab on the driver’s side, behind the pedal board, we find the fan power wires: black (“ground” is pressed with a nut on one of the bolts) and blue (“plus”).
3. Unscrew the ground nut, find the blue wire connector and disconnect it. 4. Open the hood. 5. Remove the fan shroud with the filter installed. To do this, unscrew the 4 mounting screws.
6. Unscrew the fastening screws of the air intake grille installed near the glass. We remove the grille. 7. Unscrew the 2 bolts securing the fan housing.
8. Moving towards you, remove the body from the support. 9. Rotate the body 90 degrees and remove it from the niche.
Further actions depend on what exactly was purchased for replacement - the unit assembled with the housing or just an electric motor with an impeller. If there is a fully assembled structure, we install a new element using the technology opposite to that described above.
What is a stove fan
A car heater, which is popularly called a stove, is designed to perform a simple and at the same time important function - heating the interior. In addition, the device helps eliminate fogging of windows in cold and damp weather. During normal operation of the heating system, the temperature in the interior of the “nine” should be maintained at +20 ˚С with the same indicators outside, but only with a minus sign. In the legs, with maximum heating mode, the value should be maintained at +25 ˚С. One of the important components of the stove, in addition to the radiator, is the fan. The purpose of this device, its malfunctions and repairs should be considered in more detail.
Purpose of the device
The purpose of the motor is to increase the efficiency of the heating system and air circulation in the car. Its operation is based on air intake from outside and its subsequent supply into the cabin through the radiator. As a result of the air flow passing through the heat exchanger, the air enters the cabin already warmed up.
Heater operation diagram: a - VAZ 2108; b - VAZ -2108–01: 1- fan impeller; 2 — air duct for heating the windshield; 3 — windshield heating flap; 4 — damper for heating the driver’s feet; 5 — central nozzle flap; 6 - central nozzle; 7- radiator; 8 — heater control damper; 9 — driver’s foot heating window; 10 - internal ventilation duct
Where is the motor located on the VAZ 2108/09
The heater motor on the VAZ 2108/09 is installed in a niche in the engine compartment in front of the windshield, which is radically different from the design of the heater of classic Zhiguli cars, which have a fan installed in the cabin. The unit is an electric motor with an impeller mounted on it, through which air is pumped into the cabin.
The heater motor on the VAZ 2108/09 is installed in a niche in the engine compartment in front of the windshield
Connection diagram
To make it easier to find possible faults with the fan, an installation diagram may sometimes be required, the main components of which are:
- fuse mounting block;
- egnition lock;
- additional resistor;
- fan motor;
- operating mode switch.
The heater motor connection diagram consists of a fuse mounting block, an ignition switch, an additional resistor, a fan motor, and an operating mode switch
Replacing the fan motor
To replace the furnace fan, you will need to prepare the following tools:
- a set of keys;
- pliers.
- Phillips screwdriver
Also replace the VAZ 2114 heater fan in the following order:
- Disconnect the negative terminal from the battery.
- We unscrew the fastenings of the plastic protective strip located in the engine compartment.
- Remove the plastic cover itself.
- Remove the hood seal.
- Remove the protective casing from the heater motor.
- Remove a couple of motor mounting bolts from the sides.
- Find the “positive” plug of the device in the cabin under the panel and pull it out of the socket.
- Locate the ground wire from the engine, secured with a nut, under the panel.
- Unscrew the negative cable retaining nut.
- Rotate the engine to an angle that allows it to be removed.
- Disassemble the device.
Unplug the power cables
Remove the protective cover
Unscrew the screws that secure the fan
We disassemble the VAZ 2114 stove motor
Reassembly is done in the same manner, but in reverse order.
How to remove the heater motor on a VAZ 2115
I’ll start with the fact that it was incomprehensible what was going on with the car, you drive calmly and it stalls, you throw off the terminal, everything is fine, and so on 3 times. And then I climbed under the hood in the light of day and accidentally saw that the wire on the minus terminal was somehow held on by snot, I just started tighten it and the thread is broken. I went to the store and bought a Mystery MBT-2 terminal
I installed it, the 3rd day I drive everything is fine.
When I bought the car, the heater motor was somehow loud, but the air flow was good, over time the motor became noisier and noisier, and in the winter mornings it was so impossible to sit in the car and it began to supply less airflow. I couldn't stand it and bought a new motor.
In a previous post I ordered a cabin filter adapter. The weekend came and I went to change it. It’s extremely inconvenient to pull out the heater motor, it’s located this way (((but apparently the designers of AvtoVAZ thought it was better this way. Well, oh well, I removed the motor and compared it with the new one as it blows. The old one ate like, when I checked it with the new one, I didn’t expect such an effect from Akum, a strong air flow . the mood immediately lifted. I inserted the motor into the snail to check where it didn’t touch it, connected it, there was such a rustling sound ((the reason was in this grid.
I cut it out and it became as it should. I made wires and folders, I didn’t try to flatten them under the panel and disconnect them. And installed the cabin filter adapter.
and here's what the old one was like.
Well, what can I say after all this. The stove has become quieter (even in the second mode it is quiet) now you can sit quietly and talk in the car, the air flow has become strong from all the holes, it blows very well, well, accordingly it has become warmer, the window opens faster. I go and am happy now.
How to remove the heater fan on a VAZ-2114
If none of the above is successful, we will remove the electric motor of the stove; for this we will need a screwdriver and a small set of keys.
- Disconnect the terminals from the battery.
- There is a positive and a negative terminal in the cabin under the instrument panel; they must be disconnected.
- Next we move to the engine compartment of the VAZ-2114; the fan casing cover can be removed by unscrewing the four fastening screws.
- After opening the cover, you need to unscrew the two screws that secure the fan.
- Next, unscrew the screws that secure the air intake grilles to the body in front of the windshield. Let's remove them.
- Next, we remove the electric motor of the stove, since all its supports have already been disassembled. The fan is located on a hook on the case: slide it towards you and lift it up.
- After removing the fan shroud from the hook, you must rotate it 90 degrees to remove it from the shroud, or disassemble the heater shroud to make removal easier.
- Disconnect the impeller motor from the housing.
- Remove the impeller from the engine.
- There are several more options: either replace the electric motor with a new one, or try to bring the old one back to life (if it is advisable, for example, replace the brushes. If the winding breaks or there are problems with the armature, then it is better to replace the entire motor).
- Next, we assemble everything in reverse order, removing all debris from the heater shaft.
After the work done, we enjoy the rustle of the heating motor, the warmth and comfort of our car. These simple tips will help you save money and continue your planned trip.
VAZ 21099 injector heater fan does not work
If the heater fan does not work on your car, then this is a problem, regardless of the time of year! Car windows fog up even from the breath of the driver, but especially from passengers who are celebrating something. And opaque glass is an immediate safety hazard. In short, fan problems need to be fixed immediately.
Today we have a VAZ-2109 in our workshop. The owner is bothered by the crackling noise that accompanies the stove fan every time he turns on. To find the cause, the node will have to be removed. We will work “on the ground”. No special tool required.
Attention! First, as usual, disconnect the battery.
| Using a Phillips screwdriver, unscrew the four screws and remove the protective casing, spreading its side walls apart. | Using the same screwdriver, unscrew the two fan mounting screws.
|
| Inside the cabin, remove the positive wire from the connector and release the negative wire, secured to the heater stud with a “10” nut. | |
| Don't be tempted to use wire cutters. The twists that appear during assembly will not add reliability. |
| Using a screwdriver, pry up the rubber bushing and remove both wires out. | Remove the fan from the air supply duct. |
The operation is akin to a puzzle, because the fan can only be removed in a certain position. In a hopeless situation, the “corridor” can be slightly expanded by pulling the front wall of the box with your hands.
| And here is the defect! The cracking noise was made by last year's leaves stuck in the impeller (except for those that had already dried out and crumbled to dust). |
And yet, you shouldn’t “cut off the oxygen” by covering the air intake with tights - the fan can barely cope with its duties anyway.
Which motor to choose
When choosing a replacement device, it is recommended to purchase domestically produced electric fan motors, original ones manufactured by AvtoVAZ. Their number is indicated in the catalog as 2108-8101078. They are quite universal and are installed on VAZ models 8 to 9 and 13 to 15, so they are easy to find for sale at any car dealership.
Among the available analogues, but at the same time proven to be good, it should be noted: Fenox HM 81002 from Belarus and Master-sport 2108-8101078-PCS-MS made in Germany. Both of these engines have approximately the same cost (about 1,500 rubles) and are of equally high quality.
Fenox stove motor
If you want (or need, for example, due to damage to the air duct) to purchase and install the entire fan unit, you should give preference to the Pekar 2108-8101091 and Luzar 2108-8101091 models. They combine high quality workmanship and economical cost.
Pekar stove motor
Therefore, replacing the motor or even the entire fan yourself will not be difficult. The most important thing is not to rush, but first check all possible causes of the malfunction, and only then proceed with replacement.
Repair of the electric heater motor - replacement of the commutator and brushes
FAQ VW Audi Skoda Seat
The information is suitable for repairing many vehicles.
In general, the original heater motor on my car, after 27 years of operation and 442 thousand km, stopped spinning. Once upon a time, there was a case that it whistled for a year or more (approximately 2010 - 2012 it whistled) - lubricated it with cyatim and since then it worked quietly for many years, until the factory commutator and brushes wore out. I had no experience with such repairs, so I made a lot of mistakes in places - but nevertheless, I’ll tell you how it is, then the next ones won’t mess up. Removing the motor does not require dismantling the stove, but you need good screwdrivers and a retaining ring remover. 3 self-tapping screws and 1 retaining ring - removable and the motor can be removed (this is in versions without climate control). I would like to note that when reinstalling, be careful with the position of the protrusion, which should clearly fit into the groove of the stove body, do not use force.
By the way, the motor number is 4A0 959 101A
, some people recommend
Termal 402102M
; in theory, you should have bought it right away, but the desire to restore the original engine was stronger
At first, I didn’t notice that the commutator lamellas were basically gone and thought that I could get by with simply replacing the brushes. To replace them, you need to bend the 2 edges at the top of the holder and pull out the brush and spring:
Brush size 8x8mm:
I only had larger brushes at hand - I ground them to 8x8 using sandpaper + a file and set them up:
I expected everything to start spinning again - to hell. Then I already noticed that the collector was not just drained, but worn down to plastic. So let's sort it out. I messed up the sequence, so I’m writing right away in the way that, in my opinion, would be better. We drill out 2 rivets (replace them with self-tapping screws during reassembly) to put the plastic with the connector aside. Where the grease is smeared in the photo, there is a retaining ring hidden on the shaft that needs to be removed, and the plastic on the rivets will get in the way:
It is necessary to flare the bends so that the component parts are separated:
Then remove the top cover to the side accordingly. It is necessary to remove the impeller - I just heated it with a hairdryer (to a medium-hot state, the main thing is that the plastic does not “float”, but is just hot) and installing a drift in the shaft - I knocked down the impeller, which was lying on the knees. It is important to do this with the lightest blows possible. I messed up here somewhere, because the shaft shifted relative to the rotor, which “came back to haunt me” later. If anyone has good ways to remove the impeller, write.
And here is the state of the collector:
The condition of the bushings is almost perfect despite 27 years, so it was time to lubricate it when it whistled.
Next, I bent the corners of the collector, removed the wires from them, and pulled the collector off the shaft with pliers (you can use a mini puller). The “new” replacement manifold was taken from a JP Group fuel pump 1115203400
, which was covered in less than 10 thousand km - but what remained of it was an almost perfect collector. But the hole diameter needs to be 8mm, and his is smaller. You can probably use a drill - but I took it to a turner, he turned it exactly in the center so that it was tight and there was no runout (at the same time you can sharpen it, if necessary). I wrapped it with tape so that the turns would not unwind at speed:
I smeared the place where the collector was put on quickly for 5 minutes. epoxy
I bent the petals and soldered them at the same time, for better contact (not necessary). I pressed it into a drill and added a little shine to the copper slats:
Assembly:
We assemble everything and roll up the lid. On the reverse side there will be rings on the sleeve and a stopper:
And then I realized that some kind of crap doesn’t fit, the shaft comes out too high. This is where the jamb knocking of the impeller “backfired”. I had to hammer the assembled shaft into place. At the same time, the glued collector moved out...Very bad. But in the end, I dropped superglue onto the shaft and turned it over so that it would leak and block the collector. Well, experience, you need to be more careful. Further. Resting against the shaft, we stuff the impeller (slightly heated) onto the opposite side.
That's it, roll up the lid, assemble the plastic onto 2 self-tapping screws instead of rivets.
I connect it - and again the horseradish is not turning. I already took out the brushes and used a roller cutter to make them the desired semicircular profile - nothing. Then I finally realized what was going on - the brushes are graphite and their resistance is 30-50 Ohms, it turns out that graphite brushes are for power tools, where there are 220 volts and few amperes, but here it’s the other way around - 12 volts and many amperes, which are graphite will not be allowed through according to Ohm's law. So only copper-graphite ones
!!!
I just purchased copper-graphite Krauf KSB0012
, resistance ~0 Ohm, the size is exactly as it should be - 8x8mm, the length is something like 20mm (too much, you can’t insert a spring). The price is about $1, you have to order it in auto parts stores like existential, etc., be careful, because... In retail, some scammers try to sell them for almost $5, which is a bit much for such a small thing.
I used a stone in a drill to give it a profile so that it would rub in faster, and the excess length was removed.
Due to frequent bending and bending during experiments, the corners may fall off - the solution is simple - tin the top of the U-shape. jumper made of thick copper wire:
When assembling, don’t forget to lubricate the bushings (I used cyatim for many years, now XADO is repair red)
ALL!!! Now, everything is finally working. It blows as it should, better than it was, and if it gets used to it, it will be even better. There is no vibration at all. And in terms of noise - without starting, you can hear some rustling at speed 1, but when it’s running you can’t hear it anymore. At 2-4 speeds everything is fine.
I'm glad if they give advice on the process, which is better. Who will do it - don’t repeat my mistakes - then you will repair it quickly and cheaply.
Continuation and all discussions of the report here
Thanks: Jurik-11
How can I find the information I need here?
Decoding the factory equipment of the car (English) Decoding the factory equipment of VAG in Russian! Diagnostics of
Volkswagen, Audi, Skoda, Seat, error codes.
If you have not found information on your car, look at the cars built on the platform of your car. Most likely, the information on repair and maintenance will be suitable for your car.
How to replace the VAZ-2114 stove motor with your own hands
A warm interior is the key to a pleasant and comfortable trip by car. A non-working stove can not only cause discomfort, but also generally become an argument against further trips by car. It’s one thing when you arrived at the garage, noticed a non-working heater and refused to move further in the car during a breakdown, but if this breakdown caught you on the road, then it’s far from the nearest service station and it’s not possible to drive a car with a non-working internal heater, because that the windshield becomes covered with frost and further movement becomes dangerous. Then all that remains is to transport the car using a tow truck or try to repair it yourself.
Let's sum it up
As you can see, a regular heater fan on domestic VAZ models can become a real problem, as the engine often makes noise and hums. Of course, this affects the comfort of the car. It also happens that the engine of the stove 2114 and other similar models completely fails. In this case, the stove does not work, and the internal heating system itself is fully operational.
We also recommend reading the article on how to replace the stove radiator (heating radiator) on a Lada Kalina. From this article you will learn about the features of replacing the Kalina stove radiator and how to remove the stove radiator on Kalina.
In such a situation, the only correct solution would be to replace the stove fan with a VAZ-2114. Since such a replacement is simple, you can solve the problems yourself in a regular garage. This means that there is no need to contact the service, since all the work can be done independently in 1-2 hours.
Finally, we note that when carrying out such work related to the ventilation and heating system of the car interior, it is important to achieve maximum density when connecting individual elements. This will prevent leakage at the outlet and ensure good airflow quality and strong airflow even at low furnace fan speeds. For this reason, you must follow the guidelines above for disassembling and reassembling the item covered in this article.
Why the VAZ-2109 stove fan does not work and how to fix it
A stove in the interior of a VAZ-2109 car is necessary in winter. Therefore, if for some reason its fan stops working, the car owner begins to seriously worry and takes all actions to solve the problem. This article will discuss the reasons for the failure of the VAZ-2109 stove fan and methods for identifying them.
Functions of the VAZ-2109 stove fan
The VAZ-2109 car heater is designed to heat the vehicle interior. It also helps get rid of glass fogging from inside the car. Its heating power is designed to ensure that at 25 degrees below zero, an optimal thermal regime will be maintained inside the car - from 16 degrees Celsius.
One of the main elements of a car heater is a fan. It is needed in order to drive air from the external environment, which enters the heating device through the radiator. Cold air undergoes a warm-up procedure and enters the car interior already warm.
The stove in a car may stop performing its direct functions if the fan included in its design stops working.
Therefore, experts recommend that the vehicle owner understand the reasons for its breakdown.
Reasons why the VAZ-2109 stove fan does not work
Experienced specialists involved in repairing the VAZ-2109 identify several of the most common reasons why the fan of a car heater-stove stops working.
The first reason is a burnt-out fuse element. It is called the most problematic, since it can be difficult to determine that this particular part has failed. To do this, it is necessary to review the entire conductive circuit of the vehicle's heating system. If the problem lies precisely in a damaged fuse, then you should know its marking - “F7” (it corresponds to the specified fuse current strength of 30 A).
Connection diagram, resistors and fan relays
Changing a fan is, in principle, not difficult, but you will have to remember about military service and the vocabulary of the duty officer. We have placed on the page the technical characteristics of the fan and its connection diagram, if this somehow helps with disassembly. Just in case someone cannot find the original fan, the motor must develop at least 4200 rpm with a current consumption of no more than 14 amperes.
Whistling and howling can be different in different engine operating modes. This is due to the fact that the connection diagram assumes the presence of a resistor with a resistance of 0.23 and 0.65 Ohms. One limits the current for low speed, and the other limits the current for obtaining second speed. But this is a theory.
What to do if heat transfer from the stove is low
We unscrew the passenger dashboard from the side. Take a close look at the pipes coming out of the furnace. Assess how hot they are. If they are cold, they are clogged and need cleaning. After cleaning them, monitor the engine using a sensor.
What should I do if the replacement did not work and the engine still does not start?
To avoid unforeseen situations, the best way out of their situation is to contact a car service.
Comfort in a modern car should be quiet. That is, all devices and devices that must operate silently must be quiet, otherwise, due to the singing choir of the air conditioner, heater, windshield wiper motor and washing machine, the sound background may not be the most favorable for traveling. One of the soloists in this symphony may be a stove fanatic, so we'll look at some ways to combat this.
Content:
Reasons for refusal
If your heater is not working and the engine shows no signs of life, you definitely need to check the system and find out what the problem is. However, first you need to clearly understand why the error may occur and whether the engine can be repaired. Let's look at the main problems.
- Fuse failure. If a short circuit occurs somewhere in the circuit, the fuse will protect the fan from damage. It is very easy to replace and there is no need to buy a new device. However, it is also important to find out exactly where the short circuit occurred in the circuit and for what reason. If this is not corrected, the next fuse installed will blow in the same way.
- Poor contact in the mounting block. This malfunction occurs on a wide variety of cars, and the VAZ-2114 is no exception. Most likely, oxidation has occurred.
- Problems with the ignition relay. The engine starts only after the car has warmed up. When such problems occur, you need to check the relay, which is most likely to stick. Replace it and check if the heating works.
- Heating operates only at third speed. A feature of the fan power circuit is a direct connection only to the 3rd speed; the remaining modes are connected through a resistor. If you encounter problems like these, it's time to replace the resistor.
The above list of “diseases” is far from complete.
There are other fan malfunctions, but we will not go into detail about them. Next, we’ll talk about how to disassemble a part for repair or replacement.
Signs and causes of stove motor failure
If the motor is noisy or the stove is blowing weakly, the problem is not necessarily that it is broken. To identify the cause of the malfunction and obtain a comfortable microclimate in the cabin, you need to analyze the symptoms indicating improper operation of the motor.
You need to start repairs if the stove motor cracks/creaks/howls/whistles. In this case, you can get away with simply cleaning the fan impeller or lubricating the bearings, or you may have to disassemble it for diagnostics. In the table you will find the main symptoms and where to look for the cause of the malfunction, and below there will be information on how and what you need to do in order to repair the heater motor with your own hands.
| Signs of breakdown | Possible causes of the malfunction | How to repair |
| Rustle | Impeller clogged | Cleaning dirt, replacing the cabin filter |
| Makes a loud noise | Brush wear | Replacing motor commutator brushes |
| Impeller play | Lubrication or replacement of bearings or motor bushings | |
| Air does not flow through the deflectors | Filter clogged | Cleaning the housing and replacing the cabin filter |
| Fan electrical circuit broken | Finding a break and fixing it | |
| Motor failure | Checking the motor with a multimeter (brushes, windings, armature) and repairing or replacing damaged parts | |
| Heater fuse blows | Short circuit in the supply line | Testing the power supply and motor control circuits, searching for a short circuit, eliminating it and replacing the fuse |
| Short circuit in the motor | Checking and troubleshooting the motor, searching for a short circuit, eliminating it or replacing the motor | |
| Replaced heater motor, blows fuse | Short circuit or incorrect connection | Testing the stove circuits (preferably with current measurements), searching for a source of increased current and eliminating the problem |
| The motor beeps or whistles when cold | Lubrication deficiency | Disassemble and lubricate rotating components |
| The heater blows weakly and the motor turns slowly | Filter clogged | Cleaning the housing and replacing the cabin filter |
| Motor brush wear | Replacing motor brushes | |
| Motor control relay malfunction | Replacing the heater motor relay in the mounting block | |
| Poor contact with ground in the fan circuit | Continuity testing of the power supply and fan control circuits with resistance measurements, searching for weak contacts and restoring them | |
| Faulty current limiting resistor | Checking the resistor and replacing it | |
| Broken armature windings | Checking the rotor and motor windings, replacing a damaged armature or electric motor assembly | |
| Fan speed is not adjustable | The rheostat (resistor) in the motor control circuit is faulty | Repairing or replacing the control resistor |
| The stove control knob is faulty | Checking the stove handle with a multimeter, replacing it with a working part | |
| Heater motor vibration | Worn bearings and/or bushings | Replacement and lubrication of bearings or bushings, maintenance of the stove motor |
| Heater motor doesn't work | Open or short circuit of power supply | Finding a break or short circuit and eliminating it |
| The motor burned out | Restoration of the stove motor or its replacement | |
| Fan switch is faulty | Switch repair or replacement |
In many cases, repairs may not be necessary; servicing the heater motor is sufficient. For example, if the fan barely blows, after replacing the filter the problem very often goes away. If even with a new filter the pressure remains weak, there are two options: either the electric motor itself is faulty, or the filter is simply installed incorrectly (on the wrong side or skewed).
The heater motor is often located in a hard-to-reach place, so you need to remove and disassemble it after you are convinced that it is the problem.
If the stove motor has already whistled, started to roar, or simply stalled, it is important to immediately detect the cause and promptly eliminate it, since in the early stages most problems can be eliminated with “little cost.” In this case, we approach the electric motor, find the defect, repair it, and if repair is impossible or impractical, we simply replace it.
Stop trash
In some cases, you can negotiate with the engine by lubricating the bushings with graphite lubricant. There is no guarantee that he will calm down, but you can try. Throw it away anyway. The noise, creaking and squealing of the fan can be attributed not only to the engine itself. Often there is a banal clogging of the air duct and debris getting into the fan. The narrowness of the situation lies in the fact that it is almost impossible to control it without disassembling the fan.
Whatever you want, you have to fight for the heat in the car. And if this heat is also quiet, it is priceless. However, it is better to try to prevent debris from getting into the air duct, so the VAZ 2114 will delight its owner with a warm and quiet interior. Good luck on the roads!
An electric motor driven fan is used to force air flow into the internal heating system. Thanks to this fan, the efficiency of the heater increases.
Replacing a heater motor on an old panel
If you need to replace a stove fan that for one reason or another does not work, does not perform its functions well, or simply burnt out, you will have to carry out a set of measures.
In this case, the official manufacturer recommends performing a complete dismantling of the entire panel, dashboard, center console and other elements. Usually this work takes at least 3-4 hours. Reassembly is even more difficult, since you need to remember or mark the location of all connectors, elements and wires. It is extremely easy to make a mistake at the stage of disassembling the panel if you are doing this for the first time. There are even more chances to collect everything differently than it was.
Therefore, folk craftsmen have found workarounds to solve this problem. They simply use an alternative dismantling option. Yes, some elements will need to be intentionally broken, but this will not significantly affect the quality of the reassembly and the subsequent condition of the Gazelle with the old-style panel.
In order to change the electric heater motor on a Gazelle with an old panel with minimal time and energy costs, you need to take into account the following nuances:
- To dismantle the electric motor without removing the entire dashboard, you should know that the main obstacles are the glove compartment and the right air duct of the windshield.
- The glove box, that is, a niche or pocket, on a Gazelle with an old-style panel is held in place using 2 screws.
- But the main problem or obstacle lies in the 7 solder joints. It is them that will have to be broken in order to go around.
- The solders break off quite easily. To do this, you need to take a thin but strong screwdriver with a flat blade and insert the tool into the gap between the glove compartment and the panel.
- Having applied a certain force, gradually all 7 solder parts need to be broken. After this, the glove compartment niche can be safely removed and temporarily removed.
- Figuring out how to reattach the glove box panel won't be too difficult.
- You can make several holes for a bolt and nut and fix the elements together.
- The second obstacle is the air duct or a kind of windshield sleeve. Like the glove compartment, it is located on the front passenger's side in the area of his left leg when sitting in the seat.
- The right windshield air duct on a Gazelle with an old-style panel is held in place by one self-tapping screw and a pair of bolts.
- The only self-tapping screw is located directly next to the stove. Unscrewing it will not be difficult. After unscrewing the fastener, do not forget to save it and remember its location. After all, you still have to reassemble it.
- A pair of bolts are unscrewed with a 10mm head. The bolts are located on the left and right sides of the right slot of the windshield air duct.
- The main difficulty is that these bolts can only be accessed from below, from under the panel.
- Here you will need to move the passenger seat completely back, or dismantle it, conveniently located under the glove compartment.
- The right bolt is completely unscrewed. But the left one can only be loosened without removing it from its seat.
- The right bolt is extremely easy to get to. In the case of the left, there are two ways. The first option provides for flexible arms and good lighting. In the second case, you will have to remove the radio. Now decide for yourself which option suits you best.
Having removed literally a couple of elements that interfere with access to the electric motor, all that remains is to dismantle the faulty electric fan of the stove itself.
To do this, illuminate the disassembled area with a flashlight or a carrying lamp and find the location of the electric motor of the Gazelle heating system. Next, you need to remove the rubber seal if present, disconnect the heater fan connector and remove the problem unit.
Assembly is performed in strict reverse order. Reinstall the new fan, connect its electrical connector, and put the negative battery terminal back on.
Just at this stage, do not rush into reassembly. First, start the heater and check whether after replacing the electric fan, the problem really went away and the heater began to function normally again.
If all is well, return the windshield air duct and glove compartment niche to their place. The latter, deprived of solder after dismantling, is usually fixed simply with a few self-tapping screws. But you can get confused, make holes for the bolted connection and tighten it with nuts. Now decide for yourself.
How to remove the heater fan on a VAZ-2114
If none of the above is successful, we will remove the electric motor of the stove; for this we will need a screwdriver and a small set of keys.
- Disconnect the terminals from the battery.
- There is a positive and a negative terminal in the cabin under the instrument panel; they must be disconnected.
- Next we move to the engine compartment of the VAZ-2114; the fan casing cover can be removed by unscrewing the four fastening screws.
- After opening the cover, you need to unscrew the two screws that secure the fan.
- Next, unscrew the screws that secure the air intake grilles to the body in front of the windshield. Let's remove them.
- Next, we remove the electric motor of the stove, since all its supports have already been disassembled. The fan is located on a hook on the case: slide it towards you and lift it up.
- After removing the fan shroud from the hook, you must rotate it 90 degrees to remove it from the shroud, or disassemble the heater shroud to make removal easier.
- Disconnect the impeller motor from the housing.
- Remove the impeller from the engine.
- There are several more options: either replace the electric motor with a new one, or try to bring the old one back to life (if it is advisable, for example, replace the brushes. If the winding breaks or there are problems with the armature, then it is better to replace the entire motor).
- Next, we assemble everything in reverse order, removing all debris from the heater shaft.
After the work done, we enjoy the rustle of the heating motor, the warmth and comfort of our car. These simple tips will help you save money and continue your planned trip.
Signs of a faulty Renault Logan heater motor
More often, the cause of a stove motor breakdown is wear and tear of parts over time, since rings, brushes and other moving parts will sooner or later fail. Less common are problems of an eclectic nature - oxidation of contacts or broken wires. Often the lubricant on the moving parts of the motor and fan simply runs out.
Signs that the Renault Logan heater fan is working in abnormal mode and the unit will soon fail can be determined by certain signs:
- the stove changes the sound during operation, the noise increases;
- the heat flow becomes uneven and weakens;
- The stove does not turn on the first time or takes a long time to gain momentum.
The stove whistles when operating
A whistle is heard from under the central panel and is a sign that the heater motor bearing has failed and if the motor is removed, you can see that the bearing has noticeable play on the shaft. Such a whistle indicates that the stove will soon break down and it is better to replace it. Sitting in the cabin becomes not very pleasant; the monotonous whistle is very tiring. If you simply lubricate the mechanism, this will not eliminate the problem for a while, but the whistling will inevitably resume.
The stove turns on poorly or does not turn on at all
On older versions of Logan, the stove simply stops turning on. If you hit the surface of the console on the right side, it began to work, sometimes with a characteristic noise. There are several reasons for the mechanism to jam:
- Throwing in a loose bearing.
- Development on the shaft.
- Lack of lubrication on mechanisms.
- The motor brushes are worn out.
Reduced air flow from the stove
This problem occurs when the curtains on the center panel are fully open. During the cold season, even with full power, the car still remains cold. The driver notices the problem only after a while; the windshield may not freeze at sub-zero temperatures, limiting visibility. Often in the fourth position the air flow is less intense than in the second.
The main reason for such a breakdown is a problem with the motor. Less commonly, the cabin filter is clogged. In this case, you need to disassemble the stove and inspect the engine and cabin filter. Only then will it be possible to identify and eliminate the cause of the malfunction.
Diagnostics
The main task is to identify the cause of the breakdown and assess your capabilities in a specific situation.
Let's start with simple ones and move on to more complex ones:
- We check the fuse (F-7 for a voltage of 30 A), which is responsible not only for the heating system, but also for the operation of the cigarette lighter, heated mirrors, glove compartment lighting, and headlight washers. Therefore, when this fuse blows, all of the above devices refuse to work. If it works, we move further along the chain.
- Turn on the car's ignition and set the speed control to positions 1, 2, 3 in order. If the fan does not work in any of these positions, move on. If the electric motor does not show signs of life in the first and second positions of the speed switch, but in the third position it starts to work (the fan is powered at the first and second speeds through a resistor, and in the third speed the current flows directly to the electric motor), the problem lies in the resistance or in the switch itself .
- If the heater motor comes on after the car engine has warmed up, the problem is a faulty ignition relay. Solved by replacing the relay.
- If the stove motor refuses to work in any mode, the fault remains - it is the stove motor itself.
The problem with the old panel and the advantages of the new one
Improvements in the automotive industry bring many positive changes, including improving weaknesses, eliminating factory defects, and improving technical and operational characteristics.
In fact, there are not many complaints about the Gazelle with the old-style panel. Quite functional, informative and of high quality for its time and cost. But if the question concerns such a unit as the heater electric motor, which needs to be removed and replaced with a new one, then the car owners have serious problems.
Compared to the updated version, when it comes to the new panel, it was extremely simple to replace the heater motor if it does not work or does not function correctly. You will clearly see this in the next section.
As for the old panel on the Gazelle, changing the stove motor will be objectively problematic.
In fact, there are two options available.
The first replacement method involves completely removing the entire torpedo. Yes, the work ahead is extremely serious and lengthy. You will need to remove literally everything, including the dashboard, steering wheel, center console, glove box, and disconnect many terminals and wires. The task is not easy, and it is not recommended for a beginner to take it on. This requires the help of one more person.
In the case of an old-style stove, only a few decide to take on the task of replacing an electric fan. Therefore, they often go to specialists with this question, who will change the unit for a certain fee.
At the same time, there is a high probability that the craftsmen themselves will decide to change your faulty electric motor in a somewhat roundabout way. It is not provided in the official instruction manual, but it significantly saves time and effort.
How to replace the VAZ-2114 stove motor with your own hands
A warm interior is the key to a pleasant and comfortable trip by car. A non-working stove can not only cause discomfort, but also generally become an argument against further trips by car. It’s one thing when you arrived at the garage, noticed a non-working heater and refused to move further in the car during a breakdown, but if this breakdown caught you on the road, then it’s far from the nearest service station and it’s not possible to drive a car with a non-working internal heater, because that the windshield becomes covered with frost and further movement becomes dangerous. Then all that remains is to transport the car using a tow truck or try to repair it yourself.
