Nowadays, any modern car is packed with electronics and various additional functions that make driving comfortable and safe for people. However, not all devices are installed by manufacturers. Drivers already add a lot of interesting and useful things to their cars. For example, a video recorder.
A recording camera is actually an excellent assistant that will help out in difficult times - a car accident, an accident, set-ups and other incidents that may occur on the roads. Let's say there was an accident with victims, in which the driver was completely innocent. It will be very difficult to prove this to law enforcement agencies, and often no one will listen to you. After all, it is much easier to punish a person than to find out the truth. It is for such cases that a video recorder exists. The entry is the driver's argument. And not only in case of an accident, but also in other important situations. Sometimes very interesting shots are captured on camera.
Based on all that has been said, you simply need to install such a device for yourself. But only a few know how this is done and what connection methods exist. Most often, the DVR is connected to the cigarette lighter circuit, but this is not the most convenient option. There are plenty of others worth learning about.
Connection to the lampshade
The closest power source to the DVR located at the top is a lamp that illuminates the interior from above. For the connection to be successful, you need to purchase an additional power module and a female cigarette lighter socket.
@drive2.ru
Stages of work:
- Disassemble the lamp by removing two screws and one latch.
- Turn off the power to the light source.
- Solder the “mother” by connecting the end of the red wire to the red, and the black to the black.
- Plug in the power supply of the recorder.
- Reassemble the lampshade in reverse order.
Why might you need to connect a recorder without a cigarette lighter?
Today, a DVR is not a luxury, but a necessary and useful gadget that should be in the cabin of every car. The ability to record on video the situation that occurs while the car is moving or parked, as well as what is happening in the cabin, helps in many controversial situations that arise, for example, during an accident. Also, the video from the recorder is a confirmation of insurance claims for the insurance company.
The DVR allows you to record the situation that occurs while the car is moving or parked, as well as what is happening in the cabin
A special feature of the recorder is that it must be able to work not only while the car is moving, but also in the parking lot, as well as when the engine is not running.
The easiest way to connect such a device is through the cigarette lighter, but there are often situations when this is impossible to do:
- the cigarette lighter is occupied by another device;
- The cigarette lighter socket does not work;
- There is no cigarette lighter in the car.
Connection to ignition
In this case, the camera will turn on when the key is turned in the ignition switch.
Step-by-step instruction:
- Fix the camera and connect via the adapter.
- Route the cables along the top or bottom of the windshield.
- Make a connection.
- Connect plus with plus, and minus with minus.
In order not to confuse the purpose of the cables, use a tester to ring the contacts.
@drive2.ru
DVR placement
Before you think about how to connect a recording device to your car's network, you must first place it correctly. At this point, it is important that the camera angle captures the entire road and preferably the edge of the curb. By the way, this is done individually with each recorder, since the viewing angle of all cameras is different and they also need to be positioned in a special way.
For example, if the equipment is designed for 120 degrees (fisheye effect), then it can be attached closer to the windshield. Accordingly, the lower this degree is, the further the device will have to be installed.
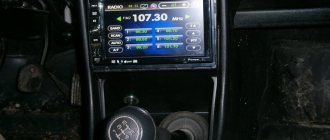
Using a radio
In this particular case, the wires from the camera and the player are connected and the junction points are isolated. If the car radio operates on a voltage of 5V, then the cable is attached directly to the plug. The block or transformer is hidden under the instrument panel. The wires are pulled through the installed chamber.
Modern car radios are usually equipped with USB connectors. In this case, the process of connecting the DVR is greatly simplified.
@drive2.ru
Where to install the DVR
Another important point is location. Since space is limited in the car, there are only a few places for the camera:
- Windshield. The most convenient way of placement.
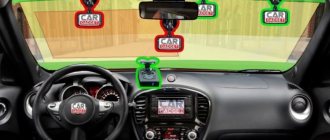
In this case, a suction cup-shaped bracket, which is attached to the glass, does its job perfectly. It’s good if the device is light and one suction cup is enough for it. Then it is possible to attach it to any part, but the most suitable place is near the rear view mirror, that is, by class=”aligncenter” width=”650″ height=”433″[/img] The best places to install the video recorder on the windshield: 1, 3, 5, 6 and 8. Locations marked in red are not recommended for installing the DVR. - Front Panel. Also a good option. Here the DVR can be mounted either on a suction cup or using screws or bolts.
Location of the DVR on the front panel
In fact, there are many places where you can install a recording device. This could be the roof, the mirror itself, or the panel. The main thing is to have the correct angle and secure fastening. You also need to consider that almost every car has airbags. They are built right into the front panel. When triggered, they can break the recorder, causing damage to the front passenger and driver. You need to pay attention to this point during installation!
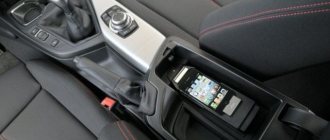
By battery
The method, although reliable, is not easy to implement. It is better to entrust such work to a person with a technical education. To reproduce the connection, you will need to purchase an adapter, a charging mechanism and a 15A fuse.
Proceed in the following order:
- Install the DVR in the planned location.
- Connect the cables through the adapter, taking into account the polarity.
- Pass the wire under the trim and pull it to the engine compartment.
- Install the fuse.
- Connect the positive to the battery terminal, and the negative to the on-board power supply cable.
Please note that with this type of connection the camcorder will not turn off at all, so the battery will drain quickly.
When using such a connection, it is advisable to install a camera shutdown button at the same time in order to save battery power.
What you need to know when connecting a DVR
You can connect a recording device anywhere. Any flashlight, light bulb, or electrical appliance runs on electricity, which comes from the battery through the wiring. If you find the positive terminal, then connecting to it will not be difficult. The question is how it will work. For example, if it is a ceiling light, then voltage is supplied there constantly, unlike the cigarette lighter. Most devices only work with the ignition on, which is not exactly what the DVR prefers. Simply put, it will only work from the cigarette lighter when the car is running. Well, or you’ll have to keep the key in the lock when you go to the store or somewhere else.
The recorder works from the cigarette lighter only when the car is running
Tension is also an important point. The camera consumes only 5 Volts when the car network has 12. To prevent the device from burning out, you have to include a converter in the power circuit and have it. This adds additional hassle and care. If you are connecting to a radio, you do not need a power supply. But remember that not all audio systems operate on 5 Volts. There are many types that consume standard voltage. Then you will need a converter, which often comes with the recorder.
Should I use an alternative connection?
Experts do not recommend connecting the DVR to your car bypassing the cigarette lighter. It is recommended to use such electrical circuits exclusively as a temporary option, but in no case permanently, since the cables will very quickly succumb to thermal aging.
It is possible to install and connect the DVR bypassing the cigarette lighter, although you will have to tinker a little. If you have never done anything like this before, then it is better not to take on such work so as not to damage the gadget.
Remember that a DVR in our time is not a luxury or an indulgence, but a reliable way to protect yourself from unfounded claims or accusations in the event of an emergency.
DVR connection options
Once the camera is installed, it's time to connect it. Do not forget that the connection method will depend on the location of the device. So, for example, if it is mounted at the top of the windshield, it would make more sense to power it from the roof light. That is, in order not to drag extra wire around the cabin, it is advisable to look for a power source nearby. Let us remind you that the DVR consumes only 5 Volts, which means you need a converter that will also be included in the circuit. Then it’s enough just to find a ground somewhere (car body) and a voltage source coming from the battery.
You also need to take into account that you will have to dismantle some parts of the interior trim in order to hide the wires under it. Therefore, it would be more logical to place the recording device locally. Although, if the cord doesn’t get in the way and doesn’t spoil the interior, then you don’t have to touch the trim. The most common connection points are:
Connecting the DVR to the lampshade
In this case, it is advisable to choose the overhead lamp, since it is closest to all other lighting devices.
DVR connected to the lampshade
First you need to remove the diffuser. This is done by unscrewing the screws or unfastening the latches. Then it is better to use a voltmeter to find the right wires. Just do not confuse those that come from the door relay, otherwise the recorder will only work when the door is open. Next, we correctly (plus to plus, minus to minus) solder the power supply, which will convert the car's 12 Volts into 5 and then connect the recording device wiring to it.
Now all that remains is to check the functionality. If the camera takes pictures, then you did everything right. We carefully isolate the connections, hide them under the panel and put everything back together.
You can see more details about this option for connecting the recorder in the video:
There are also special adapters for the lampshade with a cigarette lighter socket. After removing the lampshade, they are connected to the lampshade harness, and the wire from the DVR is inserted into the cigarette lighter itself. Then the wire is threaded, for example, through the upper roof trim and inserted into the DVR. All remaining wires are hidden under the top casing. However, it is recommended to install a fuse on this design.
Connecting the DVR to the lampshade using an adapter
Connecting the DVR to the radio
This is probably one of the easiest connection options, since the power wiring for the car's audio system runs closest to the location where the DVR is installed. The recorder wires need to be soldered into the power supply system of the radio, but, again, you need to do it correctly. First, you need to find a cord under constant voltage using a device or a homemade test light, and only then strip it and solder the DVR through a converter, since 12 Volts are supplied to the radio. There is only one problem here - the wiring to the radio goes under the front panel. In the best case, you will have to remove the radio itself, and in the worst case, the entire panel.
Connecting the DVR to the radio
You can also watch this useful video:
Connecting the DVR to the battery
If you look at it objectively, then this is the best option. Indeed, in this case, the recording device will have its own direct current line and will be able to operate independently of other factors. However, this will require a little more knowledge and detail.
Connect the DVR to the battery with care, not forgetting the fuse
To connect to the battery, we add another one to the factory cord of the camera and lead it into the engine compartment, masking it as much as possible. Under the hood, on the fender, there is a fuse box. Usually in this block there is a spare row, to which you need to connect. Then we lay the wire from the block to the battery, observing the poles. The mass can generally be screwed to the car body so as not to unnecessarily loosen the terminals. Be sure to remember to add a converter to the circuit. It is advisable to place it in a place protected from water.
However, do not forget about the fuse (15 A recommended).
You can see more details about the connection method in the video:
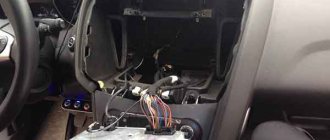
Connecting the DVR to the ignition switch
A rarer case. The recorder will only work with the ignition on. To do this, you need to remove the steering column trim and find the positive terminal on the lock. The negative is connected to the body. Also, we must not forget about the 5 Volt power supply.
These are the most primitive places to connect the DVR to the car's power supply. The cigarette lighter is not included in this list, since, as a rule, it already powers something (charging a phone, laptop, etc.), and it also only works when the ignition is on, which is very inconvenient.
You can also watch a useful video on the topic:
Tips for motorists on using a DVR
Recommendations to consider when performing the task and using the recorder:
- The device latch must be minimally movable relative to the machine body. If exposed to vibrations, the recorder will quickly fail.
- If the car is parked for a long time, it is better to remove the device from the interior, the same goes for its mounting. The presence of fasteners may attract criminals who will try to find it in the glove box.
- For high-quality functioning of the gadget, you should buy a memory drive with sufficient capacity. The instructions usually indicate what type of cards should be used.
- It is recommended to activate the device immediately after the driver gets behind the wheel.
- It does not matter whether the recorder is equipped with an autonomous battery or not. Typically, the gadget is used only inside the car, and outside it you can use the phone’s camera. It is important that the package includes a backup battery. This is especially true if not an additional drive is used to save data, but built-in memory.
- When installing, please note that the outer areas of optical lenses are not exposed to ultraviolet rays during the hot season. In particular, if the car is parked for a long time.
- To record high-quality images, the optical part of the device and the surface of the windshield must be regularly wiped with a soft cloth. The rags are moistened with alcohol before processing.
- Do not allow it to fall or hit the device against third-party objects.
Mounting methods depending on the review
After you have chosen the place where the device will be located, you should start choosing a mount. Often the kit already includes suction cups, but sometimes you have to buy them in addition, so check these points with the seller. If the DVR is not heavy in weight, then double-sided tape will be an excellent replacement for the suction cup. Even without special skills, you can do everything alone, eliminating the question: how to connect the recorder without a cigarette lighter?
To install, you must first degrease the surface. Take glass cleaner or alcohol - they will do the best job. A soft rag is a good cloth for wiping. It is unlikely to leave behind excess lint. After this, wait until it dries completely. And at the end of installation, make sure that the DVR is securely secured.
Also, suction cups, unlike other fastening methods, are the most short-lived, so stock up on extra ones. Please note that in winter it may not be installed as well. It is better to check the stability of the structure before each trip.
Sometimes only the tape is left in the kit, but don’t worry - it’s quite stable and is unlikely to deteriorate over time.
Fastening the wires
Before connecting the recorder, you need to decide how the wires will be attached. There are two installation options:
- hidden installation. The wires are hidden under decorative trim or the dashboard. It is necessary that there is a little wire left near the recorder, which will allow it to be rotated freely;
With hidden wiring, the wires are hidden under decorative trim or the dashboard - open installation. In this case, the wire is not hidden, but is fixed to the ceiling and side pillar using plastic brackets. Since these brackets have Velcro, over time the reliability of the fastener weakens and the wire may fall.
The wire is in plain sight, which is not very convenient and ugly
Tips and precautions
As in every business, there are undeniable rules here. They should be followed to ensure that the connection of the DVR in the car is without damage.
- The fuse is an important thing. Without it, there is a risk of short circuits and failures in the electrical network.
- Be careful with the wire; it should not be taut.
- Polarity must be observed when connecting wires.
- Don't forget about isolation.
- When it comes to batteries, you need to work with a soldering iron very carefully. There is the possibility of not only a short circuit, but also loss of the battery.
- If you smell something burning when connecting, immediately turn off the device.
Where and how to connect a DVR in a car without a cigarette lighter
For lovers of electronic gadgets, the solution may be to purchase a splitter that connects to the cigarette lighter via a standard plug and is equipped with several output ports of various formats. For such an adapter, the important parameters are the maximum current value and the efficiency of the built-in fuses.
When fully loaded, the device may overload, internal circuits may heat up, and cases of fire have been reported. In addition, such adapters cannot be used in car models that are not equipped with a cigarette lighter. Owners of DVRs connected to the electrical system via a USB connector have no problems. Such a device can be connected through standard ports on the dashboard or through car radio connectors.
Among the non-standard connection methods using a standard plug, practiced by Russian car enthusiasts, the following can be noted:
- Connection to the cigarette lighter socket from the inside.
- Direct connection to the battery or power connectors of the radio.
- Connection to the power supply of electric lighting through the ceiling lamp.
- Connection to the fuse box.
basic settings
It is necessary to make basic device settings. The first step is to format the memory card, because the DVR may not work correctly with the new card or simply cannot read it.
The second step is to set the date and time. This information will be used as the title for future videos.
The third step is to adjust the video quality. Modern devices shoot in Full HD format with a resolution of 1920x1080p. You can change the resolution to a lower one, but it is better to give preference to maximum quality.
When choosing the duration of the videos, you should set the value to 3-5 minutes. When the card runs out of space, old files begin to be overwritten, but the loss of information in this case will be small.
Modern models are equipped with additional features that are useful on the road:
- The GPS module determines the vehicle's coordinates.
- The Laws function performs lane control.
- The Wi-Fi function allows you to synchronize with a smartphone or laptop.
It is best to study the user manual for your specific model that comes with it.