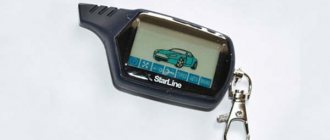
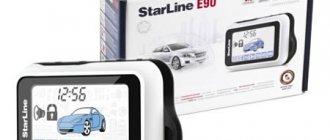
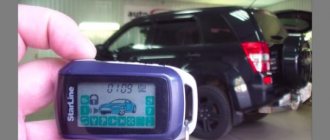
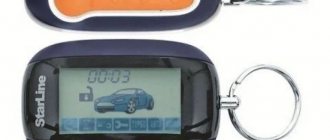
The StarLine Twage A6 car alarm kit, in addition to everything you need, includes two key fobs, one main with an LCD display and feedback support, the second additional, without two-way communication. The main one has a range of up to 600 meters, but the range may decrease, significantly, it all depends on where the transceiver is installed in the car, as well as on the weather, parking location, and the amount of radio interference (the more radio devices around, the more interference there may be) , battery condition. The auxiliary can only operate at a distance of up to 15 meters.
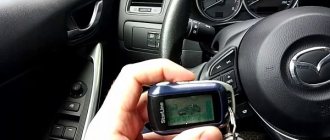
The twage a6 car alarm can operate in automatic mode, which will be set by the program, or maybe based on signals. Some functions can be modified or reconfigured through programming.
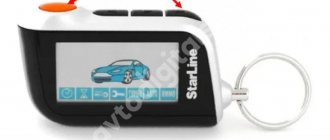
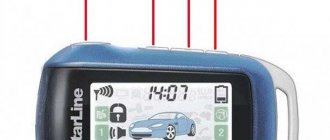
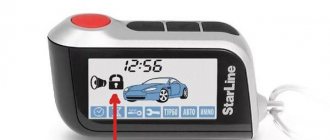
StarLine Twage on the main key fob has 3 control buttons and a liquid crystal display to display the vehicle status. The first button is programmable, the second has no function, it can be selected using button three, which is responsible for moving the cursor across the display. Each time you press, the display backlight lights up. Each function that is performed between the key fob and the car is accompanied by a sound signal, and the corresponding information is shown on the display. The average operating time of one AAA battery is 4–6 months. When the battery starts to run low, the system will notify you about it.
The additional one has four buttons on the body; there is no LCD display. It also supports all functions, but does not display them and there is no sound, and the range is much lower. So don't lose the main one.
When using two key fobs simultaneously, all information will be displayed on the main display with sound accompaniment. So, being at a distance of 400 meters, you can see that someone opened the car using a second key fob.
Purpose of the buttons
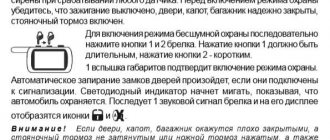
There are three buttons on the main one. Each of them has two or three functions, as well as the possibility of combination. So the first one responds by turning the security on/off (you need to hold it for 3 seconds) and programs the command (0.5 seconds). The second button opens the trunk (3 sec) and executes the command to which the display cursor is directed (0.5 sec). The third controls the cursor itself (0.5 sec), interrupts alert signals (0.5 sec), starts and stops the clock, timer, alarm clock, energy saving mode (3 sec), and also programs the first button (6 sec).
You can combine them like this:
- 1+2;
- 3+1;
- 3+2.
Otherwise they don't work with each other. 1+2 turns on the car search mode (3 sec) and monitoring temperature data in the cabin and the condition of the car as a whole (0.5 sec). 3+1 selects alert mode (0.5 sec). 3+2 urgent timer setting (0.5sec).
The additional one has four buttons. It also has several functions per button. The first one turns the security alarm on and off without sound. The second one searches for a car (0.5 sec) and turns on the alarm mode (3 sec). Third, opens the trunk (3 sec), turns on channel 3 (0.5 sec). Fourth, channel 2 (3 sec) and on/off silent security operation (0.5 sec). You can combine in the following order:
- 1+3 (disabling the sensor by levels);
- 1+4 (activating the Valet service mode);
- 3+4 (anti-robbery mode (ignition must be on), recording in programming mode).
Technical parameters of key fobs A6 and B6
Main technical parameters of key fobs:
- signal encoding method – interactive;
- operating frequency range of devices – 433.92 MHz;
- operating distance of the main remote control transceiver – up to 600 m;
- operating distance of the main remote control as a signal receiver (pager mode) – up to 1200 m;
- operating distance of auxiliary remote controls is approximately 15 m;
- battery life – 3-6 months (depending on the intensity of use and quality of the element);
- operating temperature range – from -40°C to +85°C;
- service life of the alarm and key fob – 5 years (set by the manufacturer);
- The main communicators use backlit LCD screens that expand control capabilities.
The operating distance of the Starline A6 and B6 alarm key fobs depends on the intensity of external radio interference, the density of urban development, as well as the terrain and meteorological conditions.
Programming the first button on the main key fob
The functionality of button 1 can change depending on the owner’s wishes; this must be written in the program; this can be done without restrictions. To program a button, you must follow a certain procedure:
- In order to move the cursor, you must quickly press button 3;
- After selecting the required function, you must stop the cursor on it;
- You need to hold down button 3 for 6 seconds and wait for three sound signals;
- Press button 1 to confirm your selection.
After this procedure, just one press of a button is enough to activate the selected function. To reprogram the button, you need to do the same thing.
How to install an alarm
The security system is installed in accordance with the requirements specified in the service manual.
Installation of the anti-theft system must be carried out with the battery disconnected.
This will avoid malfunctions of standard equipment. It is recommended to protect all electrical alarm circuits with safety devices.
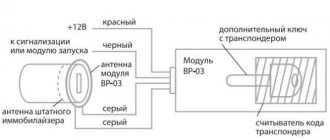
Connection diagrams
Electrical diagrams for connecting elements are given in this section.
The first part of the connection diagram to the microprocessor
The second part of the map for connecting elements to the ECU
Activators connection diagram
Recommendations for placement and installation
Tips for installing a security system:
- The microprocessor module is installed in a hidden place in the cabin. To ensure a minimum length of electrical circuits, it is recommended to install it behind or under the control panel. The unit is installed with the connector facing down so that when exposed to moisture, liquid does not get inside the housing. The device is secured using special bolts or double-sided tape. The module must be securely fixed to prevent vibration.
- The antenna adapter is fixed on the windshield, and it must be located at least 5 cm from the metal. This will prevent interference during data transmission. The antenna adapter contains a temperature sensor, so it should not be installed near a stove or other heat sources. This may cause readings to change.
- The siren is located in the engine compartment. There should be no sources of heat or moisture nearby. The device is mounted with the horn sideways or downwards. Thanks to this, moisture will not collect in it. The siren and wires should not be accessible from under the bottom of the car.
- The sensitivity controller is mounted in the cabin. After installation, the consumer must have access to the sensor adjustment element.
- The LED status light is located on the center console. Her work should be visible from the street.
- The Anti-Robbery and Jack mode buttons are located in hidden places. But the car owner must have access to these elements from the driver’s seat.
- When installing pushbutton switches on the tailgate and hood, you must ensure that they function correctly. If the doors are locked, then the gap between the contact elements in the device should be at least 3 mm.
Laying and connecting wires
The conductors are laid away from sources of interference:
- starter mechanism;
- ignition coils;
- high-voltage cables, etc.
Do not allow power lines to come into contact with moving mechanisms and components of the vehicle. This refers to steering rods, pedals, etc. All connections and soldering of wires are made with the power source turned off. If the car has an airbag or a coded car radio, when turning off the battery, you must take into account the nuances specified in the service documentation. Permanent connections are only soldered and then reliably insulated with heat-shrinkable tubing or electrical tape.
The microprocessor module and other components are connected to the terminals after complete installation. The contacts are connected according to the diagrams included in the package.
The Do-It-Yourself Auto Repair channel talked about the general nuances of connecting an anti-theft system.
Protective functions
Many modern security systems provide a wide range of capabilities of their creations. The team from StarLine, in addition to the organizer functions, provided a large number of protective functions, all of which fit into the starline a6 keychain. Each of them has its own individual alarm.
Whenever the sensor is triggered, all information will be displayed on the display of the main key fob with sound and light accompaniment. The positive thing is that when the alarm goes off, the car’s engine will be automatically blocked, and it won’t go anywhere, except in the case of a tow truck.
The notification continues for one cycle which includes vibration, sounds, and screen flashing. So, if during one such cycle the cause of its occurrence has not been eliminated, then this cycle will be played again until the cause of the trigger is corrected. Most often, the cause is a car door that is not fully closed. In addition to the fact that the pager will notify you when it is triggered, the car will flash its lights, headlights, and also make a sound.
The system may be triggered for the following reasons:
- The car was hit;
- The door is not completely closed;
- The hood is open;
- The trunk was not tightly closed;
- The ignition worked.
They all have their own individual cycles. If the system is operating in silent mode, there will be no sound!
If you were simply checking the operation of the system sensors and the car began to “make noise”, then in order to turn it off, you need to press the first button, but the alarm will still be active.
StarLine twage A6 has an interesting functionality called “anti-robbery mode”. There are a couple of ways to enable it. Let's focus on the first one, as it is more convenient and simpler. And so, it is necessary that the car is with the ignition on, you need to select the corresponding icon on the key fob (it looks like a crossed out pistol) and press button 2. To turn off this mode, you need to turn off the ignition and follow the same steps as when turning on this function.
Remote control maintenance
The display has a separate field for an icon indicating the battery charge level. The icon has three sections, each approximately equal to 33% of the full capacity of the installed battery. The battery is replaced when the charge drops to 33% (only one section remains active). The main remote control uses an AAA battery (1.5 V), and the additional remote control uses a CR2032 lithium battery (3 V).
Guide for self-installation of batteries on remote controls for A6 and B6 systems:
- Unfasten the latch of the compartment cover located on the back of the case. To replace the battery in the additional remote control, you need to unscrew the screw that holds the housing together. Then they are carefully separated, being careful not to break the latches around the perimeter.
- Remove the discharged element and briefly drown K_1 (to reset the charge of the capacitors in the power supply circuits of the transceiver).
- Install a new battery or accumulator, observing the correct polarity. The installation diagram is indicated on the back of the cover.
- Close the lid, fasten the latch (or connect the body parts until they click and tighten the self-tapping screw).
- Set the current time and alarm time. The remote control memory is non-volatile, so re-recording the function performed by K_1 is not required. For a spare key fob, no action is required.
Error protection - built-in
Let’s say the service mode was activated, you were convinced of this, but then you couldn’t write anything into the alarm memory. Then, the set of key fobs, the information about which the alarm “remembers,” will remain the same. It will not “reset to zero”, as many people think. Well, otherwise, the inept actions of the operator would lead to the loss of any connection with the car.
The service mode, which is activated by pressing the Valet button 7 times, also allows you to record digital relay codes.
Digital relay blocking the engine
Actually, for the first 5 seconds the signaling “does not know” what exactly will be registered: new key fobs or relays. And the 5-second interval itself is critical - when it expires, the system returns to normal mode. From here, by the way, we can conclude: when repeating step “3” (see “Sequence of actions ...”), you do not need to wait too long.
Starline's error protection is maximum. In addition to the service mode, there is also a programming mode. But you can only use it intentionally: press Valet 5 times and turn on the ignition. The number “5” is different from “7”, so any unforeseen consequences are excluded.
A6 with auto start – quite possible!
Since the A6 Starline is not produced, many consumers believe that the functionality of the security system is poor, but this is not the case. If the alarm does not receive signals, you need to make sure that the antenna adapter is connected correctly. You also need to check that there are no metal objects near it that would impede the transmission of impulses.
Features and Functions
How to install an alarm?
How to set up the key fob?
User manual
Download the operating instructions for the Starline A6 alarm system in PDF format
Video “How to program the Starline A6 key fob”
Comments and Reviews
Video “Overview of the capabilities of the Twage A6 anti-theft system”
User Yaroslav540 briefly described the main features of the Starline security system.
Do you have any questions? Specialists and readers of the AUTODVIG website will help you ask a question
Was this article helpful?
Thank you for your opinion!
The article was useful. Please share the information with your friends.
Yes (100.00%)
No
X
Please write what is wrong and leave recommendations on the article
Cancel reply
Rate this article: ( 1 vote(s), average: 5.00 out of 5)
Discuss the article: