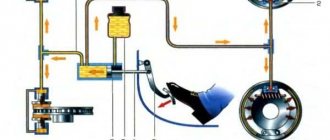
Purpose of the GTZ in a car
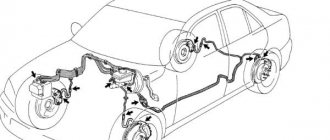
Braking begins by pressing the pedal. For now, there is no need to consider all sorts of smart driver assistance systems that work great even without his participation.
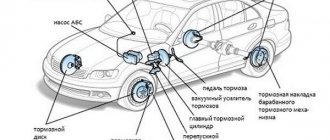
The maximum that will support the foot of a person who wants to slow down the car is a vacuum brake booster (VBS), located between the pedal assembly and the first hydraulic device in the chain ending with the brake pads.
The combined action of muscular force and the atmosphere through the VUT membrane should increase the pressure in the entire hydraulic system. If the valves and pumps of the ABS system do not interfere, then this pressure is the same at any point.
Fluids are incompressible, which is why they are used in passenger car brakes. Before this, no less incompressible solids were used in the form of rods and cables to drive the pads of the first machines.
The pressure is directly created by the piston of the main brake cylinder (MBC). Due to incompressibility, it increases very quickly; every driver felt the pedal harden under his foot after selecting its free stroke.
Relieving pressure after releasing the pedal and replenishing the lines with liquid when required are also functions of the GTZ.
ABS brake bleeding process
In order to efficiently complete the task, it is advisable to carry out bleeding with an assistant, starting with pumping the brake system from the front wheels, then the rear wheels (right and left).
The pressure in the brake system with ABS can fluctuate up to 180 atm, which is why the first thing you need to do is relieve it.
Pressure is released by discharging the pressure accumulator. To do this, turn off the ignition and press the brake pedal about 20 times. And then to proceed to the next stage of bleeding the brakes, disconnect the connectors on the brake fluid reservoir.
General principle of how to bleed ABS brakes
- We find and remove the fuse in the block responsible for the operation of the ABS;
- We unscrew the wheel and find the RTC fitting for bleeding the brake;
- We begin to pump the brakes with abs with the pedal depressed;
- We turn on the hydraulic pump (turning on the ignition, the ABS light on the dashboard will light up) and wait until all the air comes out;
- We tighten the fitting and release the brake pedal; if the ABS light no longer lights up, everything is done correctly and the air has completely escaped.
Principle of operation
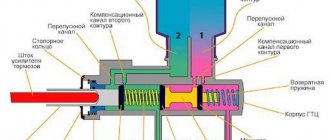
Single-circuit gas turbine engines, where there was only one piston, are no longer found in cars, so only a double-circuit one is worth considering. It is distinguished by the presence of two pistons, each of which is responsible for the pressure in its own branch of the system.
In this way, the brakes are duplicated, which is required for safety. If a fluid leak occurs, a branch that remains in good working order will allow you to stop the car without using the parking brake or other emergency techniques.
The first piston is directly connected to the pedal rod. Having started to move forward, it closes the bypass and compensation holes, after which the force through the volume of liquid will be immediately transferred to the primary circuit pads. They will press against the discs or drums, and deceleration will begin using frictional forces.
Interaction with the second piston is carried out through a short rod with a return spring and the primary circuit fluid. That is, the pistons are connected in series, hence such GTZs are called tandem. The piston of the second circuit works similarly to its branch of the system.
Typically, the working wheel cylinders operate diagonally, that is, one front and one rear wheel are connected to each circuit. This was done in order to use the front, more efficient brakes, at least partially, in any case.
But there are cars in which, for structural reasons, one circuit works only on the front wheels, and the second on all four, for which additional sets of wheel cylinders are used.
What if without an assistant?
You can bleed the brakes on a VAZ-2107 without an assistant, but to do this you will have to slightly modify the design of the expansion tank cap. You need to buy a new cover into which you install the fitting from a regular camera. Now you need to create pressure in the system - this can be done using a camera or tubeless wheel. Inflate using a compressor and do the following:
- Fill the expansion tank with brake fluid.
- Install a cover with a fitting on it.
- Connect the fitting on the cover and the chamber using a tube.
- In this case, there is no need to install spool valves inside - they will be superfluous.
- Carry out repairs following the brake bleeding sequence described above.
Do not forget to add fluid to the system, otherwise an air lock will appear in it. You will have to bleed the brakes again. The VAZ-2107 uses the brand of fluid “RosDot-3” or “RosDot-4”. Try to use only those fluids recommended by the manufacturer.
Is it possible to bleed the front or rear brakes separately on a classic?
Can. Moreover, you can separately swing the left and right mechanisms of one axis. The rear and front contours are not connected to each other if the entire cuffs are in the GTZ. Therefore, the risk of airing your neighbor is minimal. Agree, when replacing the front brake cylinder, only it is pumped, not the entire system. This also applies to the rear wheels. Repeatedly, when changing the rear cylinder on classic Zhiguli cars, I only pumped it. After this, all mechanisms continued to work properly.
Why is it sometimes impossible to upgrade a vehicle?
Sometimes VAZ 2107 owners may have a situation where they cannot bleed the brakes after repair work on the GTZ or its replacement. In this case, new parts were installed, the bleeding procedure was carried out according to all the rules, but there was no positive result.
The reason for this situation is that when installing a GTZ, most car enthusiasts first connect the hoses and brake pipes, and only then pour the fuel fluid into the tank. Next they start pumping. They do not take into account that there is also air in the cylinder. Therefore, first of all, you need to remove the air plugs in the GTZ, and then move on to the bleeder fittings on the wheels. The presence of air in the GTZ is indicated by the brake pedal lying on the floor. To remove air pockets, it will be enough to slightly tighten the fittings on the vehicle tubes and pour fuel fluid into the tank. Next, loosen the tightening of the fittings a couple of turns and wait until the fluid with air bubbles comes out of the tubes.
To make the process go faster, you need to wipe the neck of the tank and blow inside. This creates additional pressure. When there are no air bubbles in the leaking liquid, tighten the fittings and carry out further pumping according to the usual scheme.
Problems with pumping may arise if the gas turbine engine is faulty or defective products are installed. If a faulty part is installed, the fluid from the tank enters the GTZ and then returns back. As a result, it does not go further than the master cylinder. In such a situation, the faulty cylinder must be replaced. If the GTZ was installed after repair, then perhaps an error was made during assembly. Therefore, it is necessary to repeat the pumping procedure.
Any driver needs to know the bleeding rules in order to independently monitor the condition of the brake system, so that after replacing or repairing parts, air gets in, they can bleed it
The process is simple, it is important to follow the correct bleeding sequence and monitor how much fluid is in the brake reservoir, without lowering it to a minimum or complete absence
Bleeding the brake system without helpers
Sources
- https://avtoyoutubb.ru/kak-prokachat-tormoza-vaz-2107-klassika.php
- https://zapchasti.expert/zhidkosti/tormoznaya-zhidkost/tormoznaya-zhidkost-na-vaz-2107.html
- https://FB.ru/article/432955/prokachka-tormozov-na-vaz–s-pomoschnikom-i-bez
- https://bibiauto.club/remont/ustranenie/prokachat-tormoza-vaz-2107.html
- https://labavto.com/vaz/2107/kak-samostoyatelno-prokachat-tormoznuyu-sistemu-na-vaz-2107/
Device
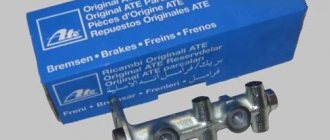
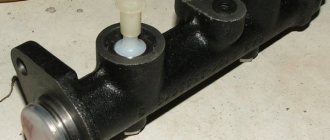
The GTZ includes:
- a housing with fittings supplying fluid from the supply tank and discharging it to the lines of the working cylinders;
- pistons of the primary and secondary circuits;
- sealing rubber cuffs located in the piston grooves;
- return springs that compress when the pistons move;
- a boot covering the entry point of the rod from the VUT or pedal into the recess on the back side of the first piston;
- a screw plug that closes the cylinder from the end, by unscrewing which you can assemble or disassemble the cylinder.
Compensation holes are located in the upper part of the cylinder body; they can overlap when the pistons move, separating the high-pressure cavity and the supply tank with a supply of liquid.
On the subject: What is a brake caliper and how does it work (types, device, repair)
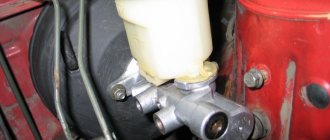
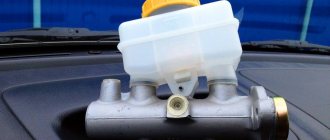
The tank itself is usually attached directly to the cylinder through sealing collars, although it can be moved to another location under the hood, and the connection is made through low-pressure hoses.
How to check and bleed the brake master cylinder? Step-by-step methods »
How to check and bleed the brake master cylinder? Step by step methods
A timely diagnosis of the brake master cylinder and the entire brake system can save you from unexpected flaws on long and short journeys. What visual clues should you pay attention to before checking?
When braking
, the car should not be driven in any direction. This is especially dangerous on slippery roads in winter. Then the car may also spin in place due to this problem. Also, you need to check the integrity of the pipes and hoses supplying the brake fluid. The clamps should be well tightened, the hoses themselves should not be frayed, and should be well seated. These previews especially do not concern new cars, as they say, used ones in good condition. So, this good condition must be maintained further.
How to check and bleed the brake master cylinder yourself
. According to the above, the entire fascinating process consists of two parts: testing and pumping. Let's start in order.
What needs to be done before the check has already been discussed a little higher. It is advisable to carry out the entire process in the garage, and not in the open air. We will need the following tools: a set of wrenches, screwdrivers, a rubber bulb for pumping out brake fluid and blowing it off; it is better to wear protective gloves on your hands.
Open the hood of the car. We find a tank with brake fluid, it is clearly visible. Remove the level sensor from it. And we pump out the liquid with a pear (a large enema purchased at a pharmacy works well). It is a very toxic chemical product in its composition. This is where gloves come in handy. Be careful not to get the mixture into your eyes or skin. If this happens, immediately run home - rinse with plenty of running water, as doctors advise.
Further
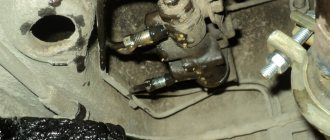
– take a 10mm wrench and unscrew the fasteners of the brake pipes leading to the master cylinder. We pull them up and to the sides, gaining access to the body of the main part.
Disconnect the head cylinder itself from the vacuum booster. Usually, a 17mm wrench with a socket head is useful for these purposes. Having disconnected it, we take out the part and proceed to inspection.
For these purposes, we carefully disassemble the spare part
. We check the mirror for cracks, scratches, and other defects. Please pay attention to whether the spring is elastic and whether the piston is clean. We also inspect the rubber seals. To avoid deformation, use an elastic band (if available - 20 seconds) or a rubber bulb.
You can, of course, use a special stand for inspections, if one is nearby (or specifically for this purpose, visit a service station that has one). Technically, the check is carried out as follows. We open and close the main brake valves alternately.
At the same time, we forcibly rotate the flywheel, forcing the piston to move.
The repair itself, carried out in cases where breakdowns are detected, is carried out by installing a standard repair kit on the cylinder. Some, if there is free money, I prefer to change it entirely. But then don’t forget about the supply hoses. At the very least, they will have to be checked for integrity and shabbyness. And the best thing is to replace it along with the fasteners and clamps, especially in older cars, where all this has not changed since birth.
Basic faults
Failures in the master brake cylinder are practically excluded, and all malfunctions are associated with the passage of fluid through the seals:
- wear and aging of the sealing cuffs on the rod side, the liquid goes into the cavity of the vacuum booster or, in its absence, into the passenger compartment, onto the driver’s feet;
- similar malfunctions of the cuffs on the pistons, the cylinder begins to bypass one of the circuits, the pedal falls, braking worsens;
- jamming of the pistons due to corrosion of the pistons themselves and the cylinder bore, as well as loss of elasticity of the return springs;
- an increase in travel and a decrease in pedal stiffness when braking due to airing of the brake line.
For some cars, repair kits with pistons and cuffs are still preserved in spare parts catalogs. As well as recommendations for removing cylinder surface defects with sandpaper.
In practice, this activity does not make much sense; it is unlikely that it will be possible to noticeably extend the life of an exhausted turbocharger, and driving with an unreliable hydraulic brake cylinder, which is not for nothing called the main one, is unpleasant and dangerous. Therefore, in the vast majority of cases, the cylinder is replaced with a new assembly.
What needs to be done to maintain full functionality of the stopping system
A week later, or after completing a run of 500 km.
1. Checking tire pressure indicators.
2. Diagnostics of the level and condition of the working mixture in the brake system.
As you know, the mixture has an important role in the system. The use of low-quality or used fluid leads to premature wear of the components of the shutdown system.
3. Diagnosis of the sensitivity of the brake pedal and checking the smoothness of its movement.
4. Diagnostics of the performance of brake lights and warning lamps.
1. Diagnostics of front brake axle components.
2. Checking the tightness of the system conductors.
Every year or after completing 20,000 km.
1. Diagnostics of the rear brake axle.
2. Diagnostics of the brake pedal bracket and check of the working bushings.
3. Thorough diagnostics of the condition of the working fluid in the system. Replace brake fluid when used.
After two years or after completing a mileage of 50,000 km.
1. Forced replacement of the working mixture.
2. Diagnosis of GTZ. During the inspection, it is necessary to examine the system element for leaks and seal failures.
After five years or 120,000 km.
1. Repair of the GTZ, overhaul of calipers and wheel cylinders.
During the operation of the vehicle, it is also necessary to pay due attention to the condition of the discs and pads. Pads must be changed if the maximum permissible wear is exceeded
The level of permissible wear is indicated by the manufacturer of certain pads.
In this article we will take a closer look at one of the most important stages of brake system maintenance - replacing and bleeding the master cylinder. But, first, let’s get acquainted with the structure and operating principle of this element, as well as its purpose in a vehicle.
The main role of the GTZ in the vehicle system is the conversion of the energy placed by the motorist on the brake pedal.
