02/28/2022 6,862 VAZ 2106
Author: Ivan Baranov
All owners of domestic cars face the need to adjust the ignition. Especially when it comes to older vehicles. This material will help you learn how to adjust the distributor of a VAZ 2106 car and in what cases this may be required.
[Hide]
Purpose and types of distributors
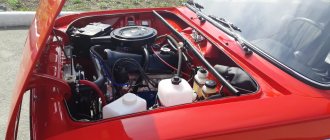
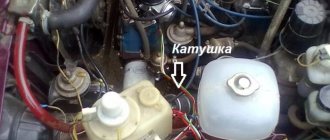
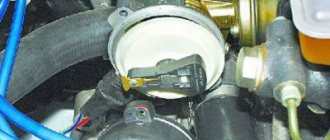
The main distributor of the “six” is located on a horizontal platform made to the left of the engine valve cover. The unit shaft, ending with splines, enters the drive gear inside the cylinder block. The latter rotates by the timing chain and at the same time rotates the oil pump shaft.
There is a special platform for installing the distributor on the engine block.
The distributor performs 3 functions in the ignition system:
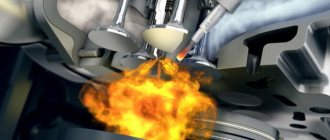
- at the right moment it breaks the electrical circuit of the primary winding of the coil, causing a high voltage pulse to form in the secondary;
- alternately directs discharges to the spark plugs according to the operating order of the cylinders (1-3-4-2);
- automatically adjusts the ignition timing when the crankshaft speed changes.
The distributor distributes impulses among the spark plugs and ensures timely sparking
Various modifications of the “sixes” were equipped with different types of distributors:
- VAZ 2106 and 21061 were equipped with engines with a working volume of 1.6 and 1.5 liters, respectively. Due to the height of the block, distributors with a long shaft and a mechanical contact system were installed on the model.
- VAZ 21063 cars were equipped with a 1.3 liter engine with a low cylinder block. The distributor is a contact type with a shortened shaft, the difference for models 2106 and 21063 is 7 mm.
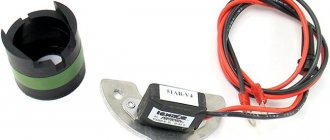
- The updated VAZ 21065 series was equipped with contactless distributors with a long rod, working in conjunction with an electronic ignition system.
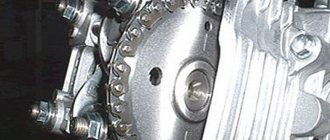
The difference in the length of the shafts of 7 mm is due to the different volumes of the motors used on the “six”
The difference in the length of the drive shaft, depending on the height of the cylinder block, does not allow the use of the VAZ 2106 part on a 1.3 liter engine - the distributor simply will not fit into the socket. Installing a spare part with a short shaft on a “clean six” will also not work - the splined part will not reach the gear. The rest of the filling of the contact distributors is the same.
As a young, inexperienced driver, I personally encountered the problem of different lengths of ignition distributor rods. On my Zhiguli VAZ 21063, the distributor shaft broke off on the road. At the nearest auto store I bought a spare part for the “six” and began installing it on the car. Result: the distributor was not inserted completely; a large gap remained between the platform and the flange. Later the seller explained my mistake and kindly replaced the part with one suitable for the 1.3 liter engine.
Checking the ignition angle while the vehicle is moving
It is best to check the functionality of the ignition system after any adjustment while driving. This is due to the design features of the distributor and the octane number of the gasoline used. It happens that the ignition angles set according to the marks do not provide sufficient dynamics and throttle response. Adjusting by ear according to the beginning of detonation will help:
- We accelerate the car to a speed of 45-50 km/h on a flat section of the road;
- We turn on direct transmission (fourth on the VAZ 2106) and press the gas pedal all the way;
- A characteristic ringing sound (detonation) should appear, which will disappear after 2-3 seconds, and the acceleration will be smooth and powerful without failures;
- If detonation does not disappear throughout the entire acceleration, then the ignition angle is “early”;
- The complete absence of ringing and sluggish dynamics indicate a delayed spark in the cylinders;
- We adjust the position of the distributor in place, turning it by 3-5 degrees;
- When the adjustment is completed, the position of the distributor body relative to the block is marked with a mark or paint.
Ignition adjustment work should be carried out regularly. The service interval for a simple contact ignition system is 15,000 km, for an electronic one - twice as long. The condition of the spark plugs and high-voltage wires is also regularly checked. All setup operations can be easily done independently; a garage is not needed for this. The skill of independently repairing the ignition of a VAZ 2106 will always come in handy on a long journey or in winter, when problems arise with starting.
List of specialized tools and symptoms of malfunction
To adjust the ignition timing on your VAZ-2106, you need to prepare:
- spark plug wrench and 13 mm socket wrench;
- a multimeter or a 12-volt indicator light bulb with wires soldered to its base.
Before exhibiting, the following must be inspected for serviceability:
- power cables;
- candles;
- distributor and other system elements.
It is possible to install the ignition on a VAZ 2106 yourself using the following tools:
- open-end wrench with a diameter of 13 mm;
- a specialized wrench for removing spark plugs;
- voltmeter or 12 volt test light;
- car strobe light.
A characteristic symptom that on a VAZ 2106 it is necessary to install the ignition according to the marks on the crankshaft pulley is a sharp detonation of the engine and loss of power. The problems are obvious when driving at forty kilometers per hour (in 3rd gear) and suddenly trying to increase the speed with the gas pedal. The manifestation of such a malfunction, as well as an extraneous metallic sound from the engine during a sharp throttle change, will indicate the need to adjust the ignition angle, and any car owner can carry out this repair with his own hands.
In what cases is ignition installation necessary?
There are several symptoms by which a car owner can determine that it is necessary to adjust and set the ignition breaker:
- Inability to start the engine.
- Increased gasoline consumption. Of course, this may be due to the need to adjust the carburetor, but this also happens. For example, if the ignition is set later, the dynamics of the car will be low, and in order to accelerate normally, the engine needs more air-fuel mixture.
- The appearance of shots in the silencer. If the explosion follows, it will take some time for the gases to expand. In the event that the piston reaches BDC, the exhaust stroke will be next, which means that a certain part of the fuel will be transferred to the exhaust system. Accordingly, pops will appear as a result.
- The power unit began to operate noisier. You will need to install the ignition and correctly install the VAZ 2106 distributor in case of shaking and tripping of the engine. The upward piston makes the operation of the power unit more rigid, and the explosion of the mixture will occur towards it.
Setting the ignition to "six"
Maintenance of contact type distributor
In order to repair the distributor yourself, you need to understand its structure and the purpose of all its parts. The operating algorithm of the mechanical distributor is as follows:
- The rotating roller periodically presses the cam onto the spring-loaded movable contact, as a result of which the low voltage circuit is broken.
The gap between the contacts appears as a result of pressing the cam on the spring-loaded pusher - At the moment of rupture, the secondary winding of the coil generates a pulse with a potential of 15-18 kilovolts. Through an insulated wire of large cross-section, current is supplied to the central electrode located in the distributor cover.
- A distribution contact rotating under the cover (in common parlance - a slider) transmits an impulse to one of the side electrodes of the cover. Then, through a high voltage cable, current is supplied to the spark plug - the fuel mixture ignites in the cylinder.
- With the next revolution of the distributor shaft, the sparking cycle is repeated, only voltage is supplied to another cylinder.
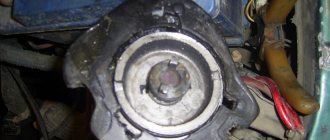
In the old version, the unit was equipped with a manual octane corrector (item 4)
In fact, 2 electrical circuits pass through the distributor - low and high voltage. The first is periodically broken by the contact group, the second is switched to the combustion chambers of different cylinders.
The design of the distributor, operating in conjunction with the electronic ignition system, is identical to the design of a mechanical distributor. There is also a plate with a bearing, a slider, a centrifugal regulator and a vacuum corrector. Only instead of a contact group and a capacitor, a magnetic Hall sensor is installed plus a metal screen mounted on the shaft.
In a contactless distributor, the main role is played by a magnetic sensor that sends signals to the switch
How a contactless distributor works:
- The Hall sensor and permanent magnet are located on a movable platform, and a screen with slots rotates between them.
- When the screen blocks the magnet field, the sensor is inactive and the voltage at the terminals is zero.
- When the roller turns and passes through the slot, the magnetic field reaches the sensor surface. At the output of the element, a voltage appears that is transmitted to the electronic unit - the switch. The latter gives a signal to the coil, which produces a discharge that goes to the distributor slider.
In an electronic ignition system, spark generation is carried out by a switch and a coil; the distributor only determines the moment the discharge is applied to the spark plugs
The non-contact distributor is more reliable in operation - the Hall sensor and bearings become unusable much less often due to the lack of mechanical load. A sign of meter failure is the absence of a spark and complete failure of the ignition system. Replacement is easy - you need to disassemble the distributor, unscrew the 2 screws securing the sensor and pull the connecting connector out of the groove.
The magnetic sensor is attached with two screws to the bearing pad
Malfunctions of the remaining elements of the distributor are similar to the old contact version. Troubleshooting methods are described in detail in the previous sections.
Distributor repair
Replacing the distributor with your own hands
If you need to replace a VAZ distributor, keep in mind that all parts that have become unusable during this time will also have to undergo this procedure. In order to repair the distributor, you will need the following parts:
- keys 7 - 2 pcs.;
- keys for 10 and 13;
- screwdrivers - 2 pcs.;
- a set of flat probes;
- hammer;
- mandrels, which are used to press out and press in bearings;
- tweezers.
The distributor rotor has two fixed screws that will need to be removed. Keep in mind that they are attached directly to the timing adjuster support plate. After this, you can carefully remove the rotor. All springs and weights that are removed from the centrifugal regulator responsible for ignition timing must be numbered.
Construction and repair of a contactless distributor
The purpose of the distributor in the VAZ 2106 car is to regulate the timely supply of spark to the spark plugs. Those who are at least a little familiar with the structure of the engine know that the power stroke in the cylinders occurs alternately.
Each engine has its own operating order. For example, in a VAZ 2106, the cylinders operate in this order 1-3-2-4. At the moment of the working stroke, when the piston is in the upper position, the distributor should give a spark.
Otherwise, without it, there would be no uninterrupted operation of the entire mechanism.
Device
The distributor of the VAZ 2106 car has a rather simple device compared to other engine components and mechanisms. The very first thing that will catch your eye when examining the distributor is its cover. It has 5 holes - 1 in the center and 4 at the edges. They are intended for contacts of spark plugs and starter.
Also, near one of the outer holes, the number “1” must be marked. It distinguishes the contact of the first cylinder from the other contacts. This makes it possible to set the candles in the correct order.
Usually, in a VAZ 2106, there is a fourth one opposite the contact of the first spark plug, a second one on the left, and a third one on the right, respectively.
Very often, the engine may operate unstably due to the fact that the spark plugs have earlier, or vice versa, late ignition. This significantly affects the speed and power of the car.
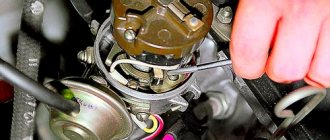
In order to set the ignition, you need to loosen the screw and turn the distributor along its own axis - first to the left, and then to the right. You need to move it literally a couple of millimeters, and check the ignition every time.
If the car starts up without problems and does not choke at high speeds, then you can congratulate yourself - the installation is complete. Inside the distributor there are such parts as:
- Rotor;
- fist;
- Breaker;
- Movable contact;
- Capacitor.
Exploitation
Since we are talking about an electrical device, it tends to break down often. In this case, some parts will need to be replaced. The VAZ 2106 engine distributor device has mainly disposable parts in the form of contacts and other similar mechanisms. How can you tell if parts need to be replaced or if the distributor is working properly?
A more severe case is when the car stalls while driving. This already indicates a more serious breakdown. Most often, this happens when the contacts are almost at the end of their service life and cannot withstand the loads. In this case, the faulty device should be replaced and the ignition should be reset.
And finally, the most severe type of breakdown is when the VAZ 2106 engine completely refuses to start. In general, many years of practice show that the engine may not start for many reasons. In order to know for sure that the distributor is faulty, you will need to remove it and install a new one.
Turn the ignition on and try to start the engine. If it works, then the problem area has been identified correctly. Often, with such a breakdown, installing a new distributor helps, but sometimes, you can resurrect the old one. This should be done by specialists, otherwise there will be no sense, but only wasted time.
Device malfunctions
Replacement and repair of the distributor on the domestic “six” is carried out in the event of incorrect operation of the mechanism.
Below are the main symptoms of breakdowns that indicate possible malfunctions:
- The vehicle jerks while driving. Moreover, these jerks are completely uncharacteristic of a car.
- The engine generally does not start.
- When trying to accelerate the car, the car may also jerk, and the acceleration process itself takes a lot of time, and the engine may detonate - the piston rings knock.
- Increased fuel consumption.
As you can see, in general the symptoms are similar to those that appear when the ignition is set incorrectly. Of course, if such symptoms appear, it cannot be said for sure that the fault lies in the distributor, but attention should also be paid to diagnosing this unit.
As for the breakdowns that may force the car owner to repair or replace the mechanism, they are as follows:
- The unit slider is worn out and burnt out.
- The problem lies in the cover itself - the contacts on it could have burned out.
- Hall sensor failure. The problem may be associated not only with a breakdown of the controller, but also with poor contact on the regulator plug.
- Another reason that domestic drivers encounter quite often is the distributor bearing. After a long period of use, it could become loose, but it could also simply jam.
- Presence of mechanical damage, including cracks on the cover.
- Engine fluid gets into the distribution unit; usually the problem is related to the seal of the cap.
Loading …
Self-adjustment without strobe
Having carried out the previously described preparatory measures, proceed to setting the ignition itself. Here you will need a homemade indicator in the form of a 12-volt light bulb, to which two wires are soldered. One of them must be connected to the output of the ignition coil, where the distributor cable (low voltage) is located. Secure the second core to the ground of the vehicle.
In the absence of a special tool, you can install the correct ignition on a VAZ 2106 using the marks, following the following algorithm of actions:
- We drive the car indoors, let the engine cool, and unscrew the spark plug from the cylinder head of the first cylinder, plug the hole with a finger, and turn the crankshaft until the compression ratio begins (when the finger begins to push out, as it were).
- We continue to rotate the crankshaft until the mark on its pulley aligns with the marks of the front cover, guided by the type of gasoline on which the car is operated.
- Having set the marks, you need to remove the cover from the distributor and mark the position of the slider on the rotor (opposite the contact of the high-voltage wire of the first cylinder), after which you need to unscrew the fastening nut using a 13 mm wrench.
- We connect a 12-volt control light (to the distributor body and inside to the low-voltage cable). We turn on the ignition from inside the car without cranking the engine with the starter, and if the angle is correctly set, the warning lamp should not light up. If it lights up, you will need to rotate the distributor rotor housing until it goes out and then tighten the fastening nut.
- Then we turn off the engine ignition with the key, screw the spark plug back in, put on the distributor cap and start the engine, checking its operation.
Important! If the ignition timing is set correctly, the car’s engine should run smoothly, without dips in speed when pressing the gas pedal, and confidently maintain its idle speed, which quite possibly will need to be adjusted on the carburetor after its ignition is set correctly.
How to set the ignition on a VAZ 2106 - procedure
First, you will need to install the ignition mark. The crankshaft can be rotated either using a ratchet or using a special wrench using the nut. On the front cover of the engine and on the crankshaft pulley there are ebbs and notches, the combination of which corresponds to different ignition timing:
- The first mark in the direction of travel is an advance of the ignition angle by 10 degrees. Angle advance is an adjustment to the fuel burning rate. So, 10 degrees is the mark for 72 gasoline.
- Next comes the middle mark - 5 degrees ahead. It is for 80 gasoline.
- The last, short mark is a lead of 0 degrees. This means that the mixture will ignite exactly at the moment when the piston is at top dead center.
After the installation of the ignition mark is completed, you must immediately set the required gap in the contacts, naturally, where they exist. To do this, remove the distributor slider and unscrew the breaker fixing screw.
Before setting the gap, it is advisable to clean the contacts with sandpaper (600-800)
The gap between the breaker contacts in the open state should be 0.35-0.40 mm. For this you will need a flat probe.
Well, now we go directly to the ignition installation of the VAZ 2106. We unscrew the distributor mount (nut 13), and then pull it out of the housing.
Now you need to insert the distributor into place, taking into account several mandatory points:
- We set the top dead compression stroke mark in the first cylinder; accordingly, at this moment the spark should appear in it. In order to catch this moment, we put the cover on the distributor and mark the place where the armored wire from the spark plug of the first cylinder enters. Now you need to remove the cover and align the outer contact of the slider exactly opposite the mark. That is, at the moment when the piston is at top dead center, a spark is supplied from the central wire of the distributor through the contacts of the runner to the armored line from the first cylinder.
- Next, to set the ignition to 2106, you need to draw an imaginary line between the roof latches and install the distributor in place so that this line is parallel to the engine block. It’s worth saying right away that you won’t be able to get into the drive splines the first time; you’ll have to twist the housing a couple of millimeters. This is not scary, because the ignition installation requires subsequent adjustment. It is important that the distributor is completely seated in place so that it rests against the block. Next, we pull it into place.
Diagnosis of ignition system faults
To save time and money, it is recommended to check the functionality of the VAZ 2106 ignition system in a certain order. For diagnosis you will need:
- spark plug wrench from 16 with handle;
- head 36 with handle;
- multimeter with the ability to measure voltage and resistance;
- control lamp (regular 12-volt car lamp with wires connected);
- pliers with dielectric handles;
- flat blade screwdriver;
- a set of flat feeler gauges for measuring gaps;
- small flat file;
- spare spark plug (known to be good).
Battery check
If the engine does not start at all, that is, when you turn the ignition key, you do not hear either a click from the starter relay or the sound of the starter itself, you need to start checking with the battery. To do this, you need to activate the voltmeter mode on the multimeter with a measurement range of 20 V and measure the voltage at the battery terminals - it must be at least 11.7 V. With lower values, the starter does not start and will not be able to rotate the crankshaft. As a result, the camshaft and distributor rotor that control the switch contact will not begin to rotate, and sufficient voltage will not be generated in the coil for normal sparking. The problem can be solved by charging the battery or replacing it.
Checking the switch
If the battery is in good condition and the starter relay operates normally, but the engine does not start, check the ignition switch. In order not to disassemble the lock, you can simply measure the voltage on the low-voltage winding of the coil. To do this, you need to connect the positive probe of the voltmeter to the terminal marked “B” or “+”, and the negative one to the vehicle ground. When the ignition is turned on, the device should show a voltage equal to the voltage at the battery terminals. If there is no voltage, it is necessary to “ring” the wire coming from the contact group of the switch to the coil, and in case of a break, replace it. If the wire is intact, you will need to disassemble the ignition switch and clean the switch contacts or completely replace the contact group.
Checking the coil
After making sure that voltage is supplied to the primary winding, it is necessary to evaluate the performance of the coil itself and check it for a short circuit. This is done as follows.
- Disconnect the high voltage center cable cap from the distributor cap.
- Insert the candle into the cap.
- Holding the spark plug with pliers with dielectric handles, we attach its “skirt” to the ground of the car.
- We ask the assistant to turn on the ignition and start the engine.
- Let's look at the spark plug contacts. If a spark jumps between them, the coil is most likely good.
Sometimes the coil fires, but the spark is too weak. This means that the voltage generated is not enough for a normal spark. In this case, check the coil windings for opens and short circuits in the following order.
- Disconnect all cables from the coil.
- We switch the multimeter to ohmmeter mode with a measurement limit of 20 ohms.
- We connect the probes of the device to the side terminals of the coil (LV winding terminals). Polarity doesn't matter. A good coil should have a resistance between 3.0 and 3.5 ohms.
If the actual winding resistance values differ significantly from the standard values, the coil must be replaced. In VAZ 2106 cars with a contact ignition system, a B117A coil is used.
Table: technical characteristics of ignition coil type B117A
| Characteristics | Indicators |
| Drawing | Oil bath, double winding, open circuit |
| Input voltage, V | 12 |
| LV winding inductance index, mH | 12,4 |
| Resistance value of the LV winding, Ohm | 3.1 |
| Secondary voltage rise time (up to 15 kV), μs | 30 |
| Pulse discharge current, mA | 30 |
| Pulse discharge duration, ms | 1.5 |
| Discharge energy, mJ | winds |
Checking the spark plugs
The most common cause of problems with the ignition system is the spark plugs. Diagnose spark plugs as follows.
- Disconnect the high voltage cables from the spark plugs.
- Using a spark plug wrench with a handle, remove the cylinder 1 spark plug and inspect it for damage to the ceramic insulator. In this case, you should pay special attention to the condition of the electrodes. If they are covered with black or white carbon deposits, the fuel system should be checked later (black carbon deposits indicate the fuel mixture is too rich, white carbon deposits indicate the fuel mixture is too lean).
The engine may become unstable due to an incorrectly set gap between the spark plug electrodes, the value of which is measured using a series of flat feeler gauges. The gap size specified by the manufacturer for the VAZ 2106 with contact ignition is 0.5-0.7 mm. If it exceeds these limits, the distance can be adjusted by bending (bending) the ground electrode.
Table: main characteristics of spark plugs for the VAZ 2106 engine
| Characteristics | Indicators |
| Distance between electrodes, mm | 0,5-0,7 |
| Heating indicator | 17 |
| Thread type | M14/1.25 |
| Thread height, mm | 19 |
For VAZ 2106, when replacing, it is recommended to use the following spark plugs:
- A17DV (Engels, Russia);
- W7D (Germany, BERU);
- L15Y (Czech Republic, BRISK);
- W20EP (Japan, DENSO);
- BP6E (Japan, NGK).
Checking high voltage wires
First, you need to check the cables for insulation damage and inspect them in the dark with the engine running. If any of the wires in the engine compartment break, you will notice sparks. In this case, the thread needs to be replaced, preferably all at once.
When checking wires for conductor wear, its resistance is measured. To do this, the multimeter probes are connected to the ends of the wire in ohmmeter mode with a measurement limit of 20 kOhm. Repairable cables have a resistance of 3.5-10.0 kOhm. If the measurement results are outside the specified limits, it is recommended to replace the wires. For replacement, you can use products from any manufacturer, but it is better to give preference to companies such as BOSH, TESLA, NGK.
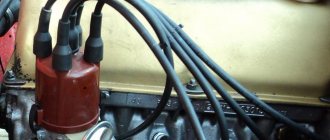
Rules for connecting high-voltage wires
When installing new cables, be very careful not to mix up the order in which they are connected to the distributor cap and spark plugs. Usually the wires are numbered - the insulation indicates the number of the cylinder to which they should go, but some manufacturers do not do this. If the connection sequence is incorrect, the engine will not start or will become unstable.
To avoid mistakes, you need to know the serviceability of the cylinders. They work in this order: 1-3-4-2. On the distributor cover, the first cylinder must be marked with the corresponding number. The cylinders are numbered from left to right.
The thread of the first cylinder is the longest. It connects to pin “1” and goes to the plug of the first cylinder on the left. The third, fourth and second cylinders are connected clockwise.
Checking the slider and contacts of the distributor
Diagnostics of the VAZ 2106 ignition system involves a mandatory check of the slider and distributor cover contacts. If they burn out for one reason or another, the spark strength can be greatly reduced. No tools are needed for diagnosis. Simply unplug the wires from the dispenser cover, unhook the two latches and remove it. If there are small burn marks on the internal contacts or slider, you can try cleaning them with a file or fine-grit sandpaper. If they are badly burned, the lid and slider are easier to replace.
Checking the breaker capacitor
To check the condition of the capacitor, you will need a test lamp with wires. One wire is connected to the “K” terminal of the ignition coil, the other to the wire from the capacitor to the switch. Then, without starting the engine, turn on the ignition. If the indicator lights up, the capacitor is faulty and needs to be replaced. The VAZ 2106 distributor uses a 0.22 µF capacitor, designed for voltages up to 400 V.
Adjusting the ignition timing
Ignition timing is the moment when a spark occurs at the spark plug electrodes. It is determined by the angle of rotation of the crankshaft journal relative to the top dead center (TDC) of the piston. The amplitude of the opening angle significantly affects engine performance. If its value is too high, the fuel will ignite in the combustion chamber long before the piston reaches TDC (pre-ignition), which can lead to detonation of the air-fuel mixture. If the spark is delayed, it will result in reduced power, overheating of the engine and increased fuel consumption (retarded ignition).
The ignition timing on the VAZ 2106 is usually set using a car strobe light. If there is no such device, you can use a test lamp.
Setting the ignition timing using a strobe light
To adjust the ignition timing you will need:
- car strobe light;
- key to 13;
- chalk or correction pencil for typed text.
The installation process itself is performed in the following order:
- We start the car engine and warm it up to operating temperature.
- Disconnect the tube from the vacuum corrector located on the distributor body.
- On the right engine hood we find three marks (low tide). We are looking for the average mark. To make it more visible in the strobe light, mark it with chalk or a correction pencil.
Video: adjusting the ignition using a strobe light
Setting the ignition timing using a warning light
To adjust the ignition using a lamp you will need:
- the warning lamp itself;
- head 36 with handle;
- key to 13;
- 16 key for candles with handle.
The operating procedure is as follows:
- Having placed head 36 on the crankshaft pulley ratchet, we move the shaft until the mark on the pulley aligns with the casting on the cover. When using gasoline with an octane rating of 92 or higher, the mark on the pulley should be aligned with the central reflux. If the octane number is less than 92, the mark is placed before the last (long) low tide.
- We check whether the distributor is installed correctly in this position. Loosen the latches and remove the distributor cover. The outer contact of the distributor spool must be directed towards the spark plug of the first cylinder.
Video: adjusting the ignition using a light bulb
Installing the ignition by ear
If the valve timing is correct, you can try to adjust the ignition by ear. This is done as follows.
- Let's warm up the engine.
- We start on a flat section of the track and accelerate to 50-60 km/h.
- We move to fourth gear.
- We sharply press the accelerator pedal all the way and listen.
- When the ignition is correctly installed, a short-term (up to 3 s) detonation should occur when the pedal is pressed, accompanied by the hum of the piston pins.
If detonation lasts more than three seconds, ignition is premature. In this case, the distributor body is rotated several degrees counterclockwise and the test procedure is repeated. If there is no detonation, post-ignition occurs and the distributor body must be turned clockwise before rechecking.
Preparing to replace the BSZ
The work of removing the old ignition and installing a new one does not require any special tools, devices or devices. An inspection ditch is not needed, and the entire operation can be carried out outdoors in good daylight. It is enough to have the following tools:
- a 13 mm open-end wrench for unscrewing the distributor fastening nut;
- using 10 and 8 mm wrenches, remove the coil;
- flat and Phillips screwdriver;
- pliers;
- electric or hand drill with a drill to match the diameters of the switch mounting screws.
Advice. To make the work easier, rent or from a friend a socket wrench with a long handle, which fits onto the ratchet nut and is used to rotate the crankshaft manually.
It is much more convenient to turn the crankshaft with this key
To get started, perform several preliminary disassembly steps:
- Open the hood and disconnect the negative battery terminal.
- Remove the high-voltage wires from the spark plugs and distributor cap.
- Unscrew the spark plugs.
- Place a screwdriver into the spark plug hole of cylinder 1 and turn the crankshaft until the piston reaches TDC. In this case, the mark on the shaft pulley will be opposite the longest mark marked on the cylinder block.
First thing you need to do is disconnect the battery
Advice. If you do not have a wrench for the ratchet nut, the crankshaft can be turned by rotating the suspended rear wheel of the car. Don't forget to secure the car with wheel chocks, release the handbrake and engage 4th or 5th gear.
When the 1st piston is at TDC, the marks on the pulley and block must match
Having matched the marks and prepared new parts, you can proceed to the main stage of work.
Features of installing a distributor on the engine of VAZ 2108, 2109, 21099 cars
Let's consider the features of installing a previously removed or new distributor (ignition distributor) on the engine of VAZ 2108, 2109, 21099 cars. Therefore, it is necessary to install the distributor so that the ignition timing is as close as possible to the required one, so that the engine can be started later. Features of installing distributor VAZ 2108, 2109, 21099
We install the pistons of the first and fourth cylinders of the engine at the highest dead center
To do this, turn the crankshaft clockwise until the mark on the camshaft pulley aligns with the protrusion on the rear timing cover.
On the protrusion on the clutch housing, the long (dangerous) mark on the flywheel should be opposite the triangular notch on the scale.
Flounce marking and triangle neckline 21083
You can turn it off the camshaft pulley nut with a 17 gauge wrench (you'll need to remove the timing cover to do this) or with a large slotted screwdriver behind the flywheel teeth in the clutch door.
Preparing the distributor for installation
We remove the cover from it. We install the contact of the slider on the output of the high-voltage wire of the first cylinder. This can be done by attaching the cap to the dispenser and finding the exit mark of the first cylinder on it.
We set the slider and cover before installing the VAZ 2108, 2109, 21099 distributor on the engine
Installing the distributor on the engine
Lubricate the distributor O-ring with engine oil. We insert it into the seat on the studs. In this case, the projections on the camshaft coupling should fit into the groove on the end of the camshaft. If the first two points are satisfied, then they will match.
We secure the distributor, but do not tighten the nuts completely, since then we will set the ignition times and will need to turn the distributor. Replace the cover and tighten the two screws to secure it. We connect the high voltage cables in the correct order.
Setting the ignition timing
Notes and additions
– Cylinder counting on VAZ 2108, 2109, 21099 engines is carried out by the timing unit. That is, the first cylinder is the farthest from the distributor.
More articles about VAZ 2108, 2109, 21099 cars
Source
Tuning on carburetor modifications of the VAZ 2107
All old textbooks on caring for classic Zhiguli models describe a method for setting the moment of sparking using a light bulb, although experienced motorists can easily do without it. You will understand why this happens as you read this material, but for beginners it will be useful to familiarize yourself with the old proven technique.
To check the performance of the carburetor or adjust its operation, it is recommended that you familiarize yourself with the following material:
To correctly configure the ignition of the “seven”, it is necessary to ensure that the following conditions are simultaneously met:
- the notch on the crankshaft pulley is opposite the long mark on the timing cover;
- in this case, the round mark applied to the camshaft chain drive gear coincides with the cast on its body;
- the piston of the 4th cylinder has completed the compression stroke and is at top dead center;
- the contacts inside the distributor are open;
- The movable contact of the spool faces the fixed contact on the distributor cap, where the spark plug wire of the 4th cylinder is connected.
Note. In non-contact systems, at this time the Hall sensor sends a signal to the switch to break the low voltage electrical circuit, which results in a high voltage pulse appearing on the wire leading to the 4th cylinder spark plug.
The diagram shows what happens in the cylinders when the marks are aligned
The light bulb is used to control the ignition timing, for which it must be connected with one wire to the “K” contact of the high-voltage coil, and with the second to the vehicle ground. You should know that in this case the piston of the first cylinder is also in the TDC position, only the air-fuel mixture is not compressed, but exhaust gases are released after its combustion. This is why ignorant motorists often confuse the first cylinder with the fourth when installing the ignition.
Location of labels on the timing cover
When the above actions occur simultaneously, a spark discharge jumps to the electrodes of the spark plug of the 4th cylinder, as evidenced by the flash of the connected light bulb. To meet these conditions and set the ignition correctly, follow the instructions:
- Turn the crankshaft with a 36mm wrench, aligning the notch on the pulley with the long notch on the timing cover.
- If the engine valve cover is removed at this time, it is better to navigate by the mark on the camshaft gear, placing it in front of the body casting.
- Take the ignition distributor, remove the cover and rotate its shaft to install the slider in front of the cable leading to cylinder No. 4 (cylinder number is indicated on the cap). Insert the distributor into the engine hole, holding the slider and housing in position, then secure it with a 13mm nut.
- Connect the light bulb wires and turn on the ignition by turning the key. Loosen the distributor nut and slowly turn it out of the housing until the light flashes, indicating the moment of spark. Connect the distributor.
- Turn off the ignition and make sure that the contacts inside the vending machine are currently open. Take a 0.35 mm feeler gauge and check the distance between them, if necessary, adjust it by loosening the mounting screws with a screwdriver.
The marks must be aligned by turning the crankshaft with a wrench
Note. The instructions imply that before starting work, the distributor was removed from the engine without aligning the marks.
The ignition is considered to be set correctly if, after installing the distributor cap and connecting the cables, the engine can be started and therefore the advance angle needs to be adjusted. The non-contact system is installed in the same way, with the exception of monitoring the gap in the contact group due to its absence.
Instructions for replacing the timing chain in a VAZ 2107 car are presented here:
The mark on the camshaft gear matches the cast on the housing
Important point. In most cases, the ignition is installed without removing the valve cover, which makes the position of the mark on the gear invisible. You have done everything according to the instructions, but the engine does not start. This means that the spark is supplied to the 4th cylinder during the exhaust stroke, while compression occurs in the first cylinder. The problem can be solved simply:
- remove the distributor cap;
- unscrew the nut securing it;
- remove the distributor from the socket, rotate the cursor exactly 180 ° and insert the element again;
- Press the nut onto the dispenser skirt and put on the lid.
Advice. If the engine does not start after these steps, but begins to show signs of life, the problem is not in the ignition setting, but in a malfunction of one of the system elements.
Photo instructions for setting up
First of all, align the markings on the pulley and the timing cover
The distributor is inserted into the hole so that the cursor faces the 4th cylinder
The distributor skirt is pressed to the block with a 13mm nut
The distance is checked with an open contact probe
The distance is adjusted by unscrewing 2 screws securing the contact group
The lamp will light up when a spark appears
Video about correct ignition installation
Scheme
The standard contactless ignition system on the VAZ classic consists of several modules. Typically, the installation kit includes hardware.
- Ignition coil for electronic module. Some motorists leave the old block.
- Distributor, also known as distributor. This is where the main difference lies. The two devices are similar only in appearance. The internal contents of the contactless and classic modules are completely different.
- Controller. This detail is not present on the standard system at all. The electronic unit is installed on the car body and connected to the distributor with wires.
- Hall controller. This part is extremely important for the normal operation of the system. A small sensor is responsible for reading the rotation of the engine crankshaft. If a part fails, the entire system stops working.
More complete kits include spark plugs and armored wires. For the electronic system, the gaps on the spark plugs are set differently, or the elements are replaced.
Installation
It’s easy to install the BSZ on a VAZ with your own hands. You will need to perform a certain sequence of actions.
- Disconnect battery power.
- Remove the distributor cover and turn the crankshaft. Set the first cylinder to TDC so that at this moment the ignition slider aligns with contact 1 of the working chamber.
- Remove the standard ignition coil and replace it with a new one. Here the position of terminals B and K must be observed. This is necessary because the contacts on the modules can be turned out.
- Now we remove the high-voltage wires from the spark plugs and remove the distributor cover from the car.
- Disconnect the distributor itself and remove it from its seat.
- Now we place the switch in a suitable place. It is desirable that the back wall of the device is completely adjacent to the metal surface. This will help cool the device better. Typically, drivers place the part on the inside of the wing or the interior bulkhead. Experts also advise treating the panel to bare metal.
- Next, a new distributor is installed. Here you need to set the marks to the zero position. Align the slider to the ignition firing position on cylinder 1.
- Add high-voltage wires to the cover according to the engine strokes.
Connecting electronic ignition to a VAZ 2106
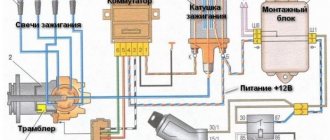
Installing the device is half the trouble. Now you need to configure it correctly. The wiring of the new module is included in the kit and is wound into one bundle. The figure above shows a diagram of connecting the device to the on-board network.
The first contact of the switch and the tachometer wire, both brown, are connected to terminal “K”. Two wires are also placed at the output of coil “B”, from terminal 15 of the ignition coil and block 4 from the control unit. The second wire from the block is routed to body ground.
How to set electronic ignition
Adding a new distributor using the marks is much easier than performing a similar procedure on a classic. The ignition timing is set using the marks. The sequence of actions looks like this.
- Set the distributor according to the marks to advance “0”.
- Try to start the engine.
- Next, you need to turn the distributor body to catch the moment of optimal advance. In this mode, the engine runs smoothly, responds quickly to the gas, and there are no dips.
If you have no experience in such repairs, it is recommended to contact a specialist. Beginners rarely catch the right moment correctly.
Adjusting contactless ignition 2106
Once set, no procedure is required. The module does not have a large number of moving parts. It is enough to set it up correctly initially and use it for a long time.
The adjustment procedure may be necessary after repairing the internal combustion engine, when the valves or carburetor were adjusted. The technician's actions may cause the device to go astray, and its position will need to be corrected.
Video about setting up contactless ignition
If you removed the distributor and high-voltage wires with the cover without aligning the marks, then the following video material will help you correctly set the ignition again:
Operating a car with an electronic system is very different from driving with an old ignition. The engine runs much smoother and more stable, and cleaning the contact group is a thing of the past. But it wouldn’t hurt the owner of a VAZ 2106 to carry a Hall sensor in reserve in case the standard one breaks down. This part cannot be repaired, although it breaks quite rarely.
Source
What is the price
A complete set for a VAZ 2106 costs from 3,000 to 4,000 rubles, depending on the manufacturer. Typically this includes:
- switch;
- distributor;
- coil;
- Hall controller;
- wiring.
Some kits also contain a set of spark plugs and high-voltage wires.
If the driver does not understand auto electrics, additional assistance from specialists will be required. Services at a service station will cost another 1000-2000 rubles. The specific cost of installation in each city can vary significantly.
Installing electronic ignition on the 2106 is carried out according to a similar principle as on other classics. If you have direct hands and a little knowledge of auto electrics, you can install the system yourself.
Source