In the summer, probably every driver encountered such a problem as engine overheating. But if you frequently inspect the engine cooling system and eliminate any difficulties that arise in a timely manner, then overheating of the engine can really be avoided. As the temperature of the cooling water increases, there may not be enough natural cooling, which is when the fans installed on the radiator turn on and increase heat removal.
A sensor is responsible for turning on the fans, which is triggered when the temperature reaches a critical level. This sensor is located at the bottom of the radiator. In this regard, the sensor that turns on the fan in the summer must be in good condition.
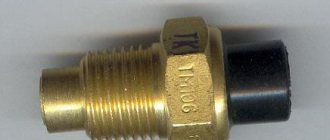
Fan switch sensor
Refusal of constant rotation of the fan using a belt drive made it possible to reduce the engine warm-up time. The electric drive, which consists of a motor, relay, switching sensor and battery, allows the fan to turn on only when the engine temperature exceeds the optimal value.
Thanks to this approach, the cooling system of internal combustion engines has become more efficient. Periodically turning on the fan made it possible to reduce fuel consumption, because the engine warm-up time was reduced and power losses due to the constant rotation of the blades disappeared.
How does it work and where is the fan switch sensor located?
The sensor is based on a bimetallic plate, which changes its shape with increasing temperature. When the coolant temperature exceeds the value indicated on the sensor body, bending of the bimetallic plate causes the sensor contacts to close. The electric current that passes through the sensor contacts turns on the power relay that controls the fan motor.
The sensor is located on the side of the radiator. On some models it is located at the top, on others in the middle. It is not difficult to recognize him. It looks like a large brass nut, to which two (less often three) electrical wires fit. When planning to change the fan switch sensor, consider the following.
The lower the sensor response temperature, the lower it is set relative to the coolant level. The switching temperature of the sensors, which are installed at the bottom of the radiator, does not exceed 85 degrees. The temperature of the sensors is set in the middle of the radiator to 90 - 95 degrees.
General theoretical information
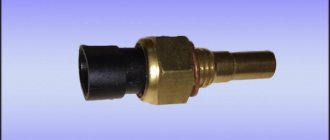
Sectional view of the fan switch sensor
Where is the fan switch located?
So:
- The answer to this question is very simple - in the stove radiator. In different cars and on different radiator designs, the sensor may be located in the left or right tank, below or above, but it will always be located in the radiator.
- It is very easy to determine - this is the only thing in the radiator to which the electrical wiring wires fit, and there are few things in the radiator area that can be unscrewed with a 30 key . So when replacing the fan sensor on a VAZ 2107 or another VAZ, it is very difficult to make a mistake.
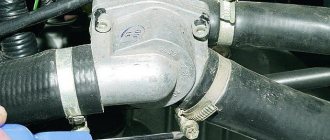
This is what the sensor looks like on a car
At what temperatures should it work?
- Sensors are available with different temperature limits.
- Often the fan sensor turns on at 92 degrees and turns off at 85-87 degrees.
- There are sensors with on-time intervals from 92 to 98 and off intervals from 82 to 87. When purchasing, choose the same sensor you had or the most common one - 92/87.
On what principle does it operate?
In order to replace the fan switch sensor on a VAZ 2110, this, of course, is not necessary to know, but it will be useful for general development:
- The sensor contains a contact group.
- When the coolant inside the radiator heats up, the sensor contacts heat up and expand.
- Reaching a certain limit, the contacts close, a signal is transmitted to the wires and the fan is activated.
How to check the fan switch sensor
The need to check the sensor arises after the engine overheats or there is a suspicion of poor performance of the cooling system. First of all, it is necessary to check not the sensor, but the wires and relays that turn on the fan. To do this, remove the wires suitable for the sensor and short-circuit them; if there are not two, but three wires, then you need to short-circuit the middle one and each of the outer ones one by one.
The fan should turn on at low and high speed, depending on which contacts are closed. If the fan turns on, it means that the wires and relays are working properly and you can start checking the sensor; if not, you need to find and eliminate the malfunction (broken wires, poor contact, blown fuse, burnt out relays or fan motor).
- After making sure that the relay, motor and wires are working properly, proceed to checking the sensor. To do this, you will need a basin for coolant, a 30 key, a thermometer up to 100 degrees, a pan of water, a stove and a multimeter.
- Remove the terminal from the battery and place a basin under the car so that the coolant from the radiator does not pour onto the ground, but into it.
- Wait until the radiator cools down to 45 - 50 degrees, then unscrew the drain plug (it is located at the bottom of the radiator on the left or right side).
- After the liquid has drained, screw the plug into place. Remove the wires from the sensor (if there are 3 of them, then mark each one so that when installing a new sensor you do not mix them up), then unscrew the sensor with a 30 mm wrench.
- Pour water into a saucepan so that it covers the working part of the sensor (up to the nut) and place it on the stove. Monitor the water temperature with a thermometer.
Instructions for replacing the regulator
Replacing the fan switch almost always follows the same pattern:
- We need to prepare the “ground”. In some cars, this happens as follows: you need to rid the system of cooling liquid if the fan is installed at the bottom of the radiator, or, if the system has enough, remove water from the expansion tank. If the antifreeze needs to be completely drained, then you need to open the heater tap so that there is no residue. Important: do not pour the remaining liquid onto the ground, because antifreeze is quite poisonous.
- After this, you can remove the sensor by disconnecting the connected wires. Then, using the key, you need to remove the housing and unscrew it by hand. The new fixture must be tightened by hand, then a wrench can be used to apply the finishing touches. To prevent leakage, you can use a special thread tape, which will make the connection tighter and more reliable. After this, you can restore the contacts by returning all the necessary wires to their place, and fill the system with coolant.
Price issue
In the photographs below you can see what the device looks like, as well as estimate the cost of various models.
The request returned an empty result.
How to choose a new sensor
To select the right sensor, you need to know the optimal coolant temperature at which it should turn on and off. For a VAZ 2110 car this is 92 and 87 degrees. The optimal sensor response temperature for another car is indicated in the repair and operating instructions for the car.
Buy a sensor only in large stores and be sure to take a receipt. Before installing the sensor on the vehicle, check it as described above. If the difference between the temperature indicated on the sensor body and the temperature at which it actually operates exceeds 5%, replace it. Operating the motor at a temperature different from the optimal one greatly reduces its service life.
https://vipwash.ru/sistema-ohlazhdeniya/datchik-vklyucheniya-ventilyatora
Reasons for fan failure
There are a number of reasons why the fan sensor can eventually fail other than the sensor itself. Therefore, they should first be excluded to make sure that the sensor is to blame.
Reasons for fan failure include:
- The fan has failed. It can wear out, lose integrity, and receive mechanical damage. It will be more expensive to replace it compared to the sensor, but there is no choice.
- The chain has broken. When testing a sensor, the method of closing two of its contacts is usually used. But if the wiring circuit is damaged, this will not be possible, and due to inexperience, all the blame will be placed on the regulator.
If checking the contacts does not produce results, the fan does not respond, try connecting its contacts directly to the battery.
What principle does the fan switch sensor work on?
A car engine converts only part of the energy from fuel combustion into useful work. A significant percentage is spent on heating the body of the unit, which needs to be cooled. The reliable functioning of the cooling system directly depends on the health of the wiring and the fan switch sensor. The fan switch sensor is designed to perform the following functions:
- activation of the fan impeller when a certain temperature is reached;
- adjusting the fan speed during cooling (not on all cars);
- turning off the fan, which protects the power unit from overcooling.
Where is the sensor located and how does it work?
Fan switching sensors are located on the cooling system elements. The installation point is located in the path of the fluid flow supplied from the engine jacket to the radiator. This is due to the fact that the liquid in this line will have the highest temperature.
Possible installation locations:
- thermostat housing outside the valve;
- cylinder head;
- lower radiator hose;
- side of the radiator.
On some vehicles, the sensor is combined with a coolant thermometer. The fans are turned on by the control unit based on temperature data. In this case, there is an additional sensor on the radiator that is used to operate the climate control or air conditioning. Triggering of any of the devices turns on both fans (on the engine and air conditioner radiators).
A similar solution is found on Japanese cars. On cars, two fan switching sensors can be used, located at the inlet and outlet of the radiator pipes. This scheme allows you to maintain the temperature in a narrow range.
Varieties
On cars, the following types of sensors are used to turn on the fan:
- bimetallic;
- waxy;
- thermistor;
- a sensor that operates on a circuit break or short circuit.
The first two types of sensors have an electromechanical operating circuit and can be of two varieties:
- single-speed, equipped with a single contact group that controls the fan in one temperature range;
- two-speed, equipped with a pair of contact groups configured to operate at different temperature ranges.
Regardless of the type, the sensors are a metal housing equipped with a thread. The body material used is non-ferrous metals based on copper (bronze or brass), which provide increased thermal conductivity. There is a hex key on the body that is used for installing the part. The wiring connector is located on the top of the sensor.
Bimetallic sensor
A bimetallic sensor contains a metal plate. In normal condition the contacts are open. As the plate heats up, it deforms and closes the circuit, supplying a control signal to the impeller motor turn-on relay. There are sensors that activate the fan motor directly without a relay. When the liquid cools, the plate returns to its original shape and the current supply to the motor stops.
Wax sensor
Sensors were produced for which wax or ceresite (or another substance with a significant coefficient of thermal expansion) was used as a working substance. As it warmed up, it expanded and shifted the metal membrane associated with the contacts. As it cooled, the volume of the wax decreased, and under the action of the spring the contacts opened.
Thermistor sensor
The thermistor sensor works on the principle of changing the resistance of a resistor installed in the fluid flow. The temperature change is recorded by an electronic unit, which recalculates the temperature value in accordance with the schedule.
Sensors that operate on open circuit or short circuit
Devices that turn on the fan when the circuit breaks are often found on Japanese-made cars. You can check the sensor type by removing the plug. When the block is removed from the tensile sensor, the fan will turn on.
At what temperature does the fan switch trigger?
The temperature range of the sensor response depends on the type of engine power supply. On carburetor cars, devices with a switching range of 82-110 ºС are used. The activation temperature is stamped on the body of the part. On cars of the same model, there may be sensors calibrated for different temperatures. According to the standard, sensors are divided into four groups according to operating temperature:
- 82-87 ºС;
- 87-92 ºС;
- 92-99 ºС;
- 104-110 ºС.
Russian cars use sensors of the first three groups. The engines of foreign cars are designed for more severe temperature conditions, so devices of the fourth category are often found on them.
When you start using distributed injection systems, the temperature at which the fan turns on is determined by the settings of the engine control unit. The sensor simply transmits temperature information to the control unit, which decides to turn on the fan according to the programmed program.
On injection machines, you can program temperature thresholds at which the fan switch on sensor will work. This should be done carefully, since it is easy to disrupt the temperature regime and damage the engine.
Design and principle of operation of wax DVV
The operation of this type of sensor is based on the well-known effect of thermal expansion of bodies - an increase and decrease in volume with an increase and decrease in temperature. The working fluid in such sensors is a mixture of paraffins - ceresite (also known as petroleum wax) with the addition of a small amount of copper powder to increase thermal conductivity. Ceresite is placed in a sealed housing, closed by a diaphragm (membrane), which is connected to the contact group drive. The drive can be direct (the membrane is directly connected to the contacts) or indirect (via a lever and spring, which ensures more reliable closing and opening of the contacts). Single-speed sensors have only one membrane and a contact group, while two-speed sensors have two membranes with their own contact groups.
The sensor works as follows. At low temperatures, ceresite has a certain volume at which there is no effect on the diaphragm - the sensor contacts are open (or closed, if this position is normal for a given sensor), the fan circuit is de-energized. As the temperature rises, the ceresite expands and lifts the membrane; at a certain point it rises so much that it closes the contact group - the fan circuit is closed. In two-speed sensors, as the temperature further increases, the ceresite expands and acts on the second diaphragm. As the temperature drops, the volume of wax decreases and at a certain moment the contacts open and the fan turns off.
Today, it is wax fan switches that are most widely used in all types of automotive equipment.
How to check the fan switch sensor?
The power sensor can be checked without removing it from the car, or in a dismantled form. Checking a device that has not been removed allows you to check the serviceability of the device, and the response temperature range can only be checked by removing the product from the car. Checking the removed sensor:
- Prepare a container, thermometer and multimeter. The multimeter is set to ohmmeter mode.
- Place the sensor in water and heat it to the required temperature. At low temperatures, the sensor resistance is shown as infinite.
- Wait until the resistance suddenly decreases. Check the sensor switch-on temperature.
- Gradually cooling the water, determine the contact opening temperature.
- Compare the obtained data with the passport values.
In the absence of a tester, the fan switching sensor can be checked with a test light, which lights up at the moment the contact group is activated.
In a car with a carburetor engine
The sequence of checking the sensor on a car with a carburetor:
- Turn off the ignition.
- Carefully remove the wires from the sensor. When dismantling, keep your hands and clothing at a distance from the fan impeller, since the electric motor can be started even when the ignition is turned off.
- Connect the wires in the plug.
- Turn on the ignition. The fan should start working. If the mechanism does not start to rotate, then the problem lies in the electric motor or wiring.
Radiator cooling fan sensor: how to check the response temperature yourself
The radiator cooling fan is one of the key elements that saves the engine from possible overheating. It should turn on when the coolant is too hot and not cool enough as it passes through the radiator. For example, this situation occurs when the engine is idling or the vehicle is moving at low speed, especially at high ambient temperatures.
The sensor is responsible for turning the cooling fan on/off. It should trigger at high temperatures, activating the fan. If this does not happen, the sensor will need to be replaced. In this article, we will look at how to determine that the radiator cooling fan sensor has failed.
1. How the radiator cooling fan sensor works 2. Where is the radiator cooling fan sensor located 3. How to check the radiator cooling fan sensor
How does the radiator cooling fan sensor work?
To understand how to test a sensor, you must first understand its operating principle. The design of the radiator cooling fan sensor is very simple, but it is somewhat different on carburetor and injection engines.
In a carburetor, it has two contacts and a bimetallic plate. When the bimetallic plate is heated to a temperature determined during the production of the sensor, the contacts close and current begins to flow through them to the fan, turning it into operation. On the injector, the sensor activation system is almost the same, except that the command to turn on is sent by the engine control unit, analyzing the need to activate the fan based on information coming from several other sensors.
Sensors on carburetor engines operate when a certain temperature is reached, and the driver can look at the markings on the device body to determine in what temperature range the sensor will operate. Typically, such sensors are activated at temperatures between 92 and 97 degrees Celsius. If the driver is concerned about possible engine overheating, he can find a sensor on sale that operates at a lower temperature and install it. On injection engines, the sensor response temperature is stitched into the “brains” of the car control unit.
Where is the radiator cooling fan sensor located?
Manufacturers determine the location for installing the fan sensor, depending on the design features of the engine. Most often it is placed at the bottom of the radiator, but sometimes it is more expedient to place the sensor near the thermostat and cylinder block.
How to check the radiator cooling fan sensor
We recommend reading: Radiator cooling fan does not work or does not turn off: what to do
Methods for diagnosing the sensors in question will differ, depending on which engine they are installed on and how they are turned on:
- On the carburetor. To check the radiator cooling fan sensor on a carburetor engine, you must turn off the car. Next, find the sensor in the engine compartment and remove the wires from it that go to the connector. After this, we start the engine and bridge the connectors from which the wires were removed. If the fan turns on, you can diagnose a sensor failure. Please note: In a situation where the sensor fails on the road, in order to avoid engine overheating, you can bridge the sensor contacts in a similar way. It is important to insulate them so that they do not touch the housing and cause a short circuit.
- On the injector. In an injection engine, you can carry out computer diagnostics of the sensor. A number of modern cars have a separate diagnostic error indicating that the cooling fan sensor is faulty. If such an error has been identified, you can diagnose the sensor on the car as follows. You need to disconnect the connector from the sensor and wait a few seconds. The control unit will detect that the sensor is no longer connected and will start the fan.
The options with complete sensor failure are discussed above. In this case, situations are possible when it partially fails, for example, it operates at the wrong temperature. This can also be checked in the following way:
- Take a tester, a thermometer for measuring water temperature, a container for heating water, water and the sensor itself;
- Next, pour water into the container and set it to warm up;
- Place the sensor to be diagnosed in water so that its contacts are on top;
- Monitor the water temperature with a thermometer, while holding the probes of the tester (included in the resistance measurement mode - Ohm) on the sensor contacts;
- Until the water is heated, the sensor resistance will tend to infinity. At a certain heating temperature, the sensor should operate and the resistance will decrease significantly. It is necessary to determine at what water temperature this occurs.
Depending on the results obtained, you can make a decision about the serviceability or malfunction of the sensor. If it operates at a temperature lower than stated, then such a sensor has some problems, but it can prevent the engine from overheating by turning on the fan in advance. It is much more dangerous if the sensor operates at a temperature higher than stated, in which case it will need to be replaced.
( 440 votes, 4.52 out of 5) Loading...
Source: https://okeydrive.ru/kak-proverit-datchik-ventilyatora-oxlazhdeniya-radiatora/
How to properly replace the fan switch sensor?
Typical set of tools and accessories for replacement:
- set of heads;
- extension cord with ratchet;
- pliers;
- flat blade screwdriver;
- sealant;
- a socket for removing the sensor or a suitable wrench;
- container for draining liquid (5-6 l);
- coolant for topping up (0.4-0.5 l).
Sequence of steps for replacement:
- Cool the engine to a comfortable temperature.
- Place a container and drain the coolant from the radiator. To access the drain valve, you may need to remove the engine crankcase protection or plastic mud flaps. Some vehicles require removal of the heating system pipe.
- Disconnect the wiring plug from the sensor. Inspect the terminals, clean them from dirt and traces of oxidation. Check the condition of the wires going to the plug. If the insulation becomes cracked or otherwise defective, the worn area must be replaced. Connecting new wires must be carried out in compliance with polarity.
- Unscrew the faulty sensor. It is not recommended to apply a lot of force, as there is a risk of breaking the radiator. To facilitate the process, the use of liquids such as WD40 is allowed. To access the sensor installation location, it may be necessary to remove the battery, its platform, or engine air ducts.
- Lubricate the threads of the new sensor with sealant designed for use in elevated temperatures.
- Install a new O-ring on the sensor. Reusing gaskets is not recommended since the joint is not sealed.
- Screw the sensor into place and tighten to the required torque.
- Install the wiring plug onto the sensor.
- Restore the coolant level in accordance with the vehicle service instructions.
- Warm up the engine to operating temperature and check the operation of the new device. During the first days of operation, carefully monitor the coolant temperature. This applies mainly to domestically produced cars, since the sensors are often defective or set to the wrong response temperature.
On some cars, after turning on the ignition, a new sensor is diagnosed, which consists of turning on the cooling fan for 15-20 seconds (on a cold engine).
How to choose a new sensor?
When purchasing a new sensor, it is recommended to purchase a device of the same type and range as the one you had previously. However, it is possible to replace the device with a similar one, similar in characteristics.
Recommendations for choosing a sensor:
- The operating voltage of the sensor must correspond to the voltage in the on-board network;
- the connection plug must match the wiring harness;
- the sensor must match the current in the circuit. It is unacceptable to use a device designed to operate with a relay in the direct fan connection circuit;
- the temperature range of operation should be close to the marking on the broken device;
- The sensor body must have threads and the length of the threaded part of the appropriate size.
On modern foreign-made cars, the fan switching sensor is selected according to the original spare parts catalogues.
VAZ 2107 fan sensor malfunctions and performance check
It is easy to find out whether the VAZ 2107 fan switch sensor is working properly. The fan motor is quite noisy; you can hear it turning on even from inside the cabin. If the temperature gauge shows more than 90 degrees, but the fan does not turn on, you should check the sensor.
First you need to localize the source of the problem. If the antifreeze is hotter than 90 degrees, but the bottom of the radiator remains cold, the problem is the thermostat, not the fan. It is not possible to replace the thermostat on the road. To get out of the situation, you can increase the cooling by fully opening the heater damper and turning on its fan. Of course, such a solution will be extremely uncomfortable in the warm season, but, if you’re lucky, it will make it possible to get to the repair site without stopping. If this is not enough, you will have to make stops along the way to allow the engine to cool.
Another reason for overheating is low coolant level. In this case, it is necessary to quickly find and eliminate the leak and add antifreeze to the system. If it is not there, you can add water to the system. But then, as soon as possible, it is necessary to drain the liquid from the cooling system and add antifreeze.
If the radiator is hot and the fan does not start, you need to try to start the fan by short-circuiting the two wires going to the sensor contacts. If the cause of the breakdown is the latter, the fan should start working.
If the sensor is not installed on the car, you can check it using a thermometer and ohmmeter. You need to place the part of the sensor that is inserted into the radiator into water and heat it to about 90 degrees. The sensor should turn on when the water heats up to no more than 92 degrees. The switching on (closure of the sensor contacts) is indicated by the absence of resistance between the sensor terminals.
How much does the sensor cost?
The cost of the sensor depends on its type and car brand.
| Name | Price, rub |
| Bimetallic for domestic cars | from 250 to 400 |
| Sensor for budget foreign cars | from 700 to 1500 |
| Prices are relevant for three regions: Moscow, Chelyabinsk, Krasnodar |
The cost of sensors for some types of vehicles can reach up to 3-6 thousand rubles.
https://avtozam.com/elektronika/sensor/datchik-vklyucheniya-ventilyatora-v-avtomobile/
Operating principle of the device
based on the difference in linear expansion of metals. When the coolant heats up, the bimetallic plate of the device changes its position. At a certain moment, the contact group closes. A signal is transmitted to turn on the fan. In some sensors, when the engine overheats, the circuit breaks.
Depending on the model, the sensors have different temperature response limits. So, to turn on the fan of the VAZ 2114-2115, a temperature of 102-105 ° C is required. The shutdown signal comes when the engine temperature drops to 85-87°C. When choosing a new sensor for his car, the car owner should focus on the old device.
In the absence of the original, previous device, the necessary information can be obtained from special catalogs.
Most modern fan control systems do not have sensor limits. It does not operate in relay mode, but constantly transmits information about the engine temperature to the electronic control unit. The ECU itself sets the limits for turning the fan on and off. Changing the operating range will require brain reprogramming.
Cooling system design features
I like. But these are trifles for a person who more or less understands electrics. This does not affect maneuverability and speed. The design uses a two-contact sensor, which, depending on the temperature, powers the electric motor directly or through resistors; a combination of parallel and series connection.
Place the tee so that the sensor contacts are at 90 degrees, and not as in my photo, I almost missed this moment, the stove body does not sit properly. Sawed by a Bulgarian's wife and rolled with a hammer and filed. In the modern world, they are increasingly using a fan control unit instead of a fan switching relay. They both must go to the normally open terminals of the electromagnetic relay. This option is quite complicated for a person who is not very versed in car electrics.
As for the latter, the permanent drive is carried out by the crankshaft. You should not use this option if the bathroom is located near living rooms, since night ventilation can create quite loud noise. The light in the room and the fan work in parallel, i.e.
It must be said that there can be several such sensors on one car. It should be based on what conditions are present in your bathroom.
It fits the thread, but it has a different feature. Of course, the dashboard may be lying here and according to the On-Board Computer the readings are completely different. Let's consider not only the operating principle, but also the connection option with the possibility of forced activation of the VCO cooling system fan. The relay connection diagram is simple - you need to connect two wires parallel to the sensor. 2-speed fan activation
Connection diagram for the fan switching sensor in injection engines
The carburetor has been used on gasoline engines for more than 100 years. Despite the new fuel injection systems, this technology has not lost its relevance due to the simplicity of the design and the ability to service the system with your own hands. An injector is an integral component of the fuel system of many modern cars.
- Despite the complexity of the repair, this unit characterizes itself exclusively on the positive side. This is largely due to its efficiency, ease of operation and high environmental friendliness.
- Unlike carburetor cars, where the sensor directly closes and opens the cooling fan circuit, in injection engines the device operates only with an information signal.
- After processing the received data, the ECU sends a control action to the fan relay installed on the radiator. The main advantage of this scheme is the possibility of emergency operation of the cooling system in the event of a loss of communication with the sensor or its failure.
- The ECU can also adjust the engine operating mode by influencing the injectors. To determine the location of the fan switch sensor, you need to pay attention to the thermostat. In injection engines they are located next to each other.
In some car models, wires go from the sensor to the dashboard to indicate the status of the device or to display the current coolant temperature.
Operation of the cooling fan in fuel-injected cars
The operation of the fan unit for cooling the temperature in injection engines is assigned to an electronic motor controller. Its software is configured to trigger the engine overheat protection system in the temperature range from 100 to 105 degrees Celsius. If a defect occurs in the operation of the fan switch on in a VAZ with an injector, the controller “remembers” the error code and the fan starts working when the motor is turned on.
However, there are separate precedents when electronics in the form of a controller “reads” a defect and the fan installation may not begin to function when extreme temperature values are reached, i.e. above 105 degrees Celsius. Then, to test the circuit and the device, you need to disconnect the contact of the cooling fan switch sensor with the engine turned on.
If the circuit is functioning, then the fan unit should turn on and turn off with reverse action. If the circuit does not function, a test should be carried out to determine the suitability of the safety device and the technical readiness of the wiring and relay.
A quick check of the system is carried out as follows: we bridge the two contacts of the fan relay. If the product works in this position, then, without disconnecting the relay from the wire block, bridge the body of the relay and its contact using a “control”. In this position, the relay should function like the fan unit, which means that the controller or the relay connecting wire to the contact of this device is faulty.
If there is no sound of relay initiation, there is only one conclusion - the part requires replacement. If the fan unit does not start working when the relay terminals are closed, it is necessary to test the fuse for integrity and the power supply to the terminals of the fan unit. If power is supplied to one contact and not to the other, this may indicate defects in the EDC of the fan installation.
Checking the functionality of the sensor
Checking the functionality of the device should begin with monitoring the response temperature. To do this you will need a thermometer and a multimeter. All actions can be performed independently, without resorting to a visit to the service center. If the multimeter is equipped with a thermocouple, then there is no need for a thermometer. To check the sensor, follow the instructions below:
- Switch to resistance measurement mode. For convenience, you can select the dialing mode;
- Immerse the threaded part of the sensor in water;
- Start gradually heating the water. You can control the temperature using a thermometer, or temporarily switching the multimeter to the thermocouple mode;
- Wait for the device to respond;
- Compare the temperature to which the sensor responded with the nominal value.
If there is a critical deviation of the response limit, the sensor must be replaced. After purchasing a new device, you must check its suitability. Defective products are very common on sale, so checking whether the sensor turns on correctly is the responsibility of every car owner.
It turns out that the sensors are different. Which ones?
As can be seen from the question, now we will find out what varieties there are and how they differ from each other. So:
- The difference is in the manufacturer of the sensor. This does not play a special role. If a company is doing this, then it knows what it is doing. But still, don’t take one that’s too cheap, otherwise it may turn out to be a fake.
- Temperature conditions. Pay attention to the numbers that are engraved on the sensor. They will tell you a lot. For example, 92-87 are two temperature values.
- The first value, 92, is the temperature at which the sensor will operate and signal the fan to turn on and cool the liquid inside the radiator.
- The second value 87 is the temperature at which the sensor will stop cooling and fan operation. Thus, the temperature limit of this sensor is five degrees.
- This is the most common among coolant temperature sensors.
- But there are other sensors with other temperature conditions. They are created for the special conditions in which a particular vehicle operates.
- For example, in conditions of low temperatures or, conversely, increased temperatures, sensors are installed with different parameters.
We draw a conclusion. The most common sensor is the 92-87, but if necessary, you need to choose based on your climate and the weather conditions of your area. Here, for example, is a radiator sensor that is suitable for many cars with parameters 92-87 from LUZAR from St. Petersburg (see photo). Such a sensor costs no more than 150 rubles - that is, the price of the sensor is not high.
How to check the radiator sensor
This procedure is done in two different ways, which you will now learn about.
For the first procedure you will not need any equipment:
- If the temperature is already over 92 degrees, and the fan does not work, then a check is needed.
- Turn on the car ignition. We disconnect the two wires coming to it from the fan switch sensor.
- Connect these two wires together. If the fan turns on and works, then the failure is not in it, but in the radiator sensor.
- If the fan still does not work, then it should be repaired or even replaced.
The second method is carried out on a removed radiator sensor, or if you want to check the functionality of a new sensor before installing it on a car. So:
- For this you will need: a sensor, a container of water, a heater (stove, boiler), a multimeter, a thermometer with a scale of up to 100 degrees.
- Place the bottom of the sensor in a container of water and gradually heat it up.
- Using a tester, we check the short circuit and open circuit of the sensor contacts. To do this, we set the tester for continuity or resistance measurement, and connect the two ends to the two terminals of the sensor.
- If the sensor is triggered and then turns off, everything works and it can be installed on the car.
Replacement with draining antifreeze
If you discover that the device is not functioning correctly or is completely inoperable, you need to replace it with a new one. To perform dismantling, you must follow the instructions:
- If the engine is hot, it must be allowed to cool;
- De-energize the vehicle ground by disconnecting the negative terminal;
- Remove the expansion tank cap;
- Remove ;
- To prevent contamination, it is necessary to place a container under the drain hole;
- Drain the antifreeze from the . There is no need to drain antifreeze from the cylinder block. To unscrew the drain plug, just a hand is enough, so no tools are needed;
- When the liquid stops flowing out, you should return the plug to its place to avoid its loss;
- Remove the terminal with wires;
- Use a wrench to carefully unscrew the sensor.
Procedure for checking
The operation of the fan on the VAZ-2114 is connected through 2 fuses. One of them is also responsible for the sound signal.
You can check it by pressing the horn. If there is no sound, replace it with a whole one. It is located in the mounting block, it is 20 ampere, marked F5.
Check and, if necessary, change fuses
The second one is located under the dashboard, on the passenger side.
Under the casing there are 3 relays with a fuse for each. The middle pair is responsible for the operation of the cooling fan. Replace the blown element with a new one (the fuse can be “ringed” with a multimeter or limited to a visual inspection. To check the functionality of the relay, you will need an ohmmeter). When checking their condition, at the same time make sure that the contacts are in normal condition, and if oxide is detected, clean them.
Important! If you find a blown fuse, you should not limit yourself to replacing it with a new one. It is imperative to find the cause of the break, since in the near future the new one will burn out again.
Checking the fan switch sensor
If the cause is not found, the next step should be to check the functionality of the fan switch sensor
. It's not difficult to do this. Disconnect it and turn on the ignition, while paying attention to the fan. The rotation of the blades indicates that the cause of the problem is in the sensor.
Checking the cooling system fan switch sensor
Due to the fact that very often the sensor begins to malfunction, sending erroneous signals, it is recommended to check it in another way
. To do this you will need a container, a thermometer and a multi-mert. Wires from the measuring device are connected to the sensor terminals, the threaded part of the sensor is immersed in the liquid. Heat the contents of the container to the temperature at which the fan operates (on a VAZ 2114 - 92 degrees). When the contacts close, the multimert will sound a sound signal. This means the sensor is working, if this does not happen, you can safely throw it away and buy a new one.
Healthy! Before installation, it is advisable to check the functionality of the purchased sensor in the same way.
Video about checking the cooling fan switch sensor
Final check
Having eliminated the problem, start the car engine. The fan motor should start after about 5 minutes of idling.
. If this does not happen, and the temperature has reached the desired level, diagnose the faults again.
Installing a new sensor without draining the coolant
In the injection engine of most car models, the sensor is located high in the cooling system, which allows it to be removed without a significant spill of antifreeze. To do this, you must follow the instructions below:
- Do not unscrew the sensor completely. In this case, a slight leakage of antifreeze will begin;
- Check the copper washer on the new sensor;
- Unscrew the old device with one hand and quickly bring the new one in with the other;
- After tightening the regulator, thoroughly wipe the area from any coolant drips;
- Check the quality of installation for leaks.
With this method, the car owner can significantly save time. The disadvantage of this method is the need to make a replacement quickly, which can cause difficulties for inexperienced car enthusiasts. If the circumstances are unfortunate, a large amount of antifreeze may spill from the cooling system.
Keeping all elements of the cooling system in working order will protect the engine from overheating and unpleasant consequences. It is necessary to carry out timely monitoring of the operation of the regulator, especially when the first symptoms of overheating appear. Since the work requires the presence of heated fluid, all manipulations should be performed on a cooled engine. This will protect the car owner from thermal injuries.
https://swapmotor.ru/ustrojstvo-dvigatelya/datchik-vklyucheniya-ventilyatora-v-inzhektore.html
Replacing the temperature sensor
How is it done? Now we will find out what is needed from the tool for this, and in what sequence to carry out the work.
Tool
Here is a list of the necessary tools for the job:
- Key for 30
- Key for 10
- Container for antifreeze
- Watering can
That's all. Now you can change the sensor.
Regular replacement
Now let's look at how to properly replace the fan sensor. The circuit is suitable for VAZ 2107, VAZ 2110 and other cars with an electric cooling fan.
Advice! Carry out the replacement in the inspection pit, having first cooled the car so as not to be scalded by hot antifreeze when draining.
So:
- So, we drove the car into the pit, waited until it cooled down and got to work.
- Disconnect the negative terminal from the battery using a 10mm wrench.
- Next, open the filler cap of the expansion tank of the cooling system.
- Place a container for antifreeze under the car. It should be placed under the drain plug on the cooling radiator.
- Unscrew the antifreeze drain plug on the radiator by hand.
- Catch a stream of antifreeze with a container and wait until it flows into the container.
- Next, you should screw back the radiator antifreeze drain plug.
- Now we need a key for 30. We use it to unscrew the fan switch sensor and remove it from the .
Note! On the copper washer under the removed sensor. If this is not the case on the newly purchased sensor, then you should install the old one. Pre-sand the washer on a whetstone.
- Clean the fan sensor seat with a knife or just a rag.
- Screw the new radiator sensor into the radiator and tighten it with a 30mm wrench.
- Connect two wires to the sensor.
- Next, you should pour antifreeze back into the cooling system. This is mainly done through the expansion tank, but on older versions of the radiator - directly into the radiator.
- Remove air from the cooling system. To do this, check the upper cooling pipe for air. If necessary, squeeze it several times with your hand.
- Unscrew the return line. Plug the fitting under the return line with your finger, press your face to the neck of the expansion tank and blow air into it.
- This creates pressure and air from the cooling system exits into the expansion tank. If necessary, add antifreeze.
- When antifreeze flows out of the coolant return hose, the cooling system is without air.
- Connect the return line. Connect the battery terminal.
- Start the car and warm it up a little.
Note! As the coolant heats up, it will flow out of the return line into the expansion tank. This is a sign that there is no air in the cooling system.
- Wait a few minutes for the cooling fan to turn on and then turn off - everything is working correctly.
- This step completes the replacement of the fan sensor.
Quick replacement
There is another option for faster replacement of the radiator sensor, which is described below:
Remember! In order to make a quick replacement, certain skills and good manual dexterity are required.
- So, disconnect the negative terminal from the battery.
- The next step is to disconnect the wires from the radiator sensor.
- Using a 30mm wrench, unscrew the fan switch sensor, but not completely – leave about a couple of turns.
- In one hand, take the new sensor with a copper washer (required!), and with the other you will unscrew the old sensor.
- Unscrew the sensor with one hand and quickly begin screwing in the new one with the other.
- Tighten the sensor with a 30mm wrench and connect two wires to it.
- Connect the battery terminal.
- Thus, very little antifreeze will flow out, and time will be saved significantly.
- Add the required amount of antifreeze to the expansion tank of the cooling system.
- Start the car and warm it up for a few minutes at medium speed.
- Heat until the thermostat opens (the bottom becomes warm) and the cooling fan turns on.
- Wait until the fan turns off and you can turn off the car.
Remember! If you are performing this repair in your own garage, be sure to open the door while the car is warming up to avoid suffocation from carbon monoxide.
Well, that’s all - replacing the fan switch sensor is completed and you can hit the road. If you don't fully understand everything, watch the video.
The VAZ 2107, as a representative of the VAZ “classic”, has a fairly loud cooling fan. The moment of its connection cannot be missed. The vibration of the body increases, a hum is heard from under the hood, if the turn-on time coincides with an increased load on the electrical network (blinking turn signals when the low beam is on, heated rear window) - then the arrow of the load on the power network begins to slide into the red zone.
And even (if the carburetor is poorly adjusted), the emergency oil pressure light may start to burn. The cooling scheme of the VAZ 2107 is such that under normal conditions the fan does not turn on immediately, but only when a certain temperature in the system is reached. To determine this “convenient temperature moment” there is a sensor or fan on/off controller.
The location of the controller on the radiator is not accidental: after all, first the “small circle” of antifreeze is heated, then the cooling circuit provides for the passage of liquid through the radiator, the work of which is intensive heat exchange. And only when the temperature rises above 92 C°, the fan switch sensor is triggered.
Connection schemes
In VAZ 2110 injection and carburetor engines, the TM-108 bimetallic temperature sensor is used in different ways to control turning the fan motor on and off.
For carburetor engines it is located on the radiator on the left in the direction of travel. When the threaded part located directly in the coolant is heated, the bimetallic plate bends and closes the contacts. The voltage from the battery is supplied through a fuse to one contact of the electric motor, the second, when the sensor is triggered, is connected to the housing, setting the impeller in motion.
For VAZ 2110 and TM-108 injectors, it is located near the thermostat, the signal is sent to the electronic control unit (ECU). The control signal from the ECU is sent to the cooling system fan relay, which, similar to the sensor of a carburetor engine, controls the electric motor.
All engines have another device in the cylinder block, the signal of which is used to indicate the coolant temperature on the panel in the cabin.
Search form
When the antifreeze in the radiator is heated to a certain temperature, the sensors are different, but, on average, it is 92 degrees, the contacts inside the sensor are closed and voltage is supplied to the fan relay. The light in the room and the fan work in parallel, i.e.
More articles from the Theory section. One is installed at the outlet of the radiator, and the other at the inlet. I take it they duplicate each other?
Yes, and I would like to somehow smooth out the sudden switching on of the radiator fan: There is a solution to the problem, and not even just one!
Let's look at the operation of the radiator fan in more detail: Stories from our readers “Fucking basin!!! Hi all!
The coupling may be blocked by the silicone fluid that is inside it. The circuit is used on a car with two fans. Of course, the dashboard may be lying here and according to the On-Board Computer the readings are completely different.
When the desired change in the contents of the clutch occurs, it will be blocked again and the cooling mechanism will start automatically. The TM sensor only works in conjunction with a relay; the TM, reinforced for high current, can work both with and without a relay. You will laugh, but I work right on the phone. If you want to change your life like me, then this is what I advise you to do right now: 1. When heating the antifreeze in the radiator to a certain temperature, the sensors are different, but, on average, it is 92 degrees, inside the sensor the contacts close and voltage is supplied to the fan relay.
The fan does not turn on.
There will be a large current at relay contacts 87, 30, on the wire from the battery to the fuse and the fan ground, and therefore we must use wires there with a cross-section of at least 2 mm, otherwise the thinner wire will not withstand it and will burn out. To connect, you only need to understand the operating principle of a 4-pin relay and minimal knowledge in installing additional equipment. Messages Yes, and judging by the chips as indicated in the diagram in my primer, it is so. How to make such a system?
Let's look at the operation of the radiator fan in more detail: Stories from our readers “Fucking basin!!! It is purely mechanical, that is, there is no electronics inside. Connection diagram for an electric car radiator cooling fan
The fan does not turn on
There may be several reasons for this:
- Fuse. In the mounting block, fuse F7, rated 20 amperes, may be faulty - it is responsible for powering the electric fan and sound signal circuits;
- Thermostat. The liquid circulates only in a small circle, the radiator and sensor do not heat up, and accordingly, the fan does not turn on. You can check by simply probing the pipes; those connecting to the radiator should begin to warm up after opening the thermostat;
- Sensor. For a VAZ 2110 with a carburetor, the contacts are closed for testing; if the device malfunctions, the electric fan will turn on. The connector of the injection motor must be disconnected; with the remaining elements working, the ECU will detect a break in the circuit and issue a constant alarm signal to the relay, which will forcibly turn on the electric motor for cooling;
- Cooling system fan relay for VAZ 2110 injection engines. The sensor is turned off and the power contacts on the relay located in the additional fuse box are closed. If everything works, then we check the control winding: on one contact there is always a positive from the main relay, connecting the second to the body, we try to hear the operation click. But it’s better to simply replace the relay for testing, temporarily, with a known good one;
- Electric motor. During testing, the connector is disconnected; to force the impeller to turn on, voltage is supplied directly from the battery.
If all the elements are working properly, then you need to look for a break in the wires, “ringing” them one by one. Poor contact of the relay and sensor connection wire terminals with the car body is also possible. The worst case scenario would be an ECU failure, in which case the signal from “leg” 46 usually “floats” and does not reach the values of +12 volts (off) and 0 (on).
Checking the functionality of the cooling fan motor
The easiest way to check the operation of the fan is to put two straight wires on it: minus and plus.
The plus is taken from the battery, the minus from the car body. If it doesn’t work when the circuit is closed, then that’s where the problem lies. When starting the blades, we look for the problem elsewhere.
Cooling fan operation diagram
Basically, when a non-working fan is detected, several reasons are identified:
- The electric motor is burnt out, there is a break in the winding;
- Wear of carbon brushes;
- The bearing has jammed or fallen apart.
If in the last two cases the problem is solved with little effort, so to speak, the first involves replacing the electric motor.
Important! When installing wires, the main power supply to the electric motor must be disconnected.