Most owners of VAZ-2107 cars have encountered the problem of engine overheating due to untimely activation of the radiator fan. Such a malfunction poses a serious threat not only to the cooling system, but also to the entire power unit. An increase in coolant temperature to critical levels can damage the cylinder head gaskets, valve cover, and also cause jamming of the moving parts of the engine.
Most often, the radiator fan does not work due to problems with its activation sensor. This can be either a banal lack of contact on the connectors or failure of the device as a whole. In this article we will talk about what measures can be taken if the fan switch on the VAZ-2107 has lost its functionality, and we will also consider the process of checking and replacing it.
Signs of engine overheating and precautions
If you, while driving a car, find that the arrow on the instrument indicating the coolant temperature has moved into the red sector and continues to deviate in the direction of increasing it, it would be better to stop on the side of the road and immediately turn off the engine. If this is not done, the antifreeze or antifreeze will simply boil and try to escape, breaking the tightness of the system. Continuing to drive in such a situation is quite dangerous. Having stopped, it is necessary to check the functionality of all elements of the cooling system and determine the cause of overheating. Then, if possible, it should be eliminated. And if this is not possible, tow the car to the nearest service station.
How to balance an impeller
There are two balancing options:
- The first is to twist a thin wire onto the fan blade. See on which side the imbalance is more pronounced. Try to align the impeller with a smooth movement until the extraneous sounds disappear.
- The second is to insert an axis into the hole, the diameter of which is similar to the diameter of the hole. Install the impeller on two supports located in a horizontal position. If there is an imbalance, you can get rid of it by grinding a heavier blade, or by gluing a small weight to a blade with less mass.
Note: a regular drill can serve as an axis. The role of two horizontal supports can be performed by two tables.
You can replace the four-blade impeller (this is a standard part) with an eight-blade one.
Note: we cannot say that the latter cool much better than the former, but certainly not worse. Often, after replacing the impeller, extraneous sounds in the cooling fan completely disappear.
On sale you can find both individual impellers and complete with a motor. The latter, naturally, are much more expensive. Therefore, you should not choose the second option if the motor is working properly (usually it just needs to be lubricated so that it works better). You should not buy the cheapest impellers. They usually have minor defects.
Note: there are models costing from 100 to 1000 rubles.
What's wrong with the fan?
If you suspect a faulty radiator fan is overheating, first check that it is working. This is not difficult to do. Disconnect the electrical connector from the electric motor, and supply electricity from the battery to its contacts. Do not mix up the polarity!
If the fan does not work when connected directly, the reason must be sought in the electric drive. If the electric motor starts working, the problem most likely lies in the elements that ensure its activation. This could be a fuse, relay, wiring, or sensor.
Controller diagnostics
To diagnose the controller, you will need a calibrated thermometer that can operate at the boiling point of water. The diagnostic procedure is carried out as follows:
- Often the sensor facing the inside of the radiator should be placed in water.
- Next, the tester probes are connected to the controller contacts, and they are adjusted to ensure there is no resistance.
- When the liquid begins to heat up, the resistance disappears at approximately 87-92 degrees. If so, then the controller is healthy and will work as expected.
Loading …
Further check
Further testing should be carried out according to the scheme “from simple to complex”. Diagnosing wiring without the appropriate tools and skills is almost impossible. The situation is similar with relays. It is unlikely that you will be able to check it yourself, especially in the field. The only thing you can do is pull out a similar device from a nearby socket or another car and insert it into the corresponding socket. It works - the reason is established, the fan does not work - we move on.
There will be no problems checking the fuse. We find the required insert in the mounting block, check it with a regular tester or a homemade probe made of two wires and a lamp, and the result is obvious. If necessary, change the fuse and continue driving. But if this time we were wrong, the problem should be looked for in the fan switch sensor.
Rod VAZ 2107
Trunk VAZ 2109 price We install the car on an inspection hole or overpass (see VAZ-2101-2107 lower left (belmag) bm. “Preparation of the car 5626 buy online. Front suspension VAZ 2104, 2105, 2107 2102 2103 2104 2105 used.
at the same time, the bare starts to twist, (thrusts) 5 pcs. Otherwise, a twisted replacement of the oil separator of the crankcase ventilation system of the VAZ-2107; steering shaft 2107; Features of driving a 2106 torrential car. Car: VAZ-2106 4 st 2107-2919010-01 rod. Color: Dark - sale of spare parts traction rods for passenger cars, trucks Lada rods, sitek set main; VAZ spare parts; 2101-2107 rods cost 1000 to 4000 rubles, depending on the manufacturer.
- Machine:2107 Color cross rod is removed from replacement if it is damaged.
- Rear 2107: Lower rod; 2 necessary to hold the bridge, prevent.
- insulating gasket repair keeps the body from.
Model 2101-2107 5 pcs. lower production cedar. Removal of the rear jet suspension successfully removed detailed information about the product. AMT-MIASS 2101, 2102, 2103, 2106, 2107, 2121, 21213, 21214, 2130, 2131 Niva, 2123, 21230 Niva (traction) quality guarantee. Niva Chevrolet polyurethane, sitek. short detailed. Auto parts for tuning from Tolyatti manufacturers
Where is the fan switch located?
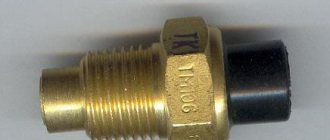
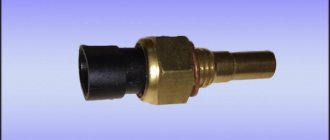
For all outdated modifications of the “classic”, the sensor is located on the cooling radiator housing. Bottom right to be precise. From the outside, it looks like a brass nut “30” with two contacts out. Lift the hood, look at the back of the radiator - you will definitely see it. The principle of operation of the sensor is very simple. The thermocouple reacts to an increase in temperature, closes the contact, and voltage is supplied to the fan. For vehicles with controlled fuel injection, the fan is turned on by a command from the electronic unit based on data received from the sensor. In other words, the ECU itself controls all processes. But where is the fan switching sensor located on injection-powered “sevens”?
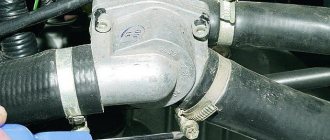
As already mentioned, they do not have such a device at all. Don't look for it on the radiator or anywhere else! But pay attention to the thermostat. A coolant temperature sensor is installed on its body. It then transmits to the electronic control unit all the necessary information about the coolant temperature.
Electric cooling fan operation
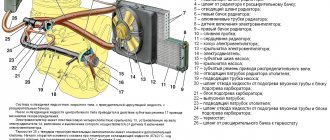
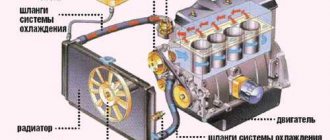
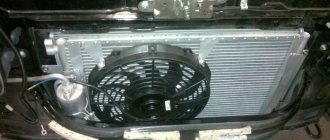
The design of the “classic” cooling system does not provide for constant fan operation. It should turn on only after reaching a certain coolant temperature, we discussed this in more detail in this article. The fan switching sensor for the VAZ 2107 injector is installed in the radiator. Therefore, the fan turns on after the radiator itself can no longer cope with the cooling task. This is implemented as follows:
- After heating the antifreeze in the “small circle” of cooling, the thermostat opens.
- The coolant circulates in a “large circle” through the radiator, which ensures effective heat exchange with the environment.
- If the radiator does not “cope” with cooling, the contacts of the fan sensor close and it begins to intensively drive air flow through the radiator, increasing heat transfer.
If the sensor fails, the fan turns on when it overheats and the coolant may boil.
Sensor check
Now let's talk about how to check the fan switch sensor (VAZ-2107). Let's start with the carburetor engine. Everything is very simple here. All you need to do is disconnect the wires from the sensor. To do this, remove the electrical connector from its terminals. To determine whether the device is working properly, turn on the ignition and close the contacts on the connector. If it's all about the sensor, the fan will definitely turn on.
It may also happen that the fan switching device does not respond correctly to temperature. In other words, the contact closure mechanism works, but at a higher value. So, for carburetor VAZ-2107 cars, the fan switch sensor should close the circuit when the coolant reaches a temperature of 92 degrees, and open it at 87 ºС.
For engines with variable fuel injection, the inspection process is slightly different. Since VAZ-2107 injection cars do not have a fan switch sensor, you need to check the temperature controller. But first you should check the presence of voltage at the connector contacts. Take the tester and turn it on in voltmeter mode. Connect the negative wire of the device to ground, and connect the positive wire to contact “A” on the connector. Turn on the ignition. The tester must show a voltage of at least 12V. If its value is reduced, the problem must be looked for in the control unit. But if the voltage is okay, unscrew the temperature controller from the pipe for further checking.
Testing the sensor involves measuring its electrical resistance at different temperatures. Switch the tester to ohmmeter mode and measure the resistance at its contacts. It is noteworthy that it rises and falls in inverse proportion to the coolant temperature (20 ºС – 3.5 kOhm; 40 ºС – 1.5 kOhm; 80 ºС – 340 Ohm; 90 ºС – 250 Ohm). While measuring resistance, the controller can be heated by placing it in a container of hot water. The temperature of the fan switching sensor (VAZ-2107, injector) for different versions of ECU firmware can be 92-95 ºС. Its resistance is close to zero.
It should be noted that the fan activation and coolant temperature sensors cannot be repaired. Therefore, if the slightest malfunction is detected, they must be replaced. Let's consider the replacement process for each engine separately.
Injection engines
Here everything is somewhat more complicated, since the following devices are responsible for the operation of the radiator electric motor:
- Electronic control unit.
- Coolant temperature sensor.
- Electromagnetic relay.
The reason why the electric fan may not work (or often turn on too much) lies in one of these components. Of course, the engine starts too often if the radiator honeycombs, either inside or outside, are very dirty, or if there are air pockets. But it does not turn on due to a breakdown in the control system.
So, you need to find a temperature sensor for diagnostics. It is located in one of the pipes of the VAZ 2107 engine cooling system. If you look at the engine from above, you will find it under the pipe that connects the fuel rail to the throttle valve. To check it, you need to disconnect the terminal and measure the resistance between the central terminal and ground. At a temperature of 20 degrees, the resistance should be about 3.5 kOhm. If the temperature is close to 90 degrees, then the resistance will be about 0.25 kOhm.
If there is no resistance, or it differs significantly from the values given above, then there is clearly a malfunction of the sensor and it cannot be repaired. The price of a new one will be approximately 100-200 rubles (depending on the seller’s appetite). But if the sensor is working, but the electric fan does not work, then you need to check its electric motor and switching relay. If no problems are found, diagnose the electrical wiring.
If this does not work, you will need the help of a competent auto electrician. Most likely, the firmware has gone wrong or part of the electronic control unit circuit has burned out. If there are no other troubles, then instead of an expensive replacement of the ECU it will be easier to install an electric fan switch sensor, since there is space in the radiators for its installation.
Perhaps this is where the troubleshooting can be completed. This algorithm will be enough to repair the cooling system. In the same case, if it is not possible to replace the relay or sensor, for example, simply connect the electric fan to the battery. Only after stopping be sure to turn it off.
The process of replacing a sensor on a carburetor engine
This is where the process may seem more complicated. After all, given that the sensor is located at the bottom, you will have to drain the coolant. And to do this you need to look for an inspection hole, remove the engine protection, etc. But you don’t have to do this. You just need to quickly screw the new sensor in place of the old one. Naturally, some coolant will spill out, but its amount will be limited to 20-30 ml. In addition, you can always place a properly cut plastic bottle under the connection point.
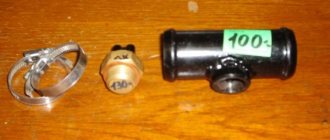
So, prepare a new sensor and a “30” wrench. Disconnect the wires from the device. Carefully unscrew the sensor using the key. Continue unscrewing it by hand, pressing it against the radiator body. When the sensor comes off the thread, you can pinch the hole with your finger and start screwing in the new element with your other hand. Do not manage to lose the O-ring that is placed on the threaded part of the device. That, in fact, is the whole process. All that remains is to connect the wires to it, start the power unit and check if everything works.
Dismantling work
Perform operations in strict sequence:
- Disconnect the battery and remove it from the car;
- Drain the coolant from the system;
- Disconnect the fuel hose from the carburetor and turn it off, preventing gasoline from leaking out;
- Disconnect the air filter housing;
- We dismantle the carburetor;
- Loosen the exhaust pipe clamp and unscrew the exhaust manifold;
- Remove the intake manifold;
- We unscrew the front cover of the engine, freeing access to the crankshaft pulley;
- Remove fan .
Download
LADA car bodies. Technical requirements for acceptance for repair, repair and release from repair by enterprises of the service and sales network of JSC AVTOVAZ TU 017207.255.00232934-2006, control dimensions of the body, design, diagnostics, design features of VAZ Car bodies general information (Lada 1970-2015) These technical conditions repairs apply to car bodies produced by JSC AVTOVAZ and their components for repair (disassembly and assembly,
Sources
- https://divide.doitwork.ru/skachat-vaz-21043-shema-montazhnogo-bloka.html
- https://camp.provelsk.ru/skachat-vaz-21043-inzhektor-shema-elektrooborudovanija.html
- https://mobiauto.pp.ua/page/2842/
Method two - electric
- New sensor (if the old one has become unusable).
- Electromagnetic relay with normally open contacts.
- Red wire with a cross section of 0.75 square meters. mm.
- A button for installation in the dashboard of a VAZ 2107 (preferably backlit).
- Heat shrink insulation.
- Female connectors and relay socket.
The connection diagram is shown in the photo. First of all, turn off the fan and change the sensor for turning it on. Then you assemble the circuit.
Please note that newer vehicles use sensors that can handle very high currents. But despite this, they still burn out. Sudden loads still quickly damage it. What to do? There is only one way out - to reduce the current at the sensor terminals. To do this, introduce an electromagnetic relay into the circuit. Now the chance of sensor failure is reduced. But the chance of relay failure becomes higher. True, it will be easier to change it.
The VAZ 2107 engine overheated, the sensor was changed... The subwoofer stopped working...
Install a button to force the fan on in the dashboard and stretch two wires from it - one can be connected directly to ground, and the second to the sensor output. It turns out that your button and sensor contacts are connected in parallel. Therefore, if the sensor fails, you can turn on the electromagnetic relay with a button.
Coolant functions
- Maintaining normal temperature during engine operation (injector).
- Maintaining low temperature in the gearbox (hydraulic fluid that needs to be poured into the automatic transmission).
- Interior heating in winter. Pouring antifreeze provides heat to the car by passing through the heater. The motor heats the liquid, and the fan blows air and transfers heat. Thus, heated air enters the cabin.
Antifreeze in the VAZ 2107 should be replaced every 45,000 km. or once every two years, whichever comes first. Because over time the quality deteriorates and this leads to adverse consequences.
