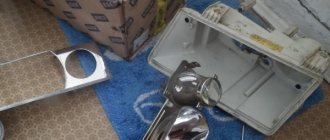
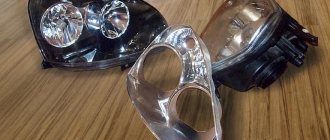
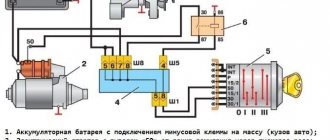
Factory optics on the VAZ 2106 include front and rear headlights, the installation of which is carried out according to the attached electrical diagram, which is available in the technical description for the car. The front optics include the headlights and fog lights themselves. Standard rear optics are lights in a metal case, covered with outer multi-colored plastic, which indicate “dimensions”, turn indicators, activation of the brake system and a red stern traffic light, fixed at the level of the exhaust pipe.
The device of block headlights VAZ 2107
The headlights on the VAZ 2107 are plastic boxes with a front side made of glass or durable transparent plastic.
Glass headlights are scratch-resistant and provide better, more focused light output. But glass breaks easily when hit by stones and physical impact. Plastic has less focusing properties and is scratched. But it has greater fracture strength and small stones are unable to damage it. This is why many car owners prefer plastic headlights.
Inside the headlight unit there is a 12-volt lighting lamp with two filaments for low and high beam, a side (parking) lamp and a turn signal lamp. The latter is also intended for emergency signaling.
The lamps are inserted into sockets, and behind them there is a reflector that focuses the light and directs the beam onto the road surface.
The VAZ 2107 headlight has an important detail - a hydraulic corrector. When heavily loaded, the front of the car, and with it the headlight beam, lifts up. The hydraulic corrector changes the vertical angle of the headlight, which allows you to adjust the angle of the light flux and direct it down onto the canvas.
The back side of the headlamp has a cover, which is used to replace burnt out lamps.
Video tuning of VAZ 2107 optics
Domestic cars that were produced several decades ago are unlikely to be able to impress with their exterior. Of course, foreign cars are in a better condition in this regard.
However, recently a trend has become noticeable when some car enthusiasts deliberately purchase domestic cars from previous years. It is quite simple to explain such actions.
It’s easier to buy a car at a low cost, “forgiving” its unsightly appearance. But later, you can apply your extraordinary skills and maximum efforts and get not just a luxurious, but certainly an original and unique “horse”, which definitely has no analogue on the road.
Tuning can help in modifying the car, which can be carried out by highly qualified specialists, as well as car enthusiasts on their own if they have the desire and familiarize themselves with some practical recommendations.
Replacing headlight bulbs
No tools are required to replace burnt out lamps. Removal and installation of lamps is done manually. To do this, you need to open the headlight cover by turning it 10 degrees to the left. To prevent a short circuit, the ground wire should be disconnected from the battery before replacing lamps. The procedure for replacing a low/high beam lamp is as follows:
- disconnect the terminal block;
- unscrew the plastic boot;
- release the locking spring;
- get an old lamp;
- snap the spring;
- connect the terminal.
Important: when replacing halogen or xenon lamps, do not allow the lamp shell to come into contact with your fingers.
Grease marks on the glass will shorten the life of the lamp. The lamps responsible for the side lights and turn signals/hazard warning lights are changed in the same way as the headlight lamps. The only difference is that they do not have a fixation spring and are not afraid of finger touches.
Improving the head optics of the “seven”
If you are the owner of a “Seven”, which is no different from many other similar analogues, you can take some steps to transform its exterior, make the car bright and different from a conveyor “product”.
Tuning the body, external and internal lighting, and body kits will help you improve your VAZ-2107 with your own hands. If you do not yet have practical experience in improving the appearance of a car, it is best to start by tuning the VAZ-2107 headlights yourself, since such actions will be accompanied by fewer problems and difficulties.
In addition, on the Internet you can find a lot of wonderful offers that act as tips on how to tune the rear lights of a VAZ-2107.
In particular, experienced craftsmen suggest that tuning VAZ-2107 headlights can be done using:
- use of LEDs;
- application of tinting.
Each of these methods deserves attention, so the owner of the “Seven” should familiarize himself with them, and then decide what is most acceptable for him, which will allow him to get cool tuned headlights on the VAZ-2107.
Uses of LEDs
The cheapest tuning of VAZ-2107 rear lights with your own hands involves the use of LEDs. In the same way, using LED lamps, you can beautifully decorate the headlights of a VAZ-2107. Tuning using LEDs encourages every car enthusiast to prepare in advance for the upcoming process, stocking up on all the necessary materials, which include:
- the LEDs themselves;
- resistors;
- wires;
- sealant.
Of course, in order to tune the VAZ-2107 headlights, you need to prepare a suitable tool, at least you will need an electric drill and a drill of the required diameter to create a socket for installing an LED into it.
Refinement of the rear lights of the VAZ-2107 begins with the creation of a seat, the size of which is very important to determine correctly, based on the fact that they will subsequently be implemented in the front and rear lights on the VAZ-2107. Tuning will look great if all actions are performed as accurately and accurately as possible.
So, after you have managed to create a suitable seat, use an electric drill to drill holes in it, the number of which should match the number of LED lamps that you wish to install in the headlights of the VAZ-2107.
In the same way, you must independently determine how such LED lamps will be placed, whether they will be lined up in one line or two, whether such lines will be smooth or zigzag, you must decide all this based on personal preferences.
Improving the appearance of your car is purely your personal prerogative; no one has the right to interfere with this process with criticism.
After installing LED lamps in the designated places, you should connect the negative contacts and, accordingly, the positive ones.
Now you need to equip each group of four LEDs with resistors. This completes the first stage of modifying the rear and front headlights, so we should move on to the final stage.
The seat with already filled and connected LED lamps is inserted into the headlights, and then into the rear lights. Of course, some car enthusiasts may want to see their tuned car, in which only the front lights are “decorated” with LEDs, while other owners, on the contrary, want to decorate only the rear stops of the VAZ-2107. Tuning is a creative process, so any of these options is acceptable; it is important that after all the planned actions are completed, it is possible to improve the aesthetics of the car’s appearance.
It should also be noted that a tuning car with LEDs will not only look beautiful, but also LED lighting will allow you to instantly feel some additional benefits.
First of all, you don’t have to worry about frequently replacing such lighting, since LED lamps have a fairly long service life.
In addition, turning on such lighting will be comfortable not only for you, but also for those drivers who are moving towards you, since LED lighting does not dazzle.
However, among all the benefits, the most advantageous is the significant improvement in the appearance of your favorite car.
Headlight tinting
In addition to installing LEDs, there are other ways to guide car owners on how to improve the light and decorate the headlights on a VAZ-21074.
Experienced car owners recommend paying attention to headlight tinting. Most often, the rear lights are tinted, but nevertheless there are also owners who want to maintain the exclusivity of the VAZ-2107 front lights. Tuning, which involves tinting, can be carried out using tinting varnish or film.
Tinting varnish is sold in retail chains in aerosol cans. Before purchasing, read the instructions for its use, make sure that it is suitable not for decorating, for example, a grille, but for tinting the lights.
Before tinting, the surface of the lamps is prepared for upcoming manipulations. Initially they are washed and dried.
To ensure maximum accuracy, masking tape is applied along the contour, thereby preventing the varnish from getting outside the headlights.
Next, degrease the surface and immediately spray the varnish, holding the can at a distance of about thirty centimeters.
It may happen that one tinting layer is not enough for you, then it is recommended to pause, allowing this layer to dry, after which you can apply a second layer.
It is very important to ensure that when applying varnish you do not cause drips.
After the last layer of tinting has completely dried, polish the surface, only after this the process can be considered complete.
If you ever have an urgent need to get rid of that tint, all you need is acetone. By wiping the headlight with a rag coated with acetone, you can easily remove the tint.
Replacing headlights VAZ 2107
In some cases (if the glass is damaged or you want to tune the car), you have to replace the headlight assembly. To replace, you need a Phillips screwdriver and an 8mm wrench.
The removal procedure is as follows:
- disconnect the ground wire;
- disconnect the lamp power terminals;
- remove the hydraulic corrector by pressing the lock;
- Unscrew the three fastening screws with a Phillips screwdriver (one of the screws is secured with a nut, which must be held in place with a key);
- remove the headlight by pulling it towards you.
To install the headlight, you need to do the operations in reverse order.
Fog lights
Fog lights are a lifesaver when visibility is poor. However, over the years they begin to fade, which creates unsafe driving conditions. The easiest option is to install xenon in the fog lights or mount 2 more fog lights side by side. But such methods are not legal, so it’s not worth the risk.
The most common option for tuning fog lights is to replace them with higher-quality lighting devices, most often round in shape or from foreign cars. To work you will need:
- frame with mechanism from standard VAZ 2107 fog lights;
- new fog lights;
- aluminum frame fasteners;
- bolts;
- silicone glue;
- primer and paint.
Manufacturing process
This type of tuning assumes that the driver has experience in locksmith work:
- Place the fog light frame on the aluminum base. Trace the outline of the frame.
Without adjusting the position, the new fog lights will blind oncoming drivers.
Video: which fog lights are better for the VAZ 2107
Do-it-yourself LED tuning of VAZ 2107 headlights
For the “Seven” you can easily find, buy and install non-standard headlights or individual lighting elements. The cheapest solution is to install LEDs instead of standard lamps or in addition to them. This allows you to transform the appearance of your car at a minimum cost.
Tuning the rear lights of a VAZ 2107 is also often done by changing lamp lighting to LED.
For tuning with LEDs you will need:
- resistors;
- panel or box for mounting lighting elements (LEDs);
- drill;
- drill;
- sealant;
- wires;
- LEDs.
The box or panel must be adjusted to the size of the headlight and installation holes for the LEDs must be drilled.
Depending on the number and parameters of the LEDs used, resistors are connected in series to provide the required circuit resistance. The resistor values are selected individually. The sealant is used to secure the LEDs in the holes. Important: when connecting LEDs, polarity must be taken into account.
In addition to the original appearance, tuning with LEDs has other advantages:
- low power and, as a result, low load on the on-board network;
- durability and reliability;
- diffused light that does not blind other road users.
If your budget allows, you can tune VAZ 2107 headlights by replacing standard units with ready-made tuning products. The advantage of this solution: beautiful design and excellent quality with minimal time investment.
Introduction
VAZ-2106 is one of the most common domestically produced cars. Created on the basis of the luxury VAZ-2103 model almost 50 years ago, version 2106 differs from its prototype in the absence of chrome-plated items, which abound in the VAZ-2103. The later VAZ model received new bumpers and redesigned rear optics. However, despite such important, at first glance, improvements, the car is far from ideal, which is why competent tuning of VAZ-2106 headlights can modernize and improve the car, give it a more beautiful exterior and at the same time improve the lighting emanating from the factory headlights.
Installation of xenon headlights on a VAZ 2107
Xenon headlights are characterized by a particularly powerful luminous flux, which requires additional focusing using lenses. Full-fledged xenon headlights are expensive and include, in addition to the power supply and lamps, an automatic beam height adjustment system and a headlight glass washer. Each of the elements is extremely important for safety:
- correct focusing and adjustment of the light flux is necessary so that oncoming drivers are not blinded by bright light;
- Without a washer, dirty headlight glass overheats and may burst.
If you do not have the funds to install xenon headlights of appropriate quality, it is better not to install fakes, endangering yourself and other road users, so we do not recommend installing this type of lighting and did not describe the connection
How to do headlight tuning
Tuning lighting devices is the easiest way to give the “Seven” an exclusive appearance. It is with headlights that inexperienced car enthusiasts begin to work, since almost anyone can change the current parameters without compromising traffic safety.
Today, tuning head optics and rear lighting devices has many different options. Sometimes you don’t even need to invent anything: online stores sell different configurations of headlights that can be installed on domestic cars.
Tinting of headlights and taillights of VAZ 2107
Another common do-it-yourself tuning of VAZ 2107 headlights is tinting. It is used when upgrading both taillights and headlights. It is necessary to carefully choose the method of dimming the headlights - the quality of road lighting is a determining criterion for safety when driving at night.
Important: before tinting your headlights, you should take into account that tinted headlights may be grounds for imposing an administrative fine. You also need to understand that any tint reduces the brightness of the headlights, making night driving more dangerous.
In order for tinting to have a minimal effect on the quality of the car's headlights, it is worth tinting the glass surface only partially. This solution is safe and quite effective: narrowed headlights make the appearance more stylish. Partial tinting can also help avoid a fine - not the entire headlight is shaded, but a small sector.
To tint headlights, you must use only high-quality film. The order of work is as follows:
- remove the VAZ 2107 headlights;
- take out the glass;
- wash and degrease the surface;
- stick the film.
You can partially tint the headlights without removing and disassembling them - just wash the glass and stick on a strip of film. But this method does not provide adequate quality, and it is almost impossible to perfectly accurately cut and paste the film without removing the headlight unit.
When tinting the taillights, you should install brighter lamps in them so that the brake lights and side lights are clearly visible to other road users. To apply the film, it is also better to remove the rear lights from the car first.
This video shows a different car, but the principle of tinting is the same
Work order
Some headlight repair operations should be performed indoors to avoid water and debris getting into the bonding area. In general, replacing a damaged element includes the following steps:
- Disconnecting the unit from the on-board network of the VAZ 2107 by uncoupling the connectors of the turn signal and the headlight lamp.
- Removing the body from the body opening using a Phillips screwdriver.
- Removing shards of broken glass, in this part of the operation you should be careful not to cut yourself.
- From the junction of the parts, it is necessary to remove the remaining adhesive mass using a flat screwdriver.
- The next step is to clean the unit and degrease it with a solvent.
- Using a dispenser syringe, apply a small amount of glue along the contour evenly without gaps or breaks.
- We place the transparent element in its intended place, press it and fix it using disposable devices or tape.
This is interesting: Car tuning
As the glue dries, the headlight element of the VAZ 2107 is installed in place; it is recommended to change both parts at the same time; during operation they tend to become cloudy and this will become noticeable even with a cursory inspection. The new transparent glass on the headlight of a VAZ 2107 car, which was replaced on our own, is pleasing to the eye. At night, better road lighting is provided.
