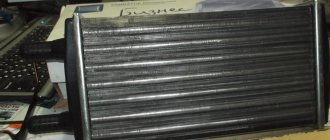
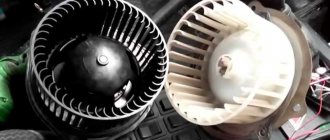
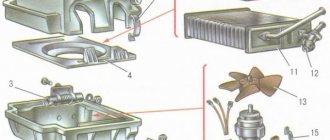
Many vehicles, especially domestic ones and those in the budget price category, are equipped with a weak and ineffective stove. As a result, the interior warms up poorly and not as quickly as we would like. Expensive solutions are also sold on the market, but not every one of our car owners is ready to spend money on purchasing them. Therefore, an additional pump for the Gazelle cooling system could be the most optimal way out of the situation.
Summer is the best time to think about winter
Life goes on as usual. And if it’s still warm outside now, winter will still come sooner or later. Many pages have been written about how to still make the Gazelle warm, but it seems that there is simply no better solution than installing an additional pump.
So, this additional pump is necessary in order to improve the coolant circulation processes in the heating and cooling systems. As for the principles of working with this system, here the additional pump for the Gazelle stove is mounted on a section of the hose to the radiator after the thermostat. This can significantly speed up the speed at which the hot coolant mixture passes through the heater.
Recommendations for use
Please note: the pump that is produced for the Gazelle is stuffing box. Even the instruction manual does not recommend using it at speeds above 60 km/h
The fact is that at high engine speeds excess pressure occurs - because of this, sooner or later the oil seal breaks through and a leak occurs
What is also important: after stopping the engine, the pump also performs the function of recirculating the coolant until it cools completely
Of course, the main advantage of the Gazelle heater pump is its affordable cost. As already mentioned, leaks inevitably begin to occur over time. If you invest 2-3 times more money, you can order a higher quality analogue from the German Bosch, which does not have the above disadvantages. If someone thinks that an additional pump is a modern innovation for insulating the interior in winter, then this is far from the case. This solution is successfully used by owners of Lanos and other cars. Moreover, many German manufacturers equip their equipment with an additional heater pump right off the assembly line.
If we summarize all the information presented in the review, we can conclude that the auxiliary heater pump is a simple and effective solution for heating the Gazelle’s interior in harsh climates. A correctly installed pump will promptly warm it up even during short trips when the engine cannot reach operating temperature. This is not only comfort, but also safety, since the glass also warms up in a short period of time and visibility improves.
The additional pump from Gazelle does its job well, but it is noisy. You can use more expensive analogues, but in any case it is necessary to periodically check the tightness of the system. Leaks can occur not only from standard components, but also from self-installed equipment.
Disadvantage of the Gazelevsky pump
This device has one important drawback. Since its design is not fully thought out, after some time of operation the pump leaks. It leaks through the gasket. This problem can be solved, but it will require dismantling and disassembling the device. Treatment is to lubricate the gaskets with silicone or hot glue. And then the cover with gaskets is secured.
No such shortcomings were found in pumps from Bosh. This device is designed almost perfectly, and there are no gaskets. There is no leak.
Which pump to choose
Unlike the standard VAZ and GAZ pump, which has a mechanical belt or chain drive, an electric pump is used as an additional driving force. Most often, motorists use an electric pump, which is standard equipment on the Gazelle car.
The unit has high performance, but the quality of its manufacture leaves much to be desired. Therefore, before installing such a pump, it is recommended to disassemble it, coat all seals with automotive sealant, reassemble it and let it dry for 24 hours.
Note: the above applies to old-style pumps. New GAZ pumps have good build quality. However, over time, they also begin to leak.
An alternative to GAZ products is to install an additional pump manufactured by Bosh. These units have high build quality and a different operating principle. The blade rotates under the action of a magnetic coupling, and not an electric motor, as in the first case. » alt=»»> By using such a scheme, the manufacturer was able to abandon sealing connections and almost completely eliminate the possibility of leakage. The disadvantages of the imported unit include its high cost and relatively low productivity (700 liters versus 1200 liters per hour for the GAZ unit).
Direct installation
Before starting installation, you need to let the motor cool down. It's better to let it cool naturally. Then you need to drain the coolant into a previously prepared and clean container. It will still be useful, so it is better to make sure that it remains as clean as possible.
Next, take the new additional pump to the Gazelle stove and tighten the screws from the impeller side. The rubber gasket, which you will definitely find there, needs to be coated with a silicone-based sealant to prevent leakage. Then assemble this structure back, but throw away the screws, and instead install thin long bolts under ordinary nuts. This way you can make the connection as tight as possible.
Now let's move on to the next step. It consists of finding the installation location of the device. There are several options. This may be a place on the stud on which the washer reservoir is attached, on the stud near the battery.
Most car enthusiasts, when they installed an additional pump on their Gazelle stove, used the second method. It is described in the instructions for the pump. That is why the devices should be positioned so that the pump nozzle is directed towards the block. To do this, you need to loosen the iron clamp.
Ready? Then secure the pump and proceed to installing the hoses. To do this, you will need to remove them from the stove and the tube that comes out from under the manifold. Now take a piece of pre-prepared reinforced hose. It should be of such length that it can reach from the brass manifold pipe to the pump without unnecessary kinks.
In order to secure the hose, an adapter is useful. The corner works successfully in this role. You can secure the part to the corner using clamps.
The connection between the pump and the hose from the standard stove is much easier. There is no need to install adapters here. You just need to draw out the required dimensions and then connect it all. It is also secured with clamps. To complete all fastenings completely, you can put a corrugated aluminum pipe on the mounted hoses. This is done to prevent the hoses from melting. Now you can securely fasten everything. Next we will deal with the electrical part.
How a new pump in the cooling system will help the driver
It is the pump for the Gazelle stove that is in high demand among car enthusiasts due to its practicality and low cost. It can even be installed on other makes and models of vehicles. Experienced drivers who have been using Gazelle for years are not lazy to disassemble the new pump and coat it with sealant
Particular attention should be paid to the area where the impeller and rubber sealing ring are located. Antifreeze leaks often appear in these places.
Where should I put the new heater pump? Typically, such installation is carried out in a gap created using a pipe going to the interior heater radiator. To do this, you can remove and cut the standard pipe. Using connecting hoses, a new heater pump is built into the gap.
The main reason why drivers think about an auxiliary pump is that there is little heating coming into the cabin at idle. The air becomes truly hot only after the engine speed increases. Additional equipment will help antifreeze circulate intensively through the radiator.
Electricity
Before connecting an additional pump to the Gazelle stove, the connection diagram should be reviewed for reference. There are several options. One of the simplest ways is to place the button in two positions in the car interior. It's simple here: on/off. For example, if it’s cold you can turn it on, if it’s warm you can turn it off.
This is a simple method, and it has a disadvantage. If you forget to turn off the additional pump, then the next time you start the car to warm up from the alarm key fob, the pump will start and take heat from the cold engine. This will increase the engine warm-up time.
Professionals recommend using a complex but more effective method. There will be a dual control system. This button is intended only to be turned on in winter and turned off with the arrival of spring. This is done to prevent the pump from working unnecessarily.
When the button is turned on, the additional heater pump for the Gazelle stove will turn on/off completely automatically when the engine starts and the car is driving. For this circuit you will need a two-position relay. The pump has a certain power, so the relay needs a current of 3 A.
How to properly organize the electrical part of the connection
Turning on the pump can be solved as follows: connect the negative terminal directly to the battery.
The positive one is carried into the cabin along with the gas pedal cable, for example. The button is placed under the steering wheel in any convenient place and so that it does not interfere. As a result, absolutely all Gazelle drivers with such a solution noted that in winter weather the car becomes noticeably warmer. It is also convenient that even with a cold engine you can turn on the pump, and after a couple of minutes heated air will begin to flow into the cabin. This is a fairly simple method, but it has weaknesses. If you forget to turn off the button in advance, then when you next start the car to warm up, the operating device will begin to take heat from the cold engine. The time it takes to warm up to operating temperature will increase. You can make a double control system so that the pump does not operate in the warm season and does not turn on automatically when it starts. To do this, you will have to add a two-position relay to the circuit.
Pumps: descriptions and technical specifications
Among domestic manufacturers, products can be distinguished. This company has been producing heater pumps for a long time. Among the products are devices for Gazelles and modifications.
For Gazelles, the company offers a series of devices based on the HO 47.3780 pump. This is a domestic additional pump for the Gazelle stove. Technical characteristics allow it to work effectively in the heating system. The device is powered by 12 V. The operating current required by this pump is 4.2 A. The pump works with antifreeze or antifreeze. The device is connected to the network using a single-wire connector. The size of the pipe here is 20 mm.
You can look at another pump from the same manufacturer. It has a smaller pipe diameter. Here this size is 18 mm.
The additional pump for the Gazelle Business stove differs from the usual one in the presence of two wires instead of one.
FakeHeader
Comments 17
I’ll probably turn the world upside down now. But on my working GAZelle (GAZ-2705 with 2 rows of seats) there are 2 factory stoves, powered in series, and there is no electric pump (it was there from the factory, but I threw it out because it was leaking). Under the hood there is a ZMZ-405 without any spring bushings where it is not needed, with a very simple thermostat (but, I note, a working one) and with a very ordinary pump. And the whole thing warms up without any tricks! If the car is standing and threshing, then it warms up from -15 to 70 in 15 minutes and both stoves blow heat as they should! At my former job, I sometimes drove the 105th Volga with the Rat and the 10th salon. There were no problems with heat either! Why bother with a garden if everything works as it should initially? And if there are any problems, then they need to be eliminated (for example, the system is clogged or the pump pumps poorly), and not stick in additional gadgets! The more complex the design, the more unreliable it is! An electric pump is an extra connection of hoses, wires, etc., which you can do without on this car.
Sources used:
- https://remam.ru/vozdsys/kak-ustanovit-dopolnitelnyj-nasos-otopitelya-na-gazel.html
- https://fb.ru/article/198871/dopolnitelnyiy-nasos-na-pechku-gazel-dopolnitelnyiy-nasos-pechki-gazel-opisanie-tsena-otzyivyi
- https://litezona.ru/podkljuchenie-dopolnitelnoj-pompy-na-gazel/
Foreign pump
Imported devices have some advantages over domestic ones. One of them is weight. For example, the device from Bosch is lightweight, so it can be freely attached directly to the hoses. The difference in design is that the “Gazelle” pump is stuffing box. At high speeds, it creates increased pressure in the system and leaks. The imported device, on the contrary, has a sealless design, and the electric motor is in no way connected to the pump.
As for performance, it is preferable to purchase an imported additional pump for the Gazelle stove. Its description shows that it is superior in quality and power to its domestic counterpart. Its parameters are the same as in the domestic version. The device is powered by 12 V, and the pipe size is 18 mm.
As for the reviews about the operation of this additional pump, those who upgraded the heating in the Gazelle in this way were satisfied. In the harsh Russian winters, the cabin of the car became warm and cozy.
Installation instructions
Direct installation work can begin when the auxiliary pump, fastening and additional elements that are required according to the diagram have been purchased. The procedure for adding another pump to the factory system will be approximately as follows:
First, a single structure is assembled, which includes a pair of hoses and a new pump. Particular attention should be paid to reliable fastening of the hoses and fittings. The following work will be carried out on the car
It is put on the handbrake and the terminals are removed from the battery. Now you need to find the hoses leading from the existing stove and carefully disconnect them. The assembled structure will be connected to this place. To mount the pump itself, you should find a specific place. The output from the thermostat should be connected to the top pipe, and this will be the input. We attach a side pipe to the stove, which will act as an outlet. Once the entire system is assembled, you can pour coolant into it and observe the tightness (no leaks, stains, etc.)
p.) Now we supply power to the pump and check the functionality of the complete system. Don’t forget that to do this you need to connect the terminals to the battery. These are the main stages of the process of how to install an additional pump to the heater on a Gazelle.
To avoid losing coolant from the system, it should be drained through the lower hose of the expansion tank. To do this, you need to remove the hose and place a suitable container under the tank (for example, any plastic canister). Antifreeze or other coolant from the hose will also be poured here. After this has been done, you can remove the supply pipe - you can find it on the side of the power unit.
During dismantling, we must not forget that the coolant is under pressure in the system and may be hot for a certain time after the engine is stopped. It is better to prepare the drain container in advance and make sure that the motor has cooled down sufficiently. Many people sequentially flush the cooling and heating system before connecting new equipment to it.
For washing, you can use a regular mixture of warm water and citric acid, which effectively removes deposits. The solution is poured from above, directly from the container, and the pump must be connected to a 12 Volt power source. Next, it will pass through the hoses through the system radiator. After the radiator, the remaining dirty antifreeze along with deposits will be drained into a bucket through another hose. The cycle must be completed several times.
Expected results
After all the necessary elements have been installed and connected, road tests should be carried out, during which the pump must run continuously for at least an hour. During this, it is necessary to carefully inspect all its connections to the cooling system to eliminate leaks.
After the inspection, you should check the car while driving. It may happen that a unit functioning properly at idle speed will fail when the pressure in the pipes increases.
If everything was done correctly, the heater begins to supply warmer air, and the engine is effectively cooled even under heavy loads.


