Additional pump for a car heater: how to choose and install
As a rule, on many budget cars, the standard stove does not warm up the interior quickly and efficiently enough.
To a greater extent, this applies to popular VAZ models (2109, 2114, etc.), as well as some foreign cars. In practice, one of the most effective and affordable methods is an additional pump for the stove. Next, we will look at what the specified heater pump is, how to choose an additional pump, and also how to install an additional pump.
How to determine if a VAZ 2112 pump is broken
The pump is a device with blades, centrifugal type. It is driven by a timing belt via a crankshaft pulley. The device is housed in an aluminum housing, inside which the roller rotates in a double-row bearing, with a supply of grease for the entire period of operation. The outer ring of the bearing is secured with a screw. The toothed pulley is pressed in front of the roller, the impeller is mounted at the rear end. The end of the impeller is held by a thrust ring made of a graphite-containing composition. There is an oil seal underneath it. The one-piece design does not allow for high-quality repair of the unit, therefore, if a breakdown is detected, a complete replacement of the pump on the VAZ 2112 is necessary.
Factors determining the malfunction of the VAZ 2112 pump
One of the main signs of pump failure is the formation of play in the drive pulley of the structure. In this case, the pulley begins to dangle, which indicates wear of the bearings and imminent failure of the pump. Worn bearings can make a characteristic noise, and due to bad bearings, the tension roller can wear out the timing belt. You can identify such a defect by touch by removing the timing belt and turning the pump pulley by hand or rocking it from one side to the other; if there is a gap, it will be immediately visible. As a result, very soon the belt can jump off the pulleys, and this contributes to the impact of the pistons on the valves and deformation of the latter
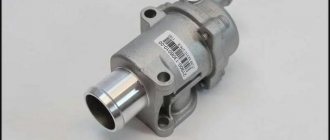
Urgent repair of the water pump or its replacement should save the situation. If you find traces of coolant near the drain hole located at the bottom of the pump housing, you need to pay attention to the stuffing box seal. The faulty element cannot be used further; the leak will intensify, which can lead to big troubles, including the engine jamming due to overheating
In this case, the pump on the VAZ 21124 needs to be replaced as soon as possible.
Replacing the pump on a VAZ 2112 car
The procedure for replacing a VAZ 2112 pump includes removing the pump from the engine. For this:
- The wheel nuts on the right front wheel are loosened.
- The car is jacked up and the wheel is removed.
- To access the crankshaft pulley, a self-tapping screw is removed from the engine splash guard.
- The fixation to the generator bar is loosened, a thin long bolt is unscrewed that holds the tensioner to the generator belt, then the generator is pulled by the belt (see Generator repair: we do it all ourselves) almost all the way into the engine.
- The fastening bolt at the engine pulley is unscrewed.
Tip: To unscrew the bolt, you need to lock the crankshaft, otherwise it will turn along with the fasteners.
To perform this operation, you will need outside help to engage fourth or fifth gear and press firmly on the brakes. Using an extension cord and a 17mm wrench, unscrew the bolt. So:
- Having released the generator from the belt, the pulley is removed from the crankshaft.
- Support the engine sump on a wooden spacer. In this case, the standard jack must be left in place for insurance purposes.
- The gas distribution device drive is completely disassembled: the front casing cover, rollers, belt, toothed pulley on the camshaft, and rear casing cover are removed.
- The bolts securing the pump are unscrewed, as shown in the photo.
Releasing the pump from fixation with three bolts
Due to the large width of the device's toothed pulley, the spar prevents the pump from being pulled out. Therefore, using a pry bar or crowbar, the engine is moved away from the spar.
Tip: In order to avoid damage to the elements, it is necessary to place a small piece of wood between the spar and the mount.
Removing the VAZ 2112 pump
Installing a new pump
- The old gasket is removed with a scraper or knife. Care must be taken not to damage the cast iron surface of the block.
- A new gasket is installed. Made from cardboard, lubricated on both sides with sealant, placed on the pump, then the unit is installed on the block.
Advice: When installing a new gasket, it is better if it is made of paronite, the price of which is slightly higher than cardboard; you do not need to use sealant for it
It is necessary to ensure that all holes match on the gasket and flange of the new pump
Final assembly is done in reverse order.
How to correctly replace a VAZ 2112 16 valve pump can be seen in the video. If the operating instructions for the car are followed, the pump on the VAZ 2112 16 valves is replaced in a timely manner, the car will operate normally for a long time.
Additional pump: what you need to know
So, if the stove initially works poorly, although it is fully operational, and also if the car is often operated in severe frost conditions, standard heating may not be enough even for a middle-class car.
In the case of a VAZ or old foreign cars, the problem is solved by gluing the dashboard, upgrading the heating system, installing tight dampers, replacing the heater radiator, the heater motor itself with a more efficient one, etc.
This allows you to more actively warm up the interior when the internal combustion engine is running or when the warmed-up engine is turned off, but the driver and/or passengers are in the car (fuel savings and increased comfort).
Also, an additional heater pump helps out when the engine is idling without load (for example, when sitting in a traffic jam) and quickly cools down. In such conditions, a standard stove usually does not blow hot air, but only warm air.
By the way, the same thing happens when driving on the highway at high speed in the cold season, when oncoming air flows intensively cool the engine compartment, as well as the coolant in the cooling radiator, etc. In turn, the additional pump to the heater causes the coolant to circulate more actively and give off more heat.
A simple connection of the pump to the vehicle's electrical network is also implemented. Usually, all the necessary fasteners, adapters, connectors, etc. are included with the pump.
Video with installation example
Additional electric pump for the “nine”
Now the cold weather has arrived and the owner of the VAZ 2109, living in Russia, will again have to face the problem of the stove. Indeed, either the domestic manufacturer initially did not take care of its normal functioning, or this car should have such a system, but the VAZ 2109 with an electric pump, which is installed independently, is more suitable in winter in our country. On a VAZ 2109, installing an electric pump will not take much time and it is enough to know the basic algorithm for carrying out the operation, which will be discussed in our article.
Why and where to install an electric pump on a VAZ 2109
It is clear that no owner wants to freeze in his car all winter. And passengers are unlikely to want to sit in a kind of “refrigerator”, where instead of warming up, you freeze completely. The standard stove of this car, of course, warms, but it does it reluctantly and as if on debt. It's all about its low efficiency, especially at idle, when you're stuck, for example, in traffic jams. Installing an additional electric pump, in this case, solves the problem immediately. In fact, there are many ways to make the interior of your “nine”, but modifying the car’s cooling system by installing an electric pump is the most rational solution.
Which stove pump is better to choose?
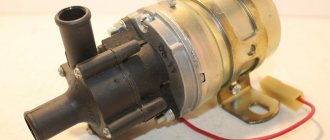
First of all, the pump itself is the most important element. The GAZelle stove pump is in greatest demand on the market, as it is cheap and affordable. However, the solution has several serious drawbacks (noise during operation, high power consumption, average resource).
It turns out that even taking into account the fact that the Gazelle heater pump is inexpensive, experts recommend considering an additional BOSCH pump for a passenger car.
For example, a sealant is necessary if a Gazelle stove pump is installed on a VAZ 2114. Let’s also add that the GAZelle pump requires additional modernization, while installing an additional BOSCH pump is faster and easier.
Replacement
Having purchased a new coolant pump, you can begin the replacement procedure.
The VAZ 2110 works in conjunction with 8 valve and 16 valve power units. Despite there being a certain difference between them, the pump replacement procedure is identical.
Dismantling works
The instructions below are relevant for dozens with two types of motors.
- Place the car on a level area above a hole or on an overpass.
- Lift the hood, remove the negative terminal from the battery, which will turn off the power to the car.
- Unscrew the cap of the coolant expansion tank. This will relieve excess pressure in the system.
- Now get down under the car.
- Place a clean container with a volume of at least 5 liters under the cylinder block.
- Unscrew the coolant drain plug using a 13mm wrench, which will allow you to drain the coolant. Be careful, unlike oil, you need to drain the coolant when the engine is cool.
- When all the coolant is out, screw the plug back into place.
- Using a 10mm wrench, unscrew the three mounting bolts that hold the timing case in place.
- Remove the casing.
- Place the crankshaft at TDC of the first cylinder - top dead center. To do this, you need to turn off the gear and turn the special bolt that holds the generator pulley to 19 with a key. Turn until the marks on the camshaft gear align with the mark on the rear timing case.
- Make sure that the marks on the flywheel and clutch housing match. To do this, you will have to remove the plug on the crankcase. It is made of rubber and is located to the right of the cylinder block.
- Lock the crankshaft in this position. You can use a simple slotted screwdriver that fits into the teeth of the flywheel.
- Slightly loosen the tension roller locking nut using a 17mm wrench.
- Turn the roller using a special wrench in a counterclockwise direction. This way you can loosen the tension level of the timing belt.
- Now you can quite easily dismantle the tension roller and belt.
- The next step is to remove the five mounting bolts that hold the lower timing case in place. These include 3 bolts that hold the pump. You will need a socket wrench or a 10mm socket.
- The casing can then be removed.
- The VAZ 2110 provides for installation of a pump using three hexagon bolts. Once you unscrew them, you can simply carefully remove the pump by tapping on the body.
- If that doesn't work, then use a flathead screwdriver to pry up the coolant pump housing, which will allow you to remove the pump.
- Remove traces of the old gasket that should remain on the surfaces of the seats.
Installing an additional pump on the stove
When all the nuances are taken into account and a suitable electric pump is purchased, you will often also need to buy the additional elements and fasteners discussed above. Only after assembling the complete installation kit can you proceed to installation. Let's look in general terms at a simple installation of a BOSCH pump.
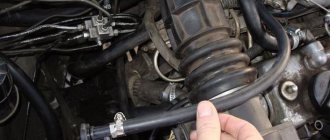
- At the initial stage, a structure is assembled from two hoses and a pump. Considering that the pump is a outlet for antifreeze or antifreeze, it is important to securely fasten the hoses to the fittings.
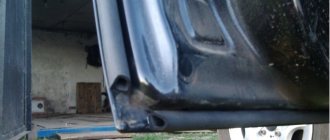
- Next, you need to put the car on the handbrake, remove the terminals from the battery and drain the antifreeze. Next, having studied the installation diagram, you should find two hoses from the stove. For example, on a VAZ 2114 you will need to remove the right hose.
- Then the assembled structure is installed in place of this hose, and the pump itself is fixed in a suitable place (for example, on a VAZ 2114 on the gearbox housing).
- In fact, the pump cuts into the gap in the antifreeze supply hose to the stove, and a 90-degree angle insert made of a copper tube of a suitable diameter (for example, 22mm) is also installed. The output from the thermostat is connected to the top pipe (input), and the side pipe (output) is connected to the stove.
- Next, having connected all the pipes, all that remains is to pour antifreeze into the system, apply power to the pump and check the operation of the device. At the same time, all connections should be inspected for leaks.
Also, it is optimal to immediately replace the standard self-tapping screws that are used in the design of this pump and install screws of better quality. After treating with sealant and assembling the pump, it should not be installed on the car immediately. The fact is that sealants must dry, which will require at least 48 hours.
- If we consider pump controls, it is also necessary to display a separate button. Usually it is placed on the dashboard, installed instead of plugs, etc. Power to the heater pump button can be taken directly from the battery. The main thing is to install a fuse, as well as a relay.
- You also need to lay out the wiring correctly; all wires must be heat-shrinkable and securely fastened. After installation, the driver is able to turn the pump on and off at his discretion.
Disadvantage of the Gazelevsky pump
This device has one important drawback. Since its design is not fully thought out, after some time of operation the pump leaks. It leaks through the gasket. This problem can be solved, but it will require dismantling and disassembling the device. Treatment is to lubricate the gaskets with silicone or hot glue. And then the cover with gaskets is secured.
No such shortcomings were found in pumps from Bosh. This device is designed almost perfectly, and there are no gaskets. There is no leak.
Let's sum it up
Taking into account the above information, it becomes clear that an electric pump for a stove is a fairly simple and convenient solution that allows you to increase comfort and safety when operating a car.
In practice, after installing such a pump, it is possible to warm up the interior faster, which is important when making short trips over short distances or while driving fast on the highway in winter. The glass warms up faster and sweats less during a trip, it is easier and faster to remove snow and ice from them, etc.
As for the choice of the pump itself and its installation, the additional GAZelle pump is in demand, primarily due to its low cost. At the same time, we are not talking about quality.
Finally, we note that an additional pump in a VAZ 2109, 2114 or on a budget foreign car can significantly increase the level of comfort, save on warming up the car, etc. If the installation is done correctly and the pump is working properly, the interior will heat up faster compared to the standard heating system.
The only thing is that you should periodically check the tightness of the cooling system, since even standard elements can leak. If we are talking about additional non-standard elements, in this case the connection points require separate control.
What does water injection into an engine provide, the principle of operation, the main advantages and disadvantages. How to inject water into the engine yourself, available methods.
Checking the car cooling system pump. Main symptoms of malfunctions. Diagnostics of the water pump without removal, troubleshooting with removal from the engine.
How to check the car engine cooling system for leaks and operability of all components. Diagnostics of the pump, thermostat, pipes, etc.
Common engine cooling system failures: water pump, thermostat, radiator, cooling fan and others. How to determine the reasons yourself.
Pump device. The operating principle of a centrifugal pump, an engine cooling system with two pumps and a switchable pump. Pump malfunctions and repairs.
Checking the functionality of the water pump
Self-diagnosis of the pump is quite simple and will take no more than 10 minutes. The verification procedure is as follows:
- The engine warms up to operating temperature (91˚C for VAZ 2110).
- For safety reasons, a thick glove is worn on the right hand.
- The coolant supply from the radiator is cut off. To do this, squeeze the pipe by hand. If the pump is working properly, you will feel the antifreeze pressure inside the hose. If the pipe compresses easily, then the pump is faulty.
All actions should be carried out with extreme caution, since the coolant gets very hot, and you can get burns from the surface of the motor or pipes.
To identify problems with the pump, it is enough to pinch the coolant supply pipe
Diagnosis of pump faults on VAZ 2110/11/12
A pump malfunction can be identified by the following signs:
- While driving, extraneous noise appears from the timing belt.
- The pump loses its seal and begins to leak.
- The timing belt breaks.
The most capricious element of the VAZ 2110/11/12 pump is the bearing. If it is severely worn or if the timing belt tension is incorrect, the pump cannot be repaired.
One of the symptoms of a pump malfunction is the appearance of a leak.
Consequences of using a faulty pump
Operating a car with a faulty pump can lead to the following serious consequences:
- damage or breakage of the timing belt, often leading to a major engine overhaul;
- When the engine overheats, the rubber elements of the cooling system, valve covers and cylinder head gaskets are destroyed.
The pump is changed along with the tension roller and timing belt every 50 thousand kilometers. If signs of wear appear, these components are replaced before the time specified by the manufacturer.
Additional heater pump on Gazelle - installation recommendations
Many vehicles, especially domestic ones and those in the budget price category, are equipped with a weak and ineffective stove. As a result, the interior warms up poorly and not as quickly as we would like. Expensive solutions are also sold on the market, but not every one of our car owners is ready to spend money on purchasing them. Therefore, an additional pump for the Gazelle cooling system could be the most optimal way out of the situation.
Variant of the scheme for the VAZ-2114
We connect the motor through a fuse and a relay rated at 10 Amps. The relay will be turned on by a button attached to the device.
Scheme (simple version)
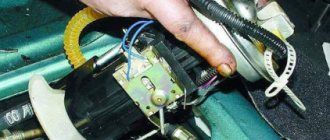
The “+” voltage was taken directly from the battery, but this can be done - a sealed holder “hangs” on the wire, where the fuse (5A) is located. Installing a button looks simple:
- Remove all the handles;
- Move the plastic panel towards you;
- We install a new button and connect the wires.
As a result, you can see what is shown in the photo.
Circulation button
What can be improved
- A diode is connected in parallel with the relay winding in the “back to front” direction, thereby extending the service life of the button;
- Connecting to the battery directly is bad. It’s better to find another point with a “plus”;
What we got
Operating principle of the additional heater pump
Many domestic car enthusiasts first try to solve the issue of raising the air temperature in the cabin using traditional methods. They seal the dashboard and doorways with insulation, change the heater radiator or install a motor with greater performance. When the effects of all such tricks are not enough, then the only effective solution may be an additional pump for the stove.
The operating principle of this technique boils down to the following: the electric pump drives antifreeze through the system within a small circle even at those moments when the power unit is not running. The auxiliary pump also helps out in situations where you have to stand in traffic jams for a long time in a Gazelle. Idle speed does not allow for an influx of well-heated air, and instead only warm air comes in.
By acquiring an additional pump, the driver receives a lot of advantages - these also include ease of installation, which does not require a significant investment of time and money. Of course, you will need a connection diagram, but the second pump is mounted into the standard electrical system of the car. The kit usually includes connectors, fasteners, adapters, etc.
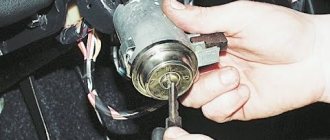
Installing a button
If you decide to acquire additional control for this modification, you will have to fool yourself further.
Voltage + can be taken directly from the battery, but we must not forget about the fuse on the wire where the sealed holder hangs.
In short, the installation is simple:
But in practice, everything is not so simple and this algorithm requires several clarifications:
- We remove the rheostat (in principle, you can throw it away, it is no longer needed).
- The wiring is heat-shrinkable and attached for convenience to the rest of the wire bundle.
- We prepare the negative (we look for it in the area of the dashboard) and positive (you can take it from the ignition) terminals.
- We find a vacuum booster, install a relay in its area, and then pull the wire from it into the interior to the button.
- The electrics are connected, we connect everything on the button, and then we put the dashboard back together.
There are examples of craftsmen who do not drain the antifreeze, they simply plug the pipe during the work, the latter’s costs are only 1.5-2 liters.
How a new pump in the cooling system will help the driver
It is the pump for the Gazelle stove that is in high demand among car enthusiasts due to its practicality and low cost. It can even be installed on other makes and models of vehicles. Experienced drivers who have been using Gazelle for years are not lazy to disassemble the new pump and coat it with sealant. Particular attention should be paid to the area where the impeller and rubber sealing ring are located. Antifreeze leaks often appear in these places.
Where should I put the new heater pump? Typically, such installation is carried out in a gap created using a pipe going to the interior heater radiator. To do this, you can remove and cut the standard pipe. Using connecting hoses, a new heater pump is built into the gap.
The main reason why drivers think about an auxiliary pump is that there is little heating coming into the cabin at idle. The air becomes truly hot only after the engine speed increases. Additional equipment will help antifreeze circulate intensively through the radiator.
Expected results
After installing and connecting all the necessary elements, it is necessary to conduct a road test, during which the pump must run continuously for at least an hour. In this case, it is necessary to carefully inspect all points of its connection with the cooling system to eliminate leaks.
After inspection, check the moving machine. It may happen that a unit that is working properly at idle will fail when the pressure in the pipelines increases.
If everything is done correctly, the heater begins to supply warmer air and the engine cools down effectively even under heavy loads.
Domestic cars in winter in Russia are not very comfortable. And Gazelle is no exception to this rule. Drivers mainly complain about the heat supply to the cabin. Simply put, this car is quite cold in winter and the heater does not create a comfortable temperature in the cabin. To solve this problem, there is an additional pump for the Gazelle stove.
Installation instructions
Direct installation work can begin when the auxiliary pump, fastening and additional elements that are required according to the diagram have been purchased. The procedure for adding another pump to the factory system will be approximately as follows:
- First, a single structure is assembled, which includes a pair of hoses and a new pump. Particular attention should be paid to reliable fastening of hoses and fittings.
- The following work will be carried out on the car. It is put on the handbrake and the terminals are removed from the battery.
- Now you need to find the hoses leading from the existing stove and carefully disconnect them. The assembled structure will be connected to this place.
- To mount the pump itself, you should find a specific place.
- The output from the thermostat should be connected to the top pipe, and this will be the input. We attach a side pipe to the stove, which will act as an outlet.
- Once the entire system is assembled, you can pour coolant into it and observe the tightness (no leaks, stains, etc.)
- Now we supply power to the pump and check the functionality of the complete system. Don’t forget that to do this you need to connect the terminals to the battery. These are the main stages of the process of how to install an additional pump to the heater on a Gazelle.
To avoid losing coolant from the system, it should be drained through the lower hose of the expansion tank. To do this, you need to remove the hose and place a suitable container under the tank (for example, any plastic canister). Antifreeze or other coolant from the hose will also be poured here. After this has been done, you can remove the supply pipe - you can find it on the side of the power unit.
During dismantling, we must not forget that the coolant is under pressure in the system and may be hot for a certain time after the engine is stopped. It is better to prepare the drain container in advance and make sure that the motor has cooled down sufficiently. Many people sequentially flush the cooling and heating system before connecting new equipment to it.
For washing, you can use a regular mixture of warm water and citric acid, which effectively removes deposits. The solution is poured from above, directly from the container, and the pump must be connected to a 12 Volt power source. Next, it will pass through the hoses through the system radiator. After the radiator, the remaining dirty antifreeze along with deposits will be drained into a bucket through another hose. The cycle must be completed several times.
Basic rules for pump installation
When installing an electric pump for heating, you must remember to follow a number of important rules:
The electric pump for heating the house is connected according to the following algorithm:
Knowing how to install an additional pump in the heating system, you can easily carry out this procedure yourself. Positive changes in the use of a heating system with an embedded pump are noticeable in the first days of operation.
It is better to buy a pump for an automatic heating boiler. This way you can protect the device from improper use. When connecting equipment to the network, it is better to use an automatic fuse with a flag, which will perform two functions: a fuse and a switch. The fuse should be installed at a distance of more than 50 cm from the boiler.
You can install the pump in a heating system that already has one pump. But here we need to take into account some nuances. The pumping device turns on when the thermal relay is activated.
In order for both devices to work synchronously, the second device must also be connected to the relay.
An additional pump can be connected to the main one by parallel connection. Knowing how to connect the heating pump to the electrical network, this will not pose any particular difficulties.
Most often, pumping equipment operates on 220 volts. But there are units that operate on 380 volts. Today on sale you can also find a 12-volt heating pump with a smooth speed variator. Such units are indispensable if there is no possibility of connecting to a 220 volt power supply. Thanks to the electronic speed variator, the pump starts smoothly, and it is possible to set the exact parameters of the device. But still, a 12-volt heating pump is used extremely rarely.
How to properly organize the electrical part of the connection
Turning on the pump can be solved as follows: connect the negative terminal directly to the battery. The positive one is carried into the cabin along with the gas pedal cable, for example. The button is placed under the steering wheel in any convenient place and so that it does not interfere. As a result, absolutely all Gazelle drivers with such a solution noted that in winter weather the car becomes noticeably warmer. It is also convenient that even with a cold engine you can turn on the pump, and after a couple of minutes heated air will begin to flow into the cabin.
This is a fairly simple method, but it has weaknesses. If you forget to turn off the button in advance, then when you next start the car to warm up, the operating device will begin to take heat from the cold engine. The time it takes to warm up to operating temperature will increase. You can make a double control system so that the pump does not operate in the warm season and does not turn on automatically when it starts. To do this, you will have to add a two-position relay to the circuit.
Electricity
Before connecting an additional pump to the Gazelle stove, you need to look at the connection diagram for the overhaul. There are several options. One of the easiest ways is to move the button to two positions inside the machine. It's simple: on / off. For example, if it’s cold you can turn it on, if you heat it up you can turn it off.
This is a simple method, and it has a drawback. If you forget to turn off the additional pump, then the next time you start the car for heating from the alarm remote control, the pump will start and absorb heat from the cold engine. This will extend the engine warm-up time.
Professionals advise using a more complex, but more effective method. There will be a dual control system. This button is only intended to be turned on in winter and turned off in spring. This is done to ensure that the pump does not work unnecessarily.
When the button is turned on, the pump for the additional heater of the Gazelle stove will turn on/off completely automatically when the engine starts and the car moves. This circuit requires a two-position relay. The pump has a certain power, so the relay needs a current of 3 A.
Stories from our readers
“Fucking basin. "
Hi all! My name is Mikhail, now I’ll tell you a story about how I managed to exchange my two-wheeler for a 2010 Camry. It all started with the fact that I began to be wildly irritated by the breakdowns of the two-wheeler, it seemed like nothing serious was broken, but damn it, there were so many little things that really started to irritate me. This is where the idea arose that it was time to change the car to a foreign car. The choice fell on the melting Camry of the tenth years.
Yes, I had matured morally, but financially I just couldn’t handle it. I’ll say right away that I am against loans and taking a car, especially not a new one, on credit is unreasonable. My salary is 24k a month, so collecting 600-700 thousand is almost impossible for me. I started looking for different ways to make money on the Internet. You can’t imagine how many scams there are, what I haven’t tried: sports betting, network marketing, and even the volcano casino, where I successfully lost about 10 thousand ((The only direction in which it seemed to me that I could make money was currency trading on the stock exchange, they call it Forex. But when I started delving into it, I realized that it was very difficult for me. I continued to dig further and came across binary options. The essence is the same as in Forex, but it’s much easier to understand. I started reading forums, studying trading strategies. I tried it on a demo account, then opened a real account. To be honest, I didn’t manage to start earning money right away, until I understood all the mechanics of options, I lost about 3,000 rubles, but as it turned out, it was a precious experience. Now I earn 5-7 thousand rubles a day. I managed to get the car buy after half a year, but in my opinion this is a good result, and it’s not about the car, my life has changed, I naturally quit my job, I have more free time for myself and my family. You’ll laugh, but I work directly on the phone)) If If you want to change your life like me, then here’s what I advise you to do right now: 1. Register on the site 2. Practice on a Demo account (it’s free). 3. As soon as you get something on the Demo account, top up your REAL ACCOUNT and go to REAL MONEY! I also advise you to download the application to your phone, it’s much more convenient to work from your phone. Download here.
Choosing an additional pump for the VAZ 2110
Most often, at VAZ, an electric pump from Gazelle is chosen as an additional pump, but you can use a pump from other manufacturers (for example, Bosch).
The Gazelle pump is a conventional centrifugal pump. The flow is thrown away by the blades from the center to the periphery, due to which a vacuum appears at the inlet, and, accordingly, the force of pumping the liquid. It does not know how to pump air (the gaps between the impeller and the housing are large).
Gazelle pumps are also different (for example, old and new). The new pump, unlike the old one, vibrates much less and generally makes itself felt less in an unpleasant way.
According to unverified data, but the source is most knowledgeable: They began installing a new seal, bourgeois, on pumps from Elara, in order to eliminate leaks. Last season there were no complaints about the leakage. Of course this will not affect the noise. They also increased the flow area of the fittings on their pumps, which increased productivity.
On the left is “Elara”, on the right is “Advers”. Both for a 20mm hose.
As they say, whichever pump you choose, that’s how it will work