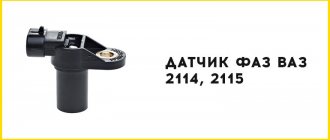
Speed sensor VAZ 2115
You discovered that your VAZ 2115 car began to stall at idle, “floating” speedometer readings appeared, engine thrust dropped, and fuel consumption increased - all this means that the speed sensor is acting up. Replacing the speed sensor of a VAZ 2115 is not difficult. It is enough to know where it is located and how to get to it. The procedure will take very little time and will save you money, and our instructions will help you. Let's start in order.
Features of replacing the speed sensor on VAZ-2113, 2114, 2115
The main role of the speed sensor (DS) is to obtain information about the number of revolutions transmitted from the gearbox gears to the front wheels of the car, as well as transmitting this data to the electronic control unit (ECU).
The controller processes the received information and transmits it to the control panel, thereby informing the driver about the speed of movement and the distance traveled. In addition, based on the same information, the ECU calculates the required proportions for the fuel mixture supplied to the engine cylinders.
There may be two types of speed sensors in VAZ 2114 cars:
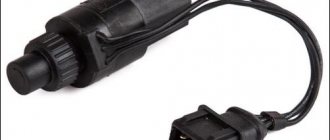
- a sensor with a mechanical drive from the gearbox gear and a cable drive of the speedometer (has a side outlet for wires and a seat for the cable);
- sensor with mechanical drive from the gearbox and electronic connection to the controller;
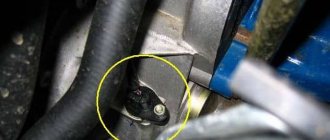
The speed sensor is located on the rear of the engine on top of the gearbox housing.
Functionality check
Diagnostics of the performance of the DS can be done in two ways.
The first option, to implement it you will need a multimeter:
- First you need to dismantle the controller itself. Read more about the removal procedure below.
- Then the tester should be set to alternating voltage mode.
- After this, you should close the multimeter probes to the contacts on the controller plug. The first probe should be connected to the contact that goes to the dashboard, it is located in the center, and the second - to ground, that is, the car body.
- There is a special rod in front of the controller; when it rotates, the device starts. That is, to diagnose the functionality of the regulator, the rod should be rotated; to do this, a metal tube of the same size should be installed on it; this option is more convenient.
- When the rod begins to rotate, the multimeter display will display data on alternating voltage, or rather, its surges. Moreover, the higher the rod rotation speed, the larger the jumps in values will be. This voltage does not jump, this indicates a controller malfunction.
The device can also be checked without dismantling it, but to implement this method, you must drive your “Fifteen” onto an overpass or pit:
- When the car is in the pit, you will need to jack up the front left wheel.
- Next, you need to find the controller itself, which is located on the gearbox, and then disconnect the connected wiring from it.
- Then take a multimeter and connect its probes to the ground contact, as well as transmitting the impulse to the control unit, this is the central, as well as the outermost contact on the block.
- Now you need to rotate the jacked wheel and diagnose the values that the multimeter gives for the appearance of voltage surges. If you don’t have a tester, you can use a regular test lamp with wires connected to it. One of the wires should be connected to the left contact, that is, power, and the second to the central one. If the light source starts to blink when the wheel rotates, this indicates that the DS is working properly.
Perhaps the reason the DS is not working is poor contact with the car's electrical network, then you will just need to clean or replace the contacts. Before diagnosing, carefully inspect the device; if there are serious signs of damage on it, then there may be no point in even checking it (the author of the video is the REMONTYCA channel).
Malfunctions
Signs of a broken DS are:
- incorrect speedometer readings (chaotic needle movement);
- problems with the engine idling;
- error message (code 0500, 0501);
- “floating” speed;
- “failures” during acceleration;
- increased fuel consumption.
DS malfunctions include:
- lack of contact in the connector;
- sensor wiring break;
- breakdown of the mechanical drive of the sensor;
- failure of the sensitive element (for electronic DS).
After checking the contacts and wiring and making sure that everything is in order, you need to remove the sensor from its seat and replace it with a new one. If the sensor is not replaced, the ECU will “force” the engine to operate in emergency mode, which will lead to increased fuel consumption, as well as wear and tear on other elements of the fuel system.
The speed sensor itself is inexpensive: mechanical versions cost 300-500 rubles. Replacing it at a service station will cost approximately 200-300 rubles.
However, it is not necessary to overpay for the work. The speed sensor can be easily replaced independently in 15-20 minutes.
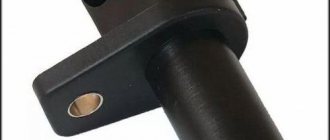
When purchasing a DS, you need to pay attention to its manufacturer and the material used to make the rod. A rod made of plastic may fail after just a few days. By the way, if the rod falls apart, you will have to disassemble the gearbox.
DIY replacement instructions
The procedure for replacing the DS with your own hands looks like this:
- First of all, you need to turn off the ignition and open the hood.
- To make the repair procedure more convenient, you can dismantle the adsorber. To do this, you simply need to unscrew the nuts that secure this unit, and then remove it to the side. Completing this step will take literally 1-2 minutes, but it will greatly facilitate access to the device.
- After this, you need to tighten the fastener and remove the connector with wiring.
- After completing these steps, you can begin dismantling the device. You need to turn the device counterclockwise until you completely unscrew the DS. Remove the DS from the seat; for this you will need a 21mm wrench.
- The installation site of the DS must be cleaned of dust and dirt to prevent it from getting inside.
- Next, a new DS is installed; in this case, you must act carefully. The bottom line is that the controller body is made of plastic, so even minor mechanical impacts can lead to its failure. Mount the DS into the mounting location so that its grooves completely coincide with the bushings, otherwise you will not be able to securely fix the device in the installation location. Turn the DS clockwise until you feel resistance. There is no need to tighten the device too much.
Self-replacement of the sensor
- Raise the hood and turn off the power by removing the ground terminal from the battery.
- For ease of operation, remove the air duct corrugation.
- When access to the sensor is open, disconnect the wires from it.
- Turn the sensor body counterclockwise by hand and unscrew it.
- If you suspect a malfunction of the drive, unscrew the nut securing it with a 10mm wrench and pry off the drive housing with a slotted screwdriver.
- Carefully remove the drive.
- Install the new drive and secure it.
- Install the new sensor and connect the wires.
Self-replacement of the VAZ 2115 speed sensor
You discovered that your VAZ 2115 car began to stall at idle, “floating” speedometer readings appeared, engine thrust dropped, and fuel consumption increased - all this means that the speed sensor is acting up. Replacing the speed sensor of a VAZ 2115 is not difficult. It is enough to know where it is located and how to get to it. The procedure will take very little time and will save you money, and our instructions will help you. Let's start in order.
Principle of operation
The operating principle of a modern speed sensor (hereinafter DS) is based on the Hall effect:
- The speed sensor transmits voltage pulses to the controller with a frequency directly proportional to the speed of the drive wheels.
- The controller, based on sensor pulses, regulates engine operation in idle mode, and with the help of the IAC (idle speed controller) controls the supply of air bypassing the throttle valve.
- In this case, the frequency of the DS signals is directly proportional to the actual speed of the car.
- DS differ in the connecting connectors to the harness block.
- BOSCH systems use a square connector.
- The sensor, which has a round connector, is used in systems such as GM and January 4.
- All of these sensors are six-pulse; they produce six pulses per axis rotation.
- A ten-pulse sensor is found in Samar carburetor trip computers.
Signals from the speed sensor are used by the control system to calculate fuel shut-off thresholds, and to electronically force limit the speed of the machine (in modern control systems). When installing the speedometer drive in models that still have one in the box, you need to be very careful, otherwise, when misaligned, the fragile plastic teeth on the speedometer drive drive gear will be crushed and then you will have to completely disassemble the entire gearbox (to replace the broken drive) and the cost of the issue increases . The output voltage for a low pulse level is permissible no more than 1 V, and for a high level it must be at least 5 V.
Types of installed meters
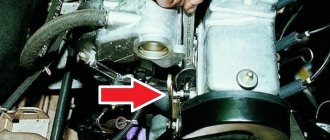
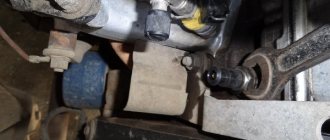
Replacing a speed sensor with your own hands for a VAZ 2115 is not much different from replacing it on any car of the “tenth series” (for example VAZ 2110-2112), as well as the Samara series (VAZ 2113-2115), and new products such as Lada Kalina , Grant or Priora. The sensor itself is located on the rear side on top of the gearbox (when viewed from the radiator) directly above the differential, where the wires come out (in the photo below it is shown by an arrow, look under the pipes).
The meter we are looking for is located under the pipe indicated by the arrow.
At different times, three types of sensors (meters) were installed on VAZ models. The first of them is no longer used on new cars.
Type No. 1
Installed on the first Samaras with an injector with a cable-driven speedometer:
- It was installed as an “intermediate insert” between the speedometer cable and the gear output to the gearbox.
- Wires with a connector extend from it to the side.
Speed meter of the first (oldest) type
- Its malfunction can only be determined with a special diagnostic tool at the same speed at idle. And also when the car is coasting and when stopping.
Sometimes, when such a breakdown occurs, the car begins to stall immediately after engaging the “neutral” (neutral gear) while driving. This happens due to the fact that the car, when driving, maintains a slightly higher idle speed initially (1000 instead of 850 if the car is stopped). This is designed for smooth shifting when coasting from neutral to gear.
Attention: Before replacing, it is recommended to check the drive mechanism (on which the meter sensor is screwed)
You can do this by trying to turn the drive using any available means. Carefully! So as not to break the square window.
Type No. 2
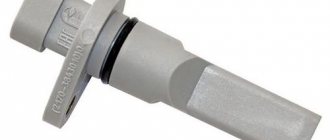
A newer model of the meter is installed on subsequent models of injection vases. Its main difference is an electronic speedometer and the complete absence of a cable. It is screwed directly onto the output of the drive gear.
Speedometer drive: types and differences
A speedometer is an important element in cars, as well as several other vehicles, as it is necessary to monitor speed in order not to violate traffic rules. But this is not the last function of this device.
All possible speedometers have a high-speed magnetic unit; due to the rotation of the magnets, a flow is formed, it moves through the coil, thereby facilitating the induction of eddy currents. They thereby begin to create more magnetic fields. They interact with each other, the needle of the device moves along the frequency scale, with the help of this the magnet rotates.
All speedometers are divided into three categories.
Mechanical speedometers. In this type of speedometer, the process of speed measurement and indication occurs thanks to a mechanical device. A gear is used as sensors, which is connected to the secondary shaft of the gearbox; this is the speed unit with an arrow indicator and the drum counter. Previously, speedometers were used in the form of a drum and tape. But they stopped using them quite a long time ago.
Electromechanical speedometers. In these devices, speed is measured using various electronic or electromechanical sensors that are connected to the gearbox. The speed is indicated by a milliammeter or the speed unit of a mechanical speedometer, and the distance is indicated by a counting drum, which drives a stepper motor.
The principle of operation of an automatic transmission, what to do if it breaks down
Electronic speedometers. This is a development of new electromechanical speedometers; the main difference is the replacement of the odometer - in an electronic device it is completely digital.
VAZ 2115 speed sensor replacement
Before you start replacing the speed sensor, we recommend that you inspect the connector and wires connected to it for breaks. If there is nothing wrong with them and it is just the sensor, you will need the following tools to replace it. To replace the first two types of meters:
- Slotted screwdriver (flat)
- Pliers (pliers)
- crosshead screwdriver
To replace the third last type meter:
- 10mm socket with extension and ratchet (or 10mm wrench if they are not available)
- Flat screwdriver (slotted)
- crosshead screwdriver
- Key for 22
We are starting to replace
- First, remove the inlet pipe with the filter housing from the machine.
- If there is heavy contamination around the sensor, we clean the surfaces of the box with a wire brush.
- Then we wash off the dirt using brake cleaner and wipe the surfaces and the meter with a rag.
- If we have a cable-driven speedometer, then first unscrew the cable from the meter by hand or with pliers.
- Sometimes it happens that the sensor itself gets unscrewed.
- Then you need to hold the sensor using a 22 key or by hand.
- We remove the sensor itself.
Work order
The first and second types are unscrewed by hand or with a 22mm wrench from the drive axis.
We remove the first two types of sensors
- To remove the new one, you need to unscrew its nut using a 10mm wrench (a head with an extension and a ratchet is more convenient).
- Then we pry it up and pull it out.
We pry and pull out the third type meter
- The third sample sensor is installed directly into the box, so when you take it out, it will be covered in oil.
- We wipe it and close the window in the box body with a clean rag to prevent foreign objects and debris from getting inside.
Now we install the new one, and we can assemble it in reverse order. As you can see, everything is not that complicated. For your specific car model and meter type, you can watch a video.
Source
Troubleshooting
A breakdown of the mechanical speedometer drive is rare, but it is also more difficult to fix. Having purchased a new cable, you need to disassemble and replace it in the following sequence:
- Unscrew and remove the instrument panel. Here you will have to work hard to remove the plastic decorative trims, unscrew all the screws and remove the clamps.
- Disconnect the connectors of the low beam switches, hazard lights and side lights.
- Remove the radio, disconnect the wires from the cigarette lighter and unscrew the panel mounting screws.
- Pull the end of the flexible shaft out of the speedometer block. Unscrew the second end from the gearbox; it is mounted into the differential housing on the top side.
Replacing an electronic speed sensor is much easier and less time consuming. Before carrying out work, you must make sure that the cause is in the sensor and not in the wiring or contacts. To do this, the contacts should be cleaned and the insulation of the wires should be checked visually.
Having prepared a set of keys, pliers and screwdrivers, you can begin replacing the device, following the following algorithm:
- Disconnect the negative battery terminal (ground). Remove the air filter and air duct pipe.
- Disconnect the connector from the sensor and clean the place where it is installed from dirt so that it does not get inside the gearbox when removing it.
- Using a 22 mm open-end wrench, loosen and unscrew the sensor nut. Remove it and cover the hole with a rag.
- Install a new meter; there is no need to tighten the nut too much.
- Connect the connector, install the air filter and replace the battery terminal.
VAZ 2115 Samara cars use 2 types of speed sensors - from the Bosch and General Motors brands. The former are distinguished by a square connector shape, the latter by a round one. These features do not affect the principle of operation and the procedure for replacing parts. There are also Russian-made elements of the January-4 type, which have a round connector.
Didn't find the information you are looking for? on our forum.
Vehicle speed sensor VAZ 2115
Some car sensors and sensors only manifest themselves in the event of a breakdown. For example, the operation of the VAZ 2115 speed sensor is invisible during operation. Many drivers do not know that in addition to speedometer readings and mileage tracking, this device performs several more functions:
- Idle speed is adjusted even when the car is moving, based on speed readings;
- control of air supply bypassing the throttle assembly;
- When the throttle valve is closed, the engine control unit receives signals from the speed and crankshaft speed sensors.
Purpose
The purpose of the VAZ 2115 speed sensor is to measure the speed of the vehicle on the roadway. The driver needs this information to competently assess the situation on the road and make appropriate decisions. In places with maximum speed limits, the driver needs a speed sensor to avoid violations and fines.
In addition, a speed sensor is necessary for more precise control of the vehicle. Before turning, when driving downhill, overtaking passing vehicles in front and other specific situations, the driver should first pay attention to the speed of his vehicle at the moment. Otherwise, if you make a mistake while driving against the backdrop of an incorrectly displayed current vehicle speed, there is a risk of a serious accident with not the most pleasant consequences.
Design and principle of operation
The sensor is a complex of mechanical and electronic components operating according to the Hall principle.
The rotating parts convert the electrical signal into a chain of pulses that are multiples of the rotation of the sensor axis. Due to the mechanical connection of the sensor rod with the wheel hub, the rotational movement of the wheel is converted into the distance traveled.
- when the outer surface of the tire rotates 360°, the wheel moves horizontally a certain distance;
- this path is equal to the circumference of the tire, it is programmed into the engine ECU;
Important: Installing wheels of a non-standard size disrupts the operation algorithm of the VAZ 2115 speed sensor.
Both of these parameters are involved in the coordinated operation of the engine's electronic control unit.
Operating principle
Thanks to the device of the measuring device, which was discussed in the previous paragraph, it seems possible to carry out the following action to measure the speed of a vehicle on the road:
- As soon as the tire on the disk rotates three hundred and sixty degrees relative to its original axis, the mechanical rim of the device slightly changes its position, which immediately becomes known to the driver in the form of “kilometers per hour.”
- This path is preset by the car’s designers in the engine ECU; most often it is equal to two tire radii. That is, its full length.
- Do not forget that to determine speed, the distance traveled is divided by the time spent in motion.
What happens if this sensor breaks?
Of course, the car will not stall, and you can continue driving it, but only to the place of repair.
- Absence or incorrect readings of the actual vehicle speed. The speedometer needle “hangs” at one mark, moves chaotically, or does not deviate from “zero” at all.
- On a moving vehicle, when the accelerator is released, interruptions in idle operation are observed.
- Floating idle speed when stopping.
- Unreasonably high fuel consumption.
- During intense acceleration, dips in traction occur: there is no increase in power in proportion to pressing the gas.
Where is the speed sensor located and why does it break?
The sensor is located on the gearbox housing, in its upper part. To get to it, you need to lift the car on a lift, or use the inspection hole.
The device and its electrical wiring are affected by moisture, road reagents and temperature changes. The causes of the malfunction are the following:
- breakage of connecting wires;
- corrosion of the connector terminal block;
- mechanical failure of the rotating rod;
- failure of the electrical part.
The symptoms of any of the breakdowns are the same; the sensor itself cannot be repaired: only replaced. Only oxidized contacts or broken wiring can be restored.
How to check
First of all, we carry out a visual inspection. The wires must be intact and have no obvious kinks or damage to the insulation. The cleanliness of the contacts on the connector is also checked. After inspection, we check the electrical part of the device.
- You can jack up one of the front wheels of the car and spin it with the ignition on (we don’t start the engine). Voltage surges are checked using a multimeter at the information contact (central terminal).
- If you remove the sensor, you need a device to force the rod to rotate. A voltage of 12 volts is supplied to the power terminals, the tester is connected to the negative terminal and the signal contact. When rotating, we register impulses. If they are not there, the sensor needs to be changed.
To replace, you will need a 21 key. We replace the faulty part with the negative terminal of the battery reset.
Advice: You should not save money by buying a cheap sensor from a dubious manufacturer. A branded part is not so expensive that you risk a breakdown on the road, where there will be no way to diagnose and replace the speed sensor.
