Can the problem be resolved under warranty?
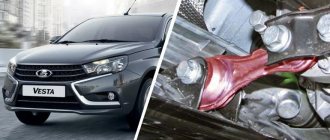
Whether dirt getting on the fan of the ventilation system is a warranty case is described in the AVTOVAZ information letter, which was received by the editors of the Lada.Online website.
It says that when operating warranty-covered cars “Lada Vesta”, “Lada XRay” and “Lada Largus”, there may be vibration felt by the consumer on the steering wheel and instrument panel. The reason for this is the operation of the interior heater fan at speed 2 or higher with dust/dirt and/or other foreign objects on the fan impeller. Dust accumulation occurs when the vehicle is used for a long time on contaminated public roads, on dirt and field roads when the fan is not working, which is a failure to follow the recommendations set out in the operating manual.
Mud flaps Lada Vesta (2015-2019)
Release period: 2015-
Release period: 2015-
Release period: 2017-
Release period: 2015-
Release period: 2017-
Release period: 2015-
Basic faults
Fuse box lada largus
A whistle is already a malfunction - there are not many of them in this unit. You have to say “heater” - either it works or it doesn’t. If the stove does not blow at all, this means the electric motor is jammed or the brushes are worn out. If you were still skating with a bang, and then at one point it disappeared, and the heater stopped working, then it’s definitely an engine failure, most likely the problem is in the bearing or bushings.
Therefore, in 70% of cases, lubrication really helps, but if you have been driving for a long time with noise, it is possible that the bearing is already worn out. Therefore, as soon as noise appears, crackling and so on, we disassemble the stove and clean it. What else I would like to note on our VAZs, especially on the “classics”, bushings were used instead of bearings; after they were worn out, they needed to be replaced, however, many craftsmen still install bearings on the VAZ heater - I think this is correct!
Checking the stove dampers
As you already know, air is pumped into the interior of the Lada Vesta by an electric fan through air ducts. It would be possible to drive air directly without using air pipes. However, then it would be impossible to regulate the speed and direction of air flows. For the orderly movement of air masses, an air flow distribution damper is used, which is located between the fan and the outlet from the air duct. There are several of the latter on the dashboard, and accordingly there are the same number of dampers.
Like any mechanism, the dampers that distribute air fail. To detect it, we will check the maximum power of the Lada heating device. This is exactly how the malfunction makes itself felt most easily.
If the volume of incoming gas does not change when moving the mode control lever. This means that the motion limiter does not operate. Most likely, the signal is lost along the way (electric drive). If you hear a creaking or noise when switching the heating mode. Lubricate the dampers with a lubricant containing silicone. Why do windows fog up?
When there is a large difference in temperature or humidity inside the cabin, a coating of water droplets forms on the glass. This is a very dangerous condition - the driver cannot see the road. One of the main functions of the stove is to quickly remove fogging. To do this, several air duct nozzles are directed at the windshield, as well as the side windows of the Lada Vesta. The luxury version also uses heated mirrors.
A working device quickly restores the windows to their normal state. This is achieved by supplying hot air to the surface. Therefore, if Vesta’s windows do not fog up, the reason for this is a faulty radiator.
How the stove works
Air ducts are directed from the Lada Vesta heater towards the windows, seats and floor. Air adjustment in various directions is carried out by central deflectors. The heat output is controlled by a wheel on the heater.
The Togliatti plant took a new approach to heating the lower part of the car interior. Now the air duct nozzle is located directly above the foot of the right limb, and not to the side, as before.
Depending on the configuration, the procedure for controlling the stove differs.
- For “Classic” (without air conditioning), the left regulator is responsible for the air temperature, and the right one changes the direction.
- The Comfort package has air conditioning. Compared to the basic version, the function of turning on circulation has been added here.
- For “Lux” the developers installed climate control. Using the Defrost MAX mode, the air conditioner turns on automatically. This function also allows you to heat the windows and side mirrors.
Checking heating efficiency
_x000D_
_x000D_
We start the engine and warm it up to operating temperature. We check that the inlet and outlet pipes of the heater radiator are heated and have approximately the same temperature. If the pipes have different temperatures, then it is possible:
_x000D_
- _x000D_
- low coolant level in the expansion tank (which antifreeze is better)
_x000D_
An air lock has appeared in the engine cooling system (air can be released through a special valve)
_x000D_
Heater radiator clogged (replace)
_x000D_
_x000D_
_x000D_
We install the temperature regulator on the stove control unit all the way to the red zone. We make sure that the temperature of the air leaving the panel deflectors begins to rise. If it blows cold, it means:
_x000D_
- _x000D_
- the damper drive is faulty (the damper does not open, preventing air from passing through the heater radiator)
_x000D_
The heater control unit is faulty (how to remove)
_x000D_
_x000D_
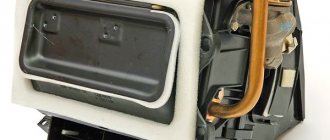
Standard heater radiator
The heater radiator is the same in design as the radiator of the Lada cooling system, only smaller. They have a common antifreeze range. Dirt from the expansion tank may also end up in the small interior assembly. Unfortunately, the radiator cannot be repaired. Need a replacement. When we come closer to the question, it turns out that the standard unit does not have a serial number. There is only a code - UT-00006936, according to which they can sell you another spare part. Therefore, before purchasing, check with the seller for information.
Why is the air blowing from the left warmer and from the right colder?
I recently learned the answer to this question, found it on the Internet. One Lada Vesta owner also encountered this problem and contacted the official dealer. The car dealership replaced the heater radiator without any problems.
What was the reason? The radiator just clogged. It is not entirely clear why this happened on an almost new car. The dealer's employees explained that such cases happen often. Apparently, when cars are assembled, the cooling system is not flushed properly. Small particles remain in it and clog the radiator. The channels in it are very thin and look like a kind of filter.
It drives coolant through itself, and the particles in it get stuck in the radiator honeycombs. As a result, heating occurs unevenly. The heating in the Lada Vesta is designed in such a way that air to warm the interior is taken from different parts of the radiator. If it is clogged, then these parts heat up differently.
If the car is under warranty, then you can safely go to the official dealer and solve the problem. If there is no longer a guarantee, then you can simply flush the radiator without removing it from the car.
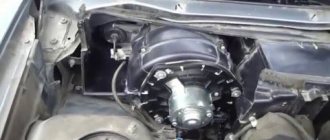
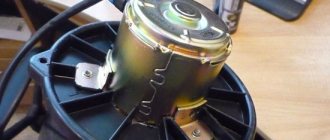
Disassembly - cleaning the fan
As I already wrote above, in each car the removal of this device is done differently, but the essence always remains the same, we either have the fan completely removed or there is direct access to it so that the elements can be lubricated.
I WOULD LIKE TO CAUTION - before you remove the electric motor, disconnect the terminals from the car battery to avoid unnecessary unnecessary short circuits.
The fan is almost always designed the same way - it is an electric motor and at the top there is a cylindrical comb (blades) that pumps air. Here's a small example.
Lada X Ray
You can independently eliminate the noise of the Lada X-Ray heater fan using one of 2 options:
- Through the top panel in the glove box;
- Through the cabin filter.
First way
Compared to Vesta, it is noticeably simpler due to the fact that you do not have to dismantle several components at once, although it is not as convenient to work with.
First you need to remove the top panel in the glove box on which the lamp is located.
The motor itself is on the left. To remove the impeller, you need to lightly press the top plastic lock and carefully turn the fan counterclockwise.
It is worth noting that it will not be possible to completely remove the motor, since this will require disassembling part of the dashboard. However, even the indicated hole is enough to clean the blades with a thin screwdriver wrapped in cloth.
Second way
To implement this option for eliminating heater fan noise in the Lada X-Ray, you will first need to remove the cabin filter and frill on the passenger side.
To get to the cabin filter, you need to remove the plastic lining of the transmission tunnel on the front passenger side (fastened with screws), and then, according to the above algorithm, remove the glove box lid (if necessary).
Next, you need to squeeze the latches and remove the filter cover.
To remove the filter itself from the housing, you need to grab its lower edge and then pull. After removal, it is recommended to clean the seat from debris (leaves, dust, etc.).
When the filter element is removed, all that remains is to remove the frill, which will require a 16mm wrench and a Torx T20 sprocket.
First you need to pry with a screwdriver or knife and remove the plastic caps that cover the nuts securing the windshield wiper arms. When this is done, all that remains is to unscrew the nuts and remove the leads along with the brushes. They should be removed carefully so as not to damage the splines.
The next step is to remove the hood seal. Then 3 screws are unscrewed in the right half of the frill and the clip is removed. Finally, you need to remove the right side of the frill. As for the left one, it is not necessary to dismantle it.
Location of fixation points and components when removing the Lada X-Ray frill
When dismantling is completed, it is necessary to insert an air conditioning cleaner tube into the air intake on the passenger side, then activate the heater and fill it with foam.
Assembly is carried out in reverse order. Before installing the windshield wiper arms, it is recommended to clean the trapezoid axes of the wipers from dirt.
As you can see, all the ways to independently eliminate the noise of a Vesta or X-Ray heater fan are more than feasible. All that remains is to implement them.
The stove in the Lada Vesta differs from similar devices on other AvtoVAZ models. The difference can be found not only in the design of the heating system, but also in the features of correction and control.
Replacing the Lada Largus heater motor (VAZ Largus)
In order to feel comfortable in a car at any time of the year, it is necessary to monitor the health of its heating system, or in other words, the “stove”. Such a system is responsible for the heating, cooling and air circulation functions in the cabin. Since we have not yet created a car that is 100% protected from malfunctions, you must know how to do such work with your own hands as replacing the heater motor on a Renault Logan.
It cannot be said that the Renault Logan ventilation and heating system is a weak point, but such a malfunction, especially in the cold season, promises unpleasant consequences. The operating principle of the interior heating system does not differ significantly from the device in other cars. But if the rear window heating does not work, then this can also spell trouble.
The heater radiator is connected directly to the cooling system, in which the coolant circulates (coolant, about replacing it here, about choosing a coolant here), which warms up within 95°C during engine operation. A special fan blows onto the hot radiator, which creates a strong air flow and directs it into the cabin through special air ducts. The quantity and speed of supply of heated air is regulated using a damper.
Signs of a malfunctioning stove
You should think about the upcoming repair and replacement of the stove motor if the following malfunctions are observed in its operation:
- An extraneous noise appeared when the stove was turned on.
- Warm air stopped flowing into the cabin.
- The speed of the incoming air flow has decreased.
- And of course, if the stove does not turn on at all. (However, in the event of such a malfunction, first of all analyze the condition of fuse F36, which is located inside the car. It is located in the green housing and is responsible for short-circuit protection of the heater system).
Removing the heater system
Most Renault Logan owners are convinced that replacing the heater motor requires completely dismantling the front panel. The same position is described in the car repair and operation manual. Since such a process is quite expensive and inconvenient, many owners prefer to leave this problem unresolved. However, in reality, to dismantle the housing with the heater fan, it is enough to unscrew only a couple of screws. You can handle a similar task with your own hands.
But at the very beginning, make sure that the cabin filter is clean; sometimes, due to its contamination, air cannot get into the cabin. The filter is installed on the right side of the front panel.
If the filter is clean and its condition does not give you any doubt, you can begin dismantling the “stove”.
Tool for the job
To dismantle the heater we will need the following tools:
- Screwdriver with straight blade.
- Phillips screwdriver.
- Plastic puller (or a regular ruler).
- TORX T20 key.
Sequence of work to dismantle the stove
- Remove the door seal.
- Using a screwdriver, pry up the plastic lining of the rack and remove it from the latches.
- After this, the first screw will be visible; use TORX T20 to unscrew it.
- Then, using a flat-head screwdriver, carefully remove the plug in the lower right corner of the panel near the glove compartment and unscrew the second screw.
- Now that the panel is not fixed, pull it towards you to create a small gap.
- Then we inspect the surface behind the panel to find the fan housing. It is not difficult to find, it is round and located not far from the cabin filter.
- After the stove fan is detected, remove the chip with the power cable from it and turn the fan housing clockwise to pull it out.
There are two types of fan designs, although the differences between them are minimal.
DIY stove motor repair
Typically, failure of the stove fan is caused by high wear on the motor brushes. In order to replace them, you just need to press out three latches, or use a Phillips screwdriver and unscrew 2 bolts.
After access is opened, we check the condition of the brushes and replace them if there is high wear.
Dimensions for brushes: 4 by 4 mm, and length up to 2 centimeters. If you find any that are longer, you can sharpen them. After repairs, it is necessary to lubricate all rubbing elements with high-temperature oil.
If the malfunction is related to a technical part, the housing has collapsed or individual parts have burned out, then the entire element must be replaced with a new one.
Installation of a repaired or new part should be carried out in the same way as removal.
Replacing the Renault Logan heater motor with your own hands (+ video and photos)
Messages 20
1 Topic by Bishop 2016-02-29 16:53:38
- Bishop
- Participant
- Inactive
- Messages: 22
- Thank you: 13
Topic: Extraneous noise behind the dash
In general, an unpleasant and rather nerve-wracking sound appeared (especially on a long trip). Behind the dashboard, under the windshield, it’s as if sand is pouring onto the fan or the electrician is shorting out. The most annoying thing is that the sound is random in nature: when you go to the dealer it is there, when you go with a specialist inside, it disappears))) Actually, that’s why the dealer couldn’t say anything. A quick internet search turned up nothing. Maybe someone had this? Maybe there are some thoughts.
2 Reply from Al.Voitov 2016-03-03 16:35:00
- Al.Voitov
- Participant
- Inactive
- Messages: 130
- Thank you: 16
Re: Extraneous noise behind the dash
Are the wipers not working at this moment?
3 Reply from aler 2016-03-03 16:50:57
- aler
- Participant
- Inactive
- Messages: 11
- Thank you: 6
Re: Extraneous noise behind the dash
as if sand is falling on the fan or the electrician is shorting out
Some strange sound) Is there a burning smell? Maybe when you turn on some electrical appliances, a sound appears? Pay attention to this.
4 Reply from Bishop 2016-03-04 14:21:15 (2016-03-04 14:22:11 edited by Bishop)
- Bishop
- Participant
- Inactive
- Messages: 22
- Thank you: 13
Re: Extraneous noise behind the dash
as if sand is falling on the fan or the electrician is shorting out
Some strange sound) Is there a burning smell? Maybe when you turn on some electrical appliances, a sound appears? Pay attention to this.
The sound is strange, I agree) I tried to find the dependence of its appearance on the inclusion of something, to no avail. I'm betting that something got into the air duct. On a standing one, no, when moving with a flow of air, this “something” begins to fumble. This confirms the "ball effect". It appears on a turn, less on a straight line, braking crackles again, turns in the other direction and disappears completely. It's like it's hanging out there. But I don’t know yet how to get there and check.
Removing and installing the Lada Vesta engine radiator
We prepare the car for the job. We install the car on a viewing hole or lift. Disconnect the negative terminal of the battery.
Remove engine protection.
Remove the front bumper of the car.
Remove beam 1, figure 1, of the front bumper.
Release the clamps and disconnect the air intake pipe from the air deflector 2.
Release the clamps and disconnect the ambient temperature sensor 1, Figure 2, from the air deflector 2.
Release the fasteners and remove the air deflector 2.
Drain the liquid from the engine cooling system (see article on replacing coolant).
Release the fastening clamps and disconnect:
— supply hose 1, Figure 3, radiator from thermostat pipe 3;
— radiator outlet hose 4 from the water pump inlet pipe;
— steam removal hose 1, Figure 4, from the expansion tank pipe 3 (use pliers).
Cut the clamps securing the hoses to the upper cross member of the radiator frame and the bracket on the gearbox.
Disconnect the connectors of harness 1, Figure 5, of the front wires from the connectors of block 2 of the electric fan relay, horn 3 and radiator electric fan 4.
Cut clamp 5 securing harness 1 of the front wires to the electric fan casing.
For vehicles with air conditioning
Press the clamps, disconnect and move aside condenser 1, Figure 6, of the air conditioning system from radiator 2 of the engine cooling system.
Operations for all vehicle trim levels
Turn and remove from the brackets 1, Figure 7, on the upper cross member of the radiator frame, the radiator fastening clamps 2 3.
Remove radiator 2, Figure 6, from the mounting on the lower cross member of the radiator frame and remove the radiator assembly with the electric fan and hoses.
Release the fasteners and disconnect the engine cooling fan from the radiator.
Radiator installation
Install the engine cooling fan onto the radiator.
Install radiator 2, Figure 6, engine cooling system with electric fan and hoses assembly into the fastening elements of the lower cross member of the radiator frame.
Secure radiator 3, Figure 7, of the engine cooling system with two clamps 2 to brackets 1.
Connect the inlet, outlet and steam exhaust hoses of the radiator of the engine cooling system to the corresponding pipes and secure with fastening clamps, Figures 3 and 4.
Install new hose clamps to the upper cross member of the radiator frame and the bracket on the gearbox.
For vehicles with air conditioning
Install and secure condenser 1, Figure 6, air conditioning system on radiator 2.
Operations for all vehicle trim levels
Install and fix the air deflector 2, Figure 1, on the radiator.
Install sensor 1, Figure 2, of ambient air temperature on air deflector 2.
Connect the air intake pipe to the air deflector.
Connect the connectors of harness 1, Figure 5, of the front wires to the connectors of block 2 of the electric fan relay, horn 3 and radiator electric fan 4.
Install a new clamp 5 securing harness 1 of the front wires to the radiator electric fan casing.
Install beam 1, Figure 1, of the front bumper.
Install the front bumper.
Fill the engine cooling system in accordance with the article (Replacing coolant).
Connect the earth wire terminal to the battery.
Start the engine and let it run for 2 - 3 minutes at idle speed to remove air pockets in the cooling system.
Check the functionality of the heater.
After stopping the engine, check the coolant level and there are no signs of leakage, and if necessary, bring the fluid level to normal. The coolant level should be between the “min” and “max” marks on the expansion tank.
Install engine splash guard
A malfunction of the Lada Xray stove most often consists of a decrease in air temperature or a cessation of air circulation altogether, i.e. The car's heater blows cold air and doesn't heat up like before. The main cause of this malfunction is the radiator of the interior heating system. On the Lada Xray, as on the Lada Vesta, it is located in the housing of the heating and air conditioning ventilation unit on the left side (driver's side).
Replacing a stove radiator with your own hands on a Lada Vesta
Preparation of the workplace, necessary tools:
- rags;
- Phillips head screwdriver;
- flashlight to increase visibility;
- new radiator.
How to remove a radiator. Replacement sequence:
- We turn off the engine, turn off the ignition, and squeeze the parking brake.
- Open the hood and remove the terminal from the battery.
- We grind off the antifreeze from the system. The plug is located at the bottom point of the radiator (key 17).
- We remove the decorative trim on the instrument panel.
- Remove the top decorative trim above the glove box. Let's take it out.
- We dismantle the metal dashboard support on the driver's side.
- Remove the air pipe.
- Open the stove lid.
- We remove the heater.
- We install a new heater radiator.
- We assemble the structure in reverse order.
Eliminate noise and vibration of the heater fan on Lada Vesta and XRAY
One of the differences between the Vesta and XRAY heater and other Lada cars (for example, Grants or Prioras) is that the cabin filter is installed after the fan. This design feature makes it easy for debris and dirt to get into the blades, which causes extraneous noise (whistle, howl, rustle) or vibration. How to solve the problem yourself 1. On a Lada Vesta. You will need to remove the heater fan. Over 10,000 km, dust accumulates on the fan blades; the thickness of this layer can be several millimeters. Also, pieces of debris (a twig, leaf, etc.) may get stuck between the blades. All this causes imbalance during rotation. Sometimes at speed 4 of the stove the vibration is so strong that it causes noise and is even transmitted to the steering wheel of the car. And the leaves in the impeller create an unbearable rustling and whistling sound. The main task is to clean the heater fan from dust and dirt. To check vibrations, you can connect a motor from a battery. If necessary, to reduce vibrations, we rearrange the balancing weights to other blades. It is also proposed to slightly modify the design (to reduce the vibrations transmitted by the fan) - stick an anti-creak (madeline) on the edges. 2. On Lada XRAY. Method 1: Remove the top panel in the glove compartment. Remove the impeller from the housing (press the petal on top and turn the motor slightly counterclockwise). It is not possible to completely pull the motor out through this hole, so we clean it with a suitable tool (for example, a flat-head screwdriver) without removing the fan. Method 2: Remove the cabin air filter and place a cloth at the front passenger's feet. Remove the frill from the passenger side and insert the air conditioner cleaner tube (the canister costs about 700 rubles) into the air intake. Turn on the stove and release the foam. Is it possible to solve the problem under warranty? Is dirt getting on the ventilation system fan a warranty case? It is described in the AvtoVAZ information letter, which was received by the editors of the Lada.Online website. It says that when operating warranty-covered cars “Lada Vesta”, “Lada XRay” and “Lada Largus”, there may be vibration felt by the consumer on the steering wheel and instrument panel. The reason for this is the operation of the interior heater fan at speeds 2 and higher with dust/dirt and/or other foreign objects on the fan impeller. Dust accumulation occurs when the vehicle is used for a long time on contaminated public roads, on dirt and field roads when the fan is not working, which is a failure to follow the recommendations set out in the operating manual. And to prevent leaves and other small objects from getting in, install a protective mesh on the air intake in the engine compartment. Let us remind you that in this article you can leave reviews about the operation of the Vesta stove.
AVTOVAZ methodology
To eliminate vibration of the interior heater fan, it is necessary to carry out work in accordance with the procedure.
1. Place the car in the workplace, brake with the parking brake, open the hood, disconnect the earth wire terminal from the battery (spanner 10).
2. Remove the heater fan, Figure 1, in accordance with the requirements of the technological instructions for the corresponding car model:
- TI 3100.25100.20546 “Body of LADA Largus cars - removal / installation of main components and parts”;
- TI 3100.25100.20589 “LADA Vesta car body – removal / installation of main components and parts”;
- TI 3100.25100.20599 “LADA X-Ray car body – removal/installation of main components and parts.”
Figure 1 – Heater fan
3. Blow out the heater fan impeller, Figure 2, with compressed air to remove dust, dirt and foreign objects (compressed air blow gun).
4. Wash the heater fan impeller with a cleaning solution to remove any remaining dust and dirt, avoiding contact of the cleaning solution with the heater fan motor (technological container, brush, wiping cloth, cleaning solution - water, liquid soap).
Figure 2 – Places where dust accumulates on the heater fan impeller
5. Use a rag to wipe off the remaining cleaning solution from the heater fan impeller (wiping rag).
6. Install the heater fan on the car in accordance with the requirements of the technological instructions for the corresponding car model.
7. Connect the earth wire terminal to the battery (spanner 10).
8. Turn on the ignition, turn on the heater fan at 2nd and higher speeds, make sure that there is no increased vibration of the fan in all operating modes. Turn off the fan and ignition.
And to prevent leaves and other small objects from getting in, install a protective mesh on the air intake in the engine compartment. Let us remind you that in this article you can leave reviews about the operation of the Vesta stove.
Photo: Phantom70 logbook and alexpalshin
Keywords: Lada Vesta stove | Lada Xray stove | air conditioner Lada Vesta | air conditioner lada xray | stove Lada Largus | air conditioner Lada Largus | AvtoVAZ order
0 0 0 0 0 1
Share on social networks:
Why is the air blowing from the left warmer and from the right colder?
I recently learned the answer to this question, found it on the Internet. One Lada Vesta owner also encountered this problem and contacted the official dealer. The car dealership replaced the heater radiator without any problems.
What was the reason? The radiator just clogged. It is not entirely clear why this happened on an almost new car. The dealer's employees explained that such cases happen often. Apparently, when cars are assembled, the cooling system is not flushed properly. Small particles remain in it and clog the radiator. The channels in it are very thin and look like a kind of filter.
It drives coolant through itself, and the particles in it get stuck in the radiator honeycombs. As a result, heating occurs unevenly. The heating in the Lada Vesta is designed in such a way that air to warm the interior is taken from different parts of the radiator. If it is clogged, then these parts heat up differently.
If the car is under warranty, then you can safely go to the official dealer and solve the problem. If there is no longer a guarantee, then you can simply flush the radiator without removing it from the car.
Ventilation and heating system
Removing and installing the fan module The heating, ventilation and air conditioning system fan is located in the housing of the heating and air conditioning ventilation unit on the right side, on the front passenger side.
1. Place the car in the workplace. Open the hood and disconnect the ground wire terminal from the battery (spanner 10).
2. Open the glove box lid, remove the glove compartment lighting lamp from the mounting hole, disconnect the instrument panel wiring harness block from the lamp lamp (flat-head screwdriver).
3. Unscrew the five screws securing the glove box, remove the glove box by disconnecting the instrument panel wiring harness block from the limit switch of the glove box lid (replaceable head Torx 20, knob).
Fastening the glove box:
- glove box;
- glove box mounting screw;
- dashboard
4. Disconnect block 4 of wiring harness 1 from fan 2 of heating, ventilation and air conditioning unit 5.
HVAC fan:
- HVAC wiring harness;
- HVAC unit fan;
- fan clamp;
- heating, ventilation and air conditioning unit wiring harness block;
- housing of the heating, ventilation and air conditioning system
5. Press the fan lock 3 and at the same time, by turning the fan housing counterclockwise, remove the fan from the housing of the ventilation, heating and air conditioning system unit.
6. Install the fan of the heating, ventilation and air conditioning system unit in the reverse order of removal, check its functionality.
7. Install the glove box.
Removing and installing the fan speed controller
The HVAC fan speed control is located in the HVAC unit housing on the left side, driver's side.
One of the differences between the Vesta and XRAY heater and other Lada cars (for example, Grants or Prioras) is that the cabin filter is installed after the fan. This design feature makes it easy for debris and dirt to get into the blades, which causes extraneous noise (whistle, howl, rustle) or vibration.
If the car is under warranty, it makes sense to contact the dealer to troubleshoot the problem. Further instructions for those who decide to deal with the problem themselves.
1. On Lada Vesta.
You will need to remove the heater fan.
Over 10,000 km, dust accumulates on the fan blades; the thickness of this layer can be several millimeters. Also, pieces of debris (a twig, leaf, etc.) may get stuck between the blades. All this causes imbalance during rotation. Sometimes at speed 4 of the stove the vibration is so strong that it causes noise and is even transmitted to the steering wheel of the car. And the leaves in the impeller create an unbearable rustling and whistling sound.
Conclusion
The process of replacing a stove heater yourself is not at all difficult, but it requires attentiveness on the part of the master. If difficulties arise, seek help from a specialist auto repair shop.
Electricians advise purchasing original parts, which guarantees compatibility with your car model.
Carefully check the serial numbers with the reference data specified in the Lada Vesta instruction manual.
One of the common problems with Lada Xray is unstable or excessively noisy operation of the car's heater. If the heater on the Xray does not work, or after turning it on you hear a whistle, hum or howl, the problem is hidden in the heater fan. On LADA XRAY it is located in the body of the heating, ventilation and air conditioning system unit on the right side (front passenger side).
We also recommend that you read
Activation of functions via ELM327 and Ddt4all software
https://www.youtube.com/watch?v=9kQGmf5S-sM
Required:
- 4-pin relay (article: 75.3777).
- Wires.
- Connector for installing an additional fuse (available in the Aliexpress catalog).
- Connectors that fit onto the fuse.
Description of the scheme:
- Contact 85 is the “minus” from the handbrake (under the handbrake there is a breaker on “-”), we pull the wire from the breaker to the relay.
- Pin 86 is a constant 12 V (can be taken from the cigarette lighter).
- Pin 30 is 12 V from the DRL fuse.
- Pin 87 is the plus from the relay, which should be connected to the second socket of the DRL fuse.
As a result, when the handbrake is raised, the DRL will turn off. We release the car with the handbrake - the DRLs turn on.
The advantage of this connection diagram is that at any time (for example, during a visit to an official dealer), you can remove the wires from the connectors of the mounting block and insert a standard fuse in their place.
Show/Hide text
On the Lada Vesta in the “Lux” configuration, the DRLs are controlled using an additional body electronics unit (EMM or comfort unit), which is located behind the glove compartment.
Scheme No. 1: DRLs operate only in the left steering column switch mode - “AUTO”. To turn off the DRL, set the switch to the “0” position.
Scheme No. 2: DRLs are disabled as long as there is ground on the additional channel of the car alarm or while the handbrake is raised (depending on the connection).
An additional car alarm channel should be programmed:
- The minus appears after the engine starts, and the car is armed.
- The minus disappears after releasing the handbrake.
Accordingly, after lowering the handbrake, the DRL begins to operate normally.
All connections are made on the EMM block:
- Points 1 and 2 (broken). Points 3 and 4 (broken).
- Broken wires: S1-C1 and S1-C2 in the diagram - power supply to the DRL lamps.
- Point 5 (contact S2 D15 in the diagram).
Let us remind you that there is an easier way to disable the DRLs without interfering with the wiring. Owners of cars without DRLs can install them themselves.
A variant version has remote control of electric window lifters. Power windows are controlled using the remote control buttons when the ignition is off. The windows are raised while the lock button is held down for more than three seconds. The windows of the front doors are raised first, then the rear doors.
Owners of Grants and Kalin in the “Lux” configuration claim that the frequency of wiper operation on their cars can be adjusted. To do this, you need to make one sweep of the blades (without fixing the lever), wait until the windshield becomes dirty, and turn the wipers to the first position. The brushes will work with the pause that you set.
The headlight switch-off delay function (on foreign cars this option is called “Follow Me Home” or “walk me home”) allows the headlights to remain on for some time after the engine is stopped, illuminating the owner’s way home. This is a standard option in some trim levels of Lada Kalina and Lada Granta.
We talked about it in detail earlier. On Lada Vesta and Lada XRAY it needs to be activated (see links at the end of the article).
On Lada Granta and Lada Kalina you can choose one of two modes of closing the car:
- When you press the key fob button, all doors open.
- When you press the key fob button, the driver's door opens, and when you press it again, all other doors open.
To change the opening mode, you need to turn on the ignition (do not start the engine), press and hold 1 and 2 key fob buttons simultaneously until a sound signal appears.
CM. all functions with ELM327.
ps the article will be updated as new features appear.
Found an error? Select it and press Ctrl Enter..
Crash tests at AvtoVAZ - 80% of them are virtual
Installation of additional (top) rear lights on Lada Largus
How the warranty conditions for LADA cars have changed over 3 years
What gasoline to fill in Lada Vesta (survey and tests)
...designed to heat the car interior. The stove is also actively used during rain or cold weather.
The heater is also activated if necessary to quickly remove fogging from the windows or warm up passengers. In the “Lux” configuration, the car is additionally equipped with air conditioning, which creates a favorable temperature for a person.
The most common malfunctions of the Lada Vesta heater radiator: leakage, fan noise, engine vibration. The replacement process is not complicated, but requires care on the part of the repairman.
There have been no fundamental changes in the control of the air conditioning and ventilation system. Still, you may notice a few new keys.
Electrics, sensors, battery Lada Vesta
Products from the Dustershop77 range on the topic of the article:
| Name | Manufacturer | Price | Availability | Add to cart |
| intro iso ant-1 | Antenna adapter Intro iso ant-1 | INTRO | 500 / 350 rub. Discount: 300 rub. | 1 |
| OBD-BT01 | Bluetooth OBDII - adapter for diagnostics | China | 1500 / 1000 rub. Discount: 700 rub. | >10 |
| DC1711 | Renault Duster engine temperature sensor digital indicator with screen | 2300 / 1900 rub. Discount: 1650 rub. | >10 | |
| multi-vc731 | On-board computer Multitronics vc731 | Multitronics | 9500 / 8700 rub. Discount: 8400 rub. | 1 |
| multi-c590 | On-board computer Multitronics C590 | Multitronics | 7500 / 7200 rub. Discount: 6900 rub. | 2 |
| multi-vc730 | On-board computer Multitronics vc730 | Multitronics | 8000 / 7300 rub. Discount: 6900 rub. | 1 |
| DC1250 | Set of small fuses (10 pcs) | Analogue | 200 / 150 rub. Discount: 100 rub. | 8 |
| OBD-WF01 | Wi-Fi OBDII ELM327 - adapter for diagnostics | China | 1500 / 1000 rub. Discount: 700 rub. | >10 |
| DC691-LA6-V003 | Anti-theft protection of the electronic control unit (ECU) for Duster 2015, Largus, Logan 2, Sandero 2, Vesta, Xray, Arkana | 4900 / 3900 rub. Discount: 3400 rub. | 3 | |
| PU-4TC-BLACK | Multitronics PU-4TC parking sensors for on-board computers (sensor color: black) | Multitronics | 4000 / 3800 rub. Discount: 3400 rub. | 2 |
| DC954-8200719629 | Manifold absolute pressure sensor MAP sensor for 2.0 and 1.6 engines - F4R/K4M original 8200719629 | Original | 2500 / 1900 rub. Discount: 1700 rub. | 3 |
| DC1143 | Renault mirror control button (joystick) original 255706283R | Original | 700 / 500 rub. Discount: 450 rub. | 4 |
| DC1949 | Fuel level sensor Duster, Largus, Logan, etc. | ASAM | 1900 / 1300 rub. Discount: 1000 rub. | 3 |
| DC1728 | Horn from Volga - sound signal (set of 2 tones) | 3000 / 2400 rub. Discount: 1950 rub. | 3 | |
| DC190 | Monitor for rear view camera, foldable | China | 2500 / 2000 rub. Discount: 1700 rub. | 1 |
| DC1195 | Fuse set 180pcs in a plastic box | China | 1000 / 800 rub. Discount: 700 rub. | 1 |
| DC1913 | Seat heating connector (4-pin male connector analogue 98822-1045 Molex with wires) | Analogue | 110 / 100 rub. Discount: 80 rub. | 1 |
| DC1999 | Brushes for VALEO generator | Analogue | 300 / 150 rub. Discount: 100 rub. | 8 |
| DC1553-7701208363 | Set of sealing rings for air conditioner pipes (6 pcs) original 7701208363 | Original | 1100 / 900 rub. Discount: 700 rub. | 2 |
| DC990-8200060049 | Seat heating switch original 8200060049 | Original | 800 / 700 rub. Discount: 600 rub. | 5 |
| DC997-255678753R | Steering column switch right analog 255678753R (MODIS) | Analogue | 2800 / 2700 rub. Discount: 2400 rub. | 1 |
| DC1998 | Contact rings for VALEO generator (1 piece) | Analogue | 800 / 600 rub. Discount: 400 rub. | 7 |
| DC485-497612479R | Power steering fluid pressure sensor original Renault 497612479R | Original | 2000 / 1600 rub. Discount: 1300 rub. | 1 |
| DC1754-104035756 | Door limit switch Lada Vesta HANS PRIES TOPRAN (1 piece) 104035756 | Analogue | 300 / 200 rub. Discount: 100 rub. | 6 |
| DC1941-8450006450 | Expansion tank Vesta 8450006450 original | Original | 1000 / 900 rub. Discount: 700 rub. | 2 |
| DC2034-593546 | Voltage regulator Duster, Terrano, Logan, etc. VALEO 593546 (2 contacts analogue 7701055052) | Analogue | 4300 / 3300 rub. Discount: 2900 rub. | 2 |
| DC1736 | Additional cigarette lighter socket with cover | 800 / 500 rub. Discount: 300 rub. | 1 | |
| DC1750 | Oil change pump via dipstick | 2800 / 2100 rub. Discount: 1800 rub. | 1 | |
| DC1360-7711238598 | Rechargeable battery original Renault 7711238598 | Original | 15000 / 12000 rub. Discount: 10900 rub. | 1 |
| PU-4TC-GRAY | Multitronics PU-4TC parking sensors for on-board computers (sensor color: gray) | Multitronics | 4000 / 3500 rub. Discount: 3200 rub. | 2 |
| DC1027-8201167988 | Left steering column switch with PTF article number 8201167988 / 255400337R | Original | 6000 / 4700 rub. Discount: 4000 rub. | 1 |
| DC1826-35372201 | Pin fuse 7.5A 35.3722-01 (1 pc.) | Original | 10 / 7 r. Discount: 6 rub. | 5 |
| DC1833 | 6.3 series female tip with locking (without wire) | 10 / 7 r. Discount: 5 rub. | 5 | |
| DC1945 | Lubricant for electrical contacts and battery terminals Liqui Moly | Analogue | 600 / 400 rub. Discount: 300 rub. | 2 |
| DC1827-35372202 | Pin fuse 10A 35.3722-02 (1 pc.) | Original | 10 / 7 r. Discount: 5 rub. | 1 |
| DC1828-35372203 | Pin fuse 15A 35.3722-03 (1 pc.) | Original | 10 / 7 r. Discount: 5 rub. | 1 |
| DC1830-35372205 | Pin fuse 25A 35.3722-05 (1 pc.) | Original | 10 / 7 r. Discount: 5 rub. | 1 |
| DC1881 | Headlight connector block H4 with wires Duster, Vesta, Terrano, Logan, etc. universal (1 pc.) | Analogue | 100 / 60 rub. Discount: 50 rub. | 4 |
| DC1950-172024388R | Fuel pump Largus, Logan, etc. (one fitting) 172024388R original | Original | 2500 / 2100 rub. Discount: 1800 rub. | 3 |
| DC1737 | Sound signal 2 tones (Airline kit) | 1600 / 1200 rub. Discount: 900 rub. | 2 | |
| DC1404 | Trunk lid and door lock activator (Asam/MANOVER analogue 7700712901) | Analogue | 1400 / 900 rub. Discount: 700 rub. | 1 |
| DC1520 | Solenoid relay 1.6 H4M analogue 233003999R | Analogue | 1900 / 1600 rub. Discount: 1400 rub. | 1 |
| DC1812-6001547488 | Heater resistor Duster, Logan, Terrano, Sandero, Kaptur, etc. original 6001547488 | Original | 1500 / 1200 rub. Discount: 950 rub. | 1 |
| DC1829-35372204 | Pin fuse 20A 35.3722-04 (1 pc.) | Original | 10 / 7 r. Discount: 5 rub. | 2 |
| DC1914 | Seat heating button connector analogue 98172-1003 Molex with wires with wires | Analogue | 250 / 200 rub. Discount: 150 rub. | 2 |
| DC2132-110678071R | Relay control unit for glow plugs K9K Renault original 110678071R | Original | 6500 / 5900 rub. Discount: 5500 rub. | 1 |
| DC2167-172024388R | Fuel pump module assembly Largus, Logan and other analogue 172024388R | Analogue | 6100 / 5600 rub. Discount: 5000 rub. | 2 |
| DC1729 | Pneumatic horn - pneumatic sound signal (set) | 2200 / 1800 rub. Discount: 1500 rub. | 1 | |
| DC1742-723377705 | Windshield wiper relay with pause adjustment with rain sensor (723.3777-05 with rain sensor) | 2300 / 2000 rub. Discount: 1700 rub. | 2 | |
| DC634-601986892R | Speed sensor (plug) for cars with ABS original 601986892R | Original | 1900 / 1300 rub. Discount: 1000 rub. | 2 |
| DC1793 | Ignition coil connector Duster, Terrano, Captur | Original | 600 / 500 rub. Discount: 450 rub. | 7 |
| DC1825-353722 | Pin fuse 5A 35.3722 (1 pc.) | Original | 10 / 7 r. Discount: 5 rub. | 3 |
| DC1831-35372206 | Pin fuse 30A 35.3722-06 (1 pc.) | Original | 10 / 7 r. Discount: 5 rub. | 3 |
| DC1927 | Connector socket for baseless lamp T10 W5W with wires | Analogue | 120 / 80 rub. Discount: 60 rub. | 3 |
| DC1935-255404709R | Left steering column switch (without front PTF, horn on steering wheel 2015-) original 255404709R | Original | 8500 / 6500 rub. Discount: 4900 rub. | 1 |
| DC1944 | Quick-detachable negative battery terminal with clamp (1 pc.) | Analogue | 700 / 500 rub. Discount: 350 rub. | 1 |
| DC1958-793710 | Glove box limit switch 1118,2170,2180 Vesta, Handbrake 2123 - 79.3710 original | Original | 200 / 120 rub. Discount: 100 rub. | 2 |
| DC2002-8200194414 | Windshield washer pump Duster, Logan, Sandero, Largus original 8200194414 | Original | 1700 / 1400 rub. Discount: 1100 rub. | 2 |
| DC2135-8200671275 | Oil pressure sensor Duster and others original 8200671275 | Original | 2500 / 2100 rub. Discount: 1750 rub. | 2 |
| DC1739 | Digital multimeter with dial (tool) | 1000 / 800 rub. Discount: 700 rub. | 1 | |
| DC1773-983747 | Automotive relay 12V 5-pin 98.3747 | 250 / 180 rub. Discount: 120 rub. | 1 | |
| DC996-255675128R | Steering column switch left article number 255675128R | Original | 4700 / 4300 rub. Discount: 3800 rub. | 2 |
| DC2067-7700712901 | Door lock activator (solenoid) Duster, Logan, Terrano, etc. original 7700712901 | Original | 3500 / 2600 rub. Discount: 2200 rub. | 2 |
| DC1665-21800141301000 | Manifold absolute pressure and temperature sensor MAP sensor 1.6l VAZ 21129 original 21800141301000 | Original | 2800 / 2200 rub. Discount: 1900 rub. | 1 |
| DC1816-284375765R | Parking sensor 284375765R original (1 piece) | Original | 2000 / 1400 rub. Discount: 1100 rub. | 2 |
| DC1841 | Ring lug 8.2mm (without wire for crimping) | 10 / 7 r. Discount: 5 rub. | 4 | |
| DC1867 | Seat back heater connection connector for Largus, Vesta, X-Ray | Analogue | 100 / 60 rub. Discount: 45 rub. | 1 |
| DC1900 | Seat heating connector Vesta, Largus, X-Ray, etc. Renault, Lada, Nissan | Analogue | 250 / 200 rub. Discount: 150 rub. | 6 |
| DC1919 | Door limit switch Lada Vesta, VAZ 2190, 1118, 2123 original | Original | 150 / 80 rub. Discount: 60 rub. | 4 |
| DC1933 | Flat fuse holder with cover and wire from 1 to 30A | Analogue | 190 / 120 rub. Discount: 90 rub. | 2 |
| DC1946 | Lubricant protection of terminals and contacts 210 ml LAVR aerosol in a bottle | Analogue | 600 / 400 rub. Discount: 300 rub. | 2 |
| DC1947 | Electrical contact cleaner aerosol 0.2L | Analogue | 500 / 300 rub. Discount: 200 rub. | 2 |
| DC2100-251451432R | ESP switch off button Duster, X-Ray, Renault, Lada 251451432R original | Original | 2500 / 1900 rub. Discount: 1500 rub. | 2 |
| DC2118-7700844253 | Yellow fan relay, fuel pump Duster, Logan, Sandero, Terrano, etc. original 7700844253 20240077 | Original | 1300 / 1000 rub. Discount: 800 rub. | 1 |
| DC2122-8200351489 | Relay gray 5 contacts 35A Renault original 8200351489 | Original | 900 / 600 rub. Discount: 400 rub. | 1 |
| DC2136-8200680689 | Knock sensor Duster and others original 8200680689 | Original | 3000 / 2200 rub. Discount: 1800 rub. | 1 |
| DC2139-8200177718 | Reversing sensor Duster, etc. (3 contacts, rectangular connector) original 8200177718 | Original | 2000 / 1700 rub. Discount: 1500 rub. | 1 |
| DC2253-7700427640 | Door limit switch (switch) analogue 7700427640 AVTOGRAD | Analogue | 600 / 400 rub. Discount: 300 rub. | 6 |
| DC2434-ZD172289 | Heater fan for cars with air conditioning. Sontian ZD172289 analog N109986D | Analogue | 5800 / 4500 rub. Discount: 4500 rub. | 1 |
| DC2124-7701418358 | Antenna adapter JASO - ISO original Renault 7701418358 | Original | 400 / 250 rub. Discount: 200 rub. | 2 |
| DC1743-75377710 | Automotive relay 12V additional 75.3777-10 | 250 / 150 rub. Discount: 100 rub. | 2 | |
| DC1661-210102692R | Water pump (pump) engine 1.6 H4M original 210102692R / 210102248 | Original | 4100 / 3600 rub. Discount: 3300 rub. | 1 |
| DC1662-WPP2463 | Water pump (pump) engine 1.6 H4M PILENGA analogue 210102692R / 210102248 | Analogue | 1600 / 1200 rub. Discount: 990 rub. | 1 |
| DC1666-LWP0129 | Water pump (pump) 1.6 / 1.8 21129/21179 LUZAR analogue 21129130701020 / 21176130701000 | Analogue | 2000 / 1800 rub. Discount: 1700 rub. | 1 |
| DC1629-1040321ZH | Air conditioner radiator Logan 2014-, Vesta 2015- (Termal) | Analogue | 5500 / 4800 rub. Discount: 4300 rub. | 1 |
| DC623-8200547283 | Speed sensor original Renault 8200547283 / 6001548870 (without ABS) | Original | 1600 / 1100 rub. Discount: 900 rub. | 1 |
| DC2181-7701044743 | Throttle position sensor 7701044743 (original AvtoVAZ) | Original | 1600 / 1200 rub. Discount: 800 rub. | 1 |
| DC2219-407009322R | Tire pressure sensor Renault 407009322R original | Original | 2200 / 1900 rub. Discount: 1500 rub. | 4 |
| DC2033-8200671272 | Oil pressure sensor Duster, Terrano, Captur F4R, K9K, etc. original 8200671272 | Original | 2200 / 1800 rub. Discount: 1300 rub. | 1 |
| DC1832 | 6.3 socket series tip with fixation (crimped with wire) | 15 / 10 rub. Discount: 8 rub. | >10 | |
| DC1844 | Pin lug series 6.3 with fixation (without wire for crimping) | 20 / 10 rub. Discount: 6 rub. | >10 | |
| DC1842 | Ring tip 8.2mm (with wire) | 45 / 30 rub. Discount: 20 rub. | 3 | |
| DC1843 | Pin lug series 6.3 with fixation (crimped with wire) | 45 / 30 rub. Discount: 15 rub. | >10 | |
| DC1847 | Split corrugation for cable with a diameter of 6.8 mm (corrugated tube with a cut) price per 1 meter | 50 / 30 rub. Discount: 25 rub. | >10 | |
| DC1848 | Split corrugation for cable with a diameter of 11.5 mm (corrugated tube with a cut) price per 1 meter | 50 / 30 rub. Discount: 25 rub. | >10 | |
| DC1850 | Corrugation for cable, cut with a diameter of 9.4-9.8 mm (corrugated tube with a cut) price per 1 meter | 50 / 30 rub. Discount: 25 rub. | >10 | |
| DC1892 | Connector for crankshaft sensor Vesta, compressor, turn signals Renault, Lada, Nissan | Analogue | 100 / 70 rub. Discount: 50 rub. | 2 |
| DC1907-12010996 | Connector for retractor relay Vesta 12010996 | Analogue | 110 / 80 rub. Discount: 70 rub. | 1 |
| DC1915 | Fuse holder connector with wires | Analogue | 110 / 80 rub. Discount: 60 rub. | 2 |
| DC1916 | 5-pin relay connection block with wires | Analogue | 110 / 80 rub. Discount: 60 rub. | 2 |
| DC1917 | Automotive wire PVAM 1.0 sq. mm, 5 m. | Analogue | 190 / 130 rub. Discount: 100 rub. | 1 |
| DC1918 | Connector for lambda probe, oxygen sensor, fuel pump | Analogue | 300 / 240 rub. Discount: 200 rub. | 1 |
| DC1943 | Quick-detachable positive battery terminal with clamp (1 pc.) | Analogue | 900 / 700 rub. Discount: 550 rub. | 1 |
| DC1959 | Cigarette lighter connector Largus, etc. | Analogue | 300 / 200 rub. Discount: 150 rub. | 1 |
| DC2034-0272220736 | Voltage regulator Duster, Terrano, Logan, etc. BOSCH 0272220736 | Original | 3100 / 2300 rub. Discount: 1900 rub. | 1 |
| DC2119-7700414484 | Relay black 5 pin 20A Renault original 7700414484 | Original | 900 / 600 rub. Discount: 500 rub. | 1 |
| DC2120-8200766093 | Relay blue 5 pin Renault original 8200766093 | Original | 900 / 600 rub. Discount: 400 rub. | 1 |
| DC2123-7700639864 | Turn signal relay Renault original 7700639864 | Original | 3000 / 2500 rub. Discount: 2200 rub. | 1 |
| DC2125-8200263345 | Relay brown 4 contacts 20A Renault original 8200263345 | Original | 1200 / 900 rub. Discount: 800 rub. | 1 |
| DC2126-8200766081 | Relay blue 4 pin 35A Renault original 8200766081 | Original | 700 / 400 rub. Discount: 250 rub. | 1 |
| DC2128-8200308271 | Relay pink 4 pin 40A Renault original 8200308271 | Original | 800 / 500 rub. Discount: 350 rub. | 1 |
| DC2129-7700844253 | Relay yellow 5 pin 40A Renault original 7700844253 | Original | 1500 / 1000 rub. Discount: 800 rub. | 1 |
| DC2131-8200859243 | Relay control unit for glow plugs K9K Renault original 8200859243 | Original | 7000 / 6300 rub. Discount: 5900 rub. | 1 |
| DC2133-8201279378 | Side impact sensor for Duster airbags, etc. original 8201279378 | Original | 1100 / 800 rub. Discount: 600 rub. | 1 |
| DC2134-497610324R | Power steering pressure sensor Duster and others original 497610324R | Original | 1400 / 1100 rub. Discount: 800 rub. | 1 |
| DC2137-7700422630 | Reverse sensor Duster, etc. (2 contacts, oval connector) original 7700422630 | Original | 1500 / 1200 rub. Discount: 1000 rub. | 1 |
| DC2138-8200209496 | Reversing sensor Duster, etc. (2 contacts, rectangular connector) original 8200209496 | Original | 1400 / 1100 rub. Discount: 800 rub. | 1 |
| DC2221-438285 | Starter Vesta, Largus, X-ray, Granta, etc. VAZ-2190,1117,1118,1119,2170 (manual transmission with cable drive) VALEO 438285 | Analogue | 5200 / 4900 rub. Discount: 4500 rub. | 1 |
| intro iso fr-12 | Adapter for connecting a radio | INTRO | 500 / 450 rub. Discount: 400 rub. | 0 |
| multi-cl590 | On-board computer Multitronics CL590 (without voice synthesizer) | Multitronics | 7000 / 6300 rub. Discount: 5900 rub. | 0 |
| DC689 | Anti-theft protection with lock for OBD2 connector | 5000 / 4000 rub. Discount: 3500 rub. | 0 | |
| DC1134-7700427640 | Door limit switch (switch) original 7700427640 | Original | 800 / 500 rub. Discount: 400 rub. | 0 |
| INTRO-PT-04 | Parking sensors with rear view camera included (black) | INTRO | 5200 Discount: 5200 rub. | 0 |
| Incar-VDR | Rear view mirror with DVR and monitor | INTRO | 25000 / 19900 rub. Discount: 19,000 rub. | 0 |
| INTRO-PT-05 | Parking sensors with rear view camera included (gray) | INTRO | 5200 Discount: 5200 rub. | 0 |
| VR-518 | DVR VR-518 | INTRO | 3600 Discount: 3600 rub. | 0 |
| DC129 | Rear view mirror with DVR and rear view camera included | China | 8500 Discount: 8500 rub. | 0 |
| DC1960 | Tray for the battery (mat tray for the battery) Largus, Vesta, etc. | Original | 300 / 200 rub. Discount: 150 rub. | 0 |
| DC2121-8200263342 | Brown relay 4 contacts 20A PTF, washer, etc. Renault original 8200263342 | Original | 900 / 600 rub. Discount: 400 rub. | 0 |
| DC2130-8200351488 | Relay blue 4 pin 70A Renault original 8200351488 | Original | 600 / 400 rub. Discount: 250 rub. | 0 |
| DC1775-VDC118 | Rear view camera SWAT VDC-118 / in standard place LADA Vesta, X-Ray, Kalina | 3000 / 2700 rub. Discount: 2500 rub. | 0 | |
| DC1821 | Adapter for steering wheel and joystick buttons for Lada/Renault and radios with built-in steering interface | 2300 / 1800 rub. Discount: 1400 rub. | 0 | |
| DC2127-8200841587 | Relay blue 4 pin 40A Renault original 8200841587 | Original | 1300 / 900 rub. Discount: 700 rub. | 0 |
| DC653 | On-board computer Ancel (Ankel) | China | 3800 / 3200 rub. Discount: 2700 rub. | 0 |
| DC642 | 2.4G Wireless RCA Video Transmitter-Receiver (Camera to Monitor Kit) | China | 1700 / 1300 rub. Discount: 1000 rub. | 0 |
| VCO-2-02 | Headrest with monitor for Renault Duster (black) | China | 8800 Discount: 8800 rub. | 0 |
| VCO-1-02 | DVR VICO-TF2 PREMIUM for Renault Duster | VICO | 5900 Discount: 5900 rub. | 0 |
| VCO-1-01 | DVR VICO-SF2 for Renault Duster | VICO | 4700 Discount: 4700 rub. | 0 |
| VCO-1-03 | DVR VICO-TF2+ PREMIUM for Renault Duster | VICO | 6700 Discount: 6700 rub. | 0 |
| VCO-1-04 | DVR VICO-WF1 for Renault Duster | VICO | 8000 Discount: 8000 rub. | 0 |
| VCO-2-01 | Headrest with monitor for Renault Duster (gray) | China | 7800 Discount: 7800 rub. | 0 |
The device of the "tens" stove
The design features of the heating system include the presence of a fuse assembly, a fan housing, a radiator with dampers for the influx of air masses and their uniform distribution. Cooled air flows, entering through the heater dampers on the VAZ 2110, warm up.
The key component of the heating system is the radiator of the VAZ 2110 stove. It is equipped with special inlet and outlet pipes. They go into the engine compartment and are attached to the car's cooling circuit. The radiator is fixed with a pair of screws, and the valve on the VAZ 2110 stove is mounted in the underwater pipe, which regulates the flow of coolant.
This mechanism can be controlled using a flexible rod mounted on the panel. A furnace electric motor is mounted at the bottom of the radiator on 2 elastic cushions located in the guide housing.
An auxiliary resistor is also built into the engine power circuit, which provides a 2-speed mode for the heater fan on the VAZ 2110. The heater is equipped with air ducts that distribute air masses to the deflectors for blowing the side windows, as well as to the tubes pointed at the windshield.
Hot air can be controlled by alternately opening or closing the heater covers. The air inlet damper is directly controlled by rods from levers.
Vesta stove blows cold through all air ducts
Regardless of the configuration and type of climate control equipment, cold air from the stove can indicate only a few faults equally:
- Low antifreeze level. There is nothing easier than checking the level and topping up if necessary, observing the tolerances and brand of liquid. After this, it is better to warm up the car and make sure that the heater starts to warm up. If everything is in order, you don’t have to read further.
- Air lock in the cooling system. A very common malfunction on Tolyatti cars. As a rule, a plug occurs when the system is depressurized or when antifreeze is replaced using the wrong technology. In this case, the air plug simply prevents the heated antifreeze from reaching the heater radiator. We described in detail how to get rid of an airlock here and here.
- Dirty cabin filter. Everything is clear here - air simply does not flow to the heater radiator, so there is nothing to blow through the interior. Replacing the cabin filter on a Lada Vesta, unlike a Granta, Priora or Kalina, is much easier. The filter is carefully removed from the cassette, then a new one is inserted.
- Clogged heater radiator.
The symptoms are the same as in the case of an air lock: antifreeze does not get into the heater radiator or the radiator throughput is so small that the liquid does not have time to warm it up. New branded heater radiator Lada Vesta
The best option is to remove and wash the heater radiator. It's a lot of work, but it's worth it. On the other hand, you can flush the radiator without disassembling it, right on the car. How to clean a honeycomb radiator without dismantling is described here, and the most correct, but time-consuming method of washing is described here.
The engine takes a long time to warm up or does not warm up to operating temperature. In severe frosts, even plugs on the engine air intakes (car blankets, plugs) do not help solve the problem. The thermostat is the only culprit here. It is necessary to check its operation and replace it if necessary. How to do this is described here.
Reviews of the Lada Vesta stove
I am pleased with the performance of the heating system; so far it has not let me down and has withstood the winter period.
The only problem that I have already encountered during the entire operation of the Lada Vesta is a clogged cabin filter. The replacement was quick and inexpensive.
I have a luxury model Lada Vesta. The heating functions are satisfactory, since the design and electronics easily and quickly warm the interior, glass and mirrors. Saves time during winter driving hours.
In a Lada Vesta car, the stove heats the interior, but as it turns out, this is not its only function. They use it not only in winter, but also in summer. The territory of the Russian Federation is dominated by a temperate climate. In cold winter, the stove becomes an important function on a Lada Vesta car. This unit is necessary in the rain or cold, when you need to quickly remove fogging from the windows and warm up the few moving people in the cabin. In the advanced configuration of the Lada Vesta, the air conditioner can create a comfortable temperature in hot weather. The Lada Vesta stove does its job well. But like in any car, problems happen: the heater radiator leaks, the fan makes noise, or there is vibration. Replacing the stove is important on a Lada Vesta car not only in winter but also in summer. Read the article and you will be warm and comfortable in your car.
Typical stove malfunctions
The most common problems with the stove on Lada Vesta are the following:
- the actual temperature does not correspond to the set one - low level of antifreeze (antifreeze), clogged radiator pipes or the formation of an air lock, which causes cold air to blow;
- vibration appears during operation - the electric motor is loose;
- insufficient air flow from the deflectors - clogging of channels and air ducts;
- the heater is inactive when it is activated on the dashboard - failure of the fuse (No. 14) of the mounting block.
Checking the stove fan
During the circulation of the air flow, dust particles settle on the surface of the impeller, as a result of which it begins to make noise and extraneous sounds appear.
To clear the fan blades of debris, it is necessary to provide access to the unit.
- Unsnap the glove box.
- Remove the filter element.
- On the right is the furnace mechanism. We press the plastic clips and turn the impeller counterclockwise.
- We remove the motor.
- We wipe the drive with a rag.
- Install the parts in reverse order.
Checking the stove dampers
Dampers are installed in the area between the deflectors and the fan. During operation, they fail, become deformed, and become damaged. Checking the serviceability of the damper on your own is quite simple: you need to activate the stove at maximum speed. If it doesn't blow well, it means the air duct is clogged. Change the damper positions. If you hear squeaking or noise, lubricate the moving parts with silicone grease.
Foggy windows when the heater is activated is the first sign of a ventilation problem. This problem provokes a sharp decrease in visibility on the road and an increase in the risk of an emergency. As soon as fogging is detected, check the condition of the ventilation; most likely, the air ducts are clogged.
Checking heating efficiency
Carry out prevention before the onset of winter. Be sure to check:
- heating the air;
- changing speed modes when switching the control lever, if necessary, replace the brushes of the stove motor;
- absence of extraneous noise, whistling in fan operation;
- the need for a time interval to warm up the air ducts.
Note to the driver! The left and right pipes must be at the same temperature. Otherwise, this is a sign of a malfunction of the heating system.
Checking the stove fan
The Vesta cabin filter is located above the blades of the unit. The job of the filter element is to collect dust and debris coming from the street. It is possible that these particles may penetrate into the ventilation device. Leaves or pebbles begin to rotate inside the impeller - the fan makes noise.
- To clean it, you need to make access to it free;
- To do this, remove the glove compartment and take out the filter element;
- Now, on the right side of the furnace body we find the mechanism. We clamp the petal located at the top, turn the impeller counterclockwise, and remove the motor;
- We clean the engine with napkins and cotton swabs. One of the reasons for the slowly working mechanism is a dense layer of dust on the walls;
- We install the unit in place and assemble the interior plastic.
There are other typical unit malfunctions. To diagnose them, analyze the operation of the device at different speeds. If one of them does not work, check the wiring and the serviceability of the additional resistor (RFV).
If the Lada fan does not blow at all, the cause may be a blown fuse. Then you don’t need to disassemble anything, just replace the circuit element in the fuse control unit.