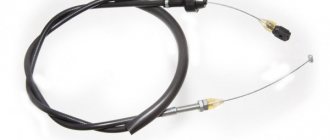
How to adjust the throttle cable on a VAZ 2110-VAZ 2112?
Note! A lot of engines were installed on cars of the tenth family, ranging from carburetor 1.5 to injection 16 valve engines. Let us immediately warn you that carburetor engines from the Samara family were installed on dozens, and we already have information on adjusting all the valves on carburetor Samaras and it is posted in two article, the first is called: “Adjusting the throttle valves”, the second: “Adjusting the air damper”, so if you have a carburetor, then go straight to them, because in this article we are talking only about injection cars and we will not touch on carburetor cars!
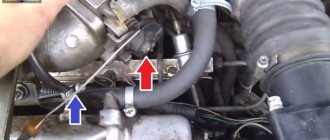
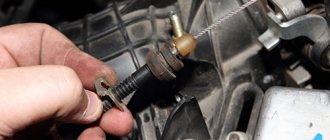
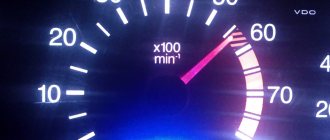
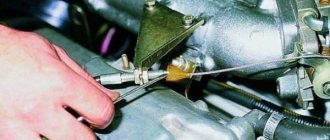
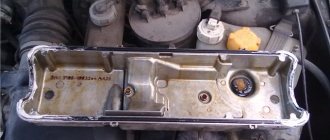
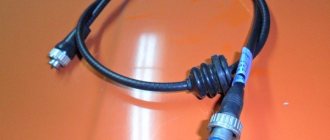
1) Let’s write briefly because there is nothing complicated in the adjustment, and there are not many nuances, in general, let’s start with the throttle valve closed (This is when the gas pedal is released and nothing presses on it), so if it is not completely closed, then the adjustment it can be done using a cable, but it is not always possible to adjust the position of the closed damper with a cable, so the adjusting screw comes into play, which is located on the throttle assembly itself (see photo 1), you will either need to tighten it, or, on the contrary, loosen it a little, thereby achieving a completely closed damper (And it shouldn’t jam yet, keep this in mind), but you need to be careful with this screw, if you tighten it too much, the car will simply stall or won’t start at all, and if you unscrew it too much, the idle speed will increase, fuel consumption will be the same and the throttle will be slightly open, but the easiest way is to adjust it by speed, for example, on a warm engine, your idle used to be 800 rpm, you will need to start the car, warm it up in the same way and adjust this screw so that again there were 800 revolutions on the tachometer needle as before, we’re done with adjusting the damper, proceed to adjusting the cable on 8 valve cars, look for the place where the cable connects to the bracket (see. photo 2), once you have found it, take two wrenches and rotate the adjusting nuts (Nut 1 and 2) with them, adjust the cable as you need (It is allowed to sag a little, do not tighten the cable too much), 16 valve cars are also adjusted in the same way , there a metal plate is pulled out with pliers or by hand (see photo 3) and after which the cable is adjusted by moving it (To the back and to the front, see photo 4), as soon as the tension suits you (Remember, do not overtighten it ) the plate is inserted into its place and the adjustment is complete; at the end, check whether the throttle valve opens completely when the pedal is pressed all the way and whether it closes.
Note! Let's say a few words about the adjusting screw, the most important thing is not to confuse it with any other screws (For example, with screws A, by the way, they cannot be turned out at all), it stands on the side, for clarity, in the photo below it is indicated by an arrow with the letter B!
Additional video: Using the example of a Renault Logan car, look at how the cable is adjusted, it applies to 16 valve cars; on dozens with a 124 engine, this adjustment is done almost exactly the same way.
Note! And regarding 8-valve machines, see the cable adjustment a little lower; by the way, it also applies to some 16-valve machines (If the intake manifold is not plastic, but aluminum)!
Every little detail in a car is important, even something like the throttle cable. The functionality of the entire vehicle mechanism depends on its quality work. In this article, our specialists will consider the nuances of replacing the throttle cable on a VAZ-2110 injector.
How to properly maintain and change the throttle cable
Chassis front and rear suspension VAZ 2110 2111 2112 Removing the lever and extension of the front suspension VAZ 2110 2111 2112
Any element of the cable drive requires periodic adjustment. The metal gradually stretches, and play appears, which not only irritates the driver, but also reduces driving safety. You press the gas pedal with a certain force, expect adequate acceleration from the car, but the engine spins up with a delay. If wedged into traffic on a busy highway, this can lead to an accident.
There is always an adjusting screw on the cable sheath.
The photo shows two nuts with which the overall tension of the drive can be adjusted within a few centimeters:
By moving the threaded bushing, you move the stop point (and therefore the zero force point) closer or further from the carburetor throttle lever.
- It is necessary to evaluate the free play of the pedal (before the damper begins to move). For this you will need an assistant. At your command, he slowly presses the pedal, and you fix the free play of the cable. Mark the setting point of the damper and make a mark with a marker;
- Then, having loosened the fastening, tighten the shell using the nut, which is located on the pedal side. Having fixed the point at which the damper begins to move (at the mark with a marker), unscrew the nut half a turn back and tighten it with the second nut. Again ask the assistant in the cab to slowly press the pedal. If the play is no more than a millimeter, the adjustment is complete. Otherwise, repeat the setup;
- If, when the pedal is released, the damper is slightly open, you will get the effect of an extended choke lever. At idle speed the crankshaft will spin faster than expected. In general, you will end up with excessive fuel consumption;
- And of course, cable lubrication. It is enough to apply it in a small amount to the entry points into the shell.
What is a throttle cable
By throttle cable, car enthusiasts understand the throttle cable, which plays an important role in the proper operation of the vehicle. The throttle valve is a structural part of the fuel intake system into an internal combustion engine. Its main function is to regulate the amount of air supplied to the engine for the air-fuel mixture. This damper is located between the air filter and the intake manifold. If the throttle valve opens, the pressure in the intake system is compared to atmospheric pressure. If it is in the closed position, then the pressure drops to vacuum. This action of the throttle valve is necessary to enhance the operation of the vehicle’s braking system and to ventilate the adsorber in the gasoline vapor recovery system.
A special cable is used to open and close the throttle valve. This is where the main point of wear occurs during operation of the damper.
When the throttle cable needs to be replaced
How to determine the moment when the VAZ-2110 throttle cable requires replacement? Experts recommend paying attention to the following points in the operation of this vehicle part:
- it is not possible to regulate the throttle valve drive;
- when pressing the accelerator pedal, the damper cannot open and close fully;
- the metal part of the cable began to “shag” (this can be seen visually when checking the internal parts of the car);
- When the throttle valve is operating, the gas cable constantly gets stuck.
If you find one of these problems in the operation of your vehicle, then you need to immediately buy a new throttle cable and replace it.
Replacing the throttle cable on a VAZ 2110, VAZ 2111, VAZ 2112
Welcome! The throttle cable, also known as the throttle cable, is responsible, by the way, for opening and closing the throttle valve. Thanks to this cable, the speed of the car can also be adjusted, that is, they pressed the gas pedal, the cable tightened and at the same time it also opened the throttle a larger angle, thereby the revolutions went up and the car began to move (or stand still if the clutch pedal is depressed or if the gear is in neutral), but this cable wears out and therefore the car begins to be very dangerous to drive, since when it wears out the metal part begins to fray (It is twisted, as it were) and in connection with this, pieces of the cable begin to touch the sheath and the cable does not return back and the car begins to accelerate further, regardless of pressing the gas pedal (Because the cable is stuck and the throttle is pushed back does not move away, so even if you take your foot off the pedal, the car will still move on, this is the situation that is dangerous).
Note! To replace this cable and to adjust it (And you will definitely have to adjust it) you will need: Various pliers (thin, large) and screwdrivers!
How to replace the throttle cable on a VAZ-2110: step-by-step instructions
You can carry out the procedure for replacing the gas cable yourself, and for its subsequent adjustment you will need a partner who will press the gas pedal.
This procedure is carried out only when the engine is cold. Otherwise, there is a risk of burns during cable replacement work.
To correctly replace this cable on a VAZ-2110, you need to follow the following step-by-step instructions:
- Prepare the necessary tools:
- screwdrivers of different sizes;
- pliers – large and thin.
- Dismantle the throttle valve cable:
- the air pipe is removed (this is necessary so that this part does not interfere with further actions with the cable), the screws on the tension clamps are loosened;
- use a screwdriver to disconnect the crankcase gas ventilation hose;
- the locking spring holding the sector is removed;
- the main part is removed from the groove by hand when turning the sector counterclockwise;
- the cable is disconnected from the throttle assembly.
- Removing the cable from the bracket:
- for 16-valve cars - using thin pliers, remove the locking plate (thanks to it, the cable is adjusted) and remove the middle part of the cable together with its holder from the bracket on the intake manifold;
- for 8-valve cars - loosen the nut, move the rubber cover, remove the middle part of the cable from the bracket;
- the cable itself is pulled through a plastic clamp, which is pre-cut.
- Removing the cable from the vehicle interior:
- Use a screwdriver to disconnect the edge of the cable from the gas pedal.
- Removing it from the engine compartment (simply pulls it out of the cabin).
- Installing a new part:
- the cable is inserted through the engine compartment;
- one edge is pushed into the cabin and connected to the gas pedal;
- the second edge is attached to the throttle valve.
After completing the procedure for replacing the throttle cable, it must be adjusted:
- Clamps are used at the connections of the intake pipe and throttle body, at the junction of the hose of the large crankcase ventilation circle and the fitting located on the cylinder head cover.
- The operation of the throttle valve is checked (for this you will need the help of a partner):
- when the gas pedal is fully recessed, it is fully open;
- When the gas pedal is fully released, it is completely closed.
If the test reveals that the throttle valve does not open fully, then you need to loosen the nut on the bracket, the second one from the end of the cable, and tighten the first nut.
If the throttle valve does not close completely, then loosen the first nut from the end of the cable and tighten the second nut.
Adjustment of the VAZ-2110 throttle cable is considered complete when the throttle is fully functional when the accelerator pedal is pressed and released.
The throttle valve is a structural element of the intake system on gasoline internal combustion engines with fuel injection. Its purpose is to regulate the amount of air that enters the engine for the fuel-air mixture. It is located in the space from the air filter to the intake manifold.
In general, the throttle valve can be called an air valve. When it is open, the pressure in the intake system is equal to atmospheric pressure. Its closed position reduces the pressure to a vacuum state. This property of the damper is used to boost brakes (vacuum), as well as to bleed the adsorber in the gasoline vapor recovery system.
The throttle valve is opened and closed by a cable. Since the damper itself usually lasts as long as the car itself, the main problem is the cable, which sometimes requires replacement.
When does it need to be changed? If you cannot adjust the damper drive so that when you press the accelerator pedal it does not open completely, and when you release it does not close completely, then this is the reason for replacement. The price for it starts from 200 rubles. For a Nexia car it costs from 180 rubles. The price for a LANOS throttle cable is from 250 to 600 rubles.
We repaired a VAZ 2110 car; on other models, the removal and adjustment procedure is similar and not complicated, but when setting up, the help of a second person is required to press the gas pedal.
Replacing the Gas Cable VAZ 2112 16 Valves
How to change a gas cable to a VAZ-2110 injector
In principle, every little thing is included in the design of a car, even such as a gas cable. The functionality of the entire vehicle mechanism depends on its high-quality performance. Then our company’s specialists will study the aspects of replacing the gas cable with a VAZ-2110 injector.
Content
What is a gas cable
By gas cable, car owners understand the throttle valve, which plays an important role in the proper operation of the car. The throttle valve is a structural part that allows the metering (software) for introducing fuel into a gasoline engine. Its main function is to regulate the amount of air supplied to the engine to match air and fuel. This valve is located between the air filter and the intake manifold. If the throttle valve is open, the inlet pressure is compared with atmospheric pressure. When it is in the closed position, the pressure drops to a vacuum. This throttle action is required to improve the performance of the brake system of the vehicle metering software to purge the canister in the gas vapor exhaust system.
READ Checking the Phase Sensor VAZ 2112 16 Valves
open and close the throttles . This is where most of the wear and tear occurs when the damper is in operation.
When to replace the throttle cable
How to find the moment when the cable | chokes
VAZ-2110 asks for changes? Experts advise paying attention to the following points when working with this part of the car:
- it is impossible to adjust the throttle valve drive;
- when you press the gas pedal, the shutter cannot fully open and lock;
- the iron part of the cable began to “sway” (you should pay attention to this when checking the car’s interior);
- When the gas throttle valve is operating, the cable is constantly jammed
If you discover one of these problems while operating your vehicle, you should immediately purchase a new throttle cable and replace it.
How to replace a gas cable on a VAZ-2110: step-by-step summary
The gas cable replacement function can be performed without assistance, for its next option you will need a partner to press the accelerator pedal.
+ Change GAS ROSE AND VILLAGE DIRECTOR. VAZ 2110.
DONANT. Subscription
+ Change throttle cable
Replacing the throttle cable
on a gazelle. Subscribe to my channel My partner AIR.
This procedure is performed only when the engine is cold. Otherwise, there is a risk of burns when replacing the cable.
READ Replacement Handbrake Cable Ford Fusion
To correctly replace this cable on a VAZ-2110, you must follow the following step-by-step instructions:
- Prepare the necessary tools:
- screwdrivers of different sizes;
- The pliers are huge and thin.
- Remove cable chokes :
- the air pipe has been removed (this is necessary so that this part does not interfere with further actions with the cable), the screws on the clamping clamps have been loosened;
- the crankcase ventilation hose is disconnected using a screwdriver;
- removed the retaining spring holding the sector;
- the main part is removed from the groove when the sector is turned counterclockwise;
- The cable is disconnected from the throttle valve.
- Removing the cable from the bracket:
- for vehicles with 16 valves. using thin pliers, the retaining plate is removed (thanks to which the cable is adjusted), and the middle part of the cable, together with the holder, is removed from the bracket on the intake manifold;
- for vehicles with 8 valves. the nut is loosened, the rubber cover is pushed back, the middle part of the cable is removed from the bracket;
- The cable
itself is pulled through a plastic clamp that is pre-cut. - Removing the cable from the interior:
- a screwdriver disconnects the edge of the cable from the accelerator pedal.
- Removing it from the engine compartment (just pulled it out of the cabin).
- Installing the last part:
- the cable is pushed through the engine compartment;
- one edge advances into the cabin, attached to the accelerator pedal;
- The 2nd edge is attached to the throttle body.
READ Replacing Niva Chevrolet Axle Shafts Do-It-Yourself
When the change is completed the throttle cable
inevitably made their own adjustments:
- The clamps are removed at the connections between the intake pipe and the throttle body, at the junction of the hoses of the huge crankcase ventilation wheel and the fitting located on the cylinder head cover.
- Work checked chokes
(this is a useful help from a partner): - when the accelerator pedal is fully depressed, it is fully open;
- When the accelerator pedal is fully released, it is completely closed.
If the check shows that the throttle valve does not open in all cases, it is necessary to put the nut on the bracket, the second end of the cable and tighten the first nut.
If the throttle body is not locked in place, under these circumstances, remove the first nut from the cable end and tighten the second nut.
Gas VAZ-2110 cable settings
It is considered complete when the throttle is fully actuated and the accelerator pedal is pressed and released.
Source
Replacing the throttle cable:
- First, use a screwdriver to move the tip of the cable from the interior so that it comes out from the pin of the pedal lever, and remove it.
Further under the hood, next to the throttle valve, there is a drive sector on which the cable is clamped. Turn this sector all the way and unfasten the drive cable itself from it.
The next step is to remove the protective cap at the end of the cord (1). Hold the nut securing the cable sheath (3) so that it does not turn, and unscrew the nut (2). Next, remove the cable from the bracket slot.
- We pull the cable in the direction of the engine compartment, it will come out of the hole that goes into the passenger compartment.
This completes the dismantling. In order to install a new cable, you need to perform the same steps in reverse order.
After installing a new accelerator cable, it needs to be adjusted. Let us consider further the order of execution point by point.
How to replace the choke cable, also known as the choke cable on a VAZ 2108-VAZ 21099
Removal: 1) At the beginning of the operation, you will need to remove the housing inside which the air filter is located. (How to remove the housing, see the article: “Replacing the housing”)
2) Next, check the position of the choke handle; it should be completely recessed. If this is not the case, then correct the problem by pushing the handle all the way down.
3) Then loosen the bolt that secures the drive cable to the damper control lever using two 8mm wrenches.
Note! There is no need to turn the nut with the wrench indicated by the blue arrow, they only need to hold this nut from turning while you unscrew the cable fastening bolt with the second wrench, it is indicated by the red arrow!
4) Then, putting one key aside, use the second to loosen the bolt securing the rod shell bracket.
5) Next, disconnect the choke cable from the carburetor.
6) Then move into the car interior and completely remove the choke handle. Once completely removed, disconnect this handle from the end of the drive cable.
7) Now, using a Phillips screwdriver, remove the two screws that secure the choke cable bracket.
 Next, push the cable drive bracket inward and, as a result, disconnect the electrical connector of the switch.
9) Then, through the hole in the car body, pull it towards you, remove the choke cable.
Installation: 1) First, insert the new cable into the same hole from which you removed it.
2) Next, with the tip on which the fastening bracket is installed, install the cable into the hole.
Note! During installation, connect the electrical connector of the switch to the new cable!
3) And then tighten both screws that secure this bracket.
4) Then install the choke handle onto the wire of the cable tip.
5) Now move to the engine and connect the other end of the cable to the carburetor.
6) Next, tighten both bolts that secure this cable to the carburetor.
7) And at the end of the operation, check the operation of the choke cable; if it causes any complaints, then try adjusting the air damper drive. (see “Adjusting the air damper drive”)
Note! When all operations are completed, install a housing on top of the carburetor cover, in the inner part of which there is a filter used for air purification!
Disassembling and assembling the suction cable:
Disassembly: 1) First, slightly move the protective cover away from the rod. And immediately after this, disconnect the switch terminal, and after the operation, remove the protective cover from the rod.
2) Now, using a wrench, completely unscrew the switch itself, and therefore remove it.
3) Then use pliers to remove the locking bracket.
4) And as a result, remove it, and after removing it along the cable, remove the mounting bracket.
Assembly: 1) Carry out the operation of assembling the cable from start to finish in the reverse order, installing on the cable: a mounting bracket, a locking bracket, a protective cover, and also connect the switch terminal and screw the switch into place.
Throttle valve adjustment:
1. We loosen clamps at the connections of the intake pipe (1) and the throttle body, as well as at the junction of the large crankcase ventilation hose and the fitting (2), which is located on the cylinder head cover.
2. With the gas pedal fully depressed, the throttle should be in the fully open position. (For this action you will need the help of a partner).
3. When the gas pedal is fully released, the throttle valve should be in the fully closed position.
4. If steps 2 and 3 are not followed, the throttle cable needs adjustment.
5. If, when checking the adjustment, it is revealed that the damper does not open completely, then you should loosen the nut on the bracket, the second one from the end of the cable, and tighten the first nut until the desired effect is achieved.
6. If the throttle valve does not close completely, then do the opposite, namely, loosen the first nut from the end of the cable and tighten the second nut.
When you achieve full opening and closing of the partition when pressing and releasing the accelerator pedal, you have adjusted the throttle cable.
Video about replacing the throttle valve on an Opel Astra 1.4T:
Cleaning the throttle and throttle body on Nissan Almera:
How to change the throttle cable on a VAZ-2110 injector
Every little detail in a car is important, even something like the throttle cable. The functionality of the entire vehicle mechanism depends on its high-quality work.
- Clamps are used at the connections of the intake pipe and throttle body, at the junction of the hose of the huge crankcase ventilation circle and the fitting located on the cylinder head cover.
- of the throttle valve
is checked (the help of a partner will be useful for this purpose): - when the accelerator pedal is completely recessed, it is completely open;
- when the accelerator pedal is released one hundred percent, it is one hundred percent closed.
If, as a result of the check, it is revealed that the throttle valve does not open to its fullest extent, then it is necessary to loosen the nut on the bracket, the second one from the end of the cable and tighten the first nut. If the throttle valve does not lock in all cases, under such circumstances, you should loosen the first nut from the end of the cable and tighten the second nut.
Replacing the Logon throttle cable
Replacing the throttle cable, Logan from a VAZ 2109 with an injection engine...
Greetings to all readers on the AAuhadullin.ru blog. I decided to write a separate article on how to replace the throttle cable from a VAZ. Replacing the Logan gas cable begins with disconnecting it from the pedal in the cabin.
Then remove the air filter assembly by unscrewing the four bolts on which it is attached. We pull the filter housing out of its seat and carefully move it to the side.
When replacing the Logan throttle cable, we need to disconnect the end (plastic clamp) from the throttle drive lever and remove the adjusting spring clamp from the Logan cable housing. Then the process goes like this: use a screwdriver to remove the shell stop from the engine compartment shield and remove it by pulling it towards you.
We have it all in our hands, what to do with it is shown and described in the video and photo below...
After we have repaired it by replacing its traction element from a VAZ 2109 car (injection engine) and replacing the throttle cable with a new one has ended, we begin to assemble the parts in the reverse order. Yes, I almost forgot, I also need to adjust the throttle valve drive.
We check what position the damper is in with the help of a friend or any persistent object like a stick, pressing the gas pedal and pressing the other end against the seat. When the pedal is pressed, the damper is fully open, and when pressed in the opposite direction, it is closed well.
If everything that I described does not happen, then during operation it is necessary to adjust the tension of the replaced Logan throttle cable. How is this replacement done, YOU ask me?
I’ll tell you that replacing the throttle cable is done like this: we remove the springy iron clamp from the slot and move the body, ensuring that the damper is fully open, and finally we fix the end by inserting a bracket (springy clamp) into its corresponding slot. Once again, we check in the cabin by pressing the accelerator pedal. If it is uncomfortable for YOU to work with your right foot, then adjust the pedal height using the same method as described above until you achieve a good adjustment result when replacing.
1. There was one 2. Nut on F10 3. Ready
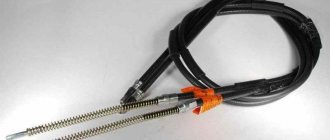
- Which one stood from the factory before it failed
- A ten nut will replace it
- After flattening
Throttle side
- A plastic tip is adjusted using sandpaper to fit the retainer socket.
- The spring from the old one remains
- The retainer from the old one remains
- New cable from VAZ 2109
1. Customized plastics. 2. spring. 3. Latch. 4. Cable.
In the cabin there is a socket on the gas Logon cable pedal
After assembly, this is how you can iron out the Logan gas cable on the pedal side in the cabin.
We complete the installation under the engine hood. All that remains is to connect the end (plastic clamp) and secure the adjusting spring iron clamp.
What is a throttle cable
By throttle cable, car owners understand the throttle cable, which plays an important role in the proper operation of the vehicle. The throttle valve is a structural part that allows accounting (software) of fuel intake into a gasoline engine. Its main function is to regulate the amount of air supplied to the engine for a fuel-air mixture. This damper is located between the air filter and the intake manifold. If the throttle valve opens, the pressure in the intake system is compared to atmospheric pressure. When it is in the closed position, the pressure drops to vacuum. This action of the throttle valve is necessary to enhance the operation of the brake complex of the vehicle's accounting programs for purging the adsorber in the gasoline vapor recovery system.
to open and close the throttle valve . This is where the main point of wear occurs during the operation of the damper.
Clutch “diseases” and where they come from
There are a large number of malfunctions that the owner of a VAZ-2110 may encounter. Among the most common signs of a problem are the following:
Clutch slipping
The most common problem, which will be especially noticeable when trying to drive up some hill. You can even smell the friction linings in the cabin, which is also typical when brake pads break down.
In the vast majority of cases this is due to the following reasons:
- oiling of the linings, pressure plate or flywheel;
- excessive wear or burnout of friction linings;
- drive damage.
To eliminate this problem, you should thoroughly rinse the oily parts with gasoline or white alcohol, and then identify and eliminate the cause of excessive oiling.
If wear of the friction linings is detected, the only repair option will be a complete replacement of the HP assembly.
If you have a damaged drive, you should try to eliminate the reason why it is sticking, or replace it completely.
Jerks at start
This problem is characterized by sudden jerks when trying to move the car. Most often, this problem occurs due to the drive cable being stuck, which will require you to treat it with engine oil or replace it with a new one.
If the HP hub jams on the splines, they should be completely cleaned of dirt or any minor damage.
If there is excessive wear, always replace the input shaft or HP.
Also, replacement of the HP will be required if it is deformed and the linings are weakened.
There is a noise when the clutch is engaged
The main cause of this problem is significant settlement or malfunctions in the damper springs, as well as excessive wear of the spring windows. The only solution to the problem here would be to completely replace the HP.
In addition, in some cases, the cause of the malfunction is loosening of the FN fastening or deformation of the HP, which can be solved by replacing components.
There is increased noise
If there is a characteristic noise when trying to engage the clutch, check the bearing lubrication and wear. In any case, the most optimal solution to the problem would be to completely replace the bearing.
Clutch not fully disengaging
Another common problem, which is characterized by difficulty shifting gears and the presence of characteristic noise, although the gearbox seems to be in good working order. If the adjustment was performed incorrectly, this procedure should be repeated, and then replace the deformed fork.
If the cable gets stuck, it must be lubricated with engine oil or some other product. If this does not help, it is replaced.
If the HP is warped or the FN rivets are weakened, the only correct solution would be to completely replace the disk.
Replacing the VAZ 2109/2110/2112 clutch cable with your own hands
Starting with model 2108, VAZ cars began to use a cable as a drive for the clutch mechanism, and not, as in classic models, a hydraulic drive.
This greatly simplified the design. The cable really turned out to be more convenient, so they used it on other modifications - 2109, 2110, 2112, etc.
Malfunctions and reasons for their occurrence
But this type of drive is also not eternal and problems with it will only be a matter of time.
Over time, the cable threads corrode and break, which is why at one point when you press the clutch pedal, it remains in the depressed position and does not return to its original position.
For the same reason, it happens that pressing the pedal and returning it is difficult, and a grinding noise can be heard. This is a consequence of the “fluffing” of the cable - rotted metal threads rest against the braid, significantly complicating movement.
All these malfunctions occur for one simple reason - moisture gets inside the braid, which leads to corrosion.
And although manufacturers are trying to combat this problem by applying a polyethylene protective layer over the cable, such measures can only extend the service life.
And here, too, everything is simple - while moving, the cable rubs against the braid and over time the protective layer wears off. Lubricating the cable also provides only temporary protection.
Corrosion is not necessarily the cause of the burst. Very sharp squeezing of the pedal, for example, during a difficult traffic situation when the driver kicks it with all his might, can also lead to destruction of the cable.
In any case, if problems arise with the drive, the cable must be replaced, since it cannot be repaired.
Note that the cause of the failure of the clutch pedal can be not only the cable, therefore, if such a malfunction occurs, first of all you need to make sure that the drive has broken.
The fact is that there are cases when the clutch release bearing control mechanism breaks, which is a much worse problem than the destruction of the cable. After all, in case of such a malfunction, you will have to remove the gearbox from the car in order to repair the mechanism.
But a cable break is a malfunction that can be very easily eliminated if you have a spare element.
And since such a problem on a VAZ can appear at any time, it is recommended to always carry a new cable with you in the trunk.
What will you need?
Another positive quality of the cable drive is the ease of replacement. The whole operation takes about 20 minutes, even for a novice VAZ car owner. Moreover, everything can be done even in the field, with a small number of tools at hand.
When the throttle cable needs to be replaced
How to find the moment when the throttle cable
VAZ-2110 asking for a change? Experts advise paying attention to the following points when operating this vehicle part:
- there is no ability to regulate the throttle valve drive;
- pressing the gas pedal, the damper is not able to open and close completely;
- the iron part of the cable began to “shag” (this should be noted visually when checking the internal parts of the car);
- When the throttle valve is operating, the gas cable constantly gets stuck.
If you find one of the problems mentioned above while operating your vehicle, you must immediately purchase a new cable for the throttle valve and replace it.
Throttle adjustment
To make adjustments, we only need pliers. When starting adjustments, first remove the plastic engine casing. Next, disconnect the air supply hose from the throttle body pipe. Then the assistant fully presses the gas pedal to the floor, in this position the throttle valve should be fully open. Accordingly, when the pedal is lowered, the throttle valve should be completely closed.
In other cases, the throttle valve needs to be adjusted. To adjust, remove the spring stop (Fig. 3). Move the cable sheath (1) and adjust the free play of the cable. When we finish this operation, install the stopper tightly to the rubber bushing (2) (Fig. 4).
This completes all gas pedal settings.
Changing the throttle cable
Changing the throttle cable
on Gazelle. Subscribe to my channel My affiliate program AIR.
This procedure is carried out only when the engine is cool. Otherwise, there is a danger of getting burns while working on changing the cable.
See:
In order to correctly change this cable on a VAZ-2110, you must adhere to the following step-by-step instructions:
- Prepare the necessary tools:
- screwdrivers of various sizes;
- The pliers are huge and thin.
- Dismantle the throttle valve :
- the air pipe is removed (this is necessary so that this part does not interfere with subsequent actions with the cable), the screws on the tie clamps are loosened;
- using screwdrivers, disconnect the crankcase gas ventilation hose;
- the locking spring holding the sector is removed;
- the main part is removed from the groove by hand when turning the sector counterclockwise;
- the cable is disconnected from the throttle assembly.
- Removing the cable from the bracket:
- for 16-valve cars - using thin pliers, remove the locking plate (thanks to it, the cable is adjusted) and remove the middle part of the cable together with its holder from the bracket on the intake manifold;
- for 8-valve cars - loosen the nut, move the rubber cover, remove the middle part of the cable from the bracket;
- the cable
itself is pulled through a plastic clamp, which is previously cut. - Removing the cable from the vehicle interior:
- Use a screwdriver to disconnect the edge of the cable from the accelerator pedal.
- Removing it from the engine compartment (simply stretches out from the passenger compartment).
- Installing the newest part:
- the cable is inserted through the engine compartment;
- one edge is pushed into the cabin and connected to the accelerator pedal;
- The second edge is attached to the throttle valve.
After completing the procedure for changing the throttle cable
it must be adjusted:
- Clamps are used at the connections of the intake pipe and throttle body, at the junction of the hose of the huge crankcase ventilation circle and the fitting located on the cylinder head cover.
- of the throttle valve
is checked (the help of a partner will be useful for this purpose): - when the accelerator pedal is completely recessed, it is completely open;
- When the accelerator pedal is completely released, it is completely closed.
Removal
1. We prepare the car for work (see paragraph 2a “Preparing the car for maintenance and repair”).
2. Remove the air supply hose to the throttle valve.
Note. The air supply hose to the throttle valve will interfere, especially when installing a new cable.
3. Use a slotted screwdriver to pry up the locking spring and remove it from the sector.
4. Turning the sector counterclockwise until it stops, remove the end of the throttle cable from the sector slot.
5. On the VAZ 21124 (l.6i) injection engine:
remove the locking plate of the throttle cable casing and pull the cable casing out of the rubber holder. We remove the throttle valve drive cable together with the rubber holder from the bracket for fastening the cable sheath (the bracket is integral with the intake module).
On the injection engine VAZ 2112 (l.5i):
remove the plastic cable end (3) and unscrew the nut (2). Remove the throttle valve cable from the bracket.
6. We pull the cable with the sheath through a plastic clamp or cut the clamp with wire cutters (a new clamp will be required during installation).
7. Under the instrument panel, prying it with a screwdriver, disconnect the cable end from the gas pedal lever.
8. Pull the end of the cable out of the passenger compartment through the hole in the engine compartment partition and remove the cable along with the rubber holder.
How to adjust the throttle cable of Lada Priora
- The adjustment is carried out using a clamping bracket, which we previously removed. This bracket is a tensioner for the casing in which the cable moves.
- Remove the bracket and tighten the throttle cable so that it sags about 1-2 mm near the throttle drive.
Instructions VAZ-2110 2111, 2112. Replacing the clutch release cable
- Now you need to install the fixing bracket into place in the casing. Make sure that the cable is tensioned optimally and that the throttle valve is not open when the gas pedal is at zero position. A cable that is too tight will cause the idle speed to be constantly elevated. Squeeze the gas pedal several times and check how everything works.
- Start the engine and make sure the throttle cable is adjusted correctly and the idle speed is normal.
NOTE Adjustment of the throttle valve drive is shown on the VAZ 21124 (1.6i) engine. Features of adjusting the throttle valve drive on the VAZ 2112 (1.5i) engine are indicated in the text.
RECOMMENDATION It is necessary to adjust the throttle valve drive after replacing the drive cable, after removing and installing the throttle assembly, and also after performing work related to dismantling the intake module. Throttle actuator adjustment may be necessary if the vehicle's engine may not be able to produce maximum power due to the throttle valve not being fully opened.
An assistant will be required to perform the adjustment work. Adjustment sequence
1. We prepare the car for work (see paragraph 2a Preparing the car for maintenance and repair).
2. Remove the decorative trim of the engine (see Decorative trim of the engine - removal and installation). 3. After loosening the three clamps, remove the air supply hose to the throttle valve.
4. We control the position of the throttle valve: when the gas pedal is pressed (all the way to the floor), the valve should be completely open, and when the gas pedal is released, it should be completely closed.
5. The position of the closed throttle valve is adjusted with a stop screw, rotating it with a slotted screwdriver with a thin blade. The throttle valve should close completely without sticking.
The position of the open throttle valve is adjusted by changing the tension of its drive cable.
WARNING When adjusting the open throttle valve, do not overtighten the cable, as this may damage the drive elements.
6. On the VAZ 2112 (1.5i) injection engine:
Using two 13 mm wrenches, rotating the adjusting nuts (1 and 2), we adjust the cable tension (small sagging of the cable is allowed in the area between the throttle valve drive sector and the end of the casing).
On the VAZ 21124 (l.6i) injection engine:
a) Use pliers to remove the locking plate of the cable sheath.
b) By moving the cable sheath in the rubber holder, we adjust the cable tension (in the area between the throttle valve drive sector and the end of the sheath, a slight slack in the cable is allowed).
c) Install the locking plate in place.
7. Check the operation of the throttle valve drive. If necessary, repeat the adjustment.
8. Install all the removed parts on the car in the reverse order of removal.
useful tips for motorists
Throttle valve VAZ 2110 – replacement, adjustment, modification +Video | TuningKod
According to statistics, one of the main problems of VAZ 2110 owners is frequent breakdowns of the throttle valve. Even with careful operation of the car, such an important part has to be modified or completely changed. Fortunately, doing this yourself is not as difficult as it might seem at first glance.
- Modification of the VAZ throttle by shifting the ventilation circuit
- Flushing the throttle "tens"
- Replacing the throttle valve on a VAZ 2110
Replacement Tools
To work you will need:
- The key is "8".
- Two keys for "14".
- Screwdriver (phillips).
Sequence of work
For comparison, old and new clutch cables
They go in this order:
- Move the air filter housing to the side.
The air filter housing will interfere with us, so we will move it to the side. Moreover, all the housing latches were broken and it was dangling under the hood
Pull the cable out of the bracket
Clutch cable bracket in the cabin - you'll have to tinker with it
Important! Before installing the cable, you need to adjust the clutch pedal so that it is 10-13 centimeters from the floor level. We have already written in more detail about replacing the clutch itself on a VAZ-2112.
Video about replacing the clutch cable
Clutch adjustment on a VAZ-2112
During clutch adjustment
To adjust, you will need to rotate the bolt, which is located on the cable on the gearbox side. When the pedal distance is adjusted, tighten the nut and press the pedal 2-3 times. If all is well, then tighten the locknut on the casing. Next, the car is assembled in the reverse order.
The clutch cable must first be lubricated with LSC-15 or Litol-24.
Why do you need to adjust the clutch cable?
Adjusting the clutch cable is a necessary and important process in vehicle maintenance. It is carried out if there are problems with the pedal: its travel is more or less than necessary. In the first case, the clutch does not disengage completely. As a result, the flywheel continues to come into contact with the driven disc, thereby causing the friction linings to wear out.
In the second case, the driven disk is turned on partially. As a result, the vehicle's power decreases due to reduced torque during driving. In this case, the disk can be turned on quickly and during a soft release of the pedal, which leads to audible knocking in the transmission and twitching of the car.
If the cable is faulty, the pedal may become stuck. It may feel very difficult to press, as if there is resistance. However, if you apply significant force to the pedal, it will fall to the floor because the cable will break. In this case, it needs to be replaced.
Repeated clutch slipping is also an indication that the cable is in poor condition. “Slipping” is the moment of gear shifting to another position. For example, the car begins to roll in neutral because the clutch spontaneously engaged.
“Slipping” usually occurs when the motor is overloaded. For example, when increasing speed or on a climb.
If the cable is faulty, leakage will be the main indicator. Leaks may occur if it becomes detached or torn. In the first case, you just need to install it back. When the car moves jerkily, the cable does not perform its functions correctly enough.
We recommend
“How to change a clutch cable: step-by-step instructions” Read more Vehicles regularly operated in negative conditions are more likely than others to wear out or break the cable. Although this can happen to any car, even if it has a small mileage. It also wears out during incorrect driving: when the speed is high and the start is abrupt, or while driving the driver constantly keeps his foot on the clutch, which leads to slipping and a malfunction.
How to adjust the clutch drive on the “ten”?
Before thinking about changing the cable, experienced motorists adjust drive . To begin with, use a ruler to measure the distance from the floor to the “penny” of the pedal; 125-160 mm is considered the norm. If the data does not match, then you need to perform a few simple operations:
- Open the engine compartment of the car.
- Using two open-end wrenches “13”, unscrew the locknut.
- By rotating the second nut, set the pedal travel within 120-130 mm.
- Press and release the pedal several times.
- Check the pedal travel again and, if necessary, repeat the adjustment procedure.
- Tighten the locknut.
If the adjustment operation does not bring the desired result, the only way out of the situation is to change the cable.
Pedal travel
This is where the whole process begins. The factory manual states that normal travel is about 13 centimeters. Nut and locknutBut over time, the parameter increases as the driven disc lining wears out.
This causes the pedal to rise slightly. Measuring the indicator is not difficult.
- Open the door leading to the driver's seat in the cabin.
- Squat down so you are close to the pedals.
- Place a regular ruler on the mat under the pedal, positioning it perpendicular to the clutch pedal.
- Measure the distance from the mat to the extreme point of the pedal, that is, the maximum distance.
- If the indicator is 16 centimeters or more, this indicates an urgent need for adjustment.
Electronic gas pedal - how does it work?
Modern technologies are aimed at making our lives as easy as possible. On the one hand, this is a huge plus, but on the other hand, they simply deprive us of the opportunity to make any decision, or rather, they correct it, and in such a way that it is not always possible to achieve the desired result. This is clearly visible in the operation of the electronic pedal, which is so popular in the modern automotive industry. Although for those who feel insecure behind the wheel, and especially do not delve into the technical nuances of the car, this innovation is only a plus.
The principle of operation of the electronic gas pedal is as follows: after the driver presses the accelerator, data on pressure angles immediately enters the control unit through special sensors. Next, the ECU comes into play , which calculates the required opening angle, and the drive, based on the data received, opens it to this angle
. Moreover, if it suddenly becomes necessary to change the value of this angle (for a more economical mode or safety), the control unit does it itself, without receiving the corresponding command. It turns out that the driver cannot 100% regulate this process.
izocimov › Blog › Automatic transmission cable or how to adjust the cable on an automatic transmission
Hello friends. I already wrote about adjusting the cable in a used Toyota, but here I wanted to describe the general principle of operation and adjustment of the automatic transmission cable using the example of a simple hydromechanical automatic transmission.
So, let's begin. Here is an example of what an automatic transmission cable usually looks like connected to the throttle valve; in our case, the engine is an injection one.
Now about the pressure that is opposed to the “throttle” pressure. The pressure from the centrifugal regulator depends proportionally on the vehicle speed. It increases as the speed increases and tries to “push” the valves in the control plate, which are supported by springs of different hardness (they are responsible for shifting gears). If the pressure from the centrifugal regulator becomes greater than the force of decompression of the flow of one of the valves in the control plate (remember that pressure from the throttle regulator acts along with the flow, which also tries to distribute the flow), then the valve collapses and opens the passage of dextron pressure to the clutches, so the automatic transmission shifts to the next gear.