Almost every car owner has probably noticed the following pattern: license plate or license plate illumination is provided only at the rear of the vehicle. Lamps are usually not used in the front. These can be exclusively home-made lighting options, made at the request and discretion of the motorist.
Replacing car license plate lamps
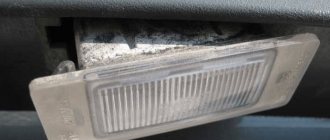
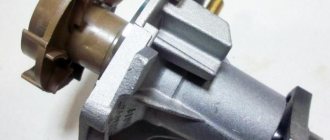
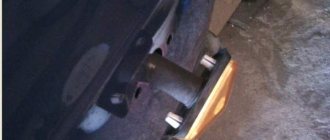
In this case, the backlight operates on the basis of light bulbs enclosed in shades. Often two lamps are used, installed in the area of the rear saber of the trunk. Periodically, the lighting device may burn out, which impairs the visibility of the license plate in the dark.
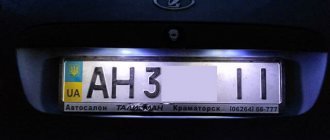
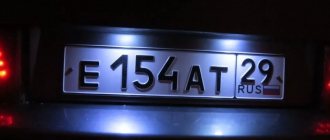
According to the traffic rules, there is a fine for such a malfunction, since vehicle license plates must be easily readable during the day and at night.
There is nothing complicated about replacing the license plate light bulb. The car owner can carry out the corresponding activities independently, simply by following a few rules and recommendations. Just remember to comply with applicable laws.
Why do you need to change the license plate lamp?
Today, any car must be equipped with special lighting that illuminates the rear license plates.
When a car just comes off the assembly line, it has 2 lamps installed; they are usually located in the lower trunk saber. The lamps work fine at first, but over time they burn out. Some car owners do not even think about replacing burnt out lamps, which is wrong and entails quite serious consequences. You may also be interested in our specialist's article on how to install automotive LED lamps.
Traffic police officers have the right to fine negligent car owners who drive cars without license plate lights.
It is important to take into account that the basis for collecting a fine is not only the lack of room lighting, but also the incorrect installation of lights.
Therefore, such situations should be avoided in order to save nerves, time, and money that will have to be spent on paying the fine. Moreover, any driver can replace the backlight on a car on their own with minimal knowledge in this area.
Installation Tips
- When buying new elements, it is worth paying attention to the fact that in addition to sizes 36 mm, which are suitable, there are also sizes 41 and 38 mm, which are not suitable.
- They have polarity, so before replacing elements on the Chevrolet Niva, you should turn on the backlight and only then carry out the installation.
- If, when examining the light bulb, the bulb turns black, but continues to shine, it should also be replaced as it will soon fail.
- Try to avoid moisture, as the device will quickly fail if water gets in.
Using the tips for replacing and installing backlights, you will be able to replace the burnt-out backlight yourself in your garage as hard as anyone.
Sources
- https://LampaExpert.ru/avtomobilnye-lampy/neispravnosti/zamena-lampy-podsvetki-nomernogo-znaka
- https://voditeliauto.ru/poleznaya-informaciya/avtoustrojstva/svetotexnika/zamena-lampy-podsvetki-nomernogo-znaka.html
- https://InfoKuzov.ru/remont/plafon-osveshheniya-nomerov
- https://LampaSveta.com/avto/zamena-lampochki-podsvetki-gosnomera-na-avtomobile
- https://car-hobby.ru/zamena-lamp-podsvetki-nomera.html
- https://expertniva.ru/elektrooborudovanie/kak-pomenyat-lampu-podsvetki-nomera-v-nive-shevrole-samostoyatelno.html
[collapse]
How to do everything yourself
The backlight bulbs need to be changed in this order.
- To begin with, the lamp shade itself is disassembled, this is done starting from the middle, using a thin screwdriver.
- The standard lamps must be unscrewed very carefully, as it is quite easy to damage the place where the lamp is attached to the car body.
- The next step is to install a new LED or incandescent bulb.
- After the new lamp is screwed in, you can reinstall the lampshade. Before installation, it must be thoroughly degreased.
- When the installation process is completed, you need to check whether the license plate light is working. If everything is done correctly, then the license plate will have bright lighting.
We also recommend reading our author’s article, in which he talks about how to replace a low beam light bulb.
We also recommend reading our specialist’s article, which talks about replacing the side light bulbs.
This is the general diagram that explains how to change the license plate light bulb. However, for each specific car model, this procedure has its own characteristics.
We are looking for the cause of the malfunction
Statistics show that the lamp burns out only in 40% of cases. Often the problem lies not there. It is advisable to start from simple to complex and do the following:
- Clean the backlight lamps from dirt, dust, etc. with a rag. Visually we try to determine whether there is darkening of the light bulb, condensation inside or damage to the lampshade due to high temperature.
- Usually two lamps are installed. If one of them is on, then the problem is not in the fuse or wiring. When you tap on the lampshade, the lamp lights up and goes out, which means it doesn’t sit well in the socket.
- If none of the lamps light up, check the mounting block for blown fuses. If they are all intact, then we call the wiring.
Examples of replacing light bulbs on certain car models
Lada Kalina"
If the license plate on the Kalina becomes poorly illuminated, this means that it is time to replace the lamps. This is not difficult to do. If you follow the algorithm below:
- To begin with, on the right side you will need to press on the flashlight itself, slightly moving it to the left. It should simply come out even with light pressure.
- Next, the lampshade is pulled out simultaneously with the power wires. It is this step that greatly simplifies the process of replacing power lamps on a Lada Kalina car.
- Then you need to slightly lift the plastic clamp up, and then remove the plug that provides power.
- The lamp housing must be unscrewed by rotating carefully. This way you can easily pull out the lamp base.
- The next step is to pull out the lamp, slightly pulling it to the side. Then the lampshade will be very easy to remove from the base.
- In place of the burnt out light bulb, another one is immediately put in place.
- Next you need to repeat all the steps in reverse order.
That's all, all that remains is to check whether the light is on after changing the bulb.
Hyundai "Solaris"
Changing the license plate lamp in a Hyundai Solaris is also easy if you do everything in the right order. In this model, 2 lights are installed for illumination, located under the trim on the trunk lid itself. These lights are closely related to each other. To change light bulbs in Solaris, you need to follow the algorithm below:
- The first step is to remove the upholstery from the trunk lid. For this purpose, you need to use a reliable screwdriver to pry up the cover; it can be easily found in the trunk handle.
- Next, when using a Phillips screwdriver, remove the screws securing the handle, and then remove it.
- Using the same screwdriver, unscrew all the pistons that secure the trim to the trunk lid itself. First, the pistons are removed, and then the upholstery is completely removed.
- The lamp socket is turned clockwise only until it stops, and after that it is important to press it and unscrew it together with the bulbs from the housing. You need to pull the socket exactly to the length at which it will be easier for you to change the lamp.
- The lamp is removed from the socket very easily. Simply pull it out by the flask.
When the lamp is replaced, it is important to install all the necessary elements in the reverse order. This rule must always be observed, regardless of the make of the car in which the light bulb is changed. If all requirements and replacement procedures are met, the lamps illuminating the sign should operate without failure. Only then can we assume that the replacement was carried out correctly.
Nissan Qashqai"
The process of replacing light bulbs on a Nissan Qashqai is practically no different from the same procedure in other cars. But there are still some nuances that should be taken into account in order to make the replacement correctly:
- In a Nissan Qashqai, before replacing the backlight bulb, you need to remove the negative cable from the car battery
- Then you need to remove the lampshade. A regular screwdriver is suitable for these purposes. To simplify this process, you need to lightly press the lampshade, swing it left, right, and then pull it out.
- When the lamp cover is removed, you need to unfasten the connector. This will make it easier to pull out the light bulb.
- Then a new light bulb is installed. The assembly process is carried out strictly in reverse order to avoid errors during assembly.
- When the negative cable is installed in place, all that remains is to check the functioning of the backlight.
Replacing headlight bulbs in Nissan cars yourself will save money and time.
Lada Priora"
How to replace a license plate light bulb on a modern Russian car? Replacing the license plate light bulb on a Lada Priora car has virtually no differences from the procedure for replacing this element in Kalina.
Additionally, we recommend reading our specialist’s article on how to remove a headlight on a Priora.
This is quite simple to do, it is important to follow the instructions.
- To change the light bulb, you will need special socket wrenches. With their help, you will need to remove the plastic elements secured with special fasteners
- The rear chrome frame is removed by unscrewing all the nuts that hold it in place.
- The light bulbs are installed in a frame. It will take a little effort to get them out of the lampshades. The problem is that they are quite difficult to understand.
- When the lampshade is disassembled, it is important to ensure that the rubber seals are not lost.
- Replacing the license plate light bulb on a Priora takes a minimum of time. All parts are assembled only in reverse order. However, before reassembling it is worth checking whether the replaced bulbs work. If you do not do this right away, then if they are installed incorrectly, you will have to disassemble the entire structure again.
- The reassembly process is as follows: after changing the lamps, the shades are put in their places, and after them the frame. It must be securely fixed at all attachment points. Lastly, the plastic is installed in its place.
In this case, changing the room lighting bulbs on the Priora is complete.
Toyota Corolla"
If there is a need to replace the license plate lamps in a Toyota Corolla car, then you need to proceed in this sequence:
- To begin with, it is important to lower the lens of the flashlight for the easiest access to the lamps. This is done by pressing on the tongue, as a result of which the diffuser easily falls down.
- The light bulb socket rotates counterclockwise, this is done to make it easier to remove.
- The next step is to unscrew the screws, they hold the lighting elements, after which you can lower the flashlight.
- Then the paw holder is removed. To do this, it is important to rotate it counterclockwise as well.
- All that remains is to remove the lamp from the socket.
- After changing the number bulb on the Corolla, the entire process of assembling parts is carried out exclusively in the reverse order.
All the steps listed above are so simple that even a novice driver can easily perform them.
How to change a license plate light bulb step by step instructions with photos and videos
- clean the area where the lampshades are located from dust and dirt;
- remove decorative trim;
- clean the surface of the lampshades;
- unscrew the screws;
- remove the lampshades;
- remove the lighting fixture;
- make sure it is faulty;
- replace light bulbs with new ones;
- check the functionality of the unit by turning on the lights;
- secure the lampshades by first lubricating the screws with silicone grease;
- Reinstall the fastening of the trunk lid trim.
Important Features
According to traffic regulations, with the onset of darkness, and even under conditions of limited visibility, the license plate must be illuminated in white or yellowish colors.
This is necessary not only so that other road users can see the license plate number of the car, but also to determine the direction of movement of the car.
Why, in this case, is it prohibited to illuminate license plates in other colors? So, if blue and red lamps are used as lighting, this may well cause an emergency on the road. This happens due to the fact that in the dark the driver’s perception of colors changes.