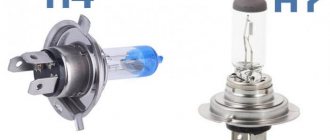
Low beam headlights are vehicle headlights that are used to illuminate the road surface in the direction of travel. The peculiarity of low beam headlights is that they are selected taking into account optimal road illumination at a distance of at least 60 meters. At the same time, the luminous flux is selected taking into account the avoidance of dazzling drivers of oncoming vehicles.
According to current legislation, if the car is not equipped with DRLs (daytime running lights), the low beam headlights must be turned on both day and night. The distant one turns on only in the dark to increase the visibility range. Low beam headlights are also used when stopping or parking on unlit sections of the road in the dark. In such cases, the low beam complements the side lights.
Review of block headlights Lada Kalina 2
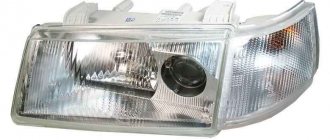
Above is a photo of the left headlight, everything on the right is identical. 1 - ventilation tube; 2 — low beam section cover; 3 — cover of the high beam section; 4 — light beam regulator in the vertical plane; 5 — lamp socket for side light and daytime running light; 6 - electrical connector; 7 — regulator of the light beam in the horizontal plane; 8 - turn signal lamp socket
Required Tools
In this case, you will not need any special kit to replace the lighting fixture. All you need is an 8 x 10 wrench. This is due to the fact that the right headlight is covered by the washer reservoir cap. You should be especially careful with the tank itself. To make installation of the low beam lamp as safe as possible, it should be completely removed. This must be done very carefully so as not to spill the liquid.
After completing the replacement, you should reinstall the tank in reverse order and attach all the wires to the control network. At this point, the process of replacing the low beam bulb can be considered complete.
You should also remember that it is not only about you on the road, but also the health of all other road users. Therefore, repairs and replacement of unsuitable spare parts must be carried out in a timely manner.
>
Instructions for replacing lamps on Kalina 2
Low beam
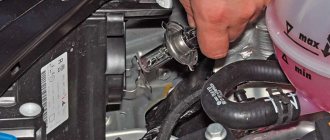
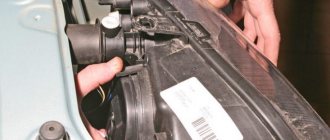
Carefully remove the rubber boot from the low beam (it is larger in size)
Disconnect the block from the lamp
Next, press the spring clamp and remove it from the clamps to the side and move it away
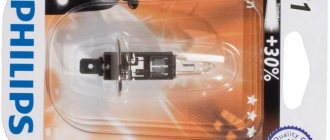
We remove the burnt out one and install a new lamp. The H7 Osram lamp is installed from the factory; if you want to install brighter lamps, you can choose the Philips H7 +30.
We reassemble in reverse order.
High beam
Remove the rubber boot from the high beam
Disconnect the block from the lamp (Only the + wire is attached to the lamp)
Press the spring clamp of the lamp and move it to the side
We take out the old lamp and install a new one. Be careful when installing, it can only be installed in one position.
We also perform assembly in reverse order.
Replacing DRL lamps
Take the cartridge and turn it counterclockwise.
Next, remove the socket from the socket, take out the old lamp and install a new one. Toshiba lamps are installed from the factory; it is impossible to buy them in retail stores, so we choose an analogue.
Turn signal lamp
By pressing lightly, turn the cartridge counterclockwise and remove it from the socket
Press the lamp and turn it counterclockwise, pull it out of the socket
We take a new PY21W lamp and install it in the socket
This completes the lamp replacement.
When replacing the low and high beam lamps, it is prohibited to touch the lamps themselves by the bulbs! This will lead to rapid failure of the lamp. The rest of the lamps are incandescent, and this does not threaten them.
Replacement process
The lamp replacement process lasts 5-10 minutes. Experienced motorists can do it in two. No tools are needed. Let's start the replacement process:
- Open the hood.
- We remove the plug from the headlight where the replacement will be carried out. It is not necessary to adjust the headlights after replacing the lamp.
The plug is marked with an arrow
- We remove the plus and minus wires for powering the lamp.
The plug is removed, the cartridge is close
- We move the latch aside.
Move the latch aside
- We take out the lamp. This should be done carefully enough so as not to break the old light bulb.
Removing the lamp
- We carry out the assembly in the reverse order.
Thus, the lamp is replaced and the car is ready for further use.
Lamp selection
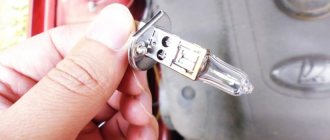
Bulb type H7, do not mix it up
It is quite easy to find in the car market or in spare parts stores. The most common manufacturer remains OSRAM.
On the left is a Chinese lighthouse, on the right is a domestic OSRAM
These are domestically produced lamps that have gained popularity due to the price-quality ratio.
Other good manufacturers are:
- Bosch,
- Hella,
- Koito,
- Philips,
- Valeo.
These are already higher quality lamps, which are also more expensive than the popular OSRAM. Thus, the choice of lamps is quite wide, and every car owner will have something to choose from.
How to choose a light bulb
Many car owners complain that the low beam bulbs in the Lada Kalina often burn out; there can be many reasons, but most often the reason for failure is in the light sources, so we will tell you how to choose a high-quality option:
It is better to choose those brands that have good reviews from car owners and specialists; of course, their price will be much higher than that of budget solutions, but reliability will also be at a completely different level.
We do not recommend installing Mayak lamps; this is the cheapest Chinese-made option, which is not distinguished by quality and can cause malfunctions in the system
Modification The manufacturer installs H7 type H7 low-beam halogen lamps with a power of 55 Watts on the cars, which is exactly what should be installed. Using options with higher power may cause overheating of the machine wiring and, as a result, short circuits or even melting of the connectors. Products with an extended service life are marked Long LifeCharacteristics
Remember that options with increased light output have a shorter service life than regular lamps. Therefore, decide for yourself what is more important to you – lighting brightness or durability.
As an option, you can consider LED elements for installation in fog lights in Lada Kalina, they have a long service life with high brightness, but their cost is high
Service life Of course, exact numbers are not indicated anywhere, but remember that replacing low beam bulbs on Kalina, and in other cars, should be done once every 1-2 years, even if the elements are working. This is due to the fact that during operation, light output inevitably decreases over time.
Important! If the light bulbs burn out frequently, then measure the voltage on the generator; it is possible that it is excessive.
How the work is carried out
Let's figure out how to replace the low beam light bulb on Kalina with your own hands, the process is quite simple and, by and large, does not require any special devices, you only need your hands. But still, the tool may be needed at the preparation stage.
Preparation
It is important to ensure a comfortable and safe working environment, so remember the following:
- The work can be done anywhere - even in the yard near the house, but it is advisable to go to the garage. There you can not be afraid of precipitation and, if necessary, find this or that tool.
- First of all, the hood is opened and the terminal is removed from the battery. We remind you of this in every review. Therefore, make it a habit to de-energize the system when working with electrical equipment to prevent short circuits and electric shock.
- Further preparation depends on what engine is installed in your car, you need to provide access to the rear of the headlight housing, and for this you need to disconnect the expansion tank on the left, and the options on the right may be different. Therefore, be guided by the situation and decide for yourself. What needs to be removed and what should not be touched.
Without easy access, work is much more difficult to carry out
Replacement process
Replacing the low beam bulb on Kalina is as follows:
First of all, you need to remove the rubber plug, which protects the interior of the headlight from moisture and dirt; this is also very important, so do not damage this element. It's very simple: grab one of the three protrusions and pull away from the body, the element will come off quite easily.
The plug is located behind the low beam headlight on the rear side
Next, you need to remove the two contacts and move them to the side; this is easier to do while the low beam light bulb on Kalina is still fixed
It is important to remove the elements carefully so as not to damage the insulation or break the wires, otherwise you will have to carry out repair work as well. After the wires are disconnected, you can proceed to the next step - releasing the latch, which presses the base to the reflector and holds the element in a certain position. To do this, you need to disengage the clamp from both sides by lightly pressing it and moving it away from the base.
With some practice, the latch releases very easily and very quickly
The latch folds back and the low beam bulb in the Lada Kalina can be easily removed. We advise you to inspect the condition of the contacts; if they are melted or blackened, it means that the failure of the bulbs is due to a malfunction in the system.
Under no circumstances should you touch the glass part, so grab the cartridge and contacts
Checking and adjusting the headlights, replacing the low beam lamp on the Lada Kalina-2
In head optics, low beam lamps most often have to be replaced. For a Lada Kalina car, the low beam lamp is a halogen lamp with an “H7” socket, the power of which is 55 watts (no more). Osram bulbs may come from the factory, but others will do. After replacement, the filament will occupy a new position, and the headlight adjustment may be lost. So, checking the settings, and, if necessary, adjusting the headlights is carried out immediately after replacing the lamps, which on the Lada Kalina is done without dismantling the headlight unit.
Possible problems and methods for solving them
The fact that the Lada Kalina headlights stop working is due to many factors that the driver cannot influence. These are exposure to moisture, metal fatigue, and a combination of minor deformations that have appeared over years of operation. The most common problem that owners of this car face is the breakdown of the high or low beam.
A similar nuisance can occur while driving. Driving such a car in the dark is unsafe and can endanger the health of the driver, passengers and pedestrians. It is advisable to repair the breakdown immediately, in the field. Fortunately, in most cases the problem is resolved within 10 minutes.
Step-by-step replacement instructions
Each H7 standard bulb has an iron base, which is pressed to the headlamp with a wire clamp. To bend this bracket, just get close to the plane of the headlight from behind. Let's open the hood and see what exactly will bother us.
Engine compartment of Kalina-2 (VAZ-2192, 2194)
Behind the headlight on the right is a washer reservoir. It is dismantled like this: disconnect the electric motor terminals, tighten the plug harder, find one nut and one fastening bolt. The fastening elements are unscrewed with a 10mm wrench, then the tank is placed on the engine. Next we could look at how to remove the headlight on Kalina-2, but in this case this is not required.
Before performing any manipulations with electrical equipment, always disconnect the negative terminal of the battery. It is better to connect this terminal last (before closing the hood). Be careful.
Replacement sequence:
- Remove the rubber cover covering the low beam lamp compartment;
- Disconnect both terminals from the lamp contacts;
- The fastening bracket is removed from the grooves by first pressing on it, then the bracket is moved to the side;
- They take out the lamp, install a new one in its place, and return the bracket to its place.
Next, perform steps “2” and “1” in reverse order. The connection diagram is not important - there are only two contacts, and both go to the filament. Now, if we connected LEDs, then everything would look more complicated.
The bracket presses the cartridge to the plane of the headlight
When installing a halogen light source, you must remember: the surface of the lamp glass must be perfectly clean. Do not allow grease marks to remain on the flask. Installation is carried out using only cotton gloves. The glass of the flask is cleaned with industrial alcohol or Secunda.
Tuning options
You can increase the attractiveness of your car for yourself and others by tuning the lighting system. Main options:
- tinting;
- installation of bilens;
- installation of LEDs in dimensions;
- creating angel eyes.
Many car enthusiasts choose tuning of headlights on Kalina, such as tinting - applying a special film over the entire surface of the glass of the device to give the car an original design. Another popular option is installing xenon. Almost all workshops offer this service, but only experienced craftsmen can carry out the installation efficiently.
Adjusting the headlight beam
Correctly adjusting headlights can only be done in a service station. However, let's look at how this operation is performed by experienced craftsmen.
Kalina-2 block headlight, correct adjustment of the beam direction
There are two adjustment screws on the back wall of the unit called the headlight unit. The first of them, located closer to the radiator, allows you to deflect the light beam “up and down”, and the “horizontal” direction is adjusted with the second screw. Ideally, this should happen: when the car is 5 meters from the screen, the border of the light spot touches line “2” (see figure). Line “1” is spaced from the ground at a distance equal to the height of the centers of the headlights. The second line is drawn 65 mm lower.
When making adjustments, the corrector switch is moved to position “0”. Of course, you only need to turn on the low beam. We also note that the headlights are adjusted one by one (the “excess” light source is covered with a cloth).
Here are a couple more tips that will be useful:
- The centers of the beams should be on lines AE, BE;
- Line “0” has the following meaning: it intersects with line “1” at one point, so the border of the spot should pass exactly through this point;
- The caps of the plastic adjustment screws are compatible with a hex screwdriver. However, a Phillips screwdriver will also work.
Question and answer: what should not be allowed under any circumstances
Q: What happens if you buy lamps with a base other than “H7”?
A: It will not be possible to install lamps in a standard headlight.
Q: If I use more than 55 watts of power, will this cause overheating?
A: Excessive power leads to the fact that the fuse in the low beam lamp circuit burns out. A separate fuse is used for each of the lamps, so it will not be possible to “deceive” the automation.
Q: Are halogens afraid of power surges?
A: For incandescent lamps, excess voltage is a harmful factor. In the case of using halogen lamps, there will be two harmful factors: overheating, underheating. Actually, this is why MTBF can be considered a relative rather than an absolute value. This value depends, and depends strongly, on the stability of the voltage.
Other causes of breakdowns
The reasons for the loss of light may be a broken wire, loose contact of connectors, breakdown of controls, etc. If the problem cannot be visually detected, it is recommended to test the wiring to identify network breaks. Calling did not bring results - contact an auto electrician. Neglecting the problem can aggravate the situation and lead to breakdown of other electrical elements in the network, then repairs will cost much more.
Kalina's headlight glass may fog up, which leads to a decrease in light brightness. If frequent fogging is observed, there is a high probability of depressurization of the headlight housing. It is recommended to remove it and thoroughly coat the joints with sealant.
Design Features
Kalina's light is not technologically advanced, since the optics use classic halogen elements. From the factory, the modules contain parts from Philips or Osram with the Long Life prefix, which means an increased service life.
The Kalina lighting system in the old and new body differs in the location of the modules, shape, and size. The elements used in optics are:
- turn signals – PY21W;
- low beam – H7/55 W;
- high beam – H1/60 W;
- fog lights – H11/55 W;
- Dimensions – W5W.
In modifications of Kalina since 2013, running lights have been added from the factory, which use parts with the index W 21/5 W.
Some car owners cannot fit their hand into the cramped space between the TV and the air filter housing. In this case, the Kalina intake system is dismantled or the radiator grille and headlight are removed.
When and why to change
The factory light is adjusted during the production process, at the time of passing technical inspection. In the new car, the modules shine with maximum power and at the peak of their capabilities. The need for replacement is determined by the following main criteria:
- Reducing light intensity.
- The appearance of yellowness and cloudy areas on the cut-off strip.
- Complete shutdown of one of the light modules.
- Increased brightness after the suspension hits a pothole or has mechanical contact with the headlight.
Kalina lamps installed on the conveyor last no more than 4 years. Cloudiness, deterioration of visibility and the appearance of unlit areas appear after the filament burns and the bulb smokes. In this case, the light does not pass through the dirt well and does not reach the desired areas of the reflector. There are yellow spots of light and darkened areas on the road.
The thickness of the light module filament is calculated by production engineers. When struck, the lamp shakes and the spiral becomes thinner. An external examination reveals a large increase in beam power. This indicates that the halogen lamp will soon fail, since the thin filament heats up above the set temperature and begins to melt. The service life of a damaged part ranges from one minute to several hours.
Low illumination of viburnum: factors of problems
The most common malfunction in vehicles is burnt out light bulbs. Sometimes this happens quite often, indicating the appearance of an auxiliary cause that caused the breakdown.
Note: When dismantling halogen light bulbs, you need to ensure that the bulb is sterile.
It is very important to keep debris and dirt out. Therefore, sometimes the touch of fingers can play a cruel joke
Low beam lighting on the Lada Kalina refuses to shine in the following cases:
- The fuse that protects the light bulb's power circuit fails.
- The headlight housing has become depressurized, dirt and foreign particles have gotten inside. The reflector along with the bulb bulb becomes clogged, and this leads to overheating and, accordingly, damage to the filament.
- Unstable operation of the generator voltage stabilizer. As is known, power surges significantly increase the breakdown of halogen light bulbs.
- The power supply to the lighting equipment has been damaged, for example, oxidation has occurred, a wire has broken, or the contact of the light bulb plugs does not work.
Which lamps are best to use in Kalina
To find out which lamps are installed in Kalina during assembly, you need to remove the cover and pull out the part. The name, model and type of spare part are printed on the case. AvtoVAZ uses products from Philips as the main light. However, some models contain parts from Osram.
When searching for light bulbs in Kalina, you should be guided by proven options:
- number on the Kalina body or in the vehicle passport;
- a burnt-out sample previously removed from the lantern.
The body number is entered into a special window that pops up when you visit online resources with catalogues. Such systems independently determine the year of production, configuration and type of lighting equipment and offer a list of original spare parts and replacements for Kalina.
The number is provided to the seller in the store to accurately determine the part code. A simple and reliable way is to remove the lamp from the base and buy a new one based on the sample. In this case, you avoid purchasing the wrong part and having to go back to the store for an exchange.
Installing a new one: sequential instructions
The procedure for removing and installing a headlight that is located on the right or left side is not particularly different from each other.
It is only important to act strictly according to the instructions. When installing a new light bulb, you must hold it only by the base, do not touch it with your hands
When removed, you can completely hold it in your hands.
Note that for the Lada Kalina (16-valve engine) a lamp with an H7 socket is required. Install the new one as follows:
- Determine the seat so that the protrusion in the base coincides with the groove on the headlight. It must be firmly fixed. Only then will it be clear that the protrusion has fallen into the groove;
- press the latch against the lamp so that the center of the base is between the antennae of the latch;
- snap the latch into place;
- connect both wires to the clamp and close the lid tightly.
After completing this procedure, you need to turn on the headlights at close range and check their operation. If everything is fine, then the installation was completed correctly. Otherwise, you will have to take the car to a car service center and pay money for it. Lamps should only be purchased in special stores. It is advisable to give preference to well-known manufacturers and models with a guarantee. Osram H7 12V 55W headlights for the Lada Kalina Cross are very popular today.
How to replace the lamps yourself
Changing a light bulb in Kalina yourself is not difficult. The time spent on the work depends on the skill of the driver and the size of the hands. Some owners change light fixtures in 15-20 minutes without removing the headlight, while others suffer for more than an hour and ultimately dismantle the optics.
When replacing, cloth gloves are used. This helps protect the skin on your hands and also prevents contact with the bulb. When touched, fingerprints remain, which heat up when the light is turned on and after a while burn through the thin glass.
During work, the battery terminal is unscrewed to avoid a short circuit, which will lead to burnout of the fuse link in the fuse box.
Far module
Replacing the high beam lamp is easier than in the low beam module, since the cover is located closer to the radiator grille.
To perform the operation you will need:
- Turn off the Kalina engine.
- Open the hood lid.
- Remove the protective boot on the back of the flashlight.
- Carefully disconnect the plastic chip.
- Open the latch.
- Pull out the lamp.
Assembly is carried out in reverse order. When installing the terminal, you need to check the contacts and, if necessary, clean them using a flat-head screwdriver, sandpaper or a special chemical spray.
Low beam
Replacing a low beam lamp on a Lada Kalina depends on the experience of the owner and is divided into two types:
- Without removing the headlight.
- With module dismantling.
Most Kalina owners cannot replace the lamp in the left headlight due to limited space. In this case, you will have to ask a more dexterous friend or dismantle the lighting device yourself for convenience.
To change lamps on installed optics:
- Unscrew the filter housing near the left headlight and move it towards the engine.
- Disconnect the washer motor terminal, remove the screws and move the reservoir to the side.
- Open the light module seals.
- Remove the block with wires.
- Remove the spring clip.
- Remove the part.
Assembling the headlight with a new spare part is carried out in the reverse order.
To dismantle the headlights, you need to unscrew the grille, fasten the modules and disconnect the contact chip. Place the removed optics on a convenient surface and replace the light elements.
Dimensions and DRLs
In the first generation Kalina, the dimensions are installed under the cover of the near reflector.
Replacement is no different from work in the near headlight compartment, however, to disconnect the lamp, it is turned counterclockwise. Drivers often install a diode instead of the original light source, which has a bright glow and can work for more hours.
Replacing DRL lamps on second generation Kalina:
- Open the hood.
- Find the plastic retainer at the bottom of the lamp near the radiator grille.
- Turn left 90°.
- Pull towards yourself.
Daytime running lamps do not contain halogen in the bulb, so they can be handled by hand when installing. Parts without gas include reverse elements, which are changed by bending the trim in the luggage compartment. To replace the Kalina station wagon's brake light bulb, you will have to unscrew the plastic plug on the fifth door, disconnect the chip and pull out the old spare part.
Turn signal
If the marker light on Kalina is freely accessible, then it is more difficult to get to the turn signal module.
To install a new lamp, you need:
- Unscrew the screws holding the air intake barrel and washer fluid reservoir.
- Move the parts towards the engine.
- Feel for the plastic cartridge and turn it to the left.
- The lamp is removed from its seat by slightly pressing and turning it 90° to the left.
To install a new part, you need:
- Install it into the cartridge.
- Press and turn to the right until it stops.
The finished element is mounted in a standard hole. You can check the operation of the light by turning on the corresponding key on the Kalina instrument panel.
Fog lights
When replacing the fog lights, partial dismantling of the locker will be required. To do this you need:
- Turn the wheel towards the engine compartment.
- Unscrew the screws and unclip the clips where they are attached to the bumper.
- Bend the fender liner.
- Turn the light bulb to the left until it stops.
- Pull towards yourself.
- Disconnect the plug.
To install a new light source in the PTF, you must first snap the connector, insert the part into the lamp and turn it to the right.
After carrying out the work, you need to check the correct functioning of the light and adjust the angle of the reflector. A properly functioning car light ensures good visibility in all conditions and safety on the road.
Bi-xenon installation
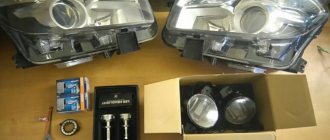
With their own hands, car enthusiasts can install bilens into the lighting device. The first step will be acquiring the necessary elements. Attention should be paid only to those products that can easily fit into the cavity of the Kalina headlight. For example, if you buy a G-5 kit, you will have to cut the lenses.
Work begins with dismantling and disassembling the headlight. Then, using a file, they cut the seat in the shape of a cone, due to which the lens will fit into the body by about a centimeter. It is necessary to remove the cap so that it does not block the flow of light, and then mount the lens in the prepared place. The element is secured using factory fasteners.
After installing the lenses, the car owner needs to stop by the stand to adjust the luminous flux and position of the lamps in accordance with the current GOST.
