- Which low beam lamp is suitable for the pre-restyling first generation Nexia?
- Which low beam lamp is suitable for the restyled first generation Nexia?
- High beam lamps of the restyled Nexia of the first generation
- Which low beam lamp is suitable for the second generation Nexia (Ravon Nexia)?
We choose the best low and high beam lamps for the Daewoo Nexia.
In the selection I included products from well-known brands - reliable and proven European manufacturers. Take care of yourself, install high-quality light bulbs with a transparent history, behind which there are experienced engineers and years of testing.
If you don't have a manufacturer preference, then decide what's more important: brighter light or longer service life.
Which low beam lamp is suitable for the pre-restyling first generation Nexia?
Suitable vehicle years: 1994, 1995, 1996, 1997, 1998, 1999, 2000, 2001, 2002, 2003, 2004, 2005, 2006, 2007, 2008. Low
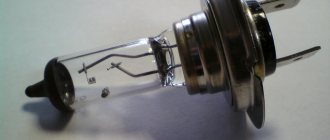
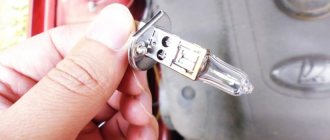
beam 60/55 H4 lamps are installed at the factory:
- 60/55 is the power of low beam (55) and high beam (60) in watts,
- H4 - base type,
- original articles - 11071361, 05104-60553, 94535545.
Please note that the same bulb is used for low and high beam
Quick comparison
| Model | Peculiarities | Rating | Link |
| Philips X-treme Vision | the brightest, give white light | ★★★★★ | Buy |
| Philips LongLife EcoVision | inexpensive, extended service life | ★★★★✩ | Buy |
| Bosch Pure Light | extended service life | ★★★★✩ | Buy |
| Osram Original Line | good lighting area | ★★★★✩ | Buy |
Philips X-treme Vision
Features declared by the manufacturer:
- bright white light,
- increase the lighting area in front of the car by 45 m,
- high quality quartz glass.
Technical characteristics: - luminous flux - 1650 ± 15% and 1000 ± 15% lm, - color temperature - 3500 K, - service life - 450 hours. The package contains two lamps.
Country of origin: Poland.
What we like most: White bright light, increased illumination area.
Test results
Good ADAC score, results:
- very good road lighting,
- short service life,
- relatively expensive (but each lamp is tested at the factory).
Auto Express test winner. According to the measurement results, the border of the bright light spot is 75 meters from the car.
Check prices and availability.
Philips LongLife EcoVision
Peculiarities:
- high strength quartz glass,
- resistant to temperature changes and vibration,
- high internal pressure - powerful light.
Technical characteristics: - luminous flux - 1650 ± 15% lm, - technology - halogen, - service life - 1500 hours (100,000 km).
There are two pieces in the package.
Country of origin: Poland, Germany.
What we like most: they are close in color to standard lamps, they should last longer than regular lamps.
Check prices and availability.
Bosch Pure Light
Features declared by the manufacturer:
- a universal series of high-quality products for passenger cars,
- indicators as close as possible to standard lamps,
- certified by ECE (Economic Commission for Europe),
- do not transmit the ultraviolet spectrum to protect the headlights.
There is one piece in the package.
Country of origin: Poland, Germany.
What we like most: Inexpensive, well-known manufacturer.
Price and availability.
Osram Original Line
Peculiarities:
- quality of the original spare part (OEM),
- improved visibility up to 130%.
Technical characteristics: - luminous flux - 1650/1000 lm, - service life - 500 hours.
The package contains one lamp.
Country of origin: Germany.
What we like most: inexpensive, good service life, country of origin.
Check prices and availability.
Search
Many owners of this model are thinking about how to make Daewoo Nexia headlights better. The above article describes a simple, modern method that has been fact-checked several times.
An inexperienced driver of a standard Nexia may not realize that the car’s lighting has objective disadvantages. The same cannot be said about experienced motorists. When driving different cars, they often complain about the insufficient power of the standard Daewoo Nexia headlights. The brightness of the n150 head optics is really not enough even in new cars that have recently rolled off the assembly line. What to say about the technique of used and tarnished lenses.
The root of this situation lies in the electricity settings. For some reason, Daewoo designers made the logic of the system somewhat unusual and incomprehensible. If the battery is 12.5V, only 11 bulbs go to the bulbs, in other words, noticeably fewer. In fact, 10 percent disappear, it is not clear where.
The troubleshooting process will take several hours. It is better, of course, to have a basic understanding of the structure of electricity and devices. Additionally, you will need the ability to solder and determine the voltage of the circuit. The time and energy spent will translate into a safer and more comfortable night ride.
To quickly understand whether you need to change the wiring of your Daewoo Nexia 150, you will need a regular sensitive multimeter. We measure the battery voltage and store (record) the data. When the low beam is flashing, measure the lamp cover at the connections. If, when comparing the 2 numbers obtained, you find a difference of 1.5 V, this is untapped potential that is easy to use. In this case, the operation described below has a positive effect on the efficiency of the optics.
You may also like
Daewoo Nexia N150, part 2, replaces conventional burnt lenses
To improve the Daewoo Nexia n150 headlight, you need to purchase accessories for you:
- two four-pin 30A relays;
- two gaskets under them;
- two 20A fuses in a sealed housing;
- 2.5kV Electronic Wire Typically the communication system uses a 2.5V connection, but in some places it will be narrow.
The approximate amount of necessary costs if you do the work yourself is 350 rubles.
Most of them at least remotely imagine working with a soldering iron; many have held it at least at one point. With the relay situation the opposite, the subject is familiar to the units. But mastery of the basic principles occurs instantly, enthusiasm and the desire to create miracles.
In a four-pin switch, the two main contacts are the positive and negative points, in other words, the power points for the device. You can bring it directly from the battery or try to find the "plus" in another place so that everything works with the ignition on. The third link is the manager. Voltage applied to it causes a corresponding click and redirects power from the main contacts to the fourth. On devices, contacts are usually labeled with standard numbers, so don't be upset when you see 87 or 30 in the annotation.
- First you need to find the pin marked 87 on the relay and connect it to the positive cable coming from the safety cable. A similar function is needed with the second one. Next, the fuse housings are connected by positive wires.
- We connect the dark colored cords coming from the relays, carefully attaching one to them. For the applied circuit it acts as a mass.
- Next, in the first block, find the point with number 86 (usually it is brown). Solder a wire long enough to reach the left lamp. It's better to leave a small margin in size. We do the same with the second block. These connections will be soldered to standard wiring so that the devices will turn on when the switch is activated.
- With both mechanisms, the 30s remain untouched. To these we attach two cables for the headlights, one for each. It is important to correctly calculate their length, the first should be shorter, the second longer. Make this feature required on both sites.
You must isolate the connection as carefully as possible, using whatever method you wish. The main thing is to check the full density of the conductor.
Should I buy tires for winter or summer? Tire size - marking and decoding.
Published: 04/19/2018 Spread the love
Spread the love Tire markings and decoding of their designations Contents1 Tire markings and decoding of their designations 1.1 Tire markings photo Tire size1.1.0.1 Speed index table1.1.0.2 Load index table1.2 American tire markings: Tire size (decoding)1.3 Additional markings on the side of the tire 1.4 Color marks used for marking car tires 1.5 General recommendations when purchasing winter tires 1.5.1 Tire manufacturing company 1.5.2 Basic ...
Should I buy tires for winter or summer? Tire size - marking and decoding. Read completely "
Nuances of Daewoo Nexia optics: how to choose, change and adjust?
To ensure safe movement by car at night, only working optics should be used in the vehicle. If one or both headlights are replaced on a Daewoo Nexia or any other model, the car owner must ensure that the road lighting after replacement is at the proper level. You can read more about choosing light bulbs and replacing optics in this article.
Daewoo headlights can be divided into several subgroups:
- head lighting, which includes side lights, high and low beam lamps;
- brake lights that are activated when you press the brake pedal;
- fog lights on the Daewoo Nexia, the purpose of which is to provide better illumination of the road surface when driving in bad weather (the author of the video is Sergio Valensini).
To turn on the lighting, as well as switch the bulbs to low beam, high beam or fog lights, the Daewoo Nexia uses a special switch. The light switch is located under the steering wheel.
If the optics refuse to work, this may be due to:
- fuse failure;
- burnout of lamps;
- oxidation of contacts;
- broken wiring;
- failure of the steering column switch.
Lamp selection
As for the choice of light bulbs for Nexia, today the market offers buyers the following options:
- Halogen light bulbs. This option is the most common. Halogen lamps can be installed both in low and high beam optics, and in PTF.
- LED bulbs. Provides improved illumination of the roadway. They can be used both in low and high beam optics, as well as in fog lights, as well as daytime running lights. Moreover, our compatriots, as practice shows, most often install such devices in the PTF and DRL.
- Xenon. Xenon is one of the most expensive lighting options. The cost of xenon is determined by its quality - such lamps provide maximum illumination of the road. It should be noted that the use of xenon in PTF and DRL is not always justified. If xenon was installed without following the rules, the driver may be fined for its use. It should also be noted that for xenon to work, you will also need to additionally install an optics control unit.
Mounting points for the washer reservoir
If you need to change your headlights, this procedure can be done at home. Depending on the year of manufacture of the car, the washer reservoir may interfere with the removal of the lights. If it is structurally located near the battery and can cause inconvenience during repairs, then the washer reservoir should be removed.
So, how to replace the lights:
First, you should dismantle the turn signal, as well as the radiator grille - this will allow you to get to the first lower screw, which secures the optics. After this, you need to unscrew the three screws located in the upper part of the radiator grille; these screws secure it. At the same time, you can also unscrew the top screws that secure the optics itself. After completing these steps, the radiator grille should be folded towards you
The bottom of this device is fixed on two fasteners, you need to carefully press them, after which you can completely remove the grille. Having done this, on the side of the lamp you can see the first bottom screw, you need to remove it. If the lights on your car have never been changed, then unscrewing the bolt may be difficult - in this case, we recommend treating it with WD-40
This will allow the rust to corrode a little, but keep in mind that after treating the bolts with liquid, they need to be given some time to dry out. The bolts themselves are very fragile, so if you use force, it is quite possible that they will simply crumble. In the same way, unscrew the second lower screw, which secures the headlight. Now all you have to do is unplug the plugs that power the light bulbs and remove the headlights completely. When new lights are installed, use a headlight range control to adjust the lighting.
1. Unscrew the nuts securing the optics. 2. Disconnect the connector and remove the headlight.
https://www.youtube.com/watch?v=ytcopyrightru
The article was useful. Please share the information with your friends.
Replacing the low beam light bulb DAEWOO NEXIA
The official direct partner of Yandex Taxi is announcing a recruitment of drivers. Working as a taxi driver.
Follow the link and register RIGHT NOW! https://www.workle.ru/id140369.42/spe...
Working with Yandex.Taxi you receive: 1. Daily payments! 2. Minimum order guaranteed! Even if you have to travel 2 km! 3. No plans or schedules. Absolutely free schedule. You can go out for a couple of hours a day and earn 1,000 rubles, or you can earn more than 5,000 rubles in a whole day! 4. Possibility to take the order in the direction of the house. 5. And most importantly, there are a lot of orders.
During rush hour every day, the odds allow you to take applications with a cost 2-3 times higher than usual! Conditions: • EXPERIENCE IN TAXI IS NOT REQUIRED! • Flexible schedule. • Free connection • Hundreds of orders per day, 24/7 ———————————— Also constant technical support!
Follow the link and register RIGHT NOW! https://www.workle.ru/id140369.42/spe.
..
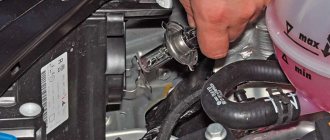
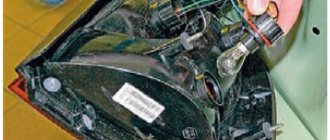
————————————————————————————————————-REPLACING THE AIR FILTER1) To change the air filter on your Daewoo Nexia car yourself All you need is a screwdriver and the air filter itself, which can be easily found in stock and purchased. Its cost will be in the range of 250-300 rubles. There is a lock on the air filter housing, press it and disconnect the block with the wiring harness from the temperature sensor that sucks in air, located on the air filter cover. The air filter is attached to the hose that conducts air using a clamp, loosen it and remove the sleeve from the fitting on the filter. The air filter housing cover is fastened with four spring latches, unfasten them and remove the cover. Pull the air filter element out of the housing by slightly pulling it up. If necessary, wipe the air filter housing from accumulated dust and dirt. Take a new filter element and insert it into the housing, observing the installation marks. Place the cover of the air filter housing in place and secure it with spring latches. 2) Replacing low and high beam lamps on a Nexia Replacing low and high beam lamps on a Nexia is quite simple. Replacing low beam lamps and high beam on Nexia (nexia) Turn the plastic cover counterclockwise and remove it from the headlight unit. Replacing low and high beam lamps on Nexia (nexia) Disconnect the electrical connector from the lamp. Replacing low and high beam lamps on Nexia (nexia) Unclip the spring fastener. lamps, take out the lampReplacing low and high beam lamps on Nexia (nexia) Install a new lamp, assemble in the reverse orderVideo on the topic:
-REPLACEMENT OF RADIO for Daewoo Nexia.
-Self-service car wash
—————————————————————————————————————YouDrive car sharing: Promo code 50% GTME8M for the first trip!— ——————————————————————————————————— URAmobile car sharing: Promo code for 300 rubles. 5IME4V
or follow the link: https://service.uramobil.ru/sign-up?p....
Source: https://www.youtube.com.s.webscope.online/watch?v=1aMxJLgqyMs
Characteristics of low beam lamps Daewoo Nexia
Before moving on to considering the lighting characteristics of the lamps installed in the low-beam headlights on Daewoo, it is necessary to remember that there is not only the modern version of the Daewoo Nexia N150, but also the pre-restyling N100. The main difference in their head optics systems is that the first uses light sources with one, and the second with two threads (for short and long-distance illumination).
1st generation models, produced from 1994 to 2008, were equipped with lamps with the following parameters:
- 60/55 – power in watts, respectively, for high and low beam.
- H4 – modification of the base.
- 11071361 – article no.
Cars with production years - 2008-2016 - were equipped with light bulbs with the following characteristics:
- 55 – power, W.
- H7 – structure of the base part.
- 96914491 – serial number.
Recommendation! On the Nexia N150 modification, a lens is installed in the low beam optics. Due to the high power of the halogen lamp, over a couple of years of operation it becomes greatly deformed, since it is made of plastic. Therefore, when replacing them with new copies, it is better to choose analogues with a metal reflector.
Halogen and diode
As an alternative to the standard low-beam halogens on the Daewoo Nexia, there are a large number of LED analogues on the market today. Their main advantages are durability and strong brightness. However, there is also a rather strong disadvantage - the high price. In addition, if such lamps fit easily into the system of side or running lights, then their successful operation in head optics is impossible without upgrading the headlights. The fact is that ice elements require a special reflector, and not the usual one that the car is equipped with at the factory.
When choosing lamps to replace with low beam for the Daewoo Nexia, you must be guided by the characteristics of the standard analogues - they should be as close as possible to them. Too much power of the light source can lead to overheating of the optics and wiring, and increased brightness can lead to violation of traffic regulations.
NEXIA new headlights
the headlights of the DAEWOO NEXIA , and it was decided to install new lamps.
Selection of lamps for headlights DAEWOO NEXIA
As you know, the headlight of the DAEWOO NEXIA car (Daewoo Nexia) of older editions is provided using block headlights.
The following lamps are installed in each headlight unit:
- Side light bulb W5W 5 Watt;
- High/low beam lamp H4 60/55W with a power of 60/55 Watts;
- Turn signal lamp P21W 21 Watt.
A similar set of lamps was installed on most older domestic cars. The H4 60/55W high/low beam lamp is shown in Fig. 1.
Fig.1. High/low beam lamp H4 60/55W 60/55 Watt
Due to the fact that one of the lamps burned out (apparently the daytime driving with the headlights on was affected), it was decided to install new lamps. By the way, the “original” lamps turned out to be of high quality, produced by a renowned manufacturer.
The following could be read on the lamp base:
OSRAM BILUX 64193 GERMANY 12V 60/55W H4 U 37R (E1)
In accordance with modern trends, it was decided to install lamps with white light “under xenon”.
We considered lamps from several manufacturers, but in the end the choice fell on lamps manufactured by OSRAM.
The minimum service life of such lamps (minimum lifetime), measured using various methods, is 200 and 400 hours, respectively.
Here's how the manufacturer describes these lamps:
Start of quote
COOL BLUE HYPER - crystal white light
OSRAM COOL BLUE HYPER lamp with a color temperature of 5000°K produces a unique white light that will transform any car and make it an object of universal admiration. Increased brightness compared to a conventional lamp allows you to better distinguish markings and road signs, increasing safety.
In addition, being as close to natural light as possible, the OSRAM COOL BLUE HYPER is more comfortable for the eyes and does not lead to driver fatigue.
Features and Benefits
- Stylish, bright white light 5000°K, 15% whiter than standard xenon lamps
- High-contrast lighting of road surfaces, signs and markings
- Light color as close to natural light as possible
- Stylish headlight looks for design-conscious drivers
- Highest OSRAM quality
End of quote
The appearance of the headlight lamps is shown in Fig. 2. The painted bulb of the COOL BLUE HYPER lamp is clearly visible.
Fig.2. Standard headlight (left) and COOL BLUE HYPER
By the way, while the lamps for the headlights were being selected, one of the side light lamps burned out, so these lamps were also replaced at the same time. Instead of W5W side light lamps, LED lamps with a white glow were installed.
Replacing head and side light bulbs
The lamps were replaced independently and did not cause any difficulties. Although the repair instructions recommend removing the air filter when replacing lamps on the right side, in practice it turned out to be enough to remove the air pipe.
In principle, all operations performed when replacing lamps are quite simple.
The headlight cover is removed. To do this, just turn it counterclockwise.
The wiring harness block is disconnected from the lamp.
headlight lamp holder is compressed and rotated and the lamp itself is removed.
The socket assembly with the side light lamp from the headlight. Then the lamp is removed from the socket.
Assembly is carried out in reverse order.
| Do not touch the bulb of a halogen lamp with your fingers. It is better to work in new cotton gloves without rubber inserts on the fingers. Fatty traces on the bulb of a halogen lamp are sintered at high temperatures and reduce the luminous flux. |
You can remove accidentally left grease marks from the bulb of a halogen lamp using a clean cloth moistened with alcohol.
Daewoo Nexia has poor low beam
If you are reading this article, then you are tormented by the question of how to solve the problem of bad light on the Nexia. Yes, the Daewoo Nexia car has a drawback - poor or dim low beam and there are several reasons for this. If your low beam headlights don't shine well, then this article will help you deal with this issue once and for all and you can improve the light on your Nexia yourself.
Why is there bad light on the Nexia? Causes
The first reason is poor-quality headlights. The low quality of Uzbek headlights is one of the main sources of this problem; at first the low beam on the Nexia lights up normally, but as it is used it begins to dim. Because the reflector burns out or becomes cloudy.
The second reason is low voltage. The wires that go to the headlights are very thin, and the low beam also goes directly through the contact group because of this there is a strong loss on the light bulbs.
The third reason is lenses. Nexia lenses in combination with halogen bulbs are not the best pairing. Most cars have lenses if they use xenon bulbs instead of halogen bulbs.
The fourth reason is natural wear and tear. As the car is used, the headlights begin to become cloudy; wiping the headlights dry with a rag will scratch the surface severely, so the headlights will shine worse.
So, we have figured out the reasons, now we need to solve the problem with poor light on the Nexia once and for all. In order to improve the light on Nexia, you can perform a number of manipulations.
Improve headlights on Nexia
Install new headlights. Installing new headlights is a good option if your headlights are completely damaged, for example, with a crack or the reflector has turned black. If everything is fine with them, then try unloading the headlights, that is, installing a relay on the Nexia headlights to improve the voltage on the bulbs, the result will be brighter.
Also, to make the light better, installing xenon in the Nexia will help, then the combination of a lens and xenon lamps will allow you to forget about poor road lighting. If you don’t want to break the law (installing xenon yourself is prohibited in the Russian Federation), then another option will help - install other light bulbs. Yes, there are light bulbs from osram or philips that really improve the light, usually they have special markings on them.
No matter how trivial it may sound, installing additional lighting will help improve lighting. Try installing fog lights if you don't have them or adding external lamps.
If you know another way to improve the headlights on the Daewoo Nexia, then write in the comments below
How to adjust the headlights on a Nexia: a diagram of how to improve the light with your own hands, instructions
Adjusting the headlights of the Daewoo Nexia solves the problem of insufficient illumination at night. The procedure will be the same for different vehicles. The headlights can be adjusted at the service center or on your own; in the second case, complex tools are not needed.
Why do the headlights on Nexia shine poorly?
Adjusting the Nexia n150 headlights improves the quality of lighting in the dark (in the evening, late at night). Incorrect settings, on the contrary, reduce visibility on the roads. If the optics are not positioned correctly and the angle of inclination does not meet the optimal requirements, drivers of other vehicles will be blinded by the scattered light flux. This situation increases the risk of accidents during oncoming traffic. Insufficient operating efficiency of light sources reduces the field of view, and this is also a cause of accidents.
Lamps used on Daewoo Nexia N150 / N100
The Daewoo Nexia car is in great demand in different countries. This middle-class sedan model was built in Germany on the basis of the 1984 Opel Cadet. Its production was in five countries, the cars that were blown up in Russia were assembled in Uzbekistan. In our country, the assembly of large components for the Daewoo Nexia has been established. But in 1997, it was decided to stop production assembly, and after that all production was carried out in Uzbekistan.
This model was restyled in 2008, the front and rear headlights were updated. Also, the modified bumpers began to look more current. After restyling, the interior of the car became more modern; it began to resemble the interior of an old cadet less. Depending on the configuration, the car was equipped with air conditioning and power steering.
But to reduce the cost, cars could be produced without electric windows and with unpainted bumpers. Nexia had two engines, eight valve and sixteen, after restyling these same engines became a little more powerful.
With rare exceptions, 4-speed automatic transmissions were installed on the cars, but most cars were equipped with a 5-speed manual transmission.
The Daewoo Nexia has always been an affordable car, so in order to save time and money, the owners of this car will find it very useful to have information about the lamps used for it and information about replacing them. With the restyling, changes affected both low and high beam lamps. We will tell you about all types of lamps used on this car, and also consider their power.
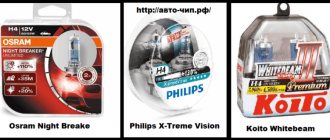
We can also recommend lamps for low and high beam headlights from such manufacturers as: Osram Night Breaker, Philips X-Treme Vision, Koito Whitebeam osram philips koito lamps
The article on our website, size of wipers for Daewoo Nexia n150, will be useful
Nexia n100 lamps
1 Low and high beam lamp - H4 halogen lamp; power 60/55 watts. Cylindrical in shape, with three electrical contacts. Has two filaments.
2 Front fog lamp - H3 halogen lamp with a power of 55 watts. A small lamp with one wire at the end.
3 Reversing and turn signal lamp - single-pin incandescent lamp PY21W, 21 watt power.
4 Taillight and brake signal lamp - two-pin incandescent lamp with a metal base P21/5W, power 21/5 watts.
5 The lamp for the interior lighting, glove compartment lighting and trunk lighting is a C10W lamp, 10 watts. Cylindrical in shape, 30 mm long, with two metal contacts at the edges.
7 The center console backlight lamp is a small single-pin lamp W1.2W, 1.2 watts.
8 The instrument cluster illumination lamp is a small single-pin W3W lamp with a power of 3 watts.
Lamps for Daewoo Nexia n150
Lamps for the front headlight of Daewoo Nexia N150
Headlight Nexia n150
1 Front turn lamp - yellow single-pin incandescent lamp PY21W, 21 watts.
2 Low beam lamp - H7 halogen lamp power 55 watts. Cylindrical in shape, with two contacts.
3 The front lamp is a small single-pin W5W lamp with a power of 5 watts.
4 High beam lamp - halogen lamp H1; power 55 watts. Lamp H1 is smaller. A small glass cylinder at the end where the filament is located.
5 The lamp in the fog lamp is a H11 halogen lamp. L-shaped, two-contact lamp, 55 watts with a plastic base.
Tail light bulbs for Daewoo Nexia N150
Rear light Nexia n150
1 Brake signal and side light lamp - two-pin incandescent lamp with a metal base P21/5W, power 21/5 watts.
2 Turn signal lamp - yellow single-pin incandescent lamp PY21W, 21 watts.
3 Reversing lamp - single-pin incandescent lamp PY21W, 21 watt.
4 Rear fog light lamp - single-pin incandescent lamp PY21W, 21 watts.
Replacing the low beam lamp on Nexia
Since the headlight unit on the updated model has become larger in shape and replacing the low beam lamp has become more difficult, we will tell you how to do it as quickly as possible.
You need to remove the air intake
Replacing the Nexia n150 lampReplacing the Nexia n150 lamp
Next, you need to unscrew the plastic cap covering the lamp
Replacing the Nexia n150 lamp
Then remove the electrical connector from the lamp
Replacing the Nexia n150 lamp
Then you need to remove the metal spring holding the lamp and pull out the lamp itself. Assembly is carried out in reverse order.
Replacing Daewoo Nexia lamps
Drivers of Daewoo Nexia cars quite often change the headlights on their cars. They pursue different goals. Some are for tuning their car, others are for practical purposes, so that it shines better at night, and others are out of necessity. The need lies in the fact that, for example, the contacts of one of the headlights have become loose and it simply does not shine, or it has been involved in an accident.
To do this, you need to at least take out the headlight and disassemble it. This article will describe in detail how to correctly and effortlessly remove headlights on the Daewoo Nexia N100 and Daewoo Nexia N150.
The fact is that the fastening of these parts on these two models differ significantly. On the first Nexia, replacing the headlights is very simple, you don’t need to crawl anywhere, all the bolts and fasteners are in an accessible place for a screwdriver and your hands.
With Nexia N150 the matter is much more difficult.
If one of the bulbs, for example, high beams or turn signals, has burned out, then do not rush to remove the entire headlight unit on the Nexia N100. Detailed instructions on how to remove and install new lamps without removing the headlight unit:
- Turn the plastic cover counterclockwise and remove it from the headlamp
- Disconnect the electrical connector from the lamp
- Unclip the spring clip securing the lamp
- Carefully remove the lamp
- Install the new lamp in reverse order
Unfortunately, this instruction is only suitable for Nexia first models. In the second one, you won’t be able to dig into it like that. There is, perhaps, an opportunity to remove the lamps without removing the headlight only on the right side, after first removing the air filter housing. On the left side, everything is much worse.
It is very difficult to get to the left headlight unit in the right way; this is exactly the case when it is easier to remove the entire headlight unit, because in addition to the battery, the Daewoo Nexia N150 also has an engine control unit (ECU) next to the headlight unit. Therefore, on this model, lamps can only be replaced when the headlight unit is removed.
If, nevertheless, you decide to change the lamps without removing the headlights on the Daewoo Nexia 2, here are the detailed instructions:
But, again, it is best to raise the headlights themselves on this model. Usually, to remove this part, you need to remove the bumper, too, since one of the headlight mounting bolts is located behind it. But we will offer a method that allows you to remove the headlight without removing the bumper, although this will require a couple of tools that not everyone has. Detailed instructions:
- First, unscrew the accessible headlight mounting bolts;
- Next, you need to find an extension screwdriver attachment, which looks like a cable in a plastic sheath, or a wrench;
- We push the knob into the crack between the headlight and the bumper. We put a 10mm socket on the knob and unscrew the hidden mount for the headlamp. To avoid scratching the bumper cover, place sheets of paper in the gap;
- We shake the headlight, remove it, and then disconnect the plug.
Replacing lamps on the rear headlights of Daewoo Nexia
Fortunately, the rear of the car has not changed much in terms of optics, and therefore you should not have any problems replacing the rear headlights. This operation will take no more than an hour to complete. If you have steady hands and a lot of desire, you can do it in 20 minutes. Detailed instructions:
- So, first you need to place the car on a level surface and open the trunk;
- Now you need to disconnect the negative (-) terminal wire on the battery;
- Unscrew the two plastic wing nuts securing the rear light protection (in the trunk);
- Pull the tab to remove the 4 pistons securing the rear light protection;
- Remove the rear light protection fabric itself;
- Squeeze the two fasteners securing the light bulb holder;
- Remove the lamp holder by pressing lightly and then turning it counterclockwise;
- Install new lamps. Be sure to install only lamps of the same power as specified in the vehicle's operating instructions;
- Inside the headlight unit you can change the lamps for the side lights, direction indicators, lights when engaging reverse gear and brake lights;
- The parts are assembled in the reverse order from disassembly.
As you can see, to remove lamps it is not always necessary to remove the headlights themselves, although sometimes this is simply necessary. Replacing both front and rear lamps will take you no more than half an hour. I hope this article was useful to you.
How to replace halogen lamps with LED lamps
The answer to the question whether it is possible to install LED lamps instead of halogen lamps is, from a technical point of view, positive. The replacement process is identical regardless of type. To do this you need:
- Remove the protective cover from the headlight.
- Disconnect the light source power connector.
- Remove the halogen lamp from its seat.
- Install the LED lamp in its original place.
- Connect the power connector.
- Install the protective cover on the headlight.
Replacing lamps is not difficult; you can do without specialists.
As you can see, the procedure for replacing lamps is simple. The motorist can handle this process on his own. To do this, you do not have to resort to the help of specialists from the bus station.
Uneven tire tread wear - causes and consequences
Published: March 31, 2019 Spread the love
Spread the love Uneven tire wearContents1 Uneven tire wear1.1 Wear of the middle part of the tread1.2 Wear of the tire along the edges1.2.1 Tearing of the tread rubber1.2.2 Deformation of the tire tread1.2.3 Wear of car tires during braking Tire wear during operation is a natural phenomenon. A warning sign should be uneven tire tread wear, which could be a sign of serious suspension failure or deformation. What are the symptoms...
Uneven tire tread wear - causes and consequences Read more »
Replacing windshield wiper blades for Renault Logan 2
Published: 12/12/2017
Spread the love
Spread the love Replacing windshield wipers Renault Logan 2Contents1 Replacing windshield wipers Renault Logan 21.0.1 Size of windshield wipers Renault Logan 21.1 Windshield wiper diagram Renault Logan1.2 Replacing windshield wiper blades Logan 21.2.1 We are in VK and Fb Windshield wipers are installed on all cars, including Renault Logan. Their job is to remove moisture and dirt from the windshield...
Replacing windshield wiper blades for Renault Logan 2 Read more »
