How to identify electrical problems in a car?
The first step is to understand whether your car really has power problems. There are two groups of problems in this regard; roughly, all problems can be divided into problems during startup and strange operation of the electrical network after starting the engine. It is important to distinguish this because different modules are involved in these processes. It’s worth figuring out what symptoms of the car you should look for if the electrical network is not working well after starting the engine:
The problem is that a car owner can easily get used to many such manifestations. And in this case there will be no surprises. You can get used to dim light, poor airflow and other troubles. But in general, this mode of operation is very harmful to your car. Sudden failure of the fuel pump, climate system, poor operation of the automatic transmission and other components is possible.
Failure of the control relay
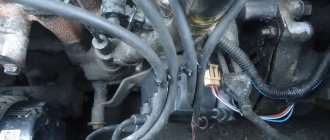
If during the check it turns out that the load on the on-board network is normal, and the generator itself is fully operational, then you should pay close attention to the VAZ 2114 generator relay. Failure of this device very often leads to problems with the mains voltage and lack of charging to the battery. In order to check the functionality of the relay (which, by the way, is located on the back of the generator and is painted black) you will need a multimeter.
The check itself is performed as follows:
- Set the tester to voltmeter mode.
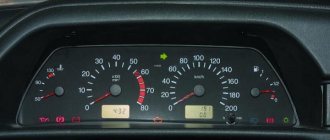
- Measure the voltage at the battery outputs with the engine not running - it should be between 12.5 and 13 volts.
- Start the engine and re-measure the voltage on the battery - now it should be around 14 volts, and sometimes even a little more.
- Turn on the consumers (for example, high beam) and measure the voltage at the battery for the third time. It should now be less than 13.2V, and ideally around 13.9V.
You can also check the functionality of the removed relay.
This is done like this:
- connect the negative of the relay to the negative of the battery;
- We connect outputs B and B of the relay to the battery positive;
- We connect a 3 Watt light bulb to the brushes installed in the relay block using wires. If it lights up, then the relay is working properly.
If during the test it turns out that the relay is faulty, it should be replaced.
The whole procedure is performed as follows:
- Disconnect the terminals from the battery.
- Unscrew terminals 10 with a wrench and remove the positive wires going to the generator.
- Pull off the “chip” with a thin wire.
- Remove the back cover of the generator by unbending the 3 clips.
- Remove the 2 screws holding the relay.
- Unplug the plug from the relay and remove it.
- Install the new relay in the same order, but in reverse order.
This option for removing the relay is the most convenient, although in some cases it can be removed together with the generator. How it will be more convenient to carry out this procedure in each specific situation is up to the driver to decide.
Main reasons
The charging indicator informs the driver about its operation. If the circuit is working properly, it lights up when the ignition is turned on and goes out when the engine is running, since the voltage at terminal D and the battery become approximately equal.
Damage to every part of the circuit is the reason why the battery does not charge. The defect can be either electrical or mechanical. For example:
To restore normal operation of the circuit, these elements should be checked.
Fuse
We have already mentioned that the culprit may be a blown fuse that protects the charging circuit from short circuits and power surges. On the VAZ-2114 this is the F16 PP, which is responsible for all the light indicators on the dashboard. Solving the problem, as you understand, does not require high qualifications.
Break of "zero"
A break or short circuit in the neutral wire, like any other section of the wiring in the generator-battery circuit, can also cause the battery to not charge. So if the battery icon is lit on the instrument panel of a VAZ-2114, and checking fuse F16 did not give any results, make sure that the wiring is intact through a visual inspection, or even better, by testing it. As in the previous case, high qualifications from the performer are not required to perform this operation.
Weight
Lack of normal contact with ground is another common reason for the low battery warning light to come on. The contact may simply weaken due to vibration, and rust, which is a dielectric, may form on it, so when inspecting the condition of the wiring, be sure to evaluate the contact group as well. The problem is eliminated by stripping and tightening the connection, which can also be done using a simple plumbing tool.
Oxidation of contacts
Since we are already talking about wiring, it should be noted that not only wire contacts can oxidize - battery terminals are no less susceptible to this, even though they are lead. The reason here is obvious - if the battery is removed quite often (for example, for charging), then when installing it in its original place, drivers do not always tighten the contact clamp as expected. As a result, moisture accumulates in the cracks, which leads to rapid oxidation. Regardless of where the contacts have oxidized, they must be cleaned with sandpaper, and if it is missing, with a knife or even a flat screwdriver, but the highest quality and most effective way to get rid of corrosion is a special liquid WD-40.
Egnition lock
So far we have looked at causes related solely to wiring problems. The ignition switch is also a link in the electrical circuit between the battery and the generator. So simple wear and tear of the ignition switch is another reason why the battery indicator lights up on the instrument panel of the VAZ-2114. But, unlike previous cases, diagnosing this breakdown is much more difficult.
Problems with the generator
The second group of faults that cause the battery sensor to light up is related to the operation of the generator itself.
It is he who is responsible for supplying electricity to all consumers, while part of the generated electricity goes to recharging the battery.
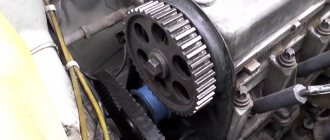
The most common reason leading to undercharging of the battery is a weakening of the belt tension, as a result of which it begins to slip. The efficiency of the generator decreases, regardless of the engine speed. The problem is solved by tightening the belt, and if defects are detected, by replacing it.
In second place you can put brush wear. Checking their sizes requires the appropriate skills, not to mention replacing them, so this operation cannot always be performed independently.
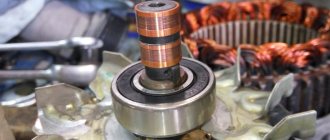
Wear of the generator bearings can also cause a drop in its output power and a constant undercharging of the battery. Typically, this malfunction is indicated by the appearance of extraneous sounds in the area where the generator is located. Replacing bearings requires dismantling this unit.
But a broken winding is more difficult to detect, and this problem will most likely require replacement of the generator.
Voltage regulator
The battery is charged while the car is moving, not constantly, but as needed. The voltage regulator is responsible for controlling the charge level, and if it breaks down, either an increased current will be supplied to the battery, which can lead to boiling of the electrolyte and rapid wear of the battery, or charging will not occur at all.
So if the fuel-injected VAZ-2114 is not charging the battery, you should make sure that the relay regulator is working properly.
The battery does not hold a charge
Finally, a constant light or flashing of the indicator may be a consequence of the poor condition of the battery itself, which, due to old age, is simply not able to hold a charge. In this case, the voltage at its terminals will not rise above the level that is perceived as normal.
As you can see, the lack of battery charge can occur for various reasons, not all of which can be identified quickly and eliminated just as quickly. In any case, ignoring a malfunction signal can result in complete failure of the battery, even a relatively new one. Considering the high cost of car batteries, this scenario can hardly be called desirable.
Do-it-yourself troubleshooting
It is better to start diagnosing VAZ 2114 cars with the most accessible and simple causes of possible problems. It is necessary to adjust the tension of the drive belt and ensure that its brush mechanism is in good condition (including the general condition of the holder).
Tighten the fastenings of the power wires. Concerns about dismantling the entire assembly and revising it should be carried out after all previous options did not produce results.
As in the previous case, you need to start from a simple case to a complex one:
- checking the status of the regulator;
- Make sure once again that there is less than 14.6 V on a cold engine;
- turn off the engine, disconnect the battery terminals;
- disconnect all electrical wiring from the unit being repaired;
- remove the plastic protection of the electrical contact unit;
- remove the wiring block and unscrew the 2 mounting screws;
- remove the regulator;
- make sure that the brushes and brush holder are in good condition, otherwise replace them;
- Using a battery, a 12 V light bulb and 2 AA batteries, check the functionality of the tablet. By applying alternately 12 V and then 15 V, make sure that the light on the brushes is on;
- otherwise, replace the “tablet” with a similar model;
- checking and replacing the diode bridge (horseshoe), for this purpose it is better to remove the generator from the car;
- Using a spanner or socket wrench, unscrew the 3rd fastening nuts and the 2nd hooks securing the spacer bushings;
- disconnect the supply wires (soldering) and remove the “horseshoe”;
- in this state, you can check the suitability of all 6 power and 3 additional diodes, if you have a multimeter and certain electrician skills;
- replace faulty diodes or purchase a new unit entirely;
- at the same time you can check the windings of the generator itself for breakdown;
- replacing it without removing the protection;
- choose the right tool - various 13 mm wrenches. and 10 mm, socket heads sizes 13,17 and 19 with ratchet, lever (mount);
- disconnect the battery;
- loosen the excessive tension on the drive belt, remove it along with the adjustment unit;
- remove the battery connection wire;
- Using a “13” head, unscrew both bolts securing the adjusting bracket to the car block, one of them is longer than the other;
- after that, turning the generator clockwise, you can remove its axis of attachment to the bracket;
- You should not miss the opportunity to check the condition of the front bearing assembly;
Having thus removed the electrical installation, you can begin to solve all both mechanical and electrical problems associated with the performance of this unit. However, it should be assumed that if replacing the “tablet” and adjusting the tension belt are operations quite accessible to the average car enthusiast, then it is still better to do the manipulations in specialized car services.
The generator and its environment are sources of electricity sags
Network sags are often associated with the generator and its operation. Theoretically, after turning on the power unit, the battery goes to rest and is even recharged from the generator. All tasks for providing power supply are taken over by this small device. There are a certain number of problems that should always be taken into account when you have such problems. The issue of a non-working generator can be resolved by troubleshooting the following problems:
But this is just a suggested list of problems with the generator. The consequence of this problem will be a constantly loaded battery. Also, if there is no current of 14.1 Volts from the generator, the battery will not be able to charge. Therefore, you should measure all voltages in the network using a conventional tester to find out the real state of affairs. Even in the most expensive and elite car, such a breakdown can drive the owner crazy with various manifestations of problems.
A drop or too low voltage on the on-board network can be due to various reasons. Before increasing the network voltage from 5 to 12 Volts, you need to make sure that the car generator is functioning normally. If the energy loss is due to improper operation, then it is necessary to dismantle and repair the device, replacing the failed mechanisms with new ones.
Generator Basics
Electricity is generated under the influence of a magnetic field. It is produced by two main parts found in any generator:
- stator;
- rotor.
The latter is a movable element consisting of a core made of steel tips. On them, in turn, windings are strung.
The stator is a ring assembled from steel plates. There is also a coil of fairly thick copper wire inside. All of these elements are hidden in the case. Bearings are responsible for the smooth rotation of the rotor. Besides them, there is also:
- pulley;
- diode bridge;
- impellers;
- voltage regulator.
Wires, non-original connections, low-quality devices
The issue of poor-quality connection of on-board network consumers is worth considering in more detail. If you installed the radio in your car yourself, taking power from the wrong place, the problem of battery drain and load on all vital organs will be very relevant. It is better to exclude handicraft interference in the electrical power system altogether. If something needs to be delivered, contact the station and do it efficiently. The following problems of increased load on the system are possible:
In fact, all such details are examined only at a professional station, otherwise it will be impossible to get an answer to the question. If you are familiar with electricity, then with the help of a tester you can determine for yourself exactly where the drawdown is occurring. After this, through trial and error, you can find the element that is responsible for the drawdown. But keep in mind that experiments in this area may not end well for your car.
Malfunctions
The following signs indicate that there is a problem with the generator:
- the loud noise it makes;
- The battery light installed on the panel is brighter than usual;
- The lighting in the car is too bright;
- Electrical appliances do not turn on when the battery indicator goes out.
A hum or noise from the generator indicates that the bearings have become unusable. Most often, failure occurs in the front. You should not use a machine with such a malfunction - if the generator jams, then, most likely, it will completely lose its functionality. New ones, as you know, are not cheap.
Bright lighting of the lights (even when the engine is turned off) indicates that the limit voltage in the network has been exceeded.
Power loss in the battery - main indicators and reasons
We have already talked about the reasons for a dead battery today. This is a poorly functioning generator that does not charge the battery. It is also worth paying attention to the age of the battery in the car. Often the time just comes for her. You can also notice that constant loads in the network can involve the battery, which will certainly drain it. When operating a car with a dead battery, the following problems will be visible:
It is recommended to quickly respond to such manifestations of drawdowns in the on-board network, since otherwise you will have to deal with completely different troubles. It is important to realize this, because otherwise you will have to very unpleasantly repair the car and invest very large sums of money into it. This will definitely damage the car and make it a really expensive pleasure for you. Troubleshooting such problems can be very expensive. You can check the generator malfunction in the following order, as in the following video:
On-board network voltage drop. — logbook Lada 2114 Nimble girlfriend 2011 on DRIVE2
We arrived at the core from which everything needs to start in the electrical part. People on the network are changing the wires of the starter, generator, and engine grounding to thicker ones. To begin with, I began to think about whether such thick wires were needed and the question of choosing the correct cross-section of the wire. While searching I came across this page www.drive2.ru/l/4062246863888649299/
Here with this table. Thanks to the author and I will keep it as a souvenir.
The most powerful wire in the on-board network goes to the starter according to plan. About half a meter. In fact, it turns out that according to the table, about 5 squares should be enough. We proceed from starting currents in winter to cold. When the consumed currents can jump at the moment of start according to the passport up to 500A (in fact, I think up to 700A), and when the engine spins up it will already begin to fall to values of approximately 180A. but people put 25 squares. Let's say in this link www.drive2.ru/l/2520980/. Let's begin to understand the reason. A thicker cable gives a greater amount of current passing. After rummaging through the sites a little, I came across this link kavr.ru/car/120103/. It seems to be explained clearly enough even for a teapot. After rummaging around the net, I found out that there may be 2 positions of the starter relay. Under the steering wheel cover and in the area of the left foot on the bulkhead. I haven’t decided yet whether it’s worth throwing a thicker cable to it. In any case, I think you can throw one wire from the starter to the battery, and think about the second on the spot. It’s not for nothing that the batteries are placed so close to the starter. In addition to the power wires, you need to scatter all sorts of wires to ground. Of course, weight on the body is not the best solution, but for now it will do.
Second question. When installing the terminals and connections directly, you must remember that the contacts will need a good conductive lubricant. At the contact points there are very large losses of electricity due to the banal heating of the connection. I lubricated the nine with lithol. Then I switched to copper grease, but after surfing the sites I now found options like www.12vi.ru/778/776/978/5303.html
This is the very first one I came across. I ordered it for myself, but it wasn’t in stock. We will search further
In this link autoflit.ru/937-chem-smaz...h-sredstv-i-sposobov.html, in principle, there are more options for every taste. In addition, we can name the German Molykote HSC Plus lubricant. According to people's reviews, it is a very good thing. It has both excellent conductivity and fights rust, has excellent heat resistance (oilmart.ru/product/elektr…-molykote-hsc-plus-100-g/). Of course, the terminals are initially treated to remove oxides. We also carefully process the body and joints. At home you will need to address this issue as well.
Let's sum it up
It is better to always monitor the behavior of your car. If there are problems with the battery or generator, you will have to immediately begin restoring the vehicle. Otherwise, you will soon be faced with the fact that the car simply will not be able to drive normally and will constantly provide you with unpleasant moments. Using completely understandable and long-existing methods, you can get the necessary range of services at a service station without much difficulty. But it is not recommended to fix any electrical problems yourself.
However, you can yourself, using a tester and other devices, measure all the necessary data on the on-board network, find the place of the drawdown and try to replace the element that is stealing voltage. The only problem is that to do this you need to have at least some skills in working with electricity. Also, it all depends on the level of your car, its degree of protection against artisanal interference. If a VAZ can be repaired using simple instructions, then it is better not to get into modern BMWs without an auto electrician’s diploma and constant practice. Have you ever had problems with the on-board electrical system?
The vast majority of car owners have had to deal with such phenomena as underestimation of the on-board network and its so-called jumps (“sagging”) during their practice of driving and maintaining a car. Most often, cars belonging to the category of products of the domestic automobile industry are subject to such troubles, starting from its classic representatives - VAZ-2106 and ending with more modern modifications - VAZ-2110, VAZ211 and VAZ 2112.
What could be the reason
Modern cars have two sources of electricity. This is, first of all, the car’s generator and its indispensable companion (the initiator of its labor exploits) – the battery.
Working in pairs, they represent an automatic power plant in miniature. Such a station supplies energy to all consumers of the vehicle.
Can they work independently? They can, but with limited capabilities:
- generator (model 94.3701) - before the first shutdown of the engine, after starting from an external source;
- Battery - for about an hour. Without powerful consumers;
- it is possible completely without this duet - on a tow truck;
- but they should not work with malfunctions. More precisely, they can, but with unpredictable consequences. This will already be a roulette with all sorts of accidents, which are, as the basic law of an auto mechanic says, an unknown pattern.
The spark plugs break, the voltage in the network jumps...
Car FF 1, 1999, 1.8 zetec This is the problem. The voltage in the network is constantly jumping, I don’t know what to do. This started about a week and a half ago, the lights on the dashboard started blinking, the voltage began to jump, the low beam lights were blinking, the battery was not charging well. The last time this happened, it turned out after diagnostics and full digging in the car (no errors were given), that it was all due to broken spark plugs, which I was extremely surprised by. They showed me these candles with broken ceramic bodies and showed me on a machine, installed others - immediately all the jumps stopped and everything returned to normal. At that time I only had Boshev spark plugs, so I drove it for months and didn’t have any problems. Now, too, I immediately began to sin on candles, because I was immediately warned that they were not very good. While I was driving, I stopped at the store and they picked out candles for my wine (as they told me) and gave me, it said Ford on the box? supposedly the original, plus a postscript next to Beru Z177 (I looked around the forum - it turned out that this is for 1.6 engines, although they assured me that it was for mine, what is the difference and what does this entail, I don’t know, maybe someone can tell me, I will be grateful). Everything returned to normal and became good, but this lasted for several days, then the same thing started again. I unscrewed the spark plugs - again one was pierced through the ceramic body, but I didn’t remember which cylinder, I decided that they had slipped them. I ordered 2 spark plugs marked beru z177, I think I’ll change one, let the second one lie around in reserve, the price is inexpensive. They arrived, picked them up, they look different in appearance, even though the box says the same thing. In the end, I left 2 old ones and installed 2 new ones. As the tension jumped, it remained jumping, nothing has changed. I ordered 2 more pieces, I think I need to put all four the same. Yesterday I picked it up, started changing it, at the same time I think I’ll unscrew the ones that are already there and look at them to see what their condition is. And again one is broken. What nonsense, in a week and a half there were 2 broken candles. What could it be, what could it be made of? I did the generator at the end of January, changed the relay with brushes, the brushes were worn out to nothing, and the contacts were already rotten. It started working only after you knocked on it, and then that stopped working. The coil - I don’t even know, the car doesn’t seem to be tripping, when you disconnect each wire from the spark plug in turn, it starts to trip. The only thing is one wire, the cat turned out to be broken on that candle yesterday, it’s not original. they changed it, the rest are the same, I don’t know if it’s family or not. Moreover, because of all this, there are failures in movement, the car does not move, does not accelerate normally, jerks, does not pick up speed normally. Only after 2500 rpm does it start to move a little, and then at fifth speed it jerks. when you start to speed up. The voltage jumps in the network even at idle, without turning on the devices, from 13.6 to 13.8, sometimes it jumps less. And if you press the gas pedal, it generally drops down to 12. And naturally, in this situation, it does not charge, but everything is drawn out of it, I charge it periodically. When charging, all the jars boil evenly, nothing like this is visible. The battery is old, I don’t know when it was changed, I’ve had the car for a little over 1.5 years, during which time I’ve done 62 thousand, the total mileage is 215 thousand. I think I’ve described everything, if you have any questions or need to clarify something, write . People, tell me what to do, at least something to change, what to pay attention to. You need to travel a total of 2000 km, but I don’t know what to do, and I can’t do it without a car.
Source
Step-by-step procedure for checking the generator
- Turn on the ignition and make sure that all the dashboard lights are on.
- We start the car, and if the generator is operating normally, the battery warning light should go out.
- We wait until the car warms up to its standard operating temperature of 90 °C.
- When it warms up, it is necessary to load the network as much as possible. To do this, we turn on everything that is in the car, including heated mirrors, lights, music, etc.
- We take a pre-prepared multimeter and set it to the “voltage” check mode.
- Next, we call an assistant and ask him to keep the engine speed at idle (within 3500 - approx.).
- Using a multimeter, we connect its probes to the battery, and at the moment when all consumers are turned on, the readings should not fall below - 13-13.2 V.
If the readings are lower at such engine speeds, this will indicate that the generator is not producing the required amount of energy. And when they are normal, we continue testing with switched off consumers at the same speed. In this case, the multimeter readings should be about 14.5-14.7 V.
Checking the voltage supplied by the generator
After diagnosing the battery, we go directly to the generator using the same multimeter.
- When the car is started, we connect the probes to its terminals, and the voltage should be at least 14-14.3 Volts.
- Next, as the speed increases, we monitor the instrument readings, where the values should not change by more than 0.5 volts. If this is not observed, this will mean that the generator and voltage regulator are functioning correctly.
There is an excess of overvoltage in the network.
Now, having reliable information about how many volts the generator should produce, you will know for sure whether it is working or not. And if the readings differ slightly from the norm, then first of all you should pay attention to the malfunctions described below.
Other causes of non-charging or poor battery charging
If, when trying to charge a dead battery from a charger, the car owner does not get the desired result, or the charging was not complete within a certain time, and the above tips did not help, then your actions will depend on the specific situation. Let's consider each case in detail.
In a discharged battery, the electrolyte density does not correspond to the norm
Proceed in the following sequence.
It is better to wash the cans by an experienced specialist to prevent short-circuiting of the positive and negative electrodes.
Short circuit in plates
Difficulties with charging from the charger can occur when the plates short-circuit, which occurs when they fall off. In this case, lead particles settle to the bottom and come into contact with the lower ends of the electrodes.
Another possible problem is wear of the separators, in which case the positive and negative electrodes come into contact and a short circuit occurs. In addition, the positive and negative electrodes can become deformed for various reasons and short out the circuit.
If the battery design allows, the banks are repaired. Otherwise, the power supply must be replaced.
Sulfation of battery plates
The phenomenon when a white coating covers the electrodes is called sulfation. It appears if the battery has not been recharged for a long time, the water has evaporated, and the density of the electrolyte has increased. As a result, it is possible that the battery is not fully charged.
The battery may not take a charge even if the seal of the case is broken. If its integrity is violated, distilled water evaporates and the density of the electrolyte increases, with all the ensuing consequences. What to do in this case? To identify a possible defect, if it is minor, it is possible to restore the tightness by gluing or soldering with plastic. Restoring the integrity of the case is carried out without electrolyte, with a dry container.
It is possible to keep your car battery in working condition without it reaching the point where it won’t take a charge if you strictly follow the rules in the owner’s manual. Requires periodic recharging and keeping it clean.
A car battery not charging is a common problem faced by many drivers. Novice motorists, as a rule, get rid of such a power source and allocate funds for a new device. Additional costs can be prevented by identifying the true cause of the discharge.
Voltage drops in VAZ and other cars
Significant drops in on-board voltage entail a whole range of problems that many car enthusiasts have encountered. This includes undercharging of the battery, interference with the audio system, dim lighting, and even blinking of the device in time with peak loads. There are several reasons for voltage drops that are so noticeable even to the naked eye. The most common of them are discussed in this material.
Primary signs of on-board voltage sag
In the most advanced cases, a drop in on-board voltage can be noticed without any measuring instruments. The primary signs of this defect include the following symptoms:
- chronic undercharging of the battery;
- audio system sound clipping;
- dim headlights;
- dashboard flashing during peak loads;
- floating engine speed.
For normal charging of the battery from the generator while driving, the voltage in the on-board network must be maintained at about 14.4 V. If due to drawdowns it is less, then the battery is never fully charged, may fail during a cold start of the engine, and also deteriorates as a result of sulfation of the lead plates.
Clipping is a type of sound distortion that occurs when the amplifier's output voltage exceeds the supply voltage. Most often it manifests itself in the form of wheezing from the speakers when the volume is turned up.
Problems with the generator
The battery does not charge from the generator due to a number of reasons. In order to quickly identify these problems, you need to know their characteristics.
Belt problems
If the generator does not charge, then the problem may lie in the integrity of the belt. Even an inexperienced car owner will detect serious damage. It is more difficult to determine its weakening. Indeed, in this case, the generators either provide charging or not.
To identify problems with the belt, look at the indicators and lights. They glow almost constantly. To eliminate this, tighten the belts or completely replace them.
Faulty diodes, regulators, brushes
The generator does not charge the battery if faulty diodes are included. Such elements are identified using multimeters or testers. It is possible to replace one diode or the entire bridge. Incorrectly functioning elements cause the battery to be poorly charged or recharged.
When the power supply is overcharged, the diodes, which are operating normally, heat up. Voltage surges result from the use of an ineffective regulator. It is replaced immediately.
Poor charge occurs because the brushes that make up the generator wear out. If the replacement is not made, the generator does not charge the power source.
Polarity reversal
If the battery of a laptop or vehicle is completely discharged, perform a polarity reversal. If done correctly, the power supply will charge. Polarity reversal can be performed if changes in the poles can be observed. Otherwise, the charging unit should not be connected.
When determining pole reversals, you should focus on the capacity of the cans that are included in lead-acid batteries, but not other sources. For recharging, use only those chargers that are equipped with protective elements.
Polarity reversal is not performed if:
Overload
Why does the battery receive a charge, but the voltage does not increase? The main reason is generator overload. This is caused by the connection of standard and non-standard electrical equipment, various gadgets and installations. In this case, the generator operates at the limit.
Such difficulties arise for new car enthusiasts. After all, they use a variety of units and devices, acoustic systems, and lighting equipment for tuning. Sometimes car batteries are upgraded by increasing the power level of the power sources. Therefore, the output voltage does not “cover” all costs.
Other reasons
Why won't the generator charge? This occurs due to rapid wear of the rotor, which does not perform rotational movements and gets stuck in the stator. The rotor stop frequency varies. The only way to cope with this problem is to dismantle the old installation and install a new unit that works normally.
A breakdown in the circuit is an equally common problem due to which the car battery does not take charge from the electric generator. It is problematic to independently identify why the generator stopped functioning. Car mechanics and workshop workers are involved in this event.
The generator does not produce rated voltage
When determining why the battery is not charging, specialists constantly disassemble the generator. These steps allow you to identify the following faults:
The damaged pulley is replaced. To identify such a defect, this element is periodically inspected. Abrasion of current collecting brushes. During active use of vehicles and car batteries, current collection brushes are periodically replaced. When selecting elements, they are guided by the manufacturers’ recommendations. Wear of slip rings. Copper components lose integrity and properties. This results in a reduction in the rated voltage. As a result, the generator does not produce a charge. Violation of the integrity of the diode bridge. Damaged diodes are soldered or pressed in
Why do power surges occur in the network and how to deal with them?
You are here: Electricity is used everywhere. And it doesn’t matter where a person lives - in a private house or in an apartment - electricity is used regularly. For example, this is room lighting, the use of various electrical appliances and everything that makes a person’s life so much easier. But, unfortunately, the network is not always able to withstand an even voltage.
This has a bad effect on the operation of electrical equipment, sometimes even leading to their breakdown. Power line surges are a sharp and instantaneous increase or decrease in voltage. This phenomenon significantly reduces the service life of household appliances, so it is important to know how to protect yourself from it.
In this article we will tell you what to do if you constantly experience power surges in your apartment or private house.
Causes of fluctuations
Why do such jumps occur? There are many reasons for this. These may not only be emergency problems. The reason for such jumps can also be natural or man-made. The main ones are:
- Disconnecting several powerful electrical appliances from the network at once. An apartment building uses a huge amount of powerful electronic equipment. If the house has old wiring, it is very dangerous. But these kinds of power surges also happen in new-style houses. This is justified by the fact that the load was not designed for the use of strong devices, taking into account that the electrical network in the new house is old. This happens as follows: when consumers turn on, the electrical network senses a drop in current. If electrical appliances or one powerful device is turned off, sudden surges occur.
- Unstable operation of the transformer substation. Transformer substations, which distribute and transport energy in electrical networks, were usually built a very long time ago. Therefore, the equipment that is installed and used there has a lot of wear and tear. In addition, most transformers, due to the increasing use of electricity, operate under constant overload. As a result of this, unexpected failures occur at substations, and, consequently, voltage drops and surges.
- Electrical network and failures in its operation. All cities and villages in the country are surrounded by a huge number of power lines. Today's world cannot exist without electricity. But the power grid, which was built many years ago, is not improving, but on the contrary, is becoming unusable. This means that accidents, line breaks and short circuits are a completely normal reaction of transmission lines, the consequences of which do not bring anything good. Such accidents lead to consequences such as power surges and surges.
- Zero break or weakened grounding. The parameters of the electrical network may also change due to a zero break. This is one of the most dangerous accidents that causes a large change in the transmission line. As a result, all electrical equipment that is plugged into the outlet burns out. Even the one that doesn’t work, but is simply connected.
VAZ 2115 Checking the charging system
Checking the charging system
1. If you find a malfunction in the charging system, a generator malfunction cannot be the only cause. Perform the following checks:
2. Measure the voltage at the battery terminals with the engine off. It should be about 12 Volts. 3. Connect a voltmeter to the battery poles and start the engine. Increase the speed until stable voltage is established. The voltmeter reading should be between 13.5 and 14.6 Volts. 4. Turn on as many electrical appliances as possible (headlights, heater fan, rear window defroster, etc.) and make sure the voltmeter reads between 13 and 14 volts. The voltage may drop, but should increase again (you may have to increase the engine speed slightly to do this). 5. If the voltage on the voltmeter exceeds the specified values, replace the voltage regulator. 6. If the voltage on the voltmeter is lower than the maximum permissible, then the cause of the malfunction may be worn brushes, weak brush springs, failure of the voltage regulator, burnt diode, break in the winding, as well as faulty commutator rings. The condition of the brushes and rings can be checked, but if nothing changes, the generator must be removed for inspection, repair or replacement.
Low voltage on-board network of VAZ 2114: causes and solutions
Every car breakdown is a very unpleasant situation for any driver. A malfunction such as low on-board voltage on a VAZ 2114 can be a serious test for a person who does not have specific knowledge in the field of electrical engineering. This article will help you understand all the causes of this defect and teach you how to fix the problem yourself.
Possible reasons
On-board voltage on the VAZ 2114 is provided by two energy sources: a generator and a battery.
Working in tandem, they supply the necessary energy to all consumers in the car. The operation of such a miniature electric bus station must be stable and produce approximately 14 V. At full load, a drop of 1 V is allowed, no more. If other indicators are displayed, it may indicate a malfunction.
Let us indicate all the possible reasons for the low voltage of the on-board network on the VAZ 2114:
- Mechanical problems with the generator.
- Installation of additional devices in the car that take electricity (car refrigerator, subwoofer, etc.).
- Incorrectly installed consumers on the network. Even a homemade connected radio can cause a decrease in voltage.
- Poor quality wiring and electrical circuit malfunctions.
When trying to solve a problem with electrical wiring and consumers, it is important to take into account the factory parameters of the vehicle’s electrical network. Otherwise, you will have to spend money on expensive repairs from service station specialists.
Mechanical problems include:
Mechanical problems on-board network
Electrical circuit problems are much more difficult to detect than mechanical problems. You cannot do without special devices, unless you can see a burnt-out terminal or drive.
The most common causes of electrical circuit breakdowns include:
- breakdown of the diode bridge;
- short circuit in the stator winding of the electric motor;
- malfunction in the brush assembly;
- lack of current on the excitation winding;
- violation of the geometry of the slip rings (most often they become clogged with graphite dust);
- rotor runout.
A malfunction in the brush assembly is determined by wear or complete destruction of the brushes.
Troubleshooting yourself
It’s wise to start car repairs by looking for the simplest faults, in our case mechanical damage. You should inspect the drive belt, adjust its tension, and rule out a malfunction of its brush mechanism. You can tighten the fastenings of the power wires. If this work does not bring results and the on-board network voltage on the VAZ 2114 is still low, then you can begin to disassemble the entire assembly and carry out a full diagnosis of it.
Checking the generator winding
The stages of work, as in the first case, should preferably be carried out from simple to complex:
- Check the regulator to see if it is in working condition.
- Check the voltage on a cold motor, it should be no less than 14.5 V.
- Turn off the car engine and disconnect the battery terminals.
- It is imperative to disconnect the electrical wiring from the unit to be repaired.
- Carefully remove the protective cover from the electrical contact unit.
- Remove the wiring block and regulator.
- Check the condition of the brushes and brush holder; if they are faulty, replace them with new ones.
- Make sure the regulator (tablet) is working properly. This can be done using a battery, two regular batteries (finger-type batteries) and one 12 V incandescent lamp. To determine the operating status of the regulator, it is necessary to alternately apply voltage of 12 V and 15 V. The lamp on the brushes should be lit.
- If a regulator malfunction is detected, you must buy a new one and replace it.
- Check the diode bridge. Replace the faulty spare part with a new one by removing the generator from the car.
- If you have minimal knowledge of an electrician and armed with a multimeter, check the functionality of all diodes (six power and three additional). To do this, you need to unscrew the nuts securing the spacer bushings, disconnect the wires and remove the horseshoe.
- Check the generator winding. If a breakdown is detected, it must be replaced.
- Disconnect the battery using the following tools: - pry bar;
- 13 mm and 10 mm keys; — 3 socket heads for 13, 17 and 19 mm. First, you should remove the wire that powers the battery, then use a 13 mm socket to unscrew the 2 bolts that secure the adjustment bracket. After this, turning the generator, you can slowly remove its mounting axis to the bracket. - Be sure to diagnose the performance of the front bearing assembly.
You can get more information from the video below:
Diagnosis
Whether a car battery is charging or not is diagnosed differently on different cars, but usually this is a battery charge monitoring lamp. If it flashes, you should stop and first check the alternator belt.
In any case, in order to carry out the entire range of measures to identify the cause of this malfunction, you should at least get to a garage or a specialized auto repair shop.
If everything is fine with the alternator belt, check the voltage at the battery terminals.
First, we do this with the engine not running, and it is better to completely disconnect the wires from the battery terminals. The voltage should be in the range of 12.5 - 12.7 V.
Then we connect the wires and start the car. We check the voltage, it should be at least 13.5 V, but it’s better if it’s at least 14 V. If it’s less, for example, 13V, add speed and see how the voltage “jumps.”
There are situations when the voltage value, instead of rising, as it should be logically, drops even lower, to a value of 12.7 V, or even lower.
Then you should definitely pay attention to the diode bridge, which is located on the car’s generator in the rectifier unit, which, in turn, is located in the relay regulator. When removing the diode bridge, do not forget to immediately check the generator brushes
Relay regulator VAZ 2105.
Relay regulator bmw.
Be sure to check visually and with the help of instruments for the possibility of a network break in the relay regulator; a network break in the relay regulator can also be the reason for the car battery not charging.
Many people know that diodes should only be wired in one direction; if you don’t know how to wire diodes, contact a specialized workshop.
Diode bridge of the VAZ 2108 car.
Usually, replacing the entire regulator relay solves the problem, but many experienced drivers have learned to get out of this situation on their own by selecting the necessary diodes and replacing the failed ones with them.
Moreover, for some generators it is not so easy to find or select the required relay regulator, especially for those installed on foreign cars.
But you can select diodes with the necessary or at least approximate characteristics. But again, if you have old generators, or old chargers, where such diodes are found.
As a rule, the cause of diode failure is a short circuit.
To properly solder a new diode, you need a good soldering iron with a power of more than 600 W or a gas soldering iron.
These recommendations are not intended to encourage all drivers to begin solving the problem of not charging their car battery in this way.
As practice shows, most drivers with such a problem immediately turn to specialists.
But you should still understand that if the driver at least partially understands the reasons why the car battery is not charging, and treats it in a specialized workshop, things will be completely different.
Also, if you are one of the drivers who like to repair their car themselves, then by replacing the burnt-out diodes with new ones, in the first half hour of engine operation, make sure that they do not burn out. At the same time, take all readings at the battery terminals so that they correspond to the standard indicators, this is 13.5 - 14.5 V with the engine running.
If the diodes do not burn out, it means that their characteristics match your generator, and the repair was successful.
Signs of a generator malfunction
In modern cars, breakdowns of the electrical system are one of the most common. A large number of electronics requires particularly careful monitoring of the operation and condition of the generator and battery, because their failure can immobilize the car. The most common signs of a generator malfunction are:
- battery indicator light on the instrument panel;
- unstable operation of the battery (its boiling over or undercharging);
- different intensity of headlights;
- extraneous sounds from the generator.
If you notice incorrect operation of the car, then perhaps the battery charging current from the generator is insufficient.
All malfunctions of electrical equipment, which includes the vehicle’s energy-generating device, are mechanical (deformation or breakage of fasteners, housing, malfunction of bearings, pressure springs, drive belt, etc.) or electrical (winding breaks, diode bridge malfunctions, burnout or wear of brushes , short circuits between turns, breakdowns, etc.).
Don’t write off a non-working generator: find out if there are repair kits and spare parts. Replace them if possible. If you cannot carry out repair work yourself, then take the generator to a workshop. Many craftsmen will be able to restore the unit at no extra cost and in the shortest possible time.
However, some breakdowns require the purchase of a new device that generates electricity. For example, a failing bearing that is soldered into the generator housing cannot be restored or replaced in most cases.
Remember that failure of this unit can be caused not only by wear and corrosion, but also by poor quality of elements and components; excessive load; external influence of salts, liquids, temperatures.
Generator check
This procedure should be performed in the following sequence:
- the ignition is turned on (all the lights on the panel in the cabin should be on);
- the engine starts (if everything is in order with the generator, the battery indicator goes out);
- after the power plant has warmed up (90 degrees), the network must be loaded to the maximum;
- the assistant needs to ensure that the idle speed is maintained at 3.5 thousand;
- The multimeter is connected to the battery.
Normally, when fully loaded, the readings should not be lower than 13 volts.
If the voltage is less than the specified limit, the generator does not produce enough electricity.
When no problems are noticed, the measurement is carried out after the load is completely disconnected. Here the normal data is from 14.5 to 14.7 volts.
Features of using the unit 94.3701 on the VAZ 2114
- The electric unit must not be allowed to operate with the battery disconnected. This causes voltage surges with possible damage to generator components and vehicle systems.
- Make sure that the plus of the battery is always connected to the terminal of the electrical unit, and the minus to ground. If you mix up the contacts, a stronger current will flow through the diodes and they will suffer a breakdown.
- Under no circumstances should you test a car electrical unit for a “spark”; the diodes will instantly break due to a surge in electricity. It is necessary to check only with the help of special meters or on a stand.
- The valves cannot be controlled with a voltage greater than 12 V or with a megger, this may lead to a short circuit.
- The car's electrical wiring should only be checked with a megger or voltage greater than 12 V with the electrical unit turned off.
- If it is necessary to electrically weld components or body parts, it is imperative to disconnect the wires from all terminals and connection points of the electric generator and battery.