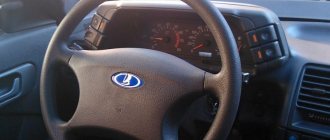
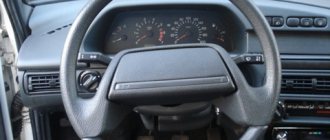
The VAZ 2114 and VAZ 2115 cars are part of the Lada Samara family. Their steering wheels are not distinguished by elegant lines and ease of use, especially on early models. There can be no question of any aesthetic pleasure here. It's not surprising that many owners of these cars are tempted to replace the steering wheel with a better designed part. But how to choose a suitable steering wheel, and is it possible to remove and install it yourself? Let's figure it out together.
How to replace a steering wheel
The whole process is divided into several stages:
- Preparatory:
- Disconnect the battery by removing the negative terminal. If this is not done, a signal will sound when unscrewing the central nut with a screwdriver.
Remove the negative terminal of the battery
- Remove the ignition key from the lock.
- Lightly turn the steering wheel to lock the steering column.
- Place two marks: one on the steering wheel, the other on the dashboard so that they coincide in direction.
- Withdrawal.
- Installation.
Dismantling
To remove the steering wheel on a VAZ-2113, 2114, 2115 car, you need to:
- Using a flat-head screwdriver, pry off the plastic trim that is installed on the steering wheel cover. It is enough to press the latches. Act carefully so as not to break.
Removing the decorative trim
- Use a Phillips screwdriver to remove the two screws.
Unscrew the screws securing the steering wheel cover
- Remove the cover.
Remove the cover
- Place the socket head 24 on the knob and release the central nut.
Release the central nut
Attention! For safety reasons, it is recommended not to completely unscrew the nut so that it does not injure the driver when removing it.
- Holding the steering wheel with your hands and rocking it to the sides, remove it from the central shaft.
Removing the steering wheel
- It happens that it is not possible to immediately disassemble the steering wheel. A hammer and a drift come to the rescue. Place a piece of metal against the end of the central shaft, then use sharp and gentle blows of a hammer on the drift to move the steering wheel.
Removing the steering wheel from the center shaft using a hammer
Note! Help from a second person will be helpful. The process will speed up if an assistant pulls the steering wheel towards you at the moment of impact.
Installation
After removing the old steering wheel, you need to install a new part.
To install the steering wheel, you must:
- transfer the mark marked on the removable sample to the new copy;
- place the steering wheel on the central shaft so that the marks match;
Installing a new steering wheel according to the marks
- tighten the nut.
Tighten the nut
When choosing a product, you must carefully look at the compliance of the purchased item with the requirements of the manufacturer.
Replacement procedure
Replacing steering wheels will require not only your hands, but also a couple more to help. So, agree in advance with a friend that he will help you solve the problem of faulty steering.
In addition to a helper and new slats, you will also need a set of tools and materials. Be sure to include in this list:
- Set of wrenches;
- Jack;
- 17mm hex wrench;
- Balloon wrench;
- Bricks or similar materials (to support the front of the car without wheels);
- Puller for steering rods (not necessarily needed, you can do without it);
- Dry rags;
- Litol type lubricant;
- The almighty WD40.
Now you can proceed directly to replacing the steering racks. We strongly recommend that you follow the established procedure for conducting operations.
- Place the car on a level surface. No, a simple floor in your garage is enough, it is not necessary to level it with cement.
- Apply the parking brake to keep the car from moving.
- Raise the car on a jack, place logs or bricks under the front, and then remove the wheels.
- Remove the negative cable from your battery for safety reasons. Nobody needs electric shocks today.
- On the driver's side inside the passenger compartment, near the pedal block, unscrew the locking fastening bolt of the cardan of your steering shaft.
- Remove the adsorber directly from the engine compartment. You can put it aside for now.
- Remove the cotter pins, which will allow you to then remove the mounting nuts from the tie rod ends.
- Using a rod puller, the ends are removed from the racks. If for some reason the puller is missing, it can be replaced by gentle, successive blows to the tips. Don't damage their threads just by doing this. They usually lend themselves, so many people do without pullers.
- Treat the rack clamp fixing nuts with an anti-rust agent. Now we are talking about the almighty WD40. Wait a while for the composition to be absorbed.
- Using a wrench, unscrew the fastening nuts. Processing with a Vedash should greatly simplify this task for you. There are four nuts in total.
- Remove the rack by pushing it through the passenger side, that is, the right side of your VAZ 2114.
- We recommend replacing the boot at the same time as replacing the racks. Over time and during the period of operation, the steering boots seriously wear out, so it is hardly worth trusting old boots to work with new racks.
- The tips are removed from the slats. At the same time, try to count the number of turns with which the nuts were tightened. This will allow you to fasten them back as close to precision as possible at the reassembly stage and, with peace of mind, go to the service station, where they will adjust the wheel alignment.
- Take your new rail, remove the plugs from it.
- Next, take Litol or a similar lubricating liquid into your hands and fill the body with this composition as much as possible.
- The ends are mounted back onto the rods. Try not to mix up the places of the nodes, although they are different from each other. However, as practice shows, this does not prevent many do-it-yourself repairmen from confusing them.
- The new rail is placed in its rightful place. To do this, the nuts are attached to the studs of the clamps.
- Now you will need your friend, comrade, assistant. Ask him to help guide the shaft drive gear to the seat located directly on the rack housing. The splines must line up exactly. Be sure to check this moment.
- A locking bolt is fixed on the cardan.
- You can safely perform all other work in the reverse order of the dismantling described above. In this case, each thread must be treated with Litol. This event will allow you to more easily deal with disassembling the elements during subsequent repairs. Or it will be a pleasant surprise for the new owner of your VAZ 2114.
Obviously, replacing steering racks yourself is not the most difficult task, but it must be done clearly, consistently and accurately.
Loading …
What kind of steering wheel can I install?
There are many options for steering wheels that can be installed on the VAZ-2113, 2114, 2115. The main thing is to choose the right mount for the central shaft.
When choosing a steering wheel, you should pay attention to:
- dimension, shape;
- type of fastening, product material;
- additional features that can be connected.
Sports models
Tuning enthusiasts want to make their car as individual as possible, and therefore they rush to install decorative trims on it, change body kits and bumpers, and attach steering wheels from famous brands of racing cars. The result is a fashionable car that attracts the attention of passers-by. By reducing the diameter of the steering wheel, the maneuverability of the car increases, there is enough space inside the car for a comfortable fit.
Example of a sports steering wheel model
However, installing a sports steering wheel has its disadvantages:
- the design does not include an airbag;
- For fastening, special clamps or adapters are required.
Adapter for mounting a sports steering wheel
Important! If you want to install a sports steering wheel, you can contact the sales points of such parts. Experts will tell you which product should be installed on a specific car.
Steering wheels from other VAZ car models
For models 2113, 2114, 2115, copies from more modern representatives of the domestic ones, Kalina, Grant, are suitable. They are more convenient and have an aesthetically attractive appearance. Installation of such products requires replacing the steering column column. The “steering wheel” from model 2110 fits perfectly.
What you should know when choosing a steering wheel
When changing the steering wheel on VAZ-2114 and 2115 cars, you need to select a similar product with an identical contact group. The diameter of the control element affects the quality of vehicle control. The smaller the size, the more effort required when driving.
Choosing the right steering wheel is not an easy task. In cases with non-original products, the installation process may take some time, taking into account the selection of appropriate components. It all depends on the desires and capabilities of the car owner himself.
Welcome! Steering wheel - many people change it to replace it with a new one, more beautiful or more convenient, but sometimes there are also people who change the standard steering wheel to a sports version, it’s up to you to decide whether to do this or not, but in a good frontal collision there will be a greater chance of squeezing in a car that has a factory injury-safe steering wheel, not a sports jelly, in addition, the size of the steering wheel also plays a very important role, so when buying a new steering wheel at a car store, pay attention to the size (the larger it is, the easier it will be for you to turn the steering wheel but if it’s too big, it won’t be comfortable for you), and also look at its thickness (with a steering wheel that’s too thin, your hands can slip off during a sharp turn, and turning such a steering wheel will be less convenient).
Note! In order to change the steering wheel, you will need to stock up on: Screwdrivers, as well as an extension or a wrench, you will need to put on a socket head of size “24”, thanks to this head you will be able to unscrew the central nut securing the steering wheel to which without an extension and You can’t really get to the collar, so you obviously can’t do without them; in addition, take a hammer and a special drift made of soft metal for the same central steering wheel mounting nut!
When should you change your steering wheel? At your discretion, but we will give you a couple of tips, if you decide to change the standard steering wheel to a sports one, we do not recommend that you do this, firstly, as was said earlier, sports steering wheels are stiffer compared to standard factory ones, and even technical inspection You may not even be able to get through with such a steering wheel, so think for yourself whether you need it or not, in fact, it is best to install a standard one, which was originally installed from the factory, but the latest cars of the Samara 2 family were equipped with injury-safe steering wheels from the VAZ 2110, think about installing them or change it to the native one from Samara 2.
Note! The steering wheel has a metal part of which it is attached to the shaft with a nut, this metal part can be deformed if you pull the steering wheel hard and try to somehow break it (Don’t think that it is impossible to break it on a car), then most likely this part will be deformed and after this it will become much more difficult and inconvenient for you to turn the steering wheel, in general, when you encounter this, you will immediately understand that in the video at the very end of the article, by the way, the metal part at the steering wheel is also broken!
Note! Do not forget that the signal of the car is an electrical part, so if you do not remove the negative terminal from the battery, then when you unscrew the central nut of the steering wheel using a metal head, the car will beep and to prevent this from happening, remove the terminal at the beginning, on how to do this, read the article: “Replacing the battery on a car” read point 1, in addition, remove the key from the ignition and turn the steering wheel all the way until it locks! (Also use a marker to place a mark on the steering wheel itself when it is in the locked position, and also install one on the instrument panel so that the marks are opposite each other)
Removal: 1) At the very beginning of the operation, use a screwdriver to pry up the trim that runs along the entire long steering wheel cover and then disconnect it, this trim, as you can see in the photo below, is attached to plastic holders, so it will not be difficult for you to disconnect it, but just be careful not break it, otherwise you will have to buy a new one, although you will most likely have it on the new steering wheel.
2) Now, using a Phillips screwdriver, unscrew the two central screws that secure the steering wheel cover, and when these screws are unscrewed, remove the cover.
3) Then, using an extension or a wrench with a cap on it, unscrew the same central nut (Indicated by the red arrow) that secures the steering wheel to the shaft, but you don’t need to unscrew this nut all the way, otherwise when you pull the steering wheel off the shaft, this nut will inertia will fly towards you and injure you in the end, so unscrew it only a few turns and then grab the steering wheel with your hands and rocking it, remove it from the shaft on which it sits, and then unscrew the nut all the way and calmly remove it without any effort steering wheel from a car.
Note! In the event that it sits dead, then take a hammer and a drift made of soft metal, in addition, stock up on an assistant (It will just be difficult without him), your actions: Hit the hammer made of soft metal with a hammer, this drift should be directed towards you and is pressed against the end of the steering shaft along it, then you will need to carry out the beating using a drift, and at this time let the assistant pull the steering wheel towards himself trying to pull it off the steering shaft!
Installation: If your new steering wheel is exactly the same as the previous one, you need to install it as follows: first, transfer the mark from the old steering wheel to the new one, then install the new steering wheel in its place so that the mark on the steering wheel and on the instrument panel match , in addition, screw the central nut of the steering wheel fastening by hand, or push it into the head, but so that it does not fall out of the head, insert something between the head and the nut, for example, as shown in the photo below, the strands from the wire can be inserted.
Note! If you choose the option with inserting wire strands, then in this case, too, you will only need to screw the nut, when it is pressed slightly onto the steering shaft, remove the wire strands from the coupling head and then completely tighten the steering wheel fastening nut, if after all done operations, the steering wheel is crooked, then perform all the operations again!
Something else we didn’t tell you is that if you need to change the contact ring of the horn (Usually, when it fails, the car’s signal stops working), then it is attached to only three screws by unscrewing which you can easily remove it, but when you be careful when pulling on it, there’s just a wire terminal connected to it from the bottom, you’ll see it right away, you’ll also need to disconnect it from the slip ring!
Sources
- vaz-russia.com/remont-vaz-2113/zamena-rulevogo-kolesa-vaz-2113-vaz-2114-vaz-2115.html
- vaz-2114-lada.ru/2021/01/kak-pomenyat-rul/
- remontvazov.com/rul-kak-snyat-zamena
- drive2.ru/l/288230376152689495/
- vazweb.ru/desyatka/upravlenie/kak-snyat-i-zamenit-rulevoe-koleso-na-vaz-2114-i-2115-svoimi-rukami.html
- zen.yandex.ru/media/avtovaz/vajno-pri-sniatii-rulia-vaz-2110-2111-2112-2113-2114-5ac861a88c8be3993481c7e2
Welcome! Steering wheel - many people change it to replace it with a new one, more beautiful or more convenient, but sometimes there are also people who change the standard steering wheel to a sports version, it’s up to you to decide whether to do this or not, but in a good frontal collision there will be a greater chance of squeezing in a car that has a factory injury-safe steering wheel, not a sports jelly, in addition, the size of the steering wheel also plays a very important role, so when buying a new steering wheel at a car store, pay attention to the size (the larger it is, the easier it will be for you to turn the steering wheel but if it’s too big, it won’t be comfortable for you), and also look at its thickness (with a steering wheel that’s too thin, your hands can slip off during a sharp turn, and turning such a steering wheel will be less convenient).
Note! In order to change the steering wheel, you will need to stock up on: Screwdrivers, as well as an extension or a wrench, you will need to put on a socket head of size “24”, thanks to this head you will be able to unscrew the central nut securing the steering wheel to which without an extension and You can’t really get to the collar, so you obviously can’t do without them; in addition, take a hammer and a special drift made of soft metal for the same central steering wheel mounting nut!
Summary:
When should you change your steering wheel? At your discretion, but we will give you a couple of tips, if you decide to change the standard steering wheel to a sports one, we do not recommend that you do this, firstly, as was said earlier, sports steering wheels are stiffer compared to standard factory ones, and even technical inspection You may not even be able to get through with such a steering wheel, so think for yourself whether you need it or not, in fact, it is best to install a standard one, which was originally installed from the factory, but the latest cars of the Samara 2 family were equipped with injury-safe steering wheels from the VAZ 2110, think about installing them or change it to the native one from Samara 2.
Note! The steering wheel has a metal part of which it is attached to the shaft with a nut, this metal part can be deformed if you pull the steering wheel hard and try to somehow break it (Don’t think that it is impossible to break it on a car), then most likely this part will be deformed and after this it will become much more difficult and inconvenient for you to turn the steering wheel, in general, when you encounter this, you will immediately understand that in the video at the very end of the article, by the way, the metal part at the steering wheel is also broken!
Symptoms of a problem
The first enemy of VAZ 2114 tips is dirt. They are a hinged element, so breaking the integrity of the boot causes solid particles to enter the mechanism. Due to friction, increased wear of the part and destruction of moving elements occurs.
The second “killer” is bad roads. Constant impacts from driving over bumps have an extremely bad effect on the condition of the part: the hinge wears out and vertical play occurs.
Defective parts must be replaced immediately.
People often ask what signs indicate that a tip needs to be changed. It is easy to check their condition. Turn the wheel all the way in one direction and carefully remove dirt from the boot. If breaks are visible or the rubber is cracked over time, the part needs to be replaced. Repeat the operation for the second wheel.
Even if there are no visible integrity problems, insert a pry bar between the rod and the steering knuckle and try to move them relative to each other. There should be no vertical play. If it is present, the part needs to be replaced.
Recommendations based on your search history
Replacing the steering rack repair kit for a VAZ 2112 – Duration: 14:46
- 2 years ago
- 654,093 views
EUR for VAZ 2114 installation, connection, all the nuances and improvements, the path to luxury 2️⃣1️⃣1️⃣4️⃣ – Duration: 39:51
- 8 months ago
- 166
Repair and modification of the VAZ 2109 steering rack – Duration: 8:27
- 1 year ago
- 279
How to remove the steering wheel on a VAZ 2110-2112: 3 important points – Duration: 13:20
- 4 years ago
- 103,091 views
Mirrors from grants for VAZ 2113, 2114, 2115 detailed installation part 1 – Duration: 15:19
- 1 year ago
- 262,804 views
Steering rack repair for Lada 2108 – Duration: 17:20
- 5 years ago
- 171
The gearshift lever is loose. How to quickly repair? – Duration: 7:02
- 2 years ago
- 845
Euro hazard warning button (WITHOUT RELAY) for VAZ 2114, 2113, 2115 // Garage Tver – Duration: 8:10
- 2 years ago
- 122
Changing the color of the backlight of the VAZ 2114 dashboard, how to do it yourself correctly and where to solder it - Duration: 16:00
- 3 years ago
- 1 368
VESTA STEERING STEERING ON A VAZ 2110 / THE VIEW IS STUNNING – Duration: 22:45
- 1 year ago
- 57
how to install a Vesta steering wheel on a VAZ 2110 with your own hands without modifications, the result is stunning
Source: web.archive.org
Installation instructions
When installing an electric power steering, it is necessary to take into account that it will be necessary to replace the steering column of the VAZ 2114 with an “electrically driven column”. To do this, let's start with the wiring. You will need to deal with the pads. There will be no need for any “twists”. There is a terminal in the block that we need to remove and insert into the block in the harness.
We insert the free terminal of the harness exactly into the place where the standard wire was. You don't need a special harness for this. Connect two 4 square wires to the battery. Don't forget to connect a 50A fuse. The “weak point” will connect to the tachometer, speed sensor, ground, K-line and wiring to the warning lamp. Don't forget to check the presence of speedometer and tachometer signals.
- Remove the casing with switches and ignition switch.
- Unscrew the bolt on the rail and remove it. We need to determine how much larger the “native” part is than our new one.
- We install the shaft on the EUR. After this we attach the shaft itself in its place.
- Setting up the wiring. We stretch two cables to the battery from the passenger compartment, preferably through the left wing. To conduct wiring you can:
- First remove the washer fluid reservoir.
- Take a solid wire and drag it through, trying to get to the hood.
- As soon as it appears near the hood, we attach our wires to it.
We pull it out together with our wire.
- We connect the EUR electronics. There is a red connector under the instrument panel with an orange wire in it. It is to this that you need to connect the electric amplifier.
- Similar procedures must be done with the gray wire.
- We connect the power ends. In the battery we connect the pink one is a plus, and the black one is a minus.
The installation is now complete. If you did everything carefully according to the instructions, you will enjoy the ease of driving the VAZ 2114.
We check the steering rack on a VAZ-2114 with our own hands
Original steering rack made by AvtoVAZ
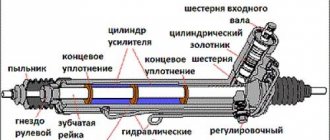
Before proceeding directly to the verification process, you need to know the design features of the steering rack. Let's look at what elements it consists of:
Steering rack device
1 – protective cap; 2 – steering gear housing; 3 – rack; 4 – drive gear; 5 – inner tie rod end; 6 – spacer sleeve; 7 – tie rod mounting bolt; 8 – connecting plate; 9 – support sleeve; 10 – steering gear support; 11 – rack support sleeve; 12 – protective cover; 13 – clamp; 14 – rack restrictive ring; 15 – sealing ring of the rack stop; 16 – nut; 17 – rack stop; 18 – roller bearing; 19 – ball bearing; 20 – retaining ring; 21 – nut sealing ring; 22 – gear bearing fastening nut; 23 – boot; 24 – lock washer
General steering diagram, including racks
Checking the rack
So, to check the steering rack you need to measure the gaps in it.
This can be done either on a removed mechanism (which is even better) or directly on the car. Now let's move on to the process:
Set the mechanism to the middle position. It can be determined by its dimensions - (87±0.25) mm from the gear axis to the rack end. Using a special device, we load the unit to a force P = 500 ± 20 N (51 ± 2 kgf). The distance from the gear axis should be – 84 mm.
The maximum permissible movement of the rack “X”, measured through the relative movement of the pressure punch 1, should not exceed 0.12 mm. After assembly, the torque of the gear in the area of the rack stroke should be in the range of 50–200 N·cm (5.1–20.4 kgf·cm) at a rotation speed of 30 min-1.
Steering rack test diagram
Reasons for failure
When the issue of rack adjustment has been sorted out, you can consider the reasons for its failure:
- Wear. Each car mechanism has its own running life.
- Due to uneven roads, the pressure on the rack is significantly increased.
- Inadmissible acceleration when the wheels are in the extreme position.
- Mechanical damage caused during operation.
Symptoms of failure
Diagnostics of knocks in the rack showed that the bushing was loose.
How can you actually determine that the rail is already on the verge? For this there are direct and indirect indicators. So, let's look at the main ones:
- A knock is the first indicator that the rack needs to be repaired or replaced.
- Biting the steering wheel when turning to one side.
- Steering play to the right or left.
- Vibration when driving on a flat road.
- The camber angle is broken.
When is it time to replace the rack?
Since the steering is involved in driving the car, and is directly responsible for the safety of not only those in the car itself, but also pedestrians outside, it is recommended to diagnose and repair this unit in a timely manner.
So, there are several options for troubleshooting the VAZ-2114 steering rack:
- Adjustment (detected during on-line diagnostics).
- Repair (possible cheap option for restoring the unit).
- Replacement (when it is not possible or advisable to repair the unit).
Checking the presence of grease on the rack and pinion teeth. If there is no lubrication, the teeth will break off.
If the service life is more than 100 thousand km without repair, it is usually recommended to replace the unit. because, as practice shows, repair kits do not save the situation, and after 5-10 thousand km the rack will knock again or leak.
The VAZ-2114 steering rack must be checked regularly. It is recommended to do this operation with in-line maintenance.
If a car enthusiast is not able to determine the malfunction, then you should not skimp and contact a car service, because not only the life of the driver, but also those around him depends on it.
Experienced car enthusiast. I have an automotive education, namely: an engine repair mechanic. At the beginning of my career there was a VAZ-2107, then a BMW 5-series, a Toyota Supra and a right-hand drive MARK-2. Now the family has 2 cars: Peugeot 407 and Dodge Challenger 2016. I study each car from “A” to “Z”. I have a lot of experience and try to repair everything with my own hands.
You can make payment in one of the ways convenient for you:
- To a SberBank or Alfa-Bank card. The most profitable method for the buyer, as well as the most convenient one, is to use the Sberbank Online service, Alfa-Click, an ATM, or through an operator at the bank. After placing your order, the manager will send you the card details. If you do not have a SberBank or Alfa-Bank card, you can also top up your card using the details at any SberBank or Alfa-Bank branch. Payment is credited within an hour.
- Yandex money. Customers who have Yandex.Wallet can quickly and easily pay for an order in our online store, the commission will be 0%.
- Yandex.Checkout is an online payment acceptance service. A convenient option with a large selection of payment methods for your order: plastic cards of any banks, including credit cards, in cash through terminals, ATMs or phone shops, Qiwi Wallet, Yandex.Money, WebMoney, from your phone balance, purchase on credit (payment in installments) . Please carefully check which email address you provided during the ordering process, as you will receive a receipt for payment for your order. Yandex.Checkout commission for transfer will range from 3% to 6% .
- QIWI wallet. If it is more convenient for the client to use a QIWI wallet or, if it is not available, to pay through the nearest QIWI terminal, the manager will provide you with the wallet number. Commission 0%.
- Payment at any bank using an invoice or receipt (+3% to the cost). If you do not use electronic wallets and plastic cards, we provide the opportunity to make payments at any bank in Russia. The site manager will send you a pre-filled receipt “Form No. PD-4” by e-mail; please carefully check the e-mail address you provide. The bank commission will be approximately 3% and depends on the bank itself
- Cash on delivery upon delivery by the Transport Company (payment for purchase upon receipt of the order).
- Cash on delivery upon delivery by Russian Post (payment for purchase upon receipt of the order). The order arrives at the post office, after which you pay its cost and pick it up, in which case the Russian Post charges a commission.
Delivery by transport company (cash on delivery, no prepayment)
Advantages:
- the cost of delivery of heavy and large-sized orders is much cheaper than that of Russian Post;
- There are practically no restrictions on the weight and dimensions of cargo;
- There is a wooden crate service - this is an additional guarantee of the integrity of the order.
Disadvantages: unfortunately, there are branches only in cities.
The estimated cost of delivery for an order up to 30 kg is 450 rubles.
List of transport companies with which we cooperate:
- TC "PEK" (cash on delivery service available);
- TC "Business Lines";
- TC "Energia";
- TC "KASHALOT" (KIT) (cash on delivery service available);
- TC "SDEK" (cash on delivery service available);
- TC "DPD";
- TC "ZhelDorExpedition";
- TC "VOZOVOZ";
- TC "Baikal-Service".
To send your order by transport company:
- Place an order in our online store by phone or on the website (registration is not necessary);
- After we receive it, our manager will contact you by phone to clarify the cost, delivery time and your wishes. Next, we will pack your order carefully and then send it to you;
- You will receive a shipment tracking number from us via SMS or email (if available). You can monitor the status of the order coming to you using our tracking service, as well as independently, on the transport company’s website using the track number. After the order reaches your locality and the manager of the transport company contacts you, you need to receive the order at their office or order home delivery;
- Upon receipt from the transport company, you pay the cost of delivery and order.
The cost of delivery is calculated based on the volume, weight of the selected product and the distance from the city of Tolyatti.
To send an order you must:
- indicate full name recipient;
- Your locality and region;
- series, number of passport or driver's license;
- Your phone number (contact).
TC "Business Lines" - Urgent delivery of goods from 1 kg throughout Russia. The exact cost can be found on the official website of the delivery service - https://www.dellin.ru
Delivery time and cost Track the parcel View the list of branches
TC "PEK" - Guaranteed safety of cargo for the entire duration of cargo transportation, clear information support, delivery of goods throughout almost the entire territory of Russia, Belarus and Kazakhstan in optimal terms and accurately calculated cost of services. The exact cost can be found on the official website of the delivery service https://pecom.ru/ru/calc
Delivery time and cost Track the parcel View the list of branches
TC "SDEK" - Low tariffs compared to foreign courier companies, while the quality of the services provided meets modern international logistics requirements. Developed network of own representative offices. The exact cost can be found on the official website of the delivery service https://www.cdek.ru/calculator.html
Delivery time and cost Track the parcel View the list of branches
TC "ZhelDorExpedition" - Serves only large cities and towns. The exact cost can be found on the official website of the delivery service - https://www.jde.ru/branch
Delivery time and cost Track the parcel View the list of branches
TC "Energia" - Cargo transportation in Russia, CIS and China. The exact cost can be found on the official website of the delivery service https://nrg-tk.ru
Delivery time and cost Track the parcel View the list of branches
TC "KASHALOT" (KIT) - Delivery of cargo from 1 kg to 20 tons throughout Russia and Kazakhstan. The exact cost can be found on the official website of the delivery service https://tk-kit.ru/calculate
Delivery time and cost Track the parcel View the list of branches
TC "Baikal-Service" - Transportation and delivery of consolidated cargo by road across Russia. The exact cost can be found on the official website of the delivery service https://www.baikalsr.ru
Delivery time and cost Track the parcel View the list of branches
TC "DPD" - Transportation and delivery of groupage cargo by road in Russia. The exact cost can be found on the official website of the delivery service https://www.dpd.ru
Delivery time and cost Track the parcel View the list of branches
TC "VOZOVOZ" - Transportation of groupage cargo by regular delivery routes between Russian cities. The exact cost can be found on the official website of the delivery service https://vozovoz.ru
Delivery time and cost Track the parcel View the list of branches
Peculiarities
VAZ 2114 cars have many innovations compared to 2109, in particular, this concerns electrical wiring.
Whether injector or carburetor, 2114 is in:
- vehicle interior;
- in the engine compartment;
- behind the car body.
It should be noted that carburetor VAZ 2114 were produced only from 1997 to 2000, then they were equipped with carburetors from the VAZ 2108.
But new engines have a more powerful ignition system; accordingly, the electrical control circuit is also characterized by certain features, for example:
- A new harness has appeared for connecting to the terminal. This component sends signals to the spark plugs through high-voltage wires.
- Another harness was added to allow mounting of the switch.
- Additional wiring has appeared to connect the adsorber valve to the injection system controller.
Wiring and equipment diagram 2114
Many VAZ 2114 car owners mistakenly believe that thanks to the ignition module, they don’t have to use a coil. In fact, this device is equipped with two coils and two switches. One of the coils transmits the signal to the first and fourth cylinders, and the second - to the second and third.
The equipment system of VAZ 2114 cars with an injector engine has undergone certain innovations not only due to the addition of new electrical equipment, but also as a result of modernization of the car as a whole:
- it is possible to mount the device;
- you can connect the system;
- VAZ 2114 car owners can install PTF, etc.
Engine compartment
So that a VAZ 2114 with an injector engine can operate on a lean combustible mixture, the car is equipped with:
- forced gasoline injection system into each individual cylinder;
- connecting an improved ignition system characterized by higher power;
- added ECM - injection engine control system.
BC display on a car dashboard
As is known, to ignite a lean combustible mixture there must be a more powerful spark transmitted through high-voltage explosive wires. A spark is transmitted through the explosives of the VAZ 2114 injector when the piston is located at top dead center. This control scheme was implemented thanks to the installation of the module.
The operating principle of the device is as follows:
- a generator is used to generate alternating electric current;
- the current passes to the control unit, where it is converted into direct current;
- further, the current flows to the windings of the coils in accordance with the control circuit;
- the secondary winding begins to generate high voltage for transmission through high-voltage explosive wires;
- then, through the same high-voltage explosive wires, the voltage passes to the spark plugs.
Salon
As for the interior, the manufacturer replaced the center console in the VAZ 2114, which has certain differences:
- there is no longer a glove compartment in the upper part, it is installed lower;
- was produced;
- an on-board computer appeared in the VAZ 2114.
Diagnostics of resistance with a multimeter
As a result of such changes and the replacement of old elements with new ones in the VAZ 2114 engine, the injector has changed and:
- another harness appeared for connecting the on-board computer;
- a sensor for monitoring the temperature level outside the window has been added, which is mounted in front of the radiator;
- A voltmeter relay has been added.
In addition, another block of wires was added to the control circuit to control the power windows.
