There are so many drivers, so many opinions, some like the sound of a foreign car door closing, others are more accustomed to the metallic clanging sound.
So I also decided to try replacing the door locks with low-noise ones, and just to try, I took a pair only for the front doors.
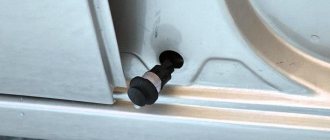
By the way, the additional caps (apparently the anthers) did not fit on these locks, I need to look for bolts of a hidden version, my relatives have a cap that sticks out too much.
I arrived in the garage and started creating. I already had low-noise hinge bolts before, but a regular lock successfully ruined them.
I started by replacing these bolts.
Well, everything is simple here - unscrew the old ones, screw in the new ones. Next I took on the locks themselves.
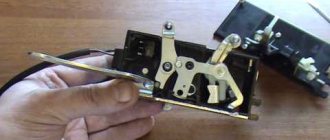
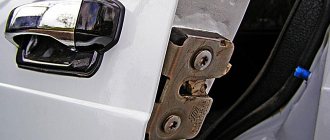
Stock lock
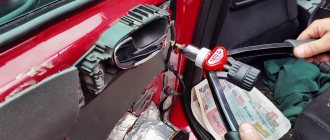
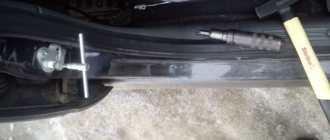
Armed with a large flathead screwdriver, I loosened both bolts. Ideally, you need an impact screwdriver with the right bit (in my case, a six-pointed star), but you can get by with a handy one if you are not afraid of tearing off the slots. Having unscrewed the top bolt ALMOST completely, I unscrewed the bottom one and turned the lock on the top one.
Then I screwed the bottom bolt back in, unscrewed the top one and removed the lock. I installed the new one in the reverse order, first threading the top bolt through the lock, then the bottom one.
Then I simply tightened both of them not all the way so that I could adjust the position of the lock. When I finished adjusting, I tightened both properly.
I don’t know if this is always the case (perhaps it depends on the manufacturer), but new locks had to be pre-lubricated and developed.
Having finished with the right door and being glad that everything worked out quickly and simply, I started working on the left one. There my first disappointment awaited me - I could not unscrew the bolts and had to go to the nearest service center, where they helped me.
Returning to the garage, I continued what I had started, but then a second disappointment came to me - the rod flew out of the external Euro handle (I was not careful and paid). And in the end I got this.
By the way, I installed and removed the casing three times, one thing was wrong, then another. I was pleased with the “bugs” - they withstood everything and did not deteriorate. Remembering the “kind” words of domestic engineers and designers, I assembled the door and decided to please myself with a small interior detail that had been lying around for about three years.
Door lock device on the VAZ 2115 model
The picture shows the front door - (2); (1) — inner door handle; (3) — internal drive rod connecting the internal handle to the lock; (4) - lock button; (5) - External door handle; (6) — handle button; (7) - lock cylinder; (8) — rubber seal for the handle; (9) — locking button rod; (10) — rod serving the external drive; (11)—leash disabling lock; (12) — leash pull; (13) — lock lock pin; (14) — latch lock body; (15) - part of the lock from the outside; (16) - part of the lock from the inside; (17) — electric drive traction; (18) - electric drive.
Correct adjustment of locks
To make the adjustment correctly, you need to know the action plan step by step:
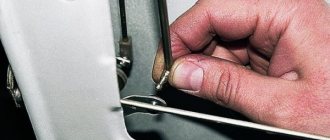
- Lighten the tension of the bolts that secure the door lock.
- It will be good if you use a pencil to mark the contours of the retainer on the body pillar.
- The direction of shift of the latch is based on the situation: if the door closes too tightly, then it is moved outward, inward - if the door closes weakly.
- Vertical regulation occurs according to a simple relationship: if the door goes down, then the latch needs to be moved up, if the door goes up, then the latch needs to be released.
Reasons for replacing the lock cylinder on a VAZ
Most often, the lock cylinder in the doors of VAZ-2113, 2114 and 2115 has to be changed in the following cases:
- In case of defects or breakages of the locking ring or fixing post. Both of these parts are located in a plastic rod cap and are easily destroyed under the influence of an aggressive external environment - during large temperature changes, in the cold season, etc. The problem is often discovered when a car owner tries to open the car in cold weather. The key starts to turn, but the mechanism does not work. If the cylinder is additionally loaded at this moment (for example, by pressing the door, knocking on it, pushing or pulling), the part will come out of the handle socket.
- When worn. During the operation of the car, the internal pins of the device wear out and when you try to turn the key in the cylinder, the parts begin to cling to each other, which ultimately leads to their destruction.
- If the car owner decides to upgrade the door handles or install European locks.
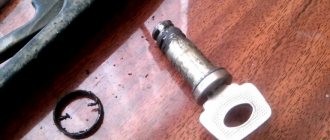
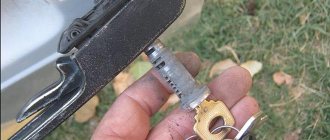
Old castle larva
Causes of failures
There are several types of faults that prevent the VAZ-2109 doors from opening from the outside or from both sides:
- The external key, made of silumin, was torn. This happens when you try to open a door in extreme cold using a lot of force. Breakage is not considered a big problem because the sheet can be opened using the handle inside.
- Broken silumin pusher, triggered by the opening button. The reasons are the same: low temperature outside and a strong shock. In this situation, the door can also be unlocked from inside the car.
- The pull has disappeared, which connects the handles with the locking mechanism. The door cannot be unlocked from any direction.
- Worn parts of the locking device.
- The screws for securing the lock are loose and it is hanging freely inside the door card
. It is impossible to open the door using the handles.
The last malfunction sometimes occurs due to the fault of the car owner himself, who decided to change or repair the door lock. By inserting it into place and not completely screwing it in, the owner of the VAZ-2109 accidentally slams the door, after which it cannot be opened with the handle.
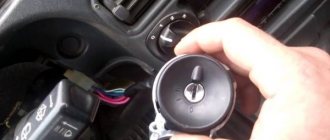
How to remove the internal door lock
Replacing the internal door lock cylinder of VAZ-2114 and 2113 can be done quickly and efficiently even outside the service station. Those who decided to replace the device with the 2115 model should take into account that the body of the “tag” is slightly different from the 14 and 13 models.
To work you will need:
- Anti-corrosion aerosol WD-40.
- Open-end wrench set to "8".
- Phillips and flathead screwdrivers.
- A set of new cylinders and springs (sold separately).
Before changing the part, you will have to disassemble the door to remove the old mechanism.
Important! If there are bolts/nuts that cannot be loosened or are rusted, you should treat them with WD-40 40 minutes before removal.
Anti-corrosion spray WD-40
Experienced car enthusiasts recommend recording the entire process on your phone. It makes sense to take step-by-step photographs of disassembling the door: this will help you quickly and without loss put it back together when the new cylinder is installed.
Disassembly process:
- You need to unscrew the three screws located at the bottom of the door trim. A Phillips screwdriver will help.
Unscrew the screws at the bottom of the door trim
- After removing the cover, you need to remove the trigger glass switch, remove the wire block and disconnect them from the switch.
- Next, use a screwdriver to remove the plug from the armrest handle.
Remove the plug from the armrest handle
- Using a Phillips screwdriver, you need to unscrew the two screws that are installed in the handle mount, and then remove the door trim.
Unscrew the screws securing the handle
- There is a panel installed in the door card, from which 6 pistons need to be removed.
- The external mount, located in the handle, has a pair of nuts. They need to be unscrewed using the “8” key.
Nuts for fastening the outer handle of the lock
- The release mechanism is connected to the inner rod lock and the outer handle lock switch - it must be disconnected from them.
We disconnect the release mechanism from the internal rod lock and the outer handle lock switch.
- Next, you need to remove the entire outer handle of the device and pull out the pin from the end of the rod.
- Now you need to remove the plastic rod end located in the cylinder.
- Remove the retaining spring.
Removing the locking spring
- Remove the old lock cylinder with the key installed in it.
Why doesn't the door open from the inside or outside?
The reasons why the car door does not open from the inside and outside (VAZ-2114, 15,12,11) can be different:
- wear of some parts responsible for traction inside the latch;
- Wetting of the lock or icing of parts of the lock due to frost;
- presence of a foreign object inside;
- The battery is completely discharged when the baby shutter is on.
Individual parts on VAZ 2108-2115 cars wear out most often. This is especially true for the plastic tip responsible for traction. Over time, the material undergoes deformation and becomes more fragile. This is due to the fact that the locking device has to be closed and opened daily.
First, the unlocking mechanism begins to jam when pressed too sharply or too smoothly. And one day the day comes when the door in your VAZ-2115 or 2112 car will stop opening both from the inside and from the outside.
How to open
If you are inside the car and the door is jammed, you can get out of the car and then try to open the lock yourself from the outside.
When this cannot be done from the outside (for example, in a situation where the owner has forgotten the keys in the car), then you can use different methods: from adequate, gentle to aggressive, radical - even knocking out the rear window.
If the car window is open a few centimeters, then it is easy to pry up the handle, which is fixed in a certain position, then pull it back using a regular rope or strong fishing line.
Another option is what to do if the car door does not open from the outside VAZ-2114, 2115,2112, 2111
How to open a jammed door from the inside
If you are inside the car, but are unable to exit through another door, you can use one of the alternative opening options:
- If the door does not slam completely shut, try to get to the locking mechanism using a metal ruler or a strong, long wire.
- If it closes all the way, press the inside and outside handles simultaneously or alternately, trying to push the door out from the inside.
- The last option involves outside help. Try opening the door from both sides by pushing down on it, pressing on the door lock, using a metal ruler.
At some point, the locking lever may operate and the mechanism will open. But it is important to understand that this situation will repeat itself in the future. Therefore, it would be safer to take the car to a car service center for professional door lock repair.
Installation of a new larva
To install a new lock cylinder, you will need to follow a few simple steps:
- Unpack the new kit, prepared for replacement, and lubricate the internal moving parts.
- Install a new return spring. Usually it is not included in the standard replacement kit and is purchased separately. When installed correctly, the key should rotate freely back when in the hole.
Installing a new return spring
- Install the pin in the end of the swivel rod.
- Reassemble the door in the reverse order as described in the previous section.
Causes of malfunctions
There are several types of malfunctions that prevent the doors of a VAZ-2109 from opening from the outside or from both sides:
- The outer key, made of silumin, broke off. This happens when you try to open the door in severe frost, applying a lot of force. Breakage is not considered a big problem, because the sash can be opened with a handle from the inside.
- The silumin pusher, which is activated by the opening key, has broken. The reasons are the same: low temperature outside and strong pressure. In this situation, the door can also be unlocked from inside the car.
- The rod that connects the handles with the locking mechanism has disappeared. The door does not unlock from either side.
- Wear of parts of the locking device.
- The screws securing the lock have come loose and it is hanging freely inside the door card. It is impossible to open the door using the handles.
The latter malfunction sometimes occurs due to the fault of the car owner himself, who has decided to change or repair the door lock. Having put it in place and not fully tightened the screws, the owner of the VAZ-2109 accidentally slams the door, after which it will not be possible to open it with the handle.
Preventing door jams
The main reason for the breakdown: long-term operation, but the service life of the part is reduced if the driver does not carry out preventive maintenance. Basic moments:
- Cleaning of internal parts, treatment with special substances.
- Power loop lubrication.
- Removing adhered dirt. The procedure is carried out at least twice a year: in spring and autumn. Active ingredients for treatment: Liqui Moly Schnell-Reiniger cleaner, Liqui Moly Wartungs-Spray weiss dirt-repellent white lubricant.
- Lubrication of hinges, internal parts, rubber seals, door stops.
Thanks to these actions, fixation improves. Lubricants with an anti-corrosion effect preserve the elasticity of parts.
The procedure is especially relevant before the winter season, when the treatment prevents the mechanism from freezing when moisture enters. Spring prevention minimizes damage to the door mechanism from ultraviolet radiation.
Troubleshooting
If a key or silumin rod breaks, you should not immediately buy a new block with a handle. On sale you can find special repair kits for VAZ 2108-099 door handles, which contain these parts in 2 copies.
This way you will save money and easily change the key yourself by removing the handle using the following sequence of actions:
- Remove the decorative panel.
- Disconnect the rod connecting it to the locking device from the handle mechanism.
- With the glass fully up, unscrew the 2 fastenings of the handle to the door card.
- Remove the handle, replace the parts and put it back.
If the rod is disconnected, then you need to remove the inner lining and put it in place, as described above. Using the moment when the facing panel is removed, check what caused the disconnection of this rod so that history does not repeat itself when the door is slammed.
Malfunctions of the locking mechanism can only be eliminated by removing it. In a situation where the device has a lot of wear, as happens on the driver and front passenger doors, it is recommended to replace the lock with a new one.
If you find an error, please select a piece of text and press Ctrl+Enter.
