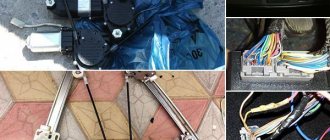
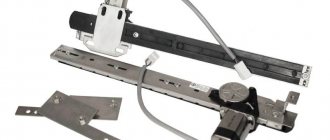
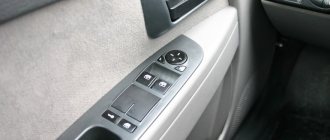
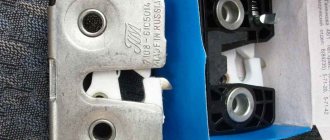
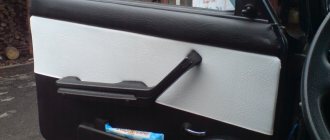
Window lifters on the VAZ 2107, as on other cars, are a necessary element of comfort and climate control in the cabin. The standard power windows on the front and rear doors are not very flatteringly called “crutches” by the people. Their plastic handles tend to break off if the car is not used very carefully; the edge of clothing can get caught on the handle, and then parts may need to be replaced. For tuning the interior, electric windows have long been used, even for the front doors. Their installation is highly desirable. While the passenger is looking for the handle, the driver proudly points to the button. We will definitely tell you about the connection diagram for electric windows in the following articles.
The structure of the window lifter is simple, but there are differences in the design of the mechanism on the front and rear doors. From the front, its schematic diagram is as follows:
The scheme can be divided into:
- internal parts, which include handle 1, lining and latch 2, socket 3;
- window lift mechanism, which includes the star winding mechanism itself 4, brackets 5, lower rollers 11, tension roller 13, bolt 12;
- cable 10 is the only flexible structural element;
- glass fastening mechanism – screws 6, pressure plates 7.
It should be noted that, unlike older “classic” models, the front glass on the VAZ 2107 is not a quadrangle in the form of a parallelepiped, but a pentagon, since the “seven” does not have a separate window. Therefore, on the “seven” the installation, feed, and location of the cable have been changed. Additionally, as can be seen in the figure, the glass connection mechanism on the VAZ 2107 has a fourth tension roller, unlike three rollers on other “classics”. Therefore, in order to remove the window regulator, you need to know these differences. In this case, the repair will be simple.
The operation of the window lifter is adjusted at the factory; independent installation and replacement is possible, but it must be done correctly. Otherwise, the mechanism will jam, or additional sounds, such as crunching and crackling, will occur during operation. Therefore, before performing repairs yourself, you need to carefully study the device.
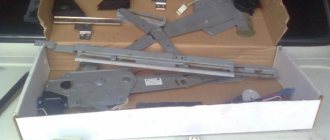
This is what the main part looks like - the window lifter mechanism. To remove it, you must first remove the door trim.
Layout of parts for the rear window lifter mechanism.
The rear windows, unlike the front ones, do not go down completely, but about 5 cm remains. The layout of the rear windows does not differ from that on other Zhiguli models. This mechanism is installed not only on the VAZ 2107 for the reason that the rectangular shape of the rear windows is the same for all “classic” models. If an electric window lifter is connected to the rear windows, this 5 cm is retained.
One of the most common breakdowns is the breakdown of handle 1, both on the front and rear window lifters. If it breaks, it needs to be replaced, since repairing a broken handle is impractical.
Replacing the handle is as follows: removing the window lifter control handle is very simple, just first free it from the plastic retainer, which can simply be pryed off. To do this, use a flat-head screwdriver to move the outer ring away from the inner ring. After this, the retainer, also called the retaining ring, is removed. After this, the handle can be easily removed and another one can be installed. How this is done is shown in the video:
As you can see, in order to simply change the handle, it is not at all necessary to contact a car service. Anyone can carry out such simple repairs themselves; all you need is a screwdriver.
A simple operation at first glance - replacing a VAZ window regulator
- requires knowledge of certain subtleties. Otherwise, the lift will not work or will work with a bang, which will constantly irritate the owner of the car and further reduce the service life of the window lift.
First, let's figure out how it works and works.
On classic VAZ models, all window lift systems are the same. An exception is the VAZ-2107 model, where the feed and position of the cable have been changed due to the installation of solid glass. The VAZ window regulator has a cable drive and a star winding mechanism. All models except the VAZ-2107 have three rollers, one of which is movable and serves to adjust the cable tension. VAZ-2107 has an additional fourth tension roller.
Before replacement, the door is disassembled and the old window regulator is removed.
Replacing a window regulator begins with installing a new mechanism in the door. The nuts securing it are finally tightened after checking the operation of the cable. There is one trick here that you need to know.
The lower branch of the window lift cable is fed to the upper roller, and the upper branch goes down accordingly, this is clearly visible in the photograph presented (the loop between the cables, which the mechanic holds with his fingers in the photo, is a piece of wire that secures the cable so that it does not get tangled. After installation mechanism, the wire is removed).
At first glance, an insoluble problem is how to put the cable on the upper invisible roller...
We proceed as follows. We make an open loop at the top of the cable and lift it into the doorway where the “blind” roller is located. We begin to make hooking movements (up and down) with the loop, and after 3-5 attempts you will throw the loop over the roller and immediately pull the cable down so that it cannot jump off the roller.
Replacing a VAZ window regulator occurs as follows.
We put the cable coming from the top roller onto the bottom roller and then onto the side one, which is an adjustment roller (tension roller).
First, use this roller to tighten the cable and check the ease of rotation of the cable by putting on the window lifter handle for this. The cable must have good tension, of course, not like a string, but also not dangle between the rollers. The window lift cable must move silently and without jamming from one extreme position to the other. If you have installed everything correctly and the cable moves silently, it can be secured to the glass, taking into account its upper or lower position when attaching the cable.
If the cable begins to creak, you will have to loosen the tension on the cable and remove it from the rollers. Then do the following. If you look at the exit of the cables from the body, then, as already stated above, the lower branch goes up, and the upper branch goes down, one on top of the other.
They need to be crossed, i.e. Place the upper branch behind the lower one and assemble everything again. It's like crossing your fingers, first one at the top and the other at the bottom - switch the fingers. Now the one that was at the bottom will become the top one, do the same with the cable - it will stop creaking, since the cables will fit correctly and will not touch each other.
Having achieved silent operation of the window regulator, thoroughly tighten the nuts securing the housing and tension roller, lubricate all connections and the cable with lithol.
At this point, the replacement of the window regulator is completed, and you can assemble the door filling.
People value comfort. And car enthusiasts are no exception in this regard. Today no one wants to turn the handles of mechanical window lifters. And the window lifters themselves with handles in a modern car are a relic of the past. But VAZ 2107 drivers are less fortunate: they still turn the handles. Of course, this can be fixed by installing power windows in the car. Today we will talk about how to do this on our own.
For your information
The cable is tensioned according to the following procedure:
- lower the window all the way;
- turn the mechanism handle all the way in the direction of lowering the glass;
- adjust the cable tension by moving the corresponding roller;
- tighten the roller mounting bolt.
You should prefer the optimal tension force of the cable drive: the cable should not be overtightened, but should not dangle.
After installing a new window regulator, a squeaking sound may occur. To eliminate it you need to:
- loosen and remove the cable from under the rollers;
- cross the upper and lower branches of the cable coming out of the lift drum;
- repeat the procedure for installing and tensioning the cable.
About the design of the VAZ 2107 window lifters
The VAZ 2107 began to be produced in the 80s of the last century, and therefore, the window lifters in this car were only manual, rack and pinion type. The main disadvantage of the rack structure is its fragility. The reason is simple: in order to save money, domestic automakers installed plastic gears in these window lifters, which failed very quickly.
By the early 90s, the designers of the VAZ 2107 realized their mistake and began to equip the car with cable-operated windows, which were more reliable than rack and pinion windows (although not much). The glass in these devices was lifted using a cable attached to a twisting mechanism. The main advantage of cable window lifts was their high maintainability. With rack and pinion lifts, replacing a broken plastic gear was a real challenge, as it was extremely difficult to find the part for sale. But there have always been a lot of parts for cable window lifts in car dealerships.
The device of a cable window lifter on a VAZ 2107
The operating principle of both rack and pinion window lifts is approximately the same: the glass is secured to the lifting mechanism, activated by rotating the handle, with special clamps. By rotating the handle, the driver either moves the gear along a vertical rack (in the case of a rack and pinion window lift) or pulls the cable, which causes the glass to slide out of the door.
Power windows (ESP) are the next step.
Articulating-lever window lifters "Granat"
The most popular among car enthusiasts are articulated-lever ESPs, which have a number of advantages:
- ESP has a reasonable price;
- ESP is easy to install;
- ESPs, as a rule, have excellent equipment: the driver does not have to look for activation buttons and wires to them - everything is already there;
- ESPs are reliable, work quickly and make almost no noise;
Common faults and solutions
Over time, the window lifting mechanism becomes unusable - it is impossible to raise or lower the glass.
There may be several reasons for a device malfunction:
- cable break;
- foreign objects entering the mechanism;
- gearbox wear.
There is no point in repairing window regulators, since their cost is low; it is easier to buy a new device and replace it.
Device assembly diagram
Electric lifts may have the following faults:
- All power windows do not work: the fuse is blown, there is no connection to ground, the wiring is broken. The repair consists of replacing fuses, restoring ground connections and electrical circuits.
- The lift on one of the doors does not work. The switch is faulty, the reverse current relay is broken, the electric motor is broken, the wiring is broken, the connector is disconnected. Faulty parts should be replaced, the wiring restored, the connector connected.
Installation of ESP "Granat" on a VAZ 2107
Before we start work, let's prepare everything we need.
- Tools and materials
- ESP “Granat” kit for VAZ 2107.
- Flat blade screwdriver.
- Calipers.
- Ruler.
- Marker.
- Set of open-end wrenches.
- Set of socket heads.
- Electric drill with a set of drills.
- Grease CV joint-4.
- Silicone grease.
Sequence of actions when installing ESP
Related video: installing ESP on a VAZ 2107
Window lift repair
Since repairing a window regulator in most cases involves replacing the mechanism, it is worth considering the step-by-step process from removal to installation. To do this you will need the following list of tools:
- heads or keys for 8 and 10;
- extension;
- ratchet handle;
- flat and Phillips screwdrivers.
Removing the window regulator
The procedure for removing the device from the car is as follows:
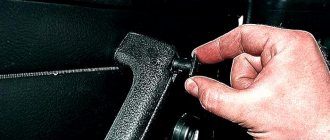
- Use a screwdriver to pry up and remove the plugs on the armrest.
Replacing rollers
Window lifter rollers fail over time. Since replacing the top element is the most problematic, we will dwell on this process in more detail. The part to the door is fixed with hooks at the top, and with welding at the bottom. To work you will need the following set of tools:
- set of drills;
- electric drill;
- flat screwdriver;
- hammer;
- new video.
The replacement procedure consists of the following steps:
- To remove the roller, we drill out the metal at the place where the plate is attached with a 4 mm drill.
- We drive a flat screwdriver inside the door under the roller plate and knock it down with a hammer, dismantling the roller.
Video: replacing the upper window lift roller
Window lifter installation
Before installing a new window lifter, you must check whether the rollers rotate freely. If necessary, lubricate them with Litol. The bracket that secures the cable should not be removed in advance so as not to confuse the mechanism, since returning everything to its original position will be quite problematic. We carry out installation as follows:
- We install the window regulator in place, securing it with nuts.
- We remove the bracket and place the cable on the rollers according to the diagram.
Important points
- The sequence of installing the Granat ESP in the rear doors of a VAZ 2107 is similar to that described above, since the rear doors differ from the front doors only in the location of the window lifter handle: it is shifted 4 cm to the left. Accordingly, the drilled mounting holes will be offset by the same distance.
In addition, if a car owner wants to install ESP on all 4 doors, he will have to buy not one, but two sets of ESP “Granat” (since 1 set is designed for only 2 doors); - The ESP installed in the door must, firstly, be completely assembled, and secondly, the ESP mechanism itself must be in the lowest position, at the very end of the vertical rail. Otherwise, the ESP simply will not pass through the technological hole in the door;
- when unbending the lock washer on the window lifter handle with a screwdriver, you should not make much effort: this is a fragile part that breaks easily;
- This rule also applies to the plugs on the door trim: they also break easily when removed. And finding new door plugs for a VAZ 2107 on sale today is almost impossible;
- When checking the operation of the ESP, special attention should be paid to the smooth movement of the glass and the sound it makes. If the moving glass creaks piercingly, it means that it is necessary to loosen the mounting bolts on the vertical rail. If the creaking does not disappear, you need to unscrew the bolts on the rail, place a couple of 2 mm high washers under them and screw the bolts into place. If the problem does not go away even after this, you should apply silicone grease to the seal from which the glass extends. Moreover, it is recommended to lubricate only the inner half of the seal (the one located in the cabin);
Installing electric windows is a task that is quite within the capabilities of the average car enthusiast, provided that he has not yet forgotten his school physics course and has an idea of what an electrical circuit is. Then there should be no problems with installing and connecting the ESP, especially since each kit is supplied with very detailed installation instructions. Well, if you had problems with physics at school, there is only one way out: contact specialists at the service center. But in this case, the car enthusiast will have to fork out a fair amount.
Every driver of a budget car wants to make it a little more comfortable. Basically, this decision concerns the car interior, where functionality and convenience only attract attention. In this article we will tell you how to install and describe this process in as much detail as possible.
Removing the window regulator
After the door trim is removed, you can proceed directly to removing the window lifter.
After the clip is removed, you need to go to the left side of the door and loosen the roller nut
, after, the window lift cable can be completely removed from the door.
The window lifter fastening mechanism is held on by three bolts
; removing them is not difficult at all - you just need to take the necessary tool and unscrew all the bolts one by one (when unscrewing the last bolt, you need to hold the window lifter mechanism from the outside so that it does not fall out and damage something).
After the window lifter has been removed, all that remains is to go to the store
and purchase a new window regulator (the price for this spare part ranges from 100-120 rubles) and put the new part back according to the same instructions, performing the steps described in it in reverse order.
It is worth noting that the mechanisms for the front and rear doors of the VAZ-2106 are not interchangeable - this is due to the different lengths of the window lift cables for the front and rear doors of cars of this model.
What can be useful when installing an ESP?
First of all, you need to purchase a set of various devices, including: controls and an actuator. It follows in advance, their quantity and price. Naturally, if you choose better and more efficient lifts, the price will be significantly higher.
Conventionally, the following types of electric windows can be distinguished:
Once you have decided on the type of window lifters you want, you need to decide on the manufacturer. To do this, you can use various tests and reviews, of which there are quite a lot on the Internet. Differences in design also have a big impact on the installation process, as many vehicles are already equipped with mounting hardware to install the appropriate devices, while others will need modifications to the inside of the door. However, redesigning the fastening parts does not seem difficult.
Adjusting door locks
Before adjusting the lock, it is recommended to outline the outline of the lock on the body pillar.
1. If the door closes too tightly, loosen the fastener bolts, move it outward and tighten the bolts. If the door closes poorly, move the lock inward. In this case, there should be no protrusion or retraction of the door relative to the body.
2. If the door goes down when closing, lift the lock. If the door rises when closing (sagging in the open position), lower the latch.
3. If the door is difficult to unlock with the internal handle, then the position of the internal handle of the lock drive is adjusted. To do this, loosen the screws securing the handle bracket and move the handle together with the bracket to the desired position. Then tighten the screws.
How to install electric windows on a VAZ 2110?
After selecting the appropriate devices, you can begin installing window regulators on the doors. To do this, the car is placed on a flat and open surface, where the door can be opened wide, and the negative terminal is removed from the battery.
- Disassemble the door panel and remove the old up and down mechanism. To do this, lower the glass slightly, and use a wrench to unscrew the clip fastening from the old window lifter mechanism.
Attention!
When disassembling the window regulator, take special care; the unsecured glass may fall into the lower part of the door panel and break. In this case, the matter may not be limited to installing only window regulators.
- Next, the nut located at the top is unscrewed. It is designed for top mounting of a special guide. The same is done with the rest of the guides and after that, the old mechanism is unscrewed along with the cable.
- A set of wires that are included in the purchased kit, you need to assemble a special harness that is connected to. Two wires are led out under the trim to the inside of the doors. At the point where the wire exits from under the wing and at the point at which the door enters, it is necessary to leave a certain margin, which will prevent the wires from breaking when the door is opened. However, such a reserve should not allow the wire to sag, otherwise it will come out and may be damaged at the place where the door gap closes.
- If the power window control buttons are planned to be on the door handle, then the third wire is also routed into the door panel. In other cases, it is pulled behind the panel onto the dashboard or brought under the floor to a switch located between the seats.
- Now you need to cut out some of the protective film so that it does not interfere with the operation of the electric motor. Through a special hole at the top of the panel, insert the electric drive with all the attached mechanisms and secure it in place of the previous mechanical window regulator. If the window regulator is installed on the rear door, the drive can be inserted through the lower hole in the corner.
- Assemble the remaining parts and connect the wires from the harness in accordance with the connection diagram. Decide on the installation location of the switch button and mount it in the right place. Special wires are also inserted into the buttons in accordance with the connection diagram.
- After this, the negative terminal is placed on the battery, and the operation of the window regulator is checked by lowering and raising the glass until it stops. After this, the glass holder is tightened and the necessary adjustment of the mechanism is carried out.
- Now assemble all the door trim and securely hide the wires where they protrude beyond it.
This completes the installation of electric windows on the VAZ. As you can see, this is not a complicated procedure at all and requires the driver to have a basic understanding of the operating principle of the lowering device, as well as minimal knowledge in reading electrical diagrams. Solving the issue yourself will help you save a lot of money on the services of car service specialists and will give you some experience in operating and maintaining a car.
Thanks to power windows, we ourselves can create a microclimate inside the car - enjoy fresh air and an invigorating breeze in summer, and hide from bad weather in winter. It’s high time to pay special attention to these devices, and that’s what we’ll do!
Do-it-yourself car tuning - installing power windows
Many VAZ 2107 owners are wondering how to adapt and install electric windows on their car. The transition from manual mechanical windows to electric ones is really justified - it will add comfort and attractiveness to the car.
Installing electric windows is quite difficult, but possible. Not all car services will undertake this work, so it is better to do it yourself. The metal of the car door cards will require some modification - try to choose a power window that is as similar in size as possible to simplify its installation.
To install it, you will need a new electric drive, several bolts and nuts of various sizes, rubber glass clamps, electrical wires and fuses, and a standard set of tools. Since you will need to drill several holes in the metal, prepare a drill and the right drill bit for the job. To begin, remove the card with the casing and lower the glass all the way. After this, remove the old mechanism and begin installing the new one.
An important step is the correct placement of the electric drive and its angle of inclination. Installation should only be carried out with the glass completely lowered. During the installation of the electric mechanism, tests can be carried out to move the glass using a battery. Once you are done with the mechanical part, move on to the electrical system.
To connect the power window, you need to decide where you will get the power from. In a VAZ 2107 car, this is best done from the cigarette lighter, since this element is used the least and does not consume load. To install on this unit, you must use pre-purchased chips with fuses. If for one reason or another the power supply option from this unit is not suitable for you, then run the electrical wiring from the car battery.
After installing the power window mechanism, you need to install buttons with which the control will take place. Since the VAZ 2107 car did not have space for such buttons, you can choose the location that is more convenient for you. It is worth considering that the farther from the door you place the buttons, the longer the wires are needed. Therefore, if possible, mount them on the map handle of your car. After all work is completed, check the functionality of your new system.
Please note that the installation of electric windows on a car must be carried out in specialized centers by qualified personnel.
Before starting work, you must read the operating instructions for the vehicle and additionally installed equipment and find out whether it is possible to disconnect the battery.
If the battery cannot be disconnected, it is recommended to remove the fuses of the circuits to which the power windows and interior lighting of the car are connected during installation work.
We remove the door trim. Raise the glass to the top position and secure it from spontaneous lowering.
We dismantle the cable mechanism.
Mark the holes according to the instructions.
We make holes with a 5.5 drill
Same thing with the bottom hole.
We install the window regulator in the door.
We fix the rail in the drilled holes.
Turning on the ESP, move the carriage opposite the technological window, lower the glass and align the holes of the glass holders with the carriage, fasten it with standard screws (fastening points are shown by arrows).
By turning it on, we check that the glass does not warp during raising and lowering, and adjust it if necessary.
The glass should move without jerking or jamming. If this requirement is not met, it is necessary to loosen the fastening of the window regulator to the door wall, slightly turn the entire mechanism in one direction or another and pre-tighten it with fasteners. After rechecking and meeting these requirements, finally tighten the fasteners.
From the door cavity, through the hole in the pillar, we stretch a two-core wire through the cabin to the location of the switches. We insert the contacts into the housing, connect the contacts on the other end of the wire to the window lift motor.
We connect the housings with wiring to the switches. We make connections in accordance with the power window connection diagram:
We connect the battery. Turn on the side lights of the car, and the backlight of the power window switch should turn on.
We test the operation of the window regulator by testing it.
Reinstall the door trim. We place decorative plugs in the holes from the handles of standard power windows in the door trims and secure them with clamps.
You can buy electric windows “Granat” for VAZ-2104, -2105, -2107 cars in our online store.
The front door window lift mechanism on the VAZ 2105 and other models of the “classic” series requires replacement in the event of failure of the mechanism itself, its cables, or to replace the drive with an electric one. To carry out repair work, prepare a standard set of tools and perform the following sequence of actions:
- First of all, you need to remove the decorative door trim, see Replacing the front door trim.
- Next, lower the glass all the way down and loosen the nut securing the tension roller, then move it to the side and remove the cable from it.
- Now you can easily remove the cable from the remaining rollers.
- And at the final stage it remains to remove the mechanism itself. To do this, use an eight-point socket to unscrew the three nuts securing it and, lifting the glass, carefully remove it from the door.
At this point, the repair work on removing the front door window lifter mechanism on the VAZ 2105 has been completed. Replace it, and then perform the installation in the reverse order. If you plan to install an old mechanism, then before installing it, it is recommended to lubricate the mechanism and cables with clean grease. After assembly, adjust the position of the glass, then check the quality of work and, if necessary, repeat the operation.
Types of window regulators - what will VAZ please?
Lately, they have been increasingly installed on domestically produced cars. The installation of such devices began at the dawn of the 2000s. Before this, all VAZ cars were equipped with ordinary cable-operated windows with manual controls.
The VAZ 2107, the production of which began in the late 80s of the last century, is equipped with a manual window lifter. This type of window control is familiar to most owners of VAZ cars. The VAZ 2110 model already has an electric window lifter, which is much more convenient and practical compared to the manual control type. Electrical devices are not something new. They began to be installed in imported cars back in the 80s, but this “know-how” reached our automobile industry only recently.
Based on the type of operating mechanism, window lifters can be divided into several types. The most basic and widely used in VAZ 2107 cars are rack and pinion, they require constant care and lubrication. It often happens that the gears of this mechanism are made of plastic, which is why the mechanism wears out catastrophically quickly.
Due to the type of construction, they require much more space in the car than cable ones. When using such window lifters, glass distortion is completely eliminated. The operation of the device is to transmit the rotation of a gear, which interacts with a linear type of rack on which the glass carriage is placed. Rack and pinion windows are reliable and produce less noise than cable windows.
The second type of window lifter is on a cable; by design, they are very weak and often fail. The main element of such window lifters is a cable and a torque mechanism. The advantage of this type of mechanism over others is its high maintainability. It is not difficult to carry out partial or complete repairs or replacement of parts in such a window regulator. Most often, the cable wears out, since it is very thin. The gears of this mechanism are made of plastic and tend to break when the glass is skewed. The cable window mechanism works quite slowly, especially if the glass rubber seals prevent this, so the electric motor tends to overheat and fail.
The newest window lifters that have recently begun to be used in VAZ 2110 cars are lever ones; their work is carried out using hinges. Such devices work very quickly and do not create noise inside the car, but they consume a considerable amount of power. They are used only in conjunction with an electric drive. The operation of the window lifter occurs due to the execution of a certain number of revolutions of the main flat gear, which transmits the revolutions to the levers of the mechanism. After this, the levers rotate and move the main plate on which the glass is attached.
The main disadvantage of the lever mechanism is the low speed of glass movement - the higher the glass rises, the lower the speed of its movement. The main feature of lever window lifters is the small size of the mechanism and the ability to install them on many VAZ cars.
This type is installed on fully equipped VAZ 2110 cars, since it is more expensive and practical in its use. If your car has a cable or rack and pinion mechanism, then installing a lever mechanism will require some modernization of the car. It is better to carry it out at a specialized car service center.
Car modifications
VAZ-2104 . The basic version of the station wagon, with a carburetor engine from the VAZ-2105, 1.3 liters and 64 horsepower. Equipped with a 4-speed gearbox.
VAZ-21041 . A prototype of a station wagon, it was equipped with a carburetor engine from a VAZ-2101, with a volume of 1.2 liters and a power of 62 hp. Just like the base model, it was equipped with a 4-speed manual transmission.
VAZ-21042 . Export version, the steering wheel was located on the right. The car also received a carburetor engine from the VAZ-2103, with a volume of 1.5 liters and a power of 72 hp.
VAZ-21043 . The car was equipped with electrics and interior from a VAZ-2107, some copies had a VAZ-2106 interior. The carburetor engine was borrowed from the VAZ-2103. The gearbox was either 4 or 5 speed.
VAZ-21044 . An export model, equipped with a 1.7-liter VAZ-2107 engine with mono-injection, as well as a 5-speed gearbox.
VAZ-21045 . The export version with a 1.8-liter engine did not enter mass production.
VAZ-21045D . It was produced in small series since 1999, equipped with a VAZ-341 diesel engine with a volume of 1.52 liters and a power of 50 horsepower. The gearbox is 5-speed.
VAZ-21047 . A prototype with an engine starting from a penny. An improved version of the Four, it was equipped with a VAZ-2107 interior and a VAZ-2103 carburetor engine with a volume of 1.5 liters and a power of 72 hp. The gearbox was 5-speed. On export versions, the radiator grille was installed from the VAZ-2107.
VAZ-21048 . Diesel station wagon, with a 1.77-liter VAZ-343 engine. The gearbox is 5-speed.
VAZ-21041i . A car equipped with a VAZ-21067 injection engine. volume 1.6 liters. The gearbox is 5-speed. The electrical equipment and interior are from a VAZ-2107 car, and the front seats are from the Izhevsk hatchback IZH-2126.
VAZ-21041 VF . The interior, electrics and front seats are the same as the previous modification; the radiator grille is also borrowed from the VAZ-2107. It was equipped with a 1.5 liter injection engine from the VAZ-2103 and a 5-speed manual transmission.
Mechanism design - how does it all work?
The VAZ 2107 window lifters are quite simple devices in terms of their design. It is based on a mechanism to which the glass is attached using special clamps. The VAZ 2110 glass is lowered and raised by turning the handle on the interior side.
The window lift system of the VAZ 2110 car has already moved far ahead in technical progress. The operation of the device is based on an electric drive, with the help of which the glass moves. This type of window lifter is controlled by buttons located on the door cards of the VAZ 2110 car.
The electric window lifter drive of the VAZ 2110 consists of an electric control unit, a lifting mechanism, which can be different depending on the vehicle’s configuration and, of course, the drive itself. The VAZ 2110 window lifter drive consists of a worm and gear drive, which interact with each other using an electric motor. The worm gear prevents spontaneous lowering of the glass and fixes it at the desired level. The operation of the electric drive is to raise and lower the glass due to the force exerted.
Replacement process
Dismantling
So, the door lock pin is manually turned away. This may be difficult to do, so it is recommended to use a Phillips screwdriver. After this, you will need to remove the decorative insert from the inside door handle. Next you need to unscrew 2 screws from the handle and 3 from under the pocket. When turning forward, the handle can be easily removed.
Replacing the side glass in a VAZ 2110
If there are front speakers, they also need to be removed. If there are mechanical window lifters on the VAZ, you need to carefully unhook the fixing bracket with a screwdriver and remove the handle. Usually the casing is secured with plastic pistons, which often break, so it is advisable to buy them with a sufficient supply. Since it is unlikely that the casing can be easily removed, it is recommended to use a screwdriver, but it must be wrapped with electrical tape so as not to scratch the paint.
Replacing the side glass of a VAZ 2110
You will also need to remove the glass seal from the inside. If you rush the process, you can tear this layer. Only after these steps can you safely remove the glass. To do this, you need to unscrew the two nuts located on the window lifter holder.
Installation
Replacing the side glass on a VAZ 2110
After removing the old glass, it's time to start installing the new one in the holder. This process must be carried out in a certain sequence:
- the glass is first tried on the holder, and it does not need to be inserted either into the holder itself or into the window lifter mount;
- It is advisable to do the glass replacement with an assistant, since he will hold the door with the glass inserted while the technician tries on the holder for the glass and window lifter. You need to make a special mark on the glass with a marker or something else;
- Now everything is pulled out again. The upper edge of the glass is placed on a wooden support, while a piece of raw rubber is placed on the lower part (you can buy it in the same place as the glass itself). Next, according to the markings, a metal holder is attached. After this, gently tap the holder with a hammer until it sits completely;
- At the end of the process, the glass is installed in its place, following the reverse sequence. The door trim should be installed with gentle blows in the area of the pistons. As a result of the blows, they must enter their nests. For better reliability, they can be guided with a screwdriver.
How to replace the side glass of a VAZ 2110
When the mechanism breaks down, what are your actions?
If the window regulator in a VAZ 2107 breaks down, it will not be difficult to fix it. The nature of the failure depends on the type of mechanism. Most often, regardless of the design, it is the teeth of the rotating gear that break. To carry out repairs, carefully remove the car door trim and card, as well as all the elements that are placed on it. After that, remove the window regulator itself and take it to a car dealership. If your mechanism is based on a cable, then with the window completely lowered, place marks on it near the gears. This will greatly simplify reassembly after repairs and will save you from lengthy glass height adjustments.
If the electric window regulator in a VAZ 2110 car fails, everything is much more serious. In this case, there may be many possible breakdowns. First of all, you need to check the power supply control unit. In all VAZ 2110 models, the operation of electric windows is controlled by a fuse, which is located in the mounting block under the hood of the car. You can see its serial number on the block cover. If it fails, replace it.
If everything is fine with it, then you need to proceed to the block itself, in which the power windows are controlled. If the electrical contact is poor or the transistors fail, the power window drive located on the passenger side will also not work, because this system is looped together.
If the window in your car does not go down or up completely, this is due to the glass being skewed or pinched. In this case, it is necessary to more accurately set the glass clamps and adjust their positions as accurately as possible. In some cases, replacement of glass rubber seals is required. When exposed to moisture, they expand and prevent the canvas from moving.
The windows in the VAZ 2110 car in some models have glass closers. This is a modern device that allows you not to hold down the button of the electric unit when pressing, because the glass will lower or rise on its own. Very often, glass closers are connected to the car alarm, which allows you to close the windows when you press the lock button on the remote control. If for some reason the glass closers in your car are not working correctly, then the first thing you need to do is check whether the control unit buttons work well. If the problem is in them, then replacement will save the situation. Do not try to disassemble or repair them, it will simply be a waste of time.
It also happens that the reason for poor performance of the glass closer is poor lubrication of the mechanism. To eliminate it, it is necessary to lubricate the drive gears, as well as other elements, depending on the type of window lifter device.
If the electric drive in the mechanism does not work, then it needs to be replaced, while the drive in the driver's door card must work. For the VAZ 2110 car model, buying the required electric drive will not be difficult, since it is available in all car stores. In order not to bother yourself with markings, simply remove the failed part and go to the store with it - this will make choosing the right model much easier.
If the cause of the breakdown of the electric window in the VAZ 2110 could not be determined, then you will have to contact a service center for a more detailed diagnosis. Since VAZ 2110 cars have electronic “brains”, the cause of the breakdown may be a failure of the controller or a failure in the firmware.
Window lifter malfunctions
In the summer, on a VAZ 2106, one of the devices that allows you to somehow cope with the stuffiness in the cabin is a window lift. If this mechanism does not work, then driving becomes a real pain. Therefore, Zhiguli owners should know what problems can arise with window regulators and how to fix them.
Glass fell
Mostly, glass falls due to loosening of the cable attachment to the glass itself. As a result, the cable slips, and the lowered window cannot be raised. If the problem lies in a loose fastening, then it will be enough to remove the door trim and tighten it, adjusting the relative position of the glass and the cable.
The glass does not respond to the rotation of the handle
If on your car, when you turn the window lifter handle, you cannot lower or raise the window and at the same time you feel that the mechanism is not working, then the main reason for this phenomenon is the licked slots on the handle itself. It is connected to the gearbox shaft through splines, but due to the soft material of manufacture, the splines on the handle wear out over time. In addition, premature wear is possible due to the tight movement of the glass, which can be caused by misalignment of the guides, the presence of a foreign object in the door, or problems in the gearbox itself.
If the handle is damaged, you only have to replace it, and it is better to choose a part equipped with a reinforced metal insert.
Broken cable
One of the malfunctions of a mechanical window lifter is a broken cable. It manifests itself in the same way as when there is a problem with the handle, i.e. in the form of free rotation of the handle. Since the cable is not sold as a separate part, the window regulator in this case will have to be completely replaced. Attempts to restore the break will require a lot of time and effort, and the low cost of the device in question, amounting to about 200–300 rubles, indicates the inexpediency of repair.
Gearbox failure
The design of the window lifter is such that the gears of the gearbox can wear out over time, that is, their teeth simply wear out due to the softness of the metal. As a result, the mechanism runs idle, while the cable and glass do not move. It is possible to replace the worn gear by removing it from the old window lifter, but it is better to install a new product that will last much longer than a restored one.
Mechanism grinding
Sometimes, when the glass is raised or lowered, the device may make sounds similar to grinding. The reason may be a lack of lubrication or damage to one of the tension rollers, which is simply rubbed by the cable, causing the cable to jam inside the roller. In this case, the latter will have to be replaced. If the grinding noise is caused by a lack of lubricant, then you simply need to apply lubricant, for example, Litol-24, both to the gearbox itself and to the cable with rollers.
Glass creaks
During vehicle operation, the windows are exposed to various types of contaminants (dust, dirt, sand, etc.). When the door glass is lowered, the abrasive substances on it act on the surface, scratching it and producing a characteristic squeak. Although the doors are designed with special velvets (glass seals), which are designed to protect the glass from scratching by dust and sand, over time they wear out and do not perform their functions well. Therefore, if a characteristic squeak appears, it is better to replace the glass seals.
