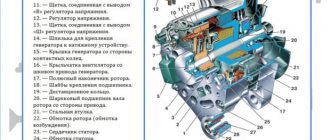
If the owner of the Priora notices that the charge from the battery is disappearing, first of all, he needs to check the condition of the generator brushes. Of course, at first the charge decreases insignificantly, but if the problem is not corrected in time, the charge will very soon disappear altogether. Replacing the brushes of the Priora generator, which are clearly worn out, will help correct this problem.
Important! The brush mechanism of the generator on the Priora cannot be repaired. If any breakdown occurs, only a replacement along with the brushes will be required.
Since this process is not so complicated, you can do everything yourself. You just need to take into account the recommendations of professionals.
What tools are needed for work?
Before changing the brushes on the generator, prepare the tools you will need for the job:
- flat screwdriver;
- wrench – it’s better if it’s an open-end wrench (size 13);
- car head with wrench (size 10).
Do-it-yourself replacement of generator brushes on a Priora
For electrical problems, basic differential diagnosis is necessary to separate brush wear from diode bridge failures, wiring shorts, faulty air conditioning or other equipment.
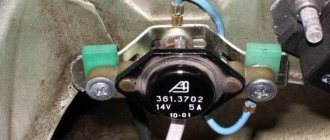
The brushes of the Priora generator are located in the voltage control unit and are responsible for regulating the on-board network current. Gradually they wear out and need to be cleaned or replaced.
Checking the work
- Switch position “min” - for operation at high ambient temperatures (above 20ºС), as well as during operation in particularly difficult conditions (traffic in traffic jams, long climbs in the mountains, etc.);
- The middle position of the switch is for operation at ambient temperatures from 0ºС to 20ºС;
- The “max” switch position is for operation at low ambient temperatures (below 0ºC), as well as for recharging a discharged battery.
Average load (PTF, dimensions, music and heater fan at first speed)
Maximum load, maximum number of consumers activated
Will you be installing a three-level voltage regulator on your car? Take part in the survey and leave your feedback in the comments.
Let us remind you that another reason for low voltage on the on-board network may be a bad ground.
Types of generator brushes
Brushes differ by generation of Lada Priora, type of generator, presence of air conditioning, type of engine (16 or 8 valves). The more consumers of electricity (climate system, electric power steering, heating), the greater the current strength the unit must support, therefore the critical characteristic of the device is its amperage. There are 14V versions:
The popular choice of Prior owners are:
- BATE 90 A;
- KZATE for 115 A;
- "Bosch" 120 A;
- developed by VAZ for 115-120 A.
Each model has its own brush units, although some are compatible within the family.
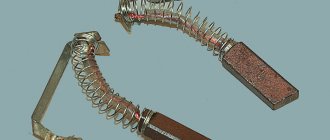
Brushes for the Priora generator 16 cl. Photo source: https://www.drive2.ru/l/497298115200549291/
For example, a regulator with article number K1216EN1 is suitable for VAZ 2170 generators:
It is also suitable for some other modifications.
There is also a new type of relay on sale with the index number 3202:
Selection of components
The original generator, installed on a car with a 16-valve engine at the factory, is marked with article number 5102.377. Its cost, as a rule, fluctuates around six to seven thousand.
Carefully check the generator itself and its packaging before purchasing so as not to encounter a counterfeit. It is important that the part is free of unevenness, chips and paint runs, as well as extraneous markings.
To avoid overpayments, you can purchase a similar original spare part. The following devices are suitable for installation on Lada Priora:
- VAZ (power 120/115a);
- KZATE (115a);
- BATE (90a);
- BOSCH (120a).
The price of analogues can be either higher or lower than that of the original. As a rule, it is in the region of 3500-6000 rubles. We choose a generator device with a large power reserve so that it lasts longer.
Keep in mind that installing less powerful generators is unacceptable, especially if you connect several different devices to the vehicle’s on-board network (when connecting a large number of electronics, it is generally recommended to increase the current). Before purchasing, we carefully check for damage to the case and the integrity of the unit.
New Lada: The brake pedal fails: causes and methods of troubleshooting
Which voltage regulator brushes should I put on the Priora?
The choice will depend on the type of generating device installed and the generation of the machine. Owners of cars with air conditioning often stop at K1216EN1. Another popular item number for Priora generator brushes is branded 849.3702.
With air conditioning
A car with air conditioning consumes more electricity and needs a more stable and efficient unit. Auto mechanics advise choosing devices compatible with 115-120 A.
Brushes for the generator (with air conditioning). Photo source: https://www.drive2.ru/l/451992188822225058/
The Priora is often equipped with a generator from the “Lux” version KZATE 9402.3701-14. Replacing the brushes of a Priora generator with air conditioning in such a case is usually carried out with a model with article number 897.3702. These generator brushes are installed on a Priora with a 115A device.
Without air conditioning
For cars less “stuffed” with electronics, brushes for a 90-100 A device will be sufficient. To replace the brushes of a Priora generator without air conditioning, you can take affordable Russian-made samples; they make good regulators.
Signs of faulty generator brushes
The following signs indicate node failure:
- weak headlights in the dark, their frequent blinking;
- interruptions in the supply of current to the on-board network;
- unexpected shutdowns of the radio and other consumers;
- poor charging of the car battery, electrical work begins to quickly drain it;
- indication of problems with the generator on the panel.
These symptoms do not always indicate a malfunction of the voltage regulator itself. For reliable diagnostics, it is worth analyzing the serviceability of other components: test the circuits with a multimeter, check the fuses, read the errors recorded in the ECU memory.
The most common breakdowns
There are several popular problems with the generator, most of which can be solved by simply replacing components. For example, a vehicle may have a faulty ignition switch, which will require immediate replacement. A break may also occur in the power supply circuit of the instrument devices. You will notice that when you turn the ignition on, the light will stop turning on.
When the generator light does not give any signals both when the engine is running and when the ignition is turned on, check the functionality of the instrument panel. Most likely, the battery is discharged, and the voltage regulator relay is out of order.
Also, the cause of this malfunction is oxidation of the contacts of the commutator rings and brushes, or their excessive wear or breakdown of the diode bridge. In this case, it is recommended to install new elements to replace those that have become unusable.
Even if the control light comes on, but the battery is being recharged, it is recommended to replace the voltage regulator relay. It would be a good idea to check the contact rings of the excitation trim and the contacts between electrical appliances and the generator terminals - they may have broken.
If the drive belt slips, it indicates that the voltage needs to be adjusted. If a malfunction occurs, the battery discharge lamp will light up. It also lights up if the diode batteries of the excitation winding have been damaged. The only rational solution in this case is to replace the rectifier unit.
Does the voltage drop sharply, problems arise with the power steering, does the generator not charge or is it overheating? In such cases, it will also need to be replaced.
How to change alternator brushes on a Lada Priora
The replacement procedure is not complicated; repairs can be done yourself.
- head with knob 10;
- open-end wrench 13;
- flat screwdriver.
Auto mechanics usually advise removing the generator itself before replacing it. This makes repairs easier, although in versions with air conditioning, access to the necessary areas may be difficult.
Installing a voltage regulator. Photo source: https://www.drive2.ru/l/470516485849088176/
An overview of the main steps after removing the generator:
- Pry up and remove the protective plastic cover, gaining access to the brushes.
- Remove the “chip” (plug).
- Unscrew the two fastening clips located at the edges.
- Unscrew the fixing bolt with a wrench.
When the fasteners are removed, it is enough to inspect the unit considered to be faulty, assess its condition and, if necessary, replace it. Assembly is performed in reverse order.
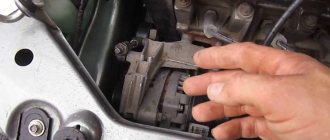
You can change the brushes on the Priora generator without removing the generator.
Without removal
Car enthusiasts from Drive2 and thematic forums describe two main ways to get to the part without removing the generator:
- through the headlight (avoiding unscrewing the air conditioning compressor on models with it);
- by sliding the air filter by hand.
practical guide
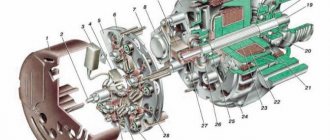
Generators from different manufacturers are installed in cars, which may differ slightly in design (rectifier unit and voltage regulator and the method of their fastening). The repair of all generators has no fundamental differences.
In cars without an air conditioning compressor, the regulator can be replaced
voltage and rectifier unit without removing the generator from the engine.
To complete the work you will need:
— power supply with adjustable voltage up to 20 V or battery charger;
— three or two-jaw puller;
— a mandrel from a cup puller set for pressing out the front bearing.
We remove the generator from the car (see above).
After releasing the three spring clips, remove the protective casing of the rectifier unit.
3. Use a Phillips screwdriver to unscrew the two screws securing the voltage regulator.
4. Disconnect the wire block from the voltage regulator terminal and remove the regulator.
5. Using an 8 mm spanner, unscrew the four bolts connecting the terminals of the stator windings to the rectifier block (remember how the insulating and thrust washers are installed).
On generators from some manufacturers, the rectifier unit is secured with screws.
6. Carefully bend the wires of the stator winding terminals into piles.
7. Use a Phillips screwdriver to unscrew the screw securing the capacitor.
8. Remove the rectifier unit along with the capacitor.
9. Using a 10 mm socket wrench, unscrew the two nuts of the contact bolt. We remove the spacer and insulating bushings from the bolt, remove the bolt from the rectifier unit and remove the capacitor tip from the contact bolt.
10. Use a marker to mark the relative positions of the front and rear covers of the generator (to simplify assembly).
11. Using an 8 mm socket wrench, unscrew the four bolts holding the front and rear covers of the generator together.
12. Use a slotted screwdriver to carefully push apart the generator covers.
13. Disconnect the back cover together with the stator winding from the front cover.
To determine the technical condition of the rear bearing, rock it from side to side and vigorously rotate its outer ring. The bearing should not have significant play, and the ring should rotate freely without jamming or extraneous noise. A faulty bearing must be replaced.
14. Use a marker to place a mark on the stator (to indicate its position relative to the back cover).
15. Remove the stator from the rear cover of the generator.
To determine the technical condition of the front bearing, hold the pulley with your hand, rock it from side to side and rotate the front cover. If the bearing seizes, has significant play, or makes noise when the cover rotates vigorously, it must be replaced. The manufacturer recommends replacing the front rotor bearing together with the front cover of the generator, since it is rolled into the cover. But, given that the cost of the bearing is significantly lower than the cost of a new front cover and, moreover, the generator assembly, it is advisable to press out and replace the faulty bearing.
16. If it is necessary to replace the front bearing of the generator, use a 24 mm socket wrench to unscrew the pulley mounting nut, holding the pulley with sliding pliers.
17. Remove the pulley with spring 3 and flat washer 2, and spacer sleeve 1 from the rotor shaft.
18. Screw the pulley mounting nut onto the threads of the rotor shaft (flush with the end). By hitting the nut with a hammer with a rubber striker, we press the rotor out of the front bearing.
19. If it is necessary to replace the front bearing of the generator, install the front cover in a vice (soft metal pads must be put on the jaws of the vice).
Replacing Priora generator brushes
Current to power conversion calculator
Convert how many amperes a kW has online. Calculator for converting current amperes to power watts
The generator cannot be called the weak point of the Lada Priora. In fact, at intervals of about 150,000 kilometers, only the brushes need to be changed. The nuance is that it is impossible to replace the brushes themselves in the Priora. And depending on the vehicle’s configuration, this procedure can be either quite simple or very complex. Or it will require removing the generator altogether.
Therefore, in the article we will look at what brushes are used on the Priora, and how they are changed in cars with and without air conditioning, as well as without removing the generator or dismantling it.
Preparation and necessary tools
It is more convenient to remove the generator on a Lada Priora on an overpass or inspection hole. Before you begin dismantling, prepare the following tools:
- locksmith's crank;
- extension;
- cardan from the tool kit;
- heads for 10, 12, 13, 17;
- spanners for 10, 12, 13, 17.
- WD-40 product.
This is interesting: Reasons for engine overheating When driving onto a pit or overpass, do not forget to install chocks under the wheels so that the car does not roll spontaneously. Then disconnect the negative terminal from the battery. Apply WD-40 to the mounting areas of the generator and air conditioning compressor. Wait 10-15 minutes for the product to take effect.
When do you need to replace generator brushes on a Priora?
Worn generator brushes Priora
This is actually quite easy to determine. Any Priora owner can determine by symptoms when to change the brushes, because he will notice that his car has:
- the headlights begin to burn worse
or the light intensity changes when the engine speed changes; - the network voltage has dropped
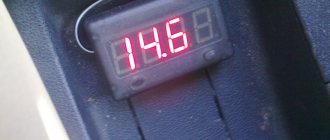
(normal level 13.6-14.5V); - The battery charge disappears and the battery light on the instrument panel starts to light up frequently;
- Electrical equipment
turns off or reboots spontaneously.
The charging voltage measurement function on the instrument panel helps in diagnostics. If any of the factors described above appear, then replacing the generator brushes with a Lada Priora becomes a necessity. Additionally, you can check the condition of the generator brushes and its other components using these instructions.
Relay-regulator connection diagram
According to the diagram, the HL 4 LED will light up if a plus from the ignition switch comes to connector pin 21 and diode VD 1 passes the minus from the LED through connector 32 to the positive brush of the regulator relay, where through the armature winding and the minus brush the LED finds a minus and lights up. In my case, there was no contact on the positive brush due to the fact that it was worn out and jammed in the seat, in short, it froze. I just changed the relay regulator with new brushes and charging appeared. I'm lucky. It was more difficult if the LED or VD 1 diode burned out and would have to be replaced.
Priora generator brushes
What voltage regulators can be installed? There is no single original number that would fit the generator - the spare part code depends on the manufacturer. The table shows the most common articles of brushes assembled with a regulator.
| Voltage regulator code | Which generator is it suitable for? | Manufacturer |
| 844.3702 | For 80A generators | Orbit |
| 849.3702 | For 90A generators | Orbit |
| 897.3702 | For 90A and 115A generators | Orbit |
| 9444.3702 | For 80A generators | VTN |
| 9454.3702 | For 90A and 115A generators | VTN |
| 611.3702-01 | For 80A generators | Energomash |
How to change the brushes of a Priora generator without removing
Often, replacing generator brushes on a Lada Priora is done with your own hands. First of all, this is due to savings. Many car services charge a significant fee for this procedure. With the average cost of replacing this part on other VAZ models being 400-500 rubles, for Lada Priora they will charge 2500-3000 rubles for such a service. This is explained by the fact that the generator needs to be removed, and sometimes other parts in the engine compartment will have to be unscrewed. So it turns out that replacing generator brushes on a Priora at a service station costs as much as half a new generator , which is not very cost-effective.
Anchor malfunction.
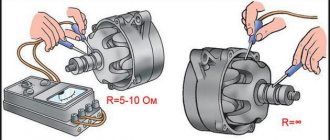
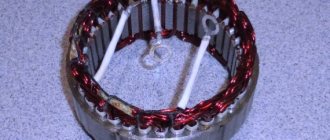
Another common malfunction of a modern generator is wear of the armature slip rings. This is due to their small diameter and high armature speeds. On old-style generators, the rings had a larger diameter, and the armature rotated at a lower speed and therefore were less subject to wear, but the wires of the armature winding could fall off in them, which also leads to malfunction. To check, you can connect a test lamp in series with the power source and slip rings, or measure the resistance between them. The lamp should be lit when connected, and the resistance value should be about 0.5 - 2 Ohms. Upon visual inspection, the slip rings should not be worn.
All these recommendations are just a small part of the malfunctions that most often occur in operation. If the check fails to determine the malfunction, you must contact the service for a complete, professional diagnosis and repair of the generator.
“If you notice an error in the text, please highlight this place with the mouse and press CTRL+ENTER” “If the article was useful to you, share the link to it on social networks”
How to replace alternator brushes on a Priora without air conditioning by removing the alternator
It is best to change the voltage regulator on a removed generator - this makes it more convenient to perform all operations. But to remove the generator on a car without air conditioning, you will need a pit or overpass. This option is used in car service centers and in cases where it was not possible to get there any other way. To dismantle a Priora generator without air conditioning, you need to follow the following algorithm.
The process of replacing brushes with removing the generator
- Disconnect the battery.
- Remove the engine protection.
- Loosen the generator belt tension roller and remove the belt from the pulley (it is not necessary to completely remove the belt).
- Disconnect the wiring block from the D+ connector.
- Disconnect the wires from the contact pin.
- Move aside the rubber boot to unscrew the nut.
- Unscrew the lower clamp nut and remove the clamp screw.
- Unscrew the nut securing it to the upper bracket.
- We take the generator down and then to the right.
- We turn out the adjusting screw and remove the tension bar.
- After making sure that there are no wires left connected to the generator, remove it from the car.
- We replace the voltage regulator and brushes according to the algorithm described above in the section on replacement without removal.
- Installing the generator is done in reverse order. After this, it is very important to adjust the tension of the drive belt.
Air conditioning systems
One of the consumers is a heating device. It is part of the climate control system. A control controller works with this system. The work is automatic. The driver only sets certain parameters.
On cars, the electrical circuit of a VAZ Priora may contain air conditioning systems. After pressing the button, the relay is activated, the compressor is turned on, power is supplied to the electromagnetic clutch, and the pump is turned on. The air conditioning turbocharger begins to rotate, creating pressure, and begins to regulate refrigerant through the system.
How to replace Priora generator brushes
If the owner of a Priora notices that the battery is no longer charging, then first of all you need to check the condition of the generator brushes. It is worth noting that at first the battery charge will decrease slightly, but if the problem is not corrected in a timely manner, the battery charge will soon disappear altogether. Replacing the worn brushes of the Priora generator will help correct this problem. And since this process is not so complicated, you can carry out such work yourself, taking into account advice from professionals in your field.
Required tools and materials
Every car owner should have a minimum set of tools in the trunk; this will help avoid great difficulties that may arise in the absence of this very tool. It is not difficult to check the condition of the generator, but the final result will depend on the type of check and the accuracy of the equipment used. The best solution would be a multimeter; even an inexpensive device with a minimum of functions will do. In addition, you may need:
- wrenches (usually sizes 10–14);
- flat or Phillips screwdriver;
- knife, side cutters, pliers and other tools for working with wires;
- electrical tape or heat shrink tubing.
Don’t forget about electrical safety - wear gloves, avoid contact of “positive” wires and terminals with the car body and other grounded objects.
Source
Step-by-step replacement of generator brushes
You can replace worn brushes without removing the generator from your car. However, according to experts, this process will be much simpler if you remove the generator from its permanent place before replacing it. After the generator is removed, the replacement process is performed in the following order:
- using a screwdriver, remove the cover made of plastic to protect the generator in order to be able to get to the brushes;
- the connecting plug with wires is disconnected from the brushes;
- two fixing fasteners, which are located at the edges of the elements being inspected, are carefully unscrewed;
- using a size 13 wrench, unscrew the fixing bolt in the center of the element;
- after all the fasteners have been unscrewed, the brushes should be removed to inspect their external condition and replace them.
parking lights
For example, the electrical circuit of a Lada Priora station wagon has the function of both automatic and manual activation of side lights. The activation itself occurs after turning the handle for the side lights and headlights on the dashboard. The contact is triggered and the lights turn on.
The circuit contains fuses that serve to protect against overvoltages and short circuits. Power is supplied to a lamp located on the dashboard. To adjust the brightness of the lights, a special regulator located on the lighting control module is used.
The headlight design of the Priora differs from other cars. The electrical circuit of the VAZ Priora contains a light sensor, as well as a lighting control unit. After turning on the ignition and the lighting control button, the electronic unit responsible for lighting control is activated.
If there is not enough light outside, the unit receives a signal from a sensor located on the windshield. There is also a rain sensor there. After receiving such a signal, the electronic control unit supplies power to the electromagnetic relay coil. Power is supplied to the headlights.
What signs will indicate that the generator brushes are faulty?
The following external signs will help you understand that the generator brushes have become unusable on a Priora with power steering or air conditioning:
- length of the element being inspected;
- if upon inspection it is discovered that the length of the brushes is less than 5 mm, they must be replaced;
- Replacement will also be required if the appearance of the brushes indicates uneven wear, that is, one element is heavily worn out, and the second is brand new. Uneven wear of these elements will certainly negatively affect the operation of the generator, so experts recommend replacing them without fail.
The cost of new components for the Priora does not exceed 150 rubles; of course, you can also find cheaper brushes for the generator, but it is unlikely that such elements will serve faithfully for a long period of time, and such savings will lead to a repeated procedure for replacing these components.
Once high-quality brushes have been purchased (it is advisable to give your choice to well-known manufacturers), you can begin assembling the entire element and installing the generator in its original place.
But as was said earlier, such a process can be carried out without removing it, which, of course, must be decided by each car owner independently. These operations, as many understand, are performed in reverse order, and after the final stage it is necessary to check whether the entire generator is working efficiently. If the replacement of worn brushes is carried out correctly, and the problem with charging the battery was precisely the wear of these components, then the car owner will solve this issue, and without the help of service station employees, which will save a lot of his own money. The replacement process itself is quite simple, but if difficulties arise during the work, you can watch the training video on the Internet resource at any time, which is provided by professionals, choosing the most suitable time for viewing.
Source
Reassembly
After purchasing high-quality brushes (it is advisable that your choice falls on a well-established manufacturer), you can begin the general assembly of the element, and then install the generator itself in its place.
However, as mentioned above, the last procedure can be performed without removing the generator. Which, however, is something every car owner decides independently. All operations performed should be performed in reverse order.
After completing the work, the operating efficiency of the entire generator must be checked.
You should use a voltmeter to check whether the charging process is moving, as well as what the panel displays. Make sure its work is objective. Indicators that correspond to each other are evidence that the remaining elements can be installed in their places and the generator repair has been completed successfully.
If the replacement of failed brushes was carried out correctly, and the battery was discharged precisely because the main elements of the car’s electrical system were worn out, the car owner will solve this problem without the help of service station workers.
And in this case, you will save a lot on such a service. The replacement process is really quite simple. However, if you encounter any difficulties during the repair work, you can watch the help video. It is provided by specialists.
On the Internet resource you can, among other things, find out:
- about design features - generator 2170;
- how to check the generator for operability, what you should pay special attention to;
- how to change wipers on a Priora and so on;
- What other possible problems can occur with the power generator?
