How to determine the malfunction?
A faulty unit can be detected either by visual inspection or by diagnostics.
The visual method is to check the behavior of the machine at different key positions. First, the key is set to the right position - “ignition”. If the unit is working properly, then all electrical equipment works. If there are any problems with the electrical system, either all or part of the electrical equipment does not work.
In the second position of the key, the starter should start. If it does not spin and you cannot hear the click of the retractor relay under the hood, then it is possible that either the starter or the starter is faulty. More specific information can be obtained using diagnostics. This is done with a multimeter set to ohmmeter mode. To carry out diagnostics, you need to remove the steering column cover.
Next you need to do the following:
How to replace (remove) the ignition switch on a VAZ 2114 (2113, 2115) all the nuances
- Disconnect power from the 3Z.
- Next, find pins 4 and 7 coming from the node. They correspond to pins “30” and “15”, and connect the multimeter terminals to them.
- Then the key in the 3Z turns to the first position. If the unit is working properly, the resistance should be zero.
- Then the operation of the unit is checked when the key is turned to position II. Likewise, the multimeter should show zero resistance if the circuit breaker is working properly.
Once you are convinced that the protection device is faulty, it must be replaced (the author of the video is Region 4253).
Replacing the lock return spring:
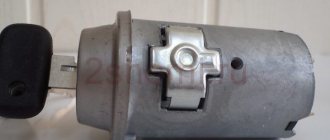
At the beginning of the operation, in order to remove the spring, you will need to pick up the lock itself and unscrew the three bolts that secure the bracket to it; see the approximate location of these bolts in the photo below, in which one of the screws is clearly visible.
When the bolts are all unscrewed, carefully remove the bracket and make sure that the ball that is inside does not fall out (It is shown in the photo below), but if it falls out then put it in place, now let's talk about the return spring, as you already saw in the photo it is located in the cylinder of the lock itself and with its antennae it rests on the grooves that are in the cylinder, so using a screwdriver, remove the old one from there and install a new one in its place and assemble the entire mechanism in the reverse order of removal.
Additional video: For more information on how to replace the ignition switch, see the video below:
conclusions
There are many reasons and signs of malfunction of the VAZ-2114 ignition switch, but you need to know them. Also, it is worth noting that in order to prolong the operation of this unit, it is necessary to remove the load from the passing current circuit. To do this, additional electrical appliances must be connected via a relay.
I encountered this problem myself. The contacts were worn out, it’s good that they were not on the road, they managed to fix it, but I spent a very long time looking for the cause, I advise you to immediately pay attention to the contacts in the event of a breakdown.
21099 why do the lights not go out? The reason may be the ignition switch. Tell me, who knows?
Agree. It is better to replace such a unit immediately than to look for something that can be replaced in it. If you are experienced, then you can, but if you are a beginner, then it is better to just buy a new one.
It is difficult for a beginner to immediately figure out what the problem was, especially without instructions like here. In general, it is easier to change, but if you like to understand, then it is better to disassemble and find the reason according to the instructions.
How to change the ignition switch on a VAZ 2115
A justified need for timely replacement of the lock may arise for several reasons. This mainly happens in the following situations:
- the car owner lost his keys;
- the contact group has worn out or failed for any reason;
- the structure is deliberately damaged to allow unauthorized access.
Important! Many problems can be identified after a careful inspection of the area.
- after switching to the first position, not all electrical appliances connected to the contacts started;
- after further rotation there is no reaction from the starter, for example, there are no clicks when the starting relay is pulled in;
- The key fits tightly into the cylinder; some effort is required.
We recommend resorting to primary diagnostic measures. Often auxiliary electrical devices are used for this: testers, multimeters, ohmmeters. The verification algorithm consists of the following steps:
- we turn off the power supply from the lock, having first gotten rid of the casing from the steering column;
- We switch the measuring instruments to resistance measurement mode;
- on the connector coming from the ignition, look for contacts marked “15” and “30” (according to the vehicle’s operating instructions);
- we connect the “crocodiles” or tester plugs to them (it doesn’t matter which contact is which);
- turn the “ignition” to the first position and look at the tester screen;
- scroll to the next position and compare the values on the screen.
There should be zero values on the screen to confirm functionality. This applies to both positions.
Removing a faulty device
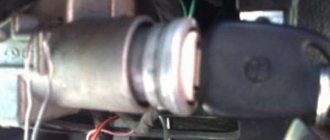
Having opened access to the protection zone, you can dismantle it. The difficulty of dismantling is that there are no heads on the 4 bolts that secure the ignition switch to the steering column on the VAZ 2114. The absence of heads prevents criminals from stealing a car without a key.
Dismantling of the protection zone is carried out as follows:
- you need to loosen the bolts using a hammer and chisel;
- then the loosened bolts are removed with pliers;
- then the bracket is removed from the steering column;
- the power supply is turned off;
- Now you can dismantle the unit.
The node connection diagram is simple. If it is purchased assembled, then it is not difficult to understand the diagram in order to connect the wires correctly.
Principle of operation
The lock works as follows. When the key is placed in the hole, its locking mechanism is deactivated. This happens due to the reverse movement of a special rod. By turning the key to the first position, you will power the “15” and “30” contacts. This will alert (but not enable) the following items:
- ignition system;
- headlight bulbs;
- external light alarm;
- electrical equipment of the dashboard;
- windshield wipers and washer;
- cigarette lighter;
- rear window defroster;
- generator excitation winding.
If in a VAZ-2114 car the ignition switch is moved to the second position, in addition to the listed equipment, the starter will start. As you can see, a lot depends on the serviceability of the device in question.
Replacing the ignition switch on Kalina
Welcome! The ignition switch is essentially a small part, having access to which you can start the car without a key (If a person has experience in this matter), but if you take ordinary owners, this does not apply to them (Although you may have to start when be it your car without a key), but today we are not talking about that, but about replacing the ignition switch on a car, in this article we will analyze with you all the nuances that relate to this lock, namely how to access it and what signs it will serve when it fails, so let's get started!
Note! In order to change the ignition switch, you will need to stock up on: A wrench, a hammer, as well as a chisel and a screwdriver with a flat rather than a cross-shaped blade at the end!
Repair or change
What to do if a faulty ignition switch is detected? You can, of course, try to restore it. But this is only if you have some experience in this area, the device is relatively new, and you suspect that contact wear is to blame. Otherwise, it is better to replace the lock assembly. Fortunately, it is not that expensive - no more than a thousand rubles, and this procedure does not take much time.
Instructions for repairing and replacing the ignition coil
Replacing short circuits on valves 8 and 16 in an engine represents a sequence of steps:
- The module can be easily found by the high voltage wires coming from the SZ spark plugs.
- Before starting work, you must turn off the negative voltage on the battery.
- The next step is to disconnect the wire block from the short circuit and high-voltage wires.
- Next, you need to unscrew the bolts securing the MZ to the engine, and you can dismantle the device.
- Now you need to install a new or repaired device and perform the steps in reverse order.
When connecting, follow the connection diagram in the manual.
Ignition on a VAZ fifteenth model: repair, replacement and tuning
The ignition system (IS) is an important component of any vehicle. For trouble-free operation of the machine, it is necessary to monitor the serviceability of all components and parts. The article is devoted to SZ, what an ignition switch (IZ) is, how to replace it, how to check the ignition coil of a VAZ 2115 , how to set the ignition .
Typical unit malfunctions
Signs of a faulty short circuit in VAZ engines with 8 valves, UAZs and other cars are similar:
- power is lost, it seems that the engine does not pull;
- the appearance of failures in engine operation;
- unstable operation at idle;
- Cylinders 2-3 and 1-4 do not function in pairs, there is no spark.
If the listed symptoms appear, you first need to check the spark plugs and crankshaft position sensor. Fuel injection into the injectors is regulated based on sensor readings, so if there is excessive fuel consumption, they require checking. The short circuit should be checked last.
You can check the ignition module (IM) on an 8-valve engine in one of three ways:
- The easiest way is to replace the module being tested with a known-good device. True, you need to find a suitable module. Before checking, be sure to make sure that the high-voltage wires are in good condition.
- The second method is to move the module. If, when you move it and the wire block, changes in the operation of the motor are noticeable, then there is a problem with the contacts. In this case, you can do the repair yourself. If repair is not possible, the device should be replaced.
- The third method is to check using a multimeter set to ohmmeter mode. It is necessary to measure resistance at the paired terminals of coils 2-3 and 1-4. It should be the same and be about 5.4 kOhm.
Ignition switch and features of its replacement
ZZ plays an important role in the vehicle's SZ, both for an 8-cl and 16-cl engine. It is activated when the starter is working, thanks to it the lighting, turn signals, and power windows work.
Replacement or repair of the VAZ 2115 ignition switch may be required if:
- lost or broken keys;
- the lock was damaged during an attempted theft;
- the 3Z cylinder is faulty;
- The contact group does not work.
Ignition switch VAZ 2115
To replace you will need: a set of keys, a hammer, screwdrivers, a thin chisel.
- The car's power is turned off by disconnecting the negative terminal from the battery.
- We remove the steering wheel.
- Next you need to remove the steering column switches.
- Then you need to loosen the bolts securing the clamp that holds the ZZ on the steering column. If the heads are cut off, the bolts should be carefully knocked out using a hammer and a thin chisel.
- Now you need to disconnect the wiring harness.
- Next, you need to completely unscrew the bolts from the 3Z housing and you can remove it.
- A new device is installed in place of the old one.
- Assembly is carried out in reverse order.
Preparation
At the preparation stage, you will need to collect the necessary tools near you, which will be useful in the process of dismantling and installing a new ignition switch. You will also have to remove the steering cover and steering column shifters. Doing this is quite difficult, but we will tell you step by step about all the nuances of these preparatory activities. So you can easily figure out for yourself how to remove the ignition switch on a VAZ 2114.
Replacement process
Tools you will need:
- Phillips strong screwdriver;
- Open-end wrench 10 millimeters;
- Chisel;
- Hammer;
- Pliers or pliers;
- New ignition switch assembly;
- Lock mounting screws (4 pieces).
Now let's move on to the casing and switches. For more convenient work, many advise removing the steering column switches and the steering wheel itself. Dismantling the casing is performed in the following sequence:
- Disconnect the negative cable from the battery. Nobody has yet canceled the requirements for personal safety and protection against electric shocks;
- Unscrew the three screws securing the two parts of the casing. A screwdriver is useful for this;
- Unscrew the screw that connects the housing to the connector of the steering column switches;
- Remove the two screws that hold the lower housing to the steering column;
- The lever that fixes the column at the corner leads down;
- The steering wheel also goes down;
- The lower casing is then removed;
- The power supply from the emergency lights must be disconnected;
- Now you can remove the top casing;
- To dismantle the steering column switches, you need to act one by one;
- Simultaneously press both latches and thereby remove the elements from their seats;
- Disconnect them from the power supply.
How to set the ignition yourself?
Precise ignition adjustment on the VAZ 2115 injector is performed using a special strobe light. If this is not possible, you can set the ignition on the VAZ by spark.
- First of all, the engine is warmed up until it reaches operating temperature.
- The distributor does not need to be removed, but only relaxed.
- You need to remove the central wire from the distributor.
- The piston in the 1st cylinder must be at TDC (the marks are set differently on 8 and 16 valve engines).
- Now you need to hold the short-circuit wire with your left hand and turn on the ignition .
- Use your right hand to adjust the distributor counterclockwise, while keeping the high-voltage wires above the metal.
- Then similar actions are performed, turning the distributor clockwise until a spark appears.
- At this point, the alignment ends, and the distributor is fixed in its regular place.
Replacing the ignition switch on a VAZ 2115
With the ignition set correctly, the car will operate without interruption with optimal fuel consumption and maximum power.
Replacing the ignition switch on VAZ 2114 and 2115. Work in the evening
Download PDF
Work such as replacing the ignition switch on VAZ 2114 and 2115 is required quite often. At the same time, it is quite complex. The main difficulty lies in the need to remove a certain number of parts that are not related to the lock, but at the same time interfere with the work of replacing it. Almost every car enthusiast can handle the process itself; practically no special skills are required. In this regard, there is practically no need to visit a car service center for this.
Everything can be done in the garage with a minimum set of tools. The whole work takes about an hour, if you decide to repair the old one instead of installing a new switch, then the work will take a little longer.
The ignition switch on VAZ 2114 and 2115 is replaced in cases of its malfunction. The most common cause is failure of the contact group. Thus, the lock simply does not turn on the ignition. An equally common malfunction is the problem with the cylinder; it often gets stuck in one of the positions.
The only way to correct the situation is to replace the lock, or install a new cylinder. The lock has an LED that provides illumination, making it easier to insert the key at night. Sometimes it fails, or more precisely, the problem does not arise with it, but with the microboard that is responsible for turning it on. To install a new diode, you need to not only remove the lock , but also disassemble it.
Installing a new device
Now you can finally proceed directly to replacing the broken or worn out ignition switch on your VAZ2114 car.
Removing the ignition switch
To do this, follow the following sequence of actions:
- Insert the key into the new lock and turn it to the first position. This will allow the latch, which is responsible for locking the steering shaft, to hide inside the housing structure;
- Insert the lock into place following the reverse dismantling sequence;
- Install the four retaining bolts and tighten them slightly.
Tools
For this work you will need the bare minimum of tools. Everything you need can be found in any garage. To avoid running around the garage looking for the required equipment while working, prepare:
- A set of keys. It should include both regular keys and heads;
- Phillips and slotted screwdrivers;
- Pliers;
- Thin chisel;
- Hammer.
If you want to diagnose and repair lock components, you will need a multimeter. It will be needed to check the functionality of the contact group.
Replacement
The work of removing and installing the ignition switch on these models requires a lot of preparatory steps. This is perhaps the biggest difficulty. Be sure to open one of the windows before work. This will avoid problems if the central lock is accidentally activated. Also, you should disconnect the battery to avoid short circuiting. Put the car on the handbrake.
Replacement is carried out in the following order:
Now all that remains is to connect the battery and start the engine. This will ensure that the ignition switch is installed correctly.
Conclusion. All frequently operating components and parts of a domestic car are at risk. Therefore, the question of how to replace the ignition switch on a VAZ 2114 and 2115 is not surprising. The work is quite simple, despite the large number of operations required.
Steering lock testing
Steering wheel testing
If you don't check the steering lock, you may encounter certain problems in the future. Therefore, do not waste your time on this event. It consists of removing the key from the ignition and turning the steering wheel at a slight angle.
- If there is no lock, you will need to slightly adjust the position of the lock. Make sure it fits into the groove located on the steering shaft.
- If the locking is effective, you will only need to tighten the four installed breakaway bolts until they stop. Twist until the heads break.
When the lock installation is completed and the test has passed, do not forget to connect the device to power and start the engine. If it starts, all systems dependent on the ignition switch are working, you can fully begin reassembly. Follow the reverse instructions for removing the casing and steering column switches. It would not be amiss to check the condition of certain nodes along the way. It is quite possible that some of them also need replacement or a little preventive maintenance.
Source: luxvaz.ru
VAZ ignition switch pinout
The ignition switch in cars of the VAZ family fails from time to time due to weakening of the contact posts or burning of the contacts inside it. It also happens that the cams of a plastic roller are produced. You can disassemble the lock and clean it, but it’s better to just replace it with a new one, considering that it costs pennies compared to imported locks.
But if connecting the wires together did not result in the starter operating (or it did not turn on the first time), check the solenoid relay on the starter. The contact spots on it may also burn out, which will prevent the circuit from closing normally. Alternatively, you can use a screwdriver to short-circuit the two large terminals on the solenoid relay (before doing this, put the car in neutral and use the handbrake). When closed, the starter should begin to spin vigorously. If this happens, remove and change the solenoid relay. If the starter rotates “sluggishly” when it closes, you will have to remove it and check the condition of the brushes.
All operations are performed with your own hands, without the help of car service specialists. Moreover, to replace it, you will need to know the pinout of the wires coming from it, for which the editors of the site 2 Schemes.ru have prepared a large reference material.
The ignition switch is designed not only to start the engine - it performs several functions at once:
- supplies voltage to the vehicle’s on-board network, closing the circuits of the ignition system, lighting, sound alarm, additional devices and instruments;
- at the driver’s command, turns on the starter to start the power plant and turns it off;
- turns off the power to the on-board circuit, preserving the battery charge;
- protects the car from theft by fixing the steering shaft.
Characteristics of a contact group
To begin with, we suggest finding out why an ignition switch contact group is needed, what its structure is and how it works.
Purpose and functions
In essence, KGZZ is used to ensure the connection of all electrical circuits of the vehicle without exception. That is, when the driver turns the key in the lock, the KGZZ closes the contacts, thus allowing the use of all electrical devices without exception.
Device
Diagram of the lock The ignition switch itself is a simple circuit breaker.
When you turn the key, the contacts are adjusted, making it possible to start the engine, power the equipment, and also stop the power unit. If you disassemble the body of the lock itself, you will see that the device itself is located inside it, as well as a large number of wires connected to each other. The wires to the lock come from the battery. The contact group of the ignition switch itself goes directly to the connection point of these electrical devices. To prevent short circuits and to delimit the contact elements themselves, the KGZZ is mounted in a plastic case.
Principle of operation
An automobile ignition system can be either battery-based or generator-based. Their fundamental difference is that battery ignition is equipped with an autonomous power source; accordingly, all electrical equipment can be turned on without starting the engine. As for the generator system, in this case, activation of electrical equipment is possible only after starting the engine.
When the driver turns the key in the lock, the electrical circuit contacts are closed from the negative terminal on the battery to the coil. At the same time, voltage begins to flow through the wiring to the lock, which is supplied to the coil through contacts, after which it returns to the positive output of the battery.
At the moment when the voltage passes through the coil, a very high voltage is generated in it, which is subsequently transmitted to the spark plugs. Ultimately, the contacts close and the engine starts. In addition to the ignition circuit itself, there are other electrical circuits in the car that conduct voltage from the key to electrical appliances. Each of the wires is responsible for connecting the contacts to each other (the author of the video is the Auto Repair and Maintenance channel).
Basic faults
Briefly about the reasons why repair of the ignition switch contact group may be required:
- Overloading of the device, which may be due to the installation of additional devices of increased power, as a result of which a higher voltage will pass through the KGZZ. For some time, the device can cope with this current, but over time, carbon deposits will begin to form on it. It should be noted that this deposit, as a rule, appears precisely inside the contact, and not on its surface, then the only way out is to replace the contact group. To prevent this problem, all additional devices must be connected via fuses or relays.
- Short circuit in the electrical network. If a short circuit occurs, this may also cause high power voltage to pass through the CGZZ, which again will cause its failure.
- Many motorists who changed the KGZZ faced the problem of abrasion of the tracks, as well as the contacts themselves. This problem usually occurs as a result of wear and tear on the lock, but in some cases the cause may be faulty.
- Mechanical failure of contact elements, as well as other components of the group.
- Overheating of the device, which can lead to damage to the design of the CGZZ. Overheating, as a rule, also occurs as a result of increased load on the device. When working in conditions of elevated temperatures, the tracks may move or even break (video author - AlexAvtoKhlam).
Source
Ignition on a VAZ fifteenth model: repair, replacement and tuning
The ignition system (IS) is an important component of any vehicle. For trouble-free operation of the machine, it is necessary to monitor the serviceability of all components and parts. The article is devoted to the ignition lock (IZ), how to replace it, how the VAZ 2115 ignition coil is checked, how the ignition .
Typical unit malfunctions
Signs of a faulty short circuit in VAZ engines with 8 valves, UAZs and other cars are similar:
- power is lost, it seems that the engine does not pull;
- the appearance of failures in engine operation;
- unstable operation at idle;
- Cylinders 2-3 and 1-4 do not function in pairs, there is no spark.
If the listed symptoms appear, you first need to check the spark plugs and crankshaft position sensor. Fuel injection into the injectors is regulated based on sensor readings, so if there is excessive fuel consumption, they require checking. The short circuit should be checked last.
You can check the ignition module (IM) on an 8-valve engine in one of three ways:
- The easiest way is to replace the module being tested with a known-good device. True, you need to find a suitable module. Before checking, be sure to make sure that the high-voltage wires are in good condition.
- The second method is to move the module. If, when you move it and the wire block, changes in the operation of the motor are noticeable, then there is a problem with the contacts. In this case, you can do the repair yourself. If repair is not possible, the device should be replaced.
- The third method is to check using a multimeter set to ohmmeter mode. It is necessary to measure resistance at the paired terminals of coils 2-3 and 1-4. It should be the same and be about 5.4 kOhm.
Replacing the ignition switch on a VAZ car
To carry out repair work to replace the VAZ ignition switch, we will need: a screwdriver, a tester and a thin awl. Once you have everything you need, you can begin the repair. On all classic VAZ cars, the ignition switch is located at the bottom, on the left of the steering column. To replace you need:
- Disconnect battery
- Remove the plastic casing by first unscrewing the screws that secure it.
- Then unscrew the two screws securing the ignition switch to the bracket.
- We insert the key and set it to position 0 to disable the anti-theft device.
- Insert the awl into the hole in the bracket and press the latch. Then we take out the lock .
- After removal, it is recommended to mark the contact wires so that nothing is mixed up the next time you connect.
Removing the ignition switch on a VAZ-2106 begins with disassembling the steering column casing. We unscrew the five bolts and remove its halves. Before you begin disassembling the electrical part of the lock, it is very useful to disconnect the battery by removing the negative terminal or unscrewing the switch bolt. After this, remove the spring retaining ring from the back of the lock body and remove the contact group. We move it to the side so that it does not interfere, and we begin to remove the lock itself.
It is secured in the steering shaft bracket with two bolts, after unscrewing which nothing happens. It is useless to try to remove the lock from its socket if you do not know about the special stopper. It is located on the lock body under the bracket. We press this stopper into the lock with a thin screwdriver through a small hole in the bracket. Further, according to all the instructions, the lock should be pulled out freely, but this does not work.
An obstacle that is not described anywhere is the anti-theft rod. Even though it is in a “disconnected” state, it still clings to the steering shaft. To remove the lock, you have to manipulate the key. In different positions of the lock cylinder, the anti-theft device also moves and is recessed as much as possible when the key is in the “Starter” position. After a few minutes the lock can be pulled out of the bracket.
Here is the time to write that assembly of the unit should be carried out in the reverse order of removal. And in general, this will be true. First you need to insert the new lock into the bracket, recessing the latch and holding the key in the starter position, tighten the fastening bolts, then connect the wires. Particular attention must be paid to this, because an incorrectly connected contact group can damage the starter or ignition system. We reconnect the wires from the old group to the new one one at a time, checking the numbers on the contacts. After this, we assemble the steering column casing.
On the car, the ignition switch is located on the driver's side, mounted on the left side of the steering wheel on the steering gear bracket, under the instrument panel.
First of all, you need to get rid of the decorative casing of the steering shaft, unscrew the fastening screws and remove it. We performed similar actions when replacing the steering shaft.
After removing the decorative casing, unscrew the two screws securing the ignition switch to the body, then insert the key into the lock and turn on the “0” position, which turns off the anti-theft device. Through the hole in the bracket, press the lock lock with a thin awl and remove the ignition switch from the mounting socket. This completes the repair work to remove the ignition switch.
On VAZ 2108 and higher models, a package with wires is connected to the lock, that is, nothing needs to be marked and the possibility of mixing up the wires when installing a new switch is completely eliminated. Well, on VAZ 2107 and lower models, this is not the case, each wire is connected separately, so when removing each wire, it must be marked so as not to be confused during further installation.
To replace the contact group of the ignition switch, you need to use a thin screwdriver or an awl to pry the retaining ring from the edge and remove the contact part. When installing a new contact part, orient it so that terminals “15” and “30” are on the side of the locking rod.
At this point, the repair work is completed, install the new ignition switch in the reverse order of removal, connect the wires, transferring the markings from the old switch to the new one. The pinout or connection diagram of the VAZ ignition switch wires is quite simple and understandable, so every car enthusiast can carry out repairs or replace a spare part without the help of car service employees.
Pinout according to the old type
Pinout of the VAZ-2109 ignition switch with unloading relay:
- comes 12V in position I, II, III (parking)
- comes 12V in position I, II, III (parking)
- 12V comes to position III (parking)
- position I, 12V goes out after turning on the ignition (contact 15/2), disappears at start (II);
- position I, 12V goes to the starter (pin 50);
- position I, 12V goes out after turning on the ignition (pin 15), does not disappear when starting II;
- 12V comes from the battery (pin 30);
- 12V comes constantly.
Sources:
https://avtozam.com/vaz/2115/zazhiganie-remont-zamena-i-nastrojka/ https://autoflit.ru/2220-zamena-zamka-zazhiganiya-na-vaz-2114-i-2115-raboty- na-vecherok.html https://moto-sol.ru/diagnostika-i-remont/kak-snjat-zamok-zazhiganija-na-vaz-2115.html
