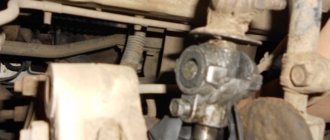
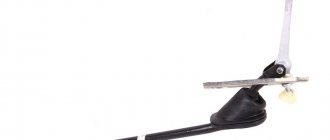
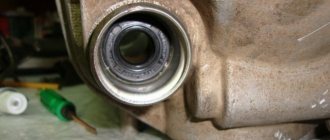
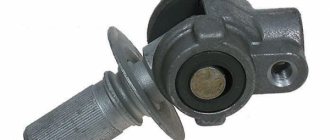
Many inexperienced drivers begin to panic and talk about a breakdown of the gearbox, although in fact the culprit of the problem is the rocker.
Practice shows that replacement and repair are rare and not very common measures. Much more often, the current situation forces you to simply adjust the scenes.
But today we will talk not only about adjustment, but also talk about the features of modification, repair and replacement of this element.
Element location
Signs of breakdown
In fact, it is not difficult to determine that the backstage is the culprit of all the troubles. After all, there are a number of characteristic signs that indicate this.
You can prepare to work on adjusting or replacing the rocker if:
- The first gear does not want to stubbornly engage or disengage, or move to another position;
- When you engage first gear, initially the gearshift knob behaves normally, but then the box spontaneously jumps into reverse gear;
- You cannot engage first and/or fifth gear, while changing to other speeds is no problem.
At the first sign of a problem, you should go to a service station or your own garage to have the problem repaired.
Sign of breakdown
Explanation
There is play on the gear lever
Most likely the linkage is worn out. In this situation, the problem can only be solved by replacing the worn element
It occurs most often when there are problems with the gearbox on a VAZ 2110. The ringing can be caused by defects in factory production, or by poor-quality repairs
It’s hard to engage the gearbox, it gets knocked out
In such a situation, you can try two methods - adjustment and replacement. If the adjustment does not help, change the element
Instead of first gear, reverse gear is engaged
Everything is fine with the lever, but the rocker let you down. Make a replacement. Although repairs using a repair kit can also help
Lever vibrates excessively
Check the condition of your transmission handle joints. Most likely, there was a serious backlash in them
It's no secret that the Priora has a congenital problem - the rattling of the gearbox driveshaft.
Lada Priora Sedan designer assemble it yourself Logbook Mileage and clutch replacement
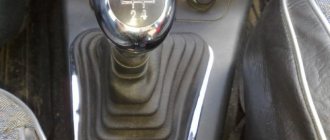
In almost all Priora, the rubber boot of the gearbox driveshaft is destroyed after some time. One glance is enough to give a verdict: the boot is made of burnt rubber, so it doesn’t last long! The markings on the cardan shaft boot were not Balakovsky.
It was decided to replace the Priora boot with a Viburnum boot, and also replace the Priora gearbox driveshaft itself with a Kalina driveshaft - it is too praised on various forums.
| The original boot of the gearbox driveshaft was cracked, and there was even a hole in its “accordion” | |
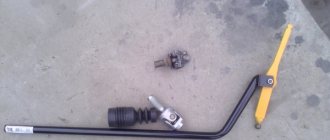
| I purchased a Balakovo-made boot and a Tolyatti gearbox driveshaft, all from Kalina | |
| I had to tinker a little with the Kalina gearbox driveshaft: the Kalina driveshaft rod is longer than the Priora rod by about 2 cm. Since I didn’t have the opportunity to compare the Kalina driveshaft with my own driveshaft (it was still on the car at that time), I had to cut it “blindly”. I measured 1.8 cm from the edge and started sawing | |
| I don’t have a grinder, I sawed with a hacksaw for metal - it took about 40 minutes of time, 2 hacksaw blades and a slightly ground corner on the emery))) It’s very difficult to saw, because the metal is strong! After sawing off part of the rod, I made a conical chamfer using sandpaper and a file. | |
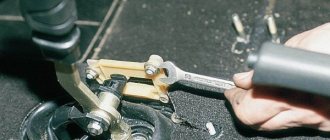
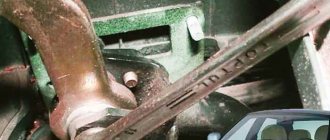
| Let's start removing the original gearbox driveshaft. We loosen the clamp and tighten the torn boot. Next, we unscrew the fixing bolt, but unfortunately this is not so easy to do: the bolt is coated with red thread locker and there is no way to unscrew it. The open-end wrench turned, “licking” the edges, but the powerful socket head did not fit; the gearbox housing interfered with it. In general, in order to remove the fixing one, stock up on spanners. Replacing the boot and drive shaft itself takes about 10 minutes | |
| I sawed at random, but the size was amazingly accurate - the length of the rod of the original Priora gearbox driveshaft and the Kalina gearbox driveshaft are the same! | |
| The original driveshaft of the Priora gearbox is essentially not a driveshaft at all: it bends only in one plane, while the Kalinov gearbox driveshaft bends in 2 planes. In addition, the photo clearly shows a huge gap of 2-3 mm on the original Priora driveshaft | |
| The anthers differ slightly, but the Kalinovsky anther has better workmanship than the original Priora anther | |
| A little about adjustment. While unscrewing the fixing bolt, the reverse gear jumped out. We had to manually select the desired gear using pliers, but we couldn’t do it the first time. Having assembled the mechanism, it turned out that in place of the reverse gear it turned out to be the first, and the second could not be engaged due to the reverse speed limiter. I had to redo everything. The repeated adjustment turned out even worse, only 3, 4, 5 gears remained. It was possible to adjust it normally only the 4th time, using pliers to find the reverse gear. And we found it this way: having removed the link and clamped the cardan shaft with pliers, turned it counterclockwise until it stops and pushed the hinge forward. In order to make sure that we had engaged reverse gear, I started the engine and carefully moved off - the car went backwards! Let me make a reservation right away: absolutely nothing will happen to the box, nothing will fly out or break. | |
| We install the gearbox driveshaft in place. Having straightened the clamp clamp a little, we connected the gearbox driveshaft to the rocker, set the lever to the reverse gear position and tightened the clamp clamp! The check showed that all the gears are there and they work perfectly. The feeling is very pleasant, the gears are engaged very softly and smoothly, no snagging. The lateral play of the lever has not changed, the longitudinal play has become smaller, but this difference is not noticeable either while moving or standing still. The position of the lever has changed a little, it has become a little closer to the driver’s seat, but it doesn’t touch anything, and it’s not noticeable from the outside, just by feeling it! But now you don’t have to reach so far for fifth gear |
Adjustment
Now let's talk about how you can adjust the link if it shows primary signs of malfunction.
- First of all, try by hook or by crook to engage first gear.
- Place the car on an overpass, turn on the handbrake, place additional supports under the wheels to avoid the car moving.
- Do not turn off first gear on the transmission.
- At the bottom, find the clamp that holds the rocker and secures it. To do this you will have to crawl under the hood. You shouldn't have any problems finding the gearbox. The clamp needs to be loosened.
- Now return to the salon. Your task is to move the box lever as far as possible to the left. If you start to pull the handle forward or backward, the drawstring will most likely come off. You don't need it.
- Get back under the car and tighten the clamp back.
- In many cases, simply shifting the rocker relative to the cardan shaft by literally a few millimeters is enough.
When adjusting, pay attention to the condition of the cardan shaft. It may require replacement if worn.
Work is in full swing
Finalization
Now many owners of the VAZ 2110 are discussing the possibility of refining and improving the gearbox by replacing the rocker from a standard one to a short-throw one.
The short walk is the result of independent tuning. Decide for yourself whether to carry out such work or not. But from the point of view of the efficiency of the gearbox, installing a short-throw rocker is only beneficial, since gears begin to shift more clearly.
Short walker
To install a short walker for yourself, it is not necessary to completely dismantle the standard version.
To do this you need to perform several operations:
- You just need to disassemble the ball joint from the outside;
- Next, the metal ring of the support is opened and the legs made of plastic are spread apart;
- This is how the ball will come out;
- Now the rod is disconnected from the support, and a small piece of pipe and a piece of sheet metal of good strength are welded to the rod;
- Be sure to lift up the hinge with the hook, otherwise erroneous switching of speeds will not be avoided.
Installing a short drive will entail the need to apply more force when engaging a particular gear. But on the other hand, switching becomes clear and smooth. Therefore, decide for yourself which option would be better for you - standard or short-stroke.
Backstage 2110: what you need to know
So, the shifter on a VAZ 2110 often makes inexperienced drivers think that the gearbox itself has failed. In fact, in the vast majority of cases, the VAZ gearbox linkage needs adjustment or repair. For this reason, it is important to know what symptoms and signs indicate a faulty yoke.
First of all, you should pay attention to the following:
- One or more gears do not engage or are difficult to engage;
- gears do not turn off after switching on or turn off with force;
- instead of engaging one gear, another is engaged (for example, instead of the first, reverse);
If such signs are noticed, it is usually not the transmission. This means that you should not rush to start diagnosing and troubleshooting the box itself. As a rule, problems can be solved by adjusting and servicing the rocker, which involves using a VAZ 2110 rocker repair kit. In extreme cases, a badly worn rocker needs to be replaced.
Let's get back to the adjustments. In fact, adjusting the VAZ 2110 rocker is not a complicated procedure, but it will require attention and patience. It happens that adjustment is required in several approaches, since it is not always possible to find a good position the first time.
To adjust the link, you will need to perform the following steps:
- First of all, the car needs to be driven onto a pit or overpass. Then you will need to put the car on the handbrake and engage first gear.
- Next, without turning off the gear, you will need to find the clamp that secures the rocker, and then loosen this clamp.
- Then, you should move the lever from the passenger compartment to the left as much as possible. In this case, you cannot move the lever both backwards and forwards. The fact is that the slide may well jump off.
- Now you need to get into the car and then tighten the clamp. In some cases, it is enough to move the rocker a few millimeters in relation to the cardan, after which the gearbox will work normally again, and gear shifts will return to normal.
Repair
Regardless of what exactly you do with the rocker - repair, adjust or change, you will still need to disassemble this unit.
Disassembly is performed as follows.
- Remove the cover from your gear shift knob.
- Place the car on a pit, or raise the front end with a jack.
- Remove the front console. It is held in place by mounting bolts.
- Now remove the curtain itself. To fix it, AvtoVAZ used 6 bolts in the case of the VAZ 2110 model.
- When carrying out dismantling work, be sure to examine the condition of all elements.
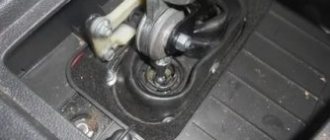
- By bending the boot, you will gain access to the support, oil seal and cardan shaft.
Changing the boot
Now regarding the repairs. There may be several recommendations in this regard, depending on the current state of the node and its components.
- At best, repairs will require the use of a repair kit for the backstage. It doesn't cost much.
- If the bushing is deformed, it will need to be replaced with a new one.
- Check the lever shaft bore for wear.
- Make sure there is no play in the driveshaft. Otherwise, a regular repair kit will no longer be enough, that is, a complete replacement of the entire backstage will be required.
- Often the culprit of extraneous noise and rattling when shifting gears in gearboxes is the rocker pad. Changing it is quite simple, and even a beginner can perform the operation.
Replacing the oil seal
Quite often, VAZ 2110 owners are faced with a situation where, after parking under the car, they find traces of oil. There are two options here - the oil filter has worn out or there are problems with the oil seal.
As you replace the oil seal, you will be able to simultaneously inspect and change such elements as the cushion, cardan shaft, and boot.
Dismantling works
But let's talk about everything in order. First of all, check whether it is really an oil seal and not a filter. If everything is fine with the filter, then we drive the car into a pit or find another way to end up under the bottom of your VAZ 2110. Beforehand, it would be a good idea to watch video materials regarding your current situation.
- Carefully inspect the boot. If oil leaks from the gearbox through the oil seal on your car, traces of it will definitely remain on the boot.
- Bend back the boot. This way you can get to the cardan, disconnect it and gain access to the cuff.
- You first need to dismantle the cardan from the lever, and only then from the rocker itself. Not the other way around.
- The cardan has been removed, so we move to the oil seal.
- The cuff is removed from the gearbox using a hook and an awl. Therefore, make sure you have these tools at hand in advance.
- Now a new one is installed in place of the old oil seal. Craftsmen have adapted to using ordinary plastic bottle caps. If you get used to it, it turns out to be very easy to change the oil seal.
- After replacing the element, return all dismantled components to their places. If some of them need replacing or signs of wear are already visible, it is better to replace them immediately. It is unlikely that you will want to repeat the same operation in a couple of weeks and lie under your own car.
Repair and restoration work
Regardless of the repair, adjustment or replacement of the link, the need to disassemble this unit does not disappear.
The parsing process includes the following procedure:
- First, you need to remove the casing from the gearshift lever, or, more precisely, from its handle.
- The front of the car needs to be raised with a jack or placed on a pit.
- Unscrew the mounting bolts that hold the front console, and then remove it.
- Now you need to unscrew the six bolts that hold the rocker and also remove it.
- When dismantling, you should be extremely careful, paying attention to the condition of each part and element, so that if their condition is unsatisfactory, replace it with a working analogue.
- To gain direct access to the cardan shaft, oil seal and support, you need to bend the boot.
Now let's get back to the repair itself. In fact, depending on the condition of the components and the unit itself, several recommendations can be made:
- It is practically impossible to do without a special repair kit for repairing the backstage, fortunately it is inexpensive.
- If the bushing is deformed during the repair work, it will have to be replaced with a new one.
- If the driveshaft is loose (which needs to be verified), then the matter will not be limited to just one repair kit, since you will have to dismantle and install a new rocker.
- The hole in the lever axis must be examined in detail, checking for wear.
- The rocker pad is one of the common reasons leading to random gear shifting and the appearance of extraneous noise and vibration. Replacing it is quite simple, so even a beginner can cope with this task.
Differences between a short-stroke link
The main differences can be seen even in photographs. We see that the short-stroke rocker has smaller dimensions, namely length. To reduce the stroke length at startup, the length of the transmission under the hinge should be increased. Due to this, we can not only get shorter gears, but also maintain the traction axis in its original position.
It is worth understanding that after such tuning, you will need to put more effort when changing speeds. After upgrading, switching will resemble joystick control, which is undoubtedly a plus. In addition to the rocker, you can install a backlash-free cardan, which will also have a positive effect on the smooth operation of the gearbox.
Is there any point in repairing the gearbox?
It happens that the metal parts of the scenes are in good condition, and only the plastic parts wear out.
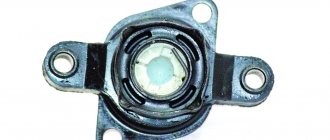
The rocker repair kit includes all plastic parts.
In this case, you can get by with a repair kit. It is inexpensive, although the operations of disassembling and assembling the stage will take much longer than replacing the entire assembly.
In any case, everything will become clear when disassembling the scenes:
- It is enough to replace a deformed bushing with a new one.
- The hole in the lever axis must also be checked for wear.
- The cardan is also checked for play. If it is found, then a repair kit will not be enough.
It also happens that all extraneous sounds during operation of the gearbox are associated not with the rocker itself, but with its cushion.
Making a short-stroke slide with your own hands
So, let's begin the modernization process:
- We raise the place of attachment of the piece of iron that goes from the gearbox to the lever inside the VAZ 2110 interior.
- You can do without dismantling the rocker, the main thing is to disassemble the ball joint.
- Now we need to ensure that the plastic paws release the ball. To do this, you need to unclench the metal ring. We disconnect the rod and carefully drag it inside through the cover, which is responsible for protecting it from dirt. It will be much more convenient to work if the clamp near the gearbox is loosened.
Replacement is carried out according to the same scheme. Only instead of welding, a freelance short-stroke rocker from another car is installed. Replacement is a more expensive solution, so doing it yourself is problematic. If you have experience working with gearboxes, then replacing and purchasing a new part will cost about 1,000 rubles.
Finalization
At the moment, a situation has arisen where the happy owners of a VAZ 2110, in order to refine and modify the gearbox, are discussing replacing the standard rocker with a so-called “short-throw” one.
The latter is a product (consequence) of tuning done with your own hands. How justified such an event is, each owner must decide individually.
If we evaluate it objectively, then the installation of a gearbox is exclusively for the benefit of the gearbox, since it makes gear shifting clearer and more responsive.
There is no need to dismantle the standard version if you decide to install a short walker. To do this you need to perform the following manipulations:
- disassemble the ball joint from the outside;
- after this, you should unclench the metal ring of the support, and also spread the plastic legs;
- in this way the ball will come out;
- then the rod is disconnected from the support, and then a sheet piece of metal having high strength and a small piece of pipe are welded to it;
- In order to avoid spontaneous inclusion of speeds, you need to lift up the hinge with the hook.
It should be clearly understood that this type of installation will require great effort when switching stages. The positive thing is that such switching will become more pronounced and smooth, which in itself is convenient.
Installing a short-stroke cardan
The first step is to purchase the cardan itself. The best choice would be a part from Priora or Kalina. Usually it is included in the repair kit with a boot, so the standard boot from a VAZ 2110 will not fit here.
Work is performed only if there is an overpass, inspection hole or lift. It is also recommended to call an assistant for help, since at the end of the process it will be problematic to independently adjust the position of the gearshift lever.
The work proceeds according to the following scheme:
- Armed with two 13 keys, we need to loosen the clamp on the drive rod and then pull it off the rod.
- The next step is to dismantle the boot. Next, use the 10th key to unscrew the bolt, which is a lock on the standard cardan. Now you can remove the cardan with gentle blows of a hammer.
Important: it is necessary to check the condition of the oil seal. If this is the first intervention in the gearbox, then it is most likely in a worn condition, so it is recommended to change the boot.
- We install the driveshaft from the Priora in the reverse order: put on the boot and install the new driveshaft, securely tighten the fixing bolt, and then tighten the boot. All that remains is to put the drive rod on the cardan rod, but the clamp should not be tightened.
- Now the assistant gets behind the wheel and places the gearshift lever in the optimal position. At this time, the clamp is tightened. Done, the replacement is complete, all that remains is to test the switching.
Short-stroke link for Priora PrioraPRO
Lada Priora Sedan 16kl Kvartsukha Logbook REPLACING THE FUEL FILTER
Before we consider how to properly install a short-throw rocker on a Priora with our own hands, let’s remember why this is being done.
The essence of a short-stroke rocker is that it reduces the travel of the gearbox lever when switching gears off or on. Moreover, gear shifting in the car becomes clearer.
Unlike the factory standard lever, the short-stroke rocker has slightly different bending angles. Thanks to improved geometry, the gear shifting process brings pleasure to sports driving enthusiasts.
As already mentioned, installing a Priora short-stroke rocker results in the gearshift lever reacting to your movement faster and more responsively, while the actual rocker travel will be less.
If you are a fan of sporty style and want to accelerate the car as quickly as possible, then you will need to change gears quickly. Again, here too a short-throw slide will come in handy.
Installation process
Let's analyze the installation of the Priora short-stroke rocker with our own hands step by step.
First you need to pull the knob and cover off the box lever. The knob on the lever is not fixed, so it is enough to apply a certain force to remove it.
Using a key set to “13”, loosen the clamp and separate the gearbox lever rod from the cardan.
To release the lever, we release the ball from the spring mechanism, which is necessary to activate the reverse gear with locking. To do this, remove the locking ring.
It is strictly forbidden to sharply pull the lever upward when trying to release it.
Slowly, carefully remove the retaining ring.
We take out the spring and then the lever with the ball inserted into the plastic frame, as well as the locking ring.
The plastic mandrel includes two parts: the lower one, located on the right and the upper one, located on the left, cylindrical in shape. There is a slit at the top. This component fits onto the gearshift lever. At the bottom there is a lever ball. The upper part wraps around the lower part so that the grooves match.
We take out the lever and rod from the interior. For convenience, you can separate the lever from the rod, although this is not at all necessary.
Using a “10” wrench, unscrew the left bolt on the cardan and pull off the rubber boot.
The driveshaft from the Priora differs in length from the driveshaft of the Viburnum. It is necessary to shorten the stem of the viburnum, depending on its type.
We insert the cardan from the viburnum. Lightly lubricate it with lithol from the inside. When screwing in the bolt, you do not need to tighten it.
We insert the rod through the interior. It is advisable to do this not alone, but to take someone as an assistant. Let one hold the elastic band in the cabin, through which the thrust passes, while the second gradually stretches the thrust.
Next we assemble the lever:
— We put the rod back on the cardan shaft. — We equip the spring mechanism again (we also lubricate the ball with lithol). — We center the lever (we fix it in a comfortable position). — We tighten the clamp on the rod.
It is quite possible that the lever will not immediately center itself as it should. In this case, perform steps 3-4 again.
Please note that if you first assemble the spring mechanism, then due to the greater length of the rod it will be impossible to put the rod on the cardan (the problem can be solved if the cardan is shortened)
Don't forget to put the boot on the driveshaft
After completing the above steps, we will be able to correctly install the short-throw rocker on the Priora.
It will also be necessary to adjust the mechanism that blocks reverse gear engagement. Due to the fact that we customize the Priora short-stroke rocker to suit ourselves, the following problem may arise. The locking mechanism does not align with the plate it engages. We solve the problem by removing the plate and carefully adjusting the engagement.
In the end, all that remains is to put the knob and cover on the gearshift lever. Keep in mind that after assembly the gearshift lever will be tilted to the right.
Advantages of a short-stroke rocker
After we bought a short-throw rocker for a Priora and installed it manually, we can see the following improvements:
— the lever stroke becomes 3 times shorter, resulting in a much faster transition from gear to gear. You can feel as if you are driving a sports car;
— you need to get used to switching, because the lever itself is not in its original position. To stick gears you now need to put in more effort;
The irritating rattling noise, which is inherent in driveshafts of Ladder models from Nines to Prior at high speeds, disappears.
Video instruction
Many inexperienced drivers begin to panic and talk about a breakdown of the gearbox, although in fact the culprit of the problem is the rocker.
Practice shows that replacement and repair are rare and not very common measures. Much more often, the current situation forces you to simply adjust the scenes.
But today we will talk not only about adjustment, but also talk about the features of modification, repair and replacement of this element.
Modification by installing a different type of backstage
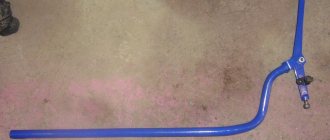
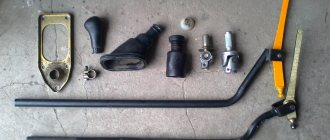
In the photo above there is a short-throw rocker, below is a standard one from a VAZ-2110.
Currently, VAZ-2110 owners have the opportunity to install an improved gearbox linkage on their car. This tuning includes replacing a standard part with a short-stroke rocker. Thanks to this procedure, gear shifts begin to shift much more clearly. Installation of the modernized backstage occurs according to the following algorithm:
- First, you need to disassemble the ball from the outside.
- You need to unclench the iron ring of the support and spread the plastic legs. After this the ball will come out.
- The thrust from the support is switched off. A piece of pipe and a piece of sheet metal need to be welded to the rod itself.
A car's transmission is one of the key components when driving. Since it transmits torque and power directly from the engine to the wheels and serves as the necessary transmission link.
The transmission structure is heterogeneous and includes many additional components and assemblies, among which the linkage (jet thrust) plays a special role. Such a detail also plays an important role in the correct operation of not only transmission systems, but also the correct operation of the engine (albeit indirectly).
Signs of breakdown
In fact, it is not difficult to determine that the backstage is the culprit of all the troubles. After all, there are a number of characteristic signs that indicate this.
You can prepare to work on adjusting or replacing the rocker if:
- The first gear does not want to stubbornly engage or disengage, or move to another position;
- When you engage first gear, initially the gearshift knob behaves normally, but then the box spontaneously jumps into reverse gear;
- You cannot engage first and/or fifth gear, while changing to other speeds is no problem.
At the first sign of a problem, you should go to a service station or your own garage to have the problem repaired.
Signs indicating a malfunction
Fortunately, it’s quite easy to identify the fact that the rocker is the culprit of the breakdown! Indeed, this is directly indicated by many factors, including:
- Inability to engage first and/or fifth gear, while the others shift without any problems.
- The first gear categorically does not want to engage, move to a different position or disengage.
- When first gear is engaged, the handle behaves quite naturally, but then it begins to “jump” into reverse gear on its own.
If your car is characterized by at least one of the above points, then you should immediately send it to a service station or carry out repair and restoration work yourself (if you have the necessary experience, knowledge and skills).
Adjustment
Now let's talk about how you can adjust the link if it shows primary signs of malfunction.
- First of all, try by hook or by crook to engage first gear.
- Place the car on an overpass, turn on the handbrake, place additional supports under the wheels to avoid the car moving.
- Do not turn off first gear on the transmission.
- At the bottom, find the clamp that holds the rocker and secures it. To do this you will have to crawl under the hood. You shouldn't have any problems finding the gearbox. The clamp needs to be loosened.
- Now return to the salon. Your task is to move the box lever as far as possible to the left. If you start to pull the handle forward or backward, the drawstring will most likely come off. You don't need it.
- Get back under the car and tighten the clamp back.
- In many cases, simply shifting the rocker relative to the cardan shaft by literally a few millimeters is enough.
Instructions for replacing the rocker on a VAZ-2110
If adjusting the part does not give positive results, there is only one thing left to do - replace the part or try to resurrect it through repair, but in the latter case you will need the help of knowledgeable repairmen.
Replacing the VAZ-2110 backstage looks like this:
- Prepare the necessary tools in advance so that you don’t have to be distracted from your work later. What you will definitely need:
- screwdriver;
- side cutters;
- set of wrenches.
You won't be able to cope without a repair kit designed specifically for the VAZ-2110.
- Now that everything is at hand, open the hood and find the nut connecting the transmission rod and the tip of the handle.
- Remove the special protective cover from the nut and tighten the turnbuckle.
- Get back into the car and take out the frame that fits the lever that controls the transmission. Clamps may interfere with this work, but you can’t get rid of them, spend a little time and everything will work out.
- Turn the cover inside out.
- Using a sharp knife, cut the clamp to secure it and remove the cover. It's okay if you couldn't avoid damaging the integrity of the clamp. It is disposable, so the clamp will still have to be replaced with a new one.
- Get rid of the tunnel lining on the floor.
- Disconnect the axle retaining part from the gearbox handle.
- Pull out the gear knob by pulling the lever up.
- Slide the sleeve inside the lever, which is responsible for the direction of the part.
- Remove the 4 mounting bolts holding the guide bushing in place.
- Remove the housing and remove the shaft.
- Now look at the nodes. If there are signs of wear on the rubber part, the bushing cannot be repaired and must be replaced. If the hole located under the handle axis is severely worn out or the play is noticeable to the naked eye, it’s time to change the link.
- Return all parts to their original place and adjust the operation of the gearbox.
Video on how to replace the rocker on a VAZ-2110:
Repair
Regardless of what exactly you do with the rocker - repair, adjust or change, you will still need to disassemble this unit.
Disassembly is performed as follows.
- Remove the cover from your gear shift knob.
- Place the car on a pit, or raise the front end with a jack.
- Remove the front console. It is held in place by mounting bolts.
- Now remove the curtain itself. To fix it, AvtoVAZ used 6 bolts in the case of the VAZ 2110 model.
- When carrying out dismantling work, be sure to examine the condition of all elements.
- By bending the boot, you will gain access to the support, oil seal and cardan shaft.
Now regarding the repairs. There may be several recommendations in this regard, depending on the current state of the node and its components.
- At best, repairs will require the use of a repair kit for the backstage. It doesn't cost much.
- If the bushing is deformed, it will need to be replaced with a new one.
- Check the lever shaft bore for wear.
- Make sure there is no play in the driveshaft. Otherwise, a regular repair kit will no longer be enough, that is, a complete replacement of the entire backstage will be required.
- Often the culprit of extraneous noise and rattling when shifting gears in gearboxes is the rocker pad. Changing it is quite simple, and even a beginner can perform the operation.
Replacing the oil seal
Quite often, VAZ 2110 owners are faced with a situation where, after parking under the car, they find traces of oil. There are two options here - the oil filter has worn out or there are problems with the oil seal.
As you replace the oil seal, you will be able to simultaneously inspect and change such elements as the cushion, cardan shaft, and boot.
But let's talk about everything in order. First of all, check whether it is really an oil seal and not a filter. If everything is fine with the filter, then we drive the car into a pit or find another way to end up under the bottom of your VAZ 2110. Beforehand, it would be a good idea to watch video materials regarding your current situation.
- Carefully inspect the boot. If oil leaks from the gearbox through the oil seal on your car, traces of it will definitely remain on the boot.
- Bend back the boot. This way you can get to the cardan, disconnect it and gain access to the cuff.
- You first need to dismantle the cardan from the lever, and only then from the rocker itself. Not the other way around.
- The cardan has been removed, so we move to the oil seal.
- The cuff is removed from the gearbox using a hook and an awl. Therefore, make sure you have these tools at hand in advance.
- Now a new one is installed in place of the old oil seal. Craftsmen have adapted to using ordinary plastic bottle caps. If you get used to it, it turns out to be very easy to change the oil seal.
- After replacing the element, return all dismantled components to their places. If some of them need replacing or signs of wear are already visible, it is better to replace them immediately. It is unlikely that you will want to repeat the same operation in a couple of weeks and lie under your own car.
Repair will not give the desired result if the adjustment was carried out with errors. To do everything carefully and competently, use the help of a partner. One will work under the car, the second will help from inside.
The gearbox is one of the most complex components of a vehicle. However, this does not mean that its repair cannot be done at home on your own. Now we will tell you what the VAZ 2110 rocker is, what may be the reasons for its malfunction and how to repair the mechanism.
Replacing rocker seals
Nothing frustrates a car owner more than traces of oil under the bottom while parked. The cause of this manifestation may be a worn out oil filter or a faulty oil seal. When installing a new oil seal, you can see and evaluate the condition of the rocker pad, cardan and boot.
Before you begin disassembling all components of the car, you need to find out the reason for the leakage of the oil mixture. If the reason is not the oil filter, you need to make sure that the oil seal is in good condition. To do this, the car is installed on a platform or lift. If the work of replacing and installing a new oil seal is being carried out for the first time, previewing a video on this topic will be very helpful.
- Climb under the car and make a visual assessment of the boot. If oil leaks through the oil seal, the boot will reveal this and there will be traces of oil leaks on it;
- Having bent the boot, you need to get to the cardan. Disconnecting the driveshaft will open the way to the cuff;
- The sequence of removing the cardan is strictly from the lever to the rocker, the reverse order is prohibited;
- After dismantling the cardan shaft, access to the oil seal opens;
- To remove the cuff you will need a hook and spike;
- A seal that has become unusable is replaced with a new one. Garage repair gurus use a plastic bottle cap as an auxiliary tool for this;
- After installing the new oil seal, the unit is reassembled. In this case, the condition of each element is necessarily checked for wear, and if necessary, the part is also replaced.
The backstage is a new model (Prior).
In general, I accidentally saw this miracle on the Internet, I wanted to find it and install it for myself. I bought parts from a 2014 Lada Priora, all assembled with levers and other fittings)
The clip is ten-size, the levers are completely similar to the old ones. The most interesting thing is the rocker, the handle is like on the new Priors and Grants with a manual transmission. In technical terms, it is similar to the viburnum wing, perhaps one to one.
It’s hard to say how she’s doing at work. But I would like to note right away that the reviews about this design are different, some are very negative! Someone has some play between parts 17 and 20; apparently the metal bushing in the center (part 18) is in the way.
It does not allow the metal discs (part 16) to be properly pressed against the plastic spacers (17) and the lever itself (20). Theoretically, if you sharpen it, there should be no more problems.
The scheme is Kalinov’s, but the essence is the same. Let's go and see!) Gearbox lever cage for VAZ 2110. I'll put the priority one with scanty mileage aside for now.
None
None
Tie rod joint for Lada Sport. There is exactly the same one only for 2108-2110. There are no repair kits for the stock joint, only this damper.
If the plastic bushings (2110-1703189) are still worn out, then it will not save the situation.
It’s very interesting how long it took for the old parts to last?!
The clip has fallen apart, there is play in the hinge. Photos of the installed goodies)
From the bottom everything is as it was, with the exception of updated spare parts)
Promised photo of the tunnel
Backstage restyling
None ps: I couldn’t pull the handle off. It is not clear how it is removed at all. I looked at other people’s posts and it turns out that on a grant, when replacing the handle with an alternative standard one, they simply saw and remove it... cruel, IMHO: D.
- avtozam.com
- vaz-2110.ru
- www.drive2.ru
- 24techno-guide.ru
Diagnosis of the problem
The gearbox linkage in a car is necessary so that the unit cannot independently change gears as a result of the simultaneous movement of the sliders. This mechanism requires careful care, as well as periodic and high-quality adjustments. If the adjustment is performed poorly or some time has passed, this may manifest itself while the car is moving and the driver will feel discomfort.
In practice, as a result of constant use of a car with a rocker drive that requires adjustment, the vehicle may be at risk of breaking the entire transmission system. Therefore, attention should be paid to the quality of the unit’s operation and problems that arise during operation should not be neglected.
To understand that in your VAZ 2110 you need to adjust the rocker shaft, you just need to pay attention to the operation of the gearbox unit. Symptoms of the malfunction will be as follows:
- There were problems with engaging first gear. In particular, it will be impossible to turn on the gearshift lever, and sometimes it will be impossible to switch from first speed to second.
- Instead of first gear, reverse gear is engaged. Imagine: you are about to start moving and engage first gear, but instead your vehicle starts moving backwards. Perhaps after switching to “neutral” the problem will disappear, but over time it may happen again. In this case, in 98% of cases the problem lies precisely in the rocker shaft, that is, this has nothing to do with the speed lever.
- There may be problems with engaging first and fifth speeds. At the same time, all transmissions will work normally.
Why change the backstage
There are situations when it is necessary to intervene in the gear shift mechanism due to the failure of a component. But there are cases when an extreme measure is required - replacing the VAZ-2109, 2114 rocker. In these cases, replacement is required:
- An oil leak appeared due to damage to the oil seal. Only the oil seal can be replaced.
- Complete failure of the scenes.
- You have realized the advantages of a short-stroke design and you have the funds for this kind of tuning.
Symptoms of gear shift mechanism failure:
Increased gearshift lever play
Please note that this behavior may also be caused by a loose cardan. Sometimes the bolt securing it gets screwed out, so to reduce the backlash it is enough to tighten it, and first apply a drop of thread locker. Difficulty shifting gears
Sometimes extraneous sounds are heard. Gear shifting is not possible. Inconsistency between the position of the lever and the selected speed. For example, the back one disappears, and the first one is in its place.
If a slight play appears, it is advisable to carry out diagnostics and identify the breakdown of the unit. Make repairs immediately, otherwise one or more speeds will disappear at the most inopportune moment.
Replacement
If the steps described in the previous paragraph did not help you, then, apparently, you need to replace the element yourself.
What will you need?
In order to replace the backstage, you will need to prepare everything that may be required to complete the work:
- directly new rocker for VAZ 2110;
- screwdriver;
- side cutters;
- set of wrenches;
- ratchet;
- lubricant "Litol-24".
Step by step instructions
- Sit in the interior of your VAZ 2110 and use a screwdriver to dismantle the decorative cover of the gearshift lever. Pull the gear selector up and remove it along with the protective cover.
- Take a 10" wrench and unscrew the two fastening nuts one by one, as well as the bolt securing the rear gear lock bracket trim.
- Next, take a “13” wrench and unscrew the nut securing the gearbox lever axis. Then unscrew the screw securing the axle. This is where you may need a ratchet.
- Dismantle the axle. Then remove the set of bushings from the gearbox selector (so as not to lose them during the replacement process).
- After this, you need to dismantle the jet thrust from the rocker pad. To do this, take a spanner wrench with which you will hold the nut on top, and using the “13” wrench, unscrew it, as shown in the photo.
- Then you need to remove the facing part of the floor and the plastic console - otherwise it will not be possible to dismantle the backstage. To do this, unscrew all the bolts around the perimeter of the console. After removing the top of the console, do the same with the bottom. Be careful not to damage the electrical wires.
- Next, unscrew the four screws securing the gearbox selector to the car body.
- Get under the bottom of the vehicle and, using a 13mm wrench, unscrew the nuts of the rocker pad bracket, and then remove the bracket itself.
- Dismantle the rocker assembly with the gearshift lever. Carefully visually inspect all elements of the device. Perhaps only the cushion has worn out, and the drawstring itself has not yet reached the end of its service life. Then replace the pillow and install the element in place.
- If the transmission component itself has failed, that is, mechanical damage is clearly visible on it, for example, the ears have broken off, then the link should be replaced with a new one. Before doing this, lubricate all rubbing elements, including the gearbox lever, with engine oil or Litol-24 to avoid squeaks.
This completes the replacement of the VAZ 2110 backstage with your own hands. Reassemble all components in reverse order.
Gearbox control drive Lada Priora Lada Priora
Adjustment may be required after removing and reinstalling the VAZ 2170 gearbox, as well as in case of unclear gear shifting during operation of the Lada Priora. You will need two “13” keys.
1. From below the car, loosen and unscrew the nut of the clamp bolt on the transmission control rod by 3–5 turns.
2. Use a screwdriver to slightly widen the groove of the clamp and the groove at the end of the rod to ensure free movement of the rod relative to the gear selection rod, and set the rod to the neutral position.
Scheme for adjusting the position of the Lada Priora gear shift lever: 1 – reverse lock bracket; 2 – axis stop; 3 – gear shift lever axis; 4 – axle bushings; 5 – gear shift lever; 6 – spacer sleeve; 7 – spherical washer of the ball joint; 8 – spherical pin of the gear shift lever; 9 – body floor; 10 – ball joint; 11 – buffer; 12 – spring; 13 – template 67.7834.9527; 14 – bracket cover
3. Inside the car, remove the gear shift lever cover from the handle, lower the cover down along the lever and install the lever so that its lower (non-bent) end is approximately vertical. If you have template 67.7834.9527, position the gear shift lever as follows: with the lever cover removed, install the template in the window of the lining 14 of the reverse locking bracket. Insert the stop 2 of the axis of the lever 5 into the groove of the template 13 and press it against the template in the transverse direction without causing elastic deformation of the bracket 1. Fix the lever 5 in this position.
4. From the bottom of the VAZ 2171 car, with light hand movements (so as not to move the levers of the VAZ 2172 gear selection mechanism), select the axial play of the rod in the rearward direction and its angular play in the counterclockwise direction.
5. Tighten the nut of the clamp bolt, placing the clamp at a distance of 1–3 mm from the end of the rod.
Gearbox and gearbox Lada Priora
| Gearbox Lada Priora |
| Lada Priora gearbox malfunctions, their causes and solutions |
| Removal and installation of the Lada Priora gearbox |
Disassembly and assembly of the Lada Priora gearbox |
| Disassembly and assembly of the secondary shaft Lada Priora (Lada Priora) |
Disassembly and assembly of the input shaft Lada Priora (Lada Priora) |
Dismantling and assembling the Lada Priora gearbox synchronizer (Lada Priora) |
| Assembly and disassembly of differential Lada Priora (Lada Priora) |
Selection of differential bearing adjusting ring for Lada Priora |
Assembly and disassembly of the gear selection mechanism Lada Priora (Lada Priora) |
Removal and installation of gearbox seals Lada Priora (Lada Priora) |
| Replacing gear shift lever axle bushings for Lada Priora |
Assembling and disassembling the gear shift lever Lada Priora (Lada Priora) |
| Gearbox control drive Lada Priora |
Replacing a car's rocker, eliminating play
When using such a link, gear shifting occurs clearly and quickly. The process of replacing a regular link with a short-stroke one is quite simple. It is necessary to lift the fastening of the iron rod that runs from the gearbox to the shift lever in the passenger compartment. In this case, it is not necessary to remove the link; you only need to disassemble the spherical support.
A simpler option, but quite expensive, is purchasing a new rod. A short-stroke slide costs about 700 rubles.
Large play on the rocker is a disease of the car model in question, the cause is the original gearbox driveshaft. To carry out repairs, you need to purchase the cardan itself. For this car, it is suitable from Kalina; it is purchased together with the boot. For the repair itself, a minimum of tools is required: keys “13” and “10”, a screwdriver and a hammer.
Unscrew the bolt and knock down the cardan with weak blows of a hammer. Installation of a new one is carried out in the reverse order, that is, first you need to put the boot on and the cardan on the shaft. After the bolt aligns exactly with the recess on the shaft, put the boot on the universal joint.
Reasons for replacement
There are several situations when the owner of a VAZ 2109 has or wants to get into the design of the gearbox and specifically work with the rocker:
- Oil is leaking due to a damaged rocker seal. It must be replaced;
- The old drawstring was out of order;
- I would like to exchange the long-stroke for a short-stroke in view of its advantages.
Now to the question of when replacing or repairing the backstage is a necessary measure.
- The backlash of the gearbox selector has increased significantly.
- Gears change with difficulty, and when changing speed, extraneous sounds appear.
- It is possible to change gears, but with a lot of effort.
- Speeds change incorrectly. Instead of one, a completely different one turns on.
- It is impossible to turn on all or part of the gears at all.
Even if the resulting play is still insignificant, it is advisable to immediately begin repairs or completely change the drawstring.
Replacing the oil seal
If you find that the oil in the gearbox is gradually disappearing, you can suspect the rocker seal. There is nothing else left to do but change the element.
- First, buy a new shift rod seal. It costs about 70-100 rubles.
- Drain the oil from the box, having prepared a clean container in advance. This is in case you refill the same oil. Although this is an excellent reason for you to change the transmission lubricant at the same time.
- To make sure the oil flows out better, first unscrew the filler plug or remove the speedometer gear. After draining the oil, screw the cap back on.
- We climb under the car and disconnect the fasteners of the gearbox lever driveshaft.
- Pull the boot off the cardan, unscrew the bolts securing it to the gearshift rod. Problematic fasteners that you will have to tinker with.
- After removing the cardan shaft, remove the rod boot.
- We remove the damaged oil seal using an awl or suitable available tools. The main thing here is the stock itself.
- We install a new one in place of the old oil seal and press it with a tube of the appropriate diameter.
- Put the boot back in place and rotate the driveshaft.
- Please note that the bolt securing the cardan to the rod is an adjustment bolt. Therefore, screw it in exactly the same way as before dismantling. Otherwise, some speeds may not turn on.
After the work done, do not forget to check the result.
Replacing the cardan
Practice shows that if problems arise with the slide, it is not at all necessary to completely change it.
The instructions for replacing the cardan are as follows.
- Using two 13mm spanners, unscrew the clamp that relates to the speed switch drive rod.
- Pull the boot off with a screwdriver, moving towards the box. If you want, remove it completely. So it definitely won’t interfere with the repair process.
- Using a 10mm wrench, unscrew the fixing bolt on the cardan.
- Apply several gentle, not strong blows with a hammer to knock the cardholder off the shaft. Remove the boot to the side if you have not done so before.
- We replace the old cardan with a part from Kalina. It is more reliable, efficient and durable.
- For reassembly you will need the help of a friend. Do not rush to tighten the clamp immediately at the end.
- The assistant will set the position of the gearshift lever at the optimal points from inside the cabin. First you need to catch the center, then move the lever a little to the right while you tighten the clamps from below.
- Check if the gears engage well. If yes, then we continue assembling the unit and check the updated gearbox under real road conditions.
The experience of VAZ 2109 owners shows that when there are problems with the rocker, the essence often lies in an unsuccessful factory cardan. By replacing it with an analogue from Kalina, you will be able to get rid of discomfort and continue to confidently operate your car. By replacing the cardan shaft, the design of the gearbox will improve significantly.
Adjustment
After changing the link or cardan, you should definitely adjust the operation of the unit.
- Engage reverse gear, loosen the clamp tension.
- Set the gearbox selector to the position in which it should ideally be located when engaging reverse.
- Tighten the clamp back.
- A similar operation is performed with other speeds.
There are situations among VAZ 2109 owners when difficulties arise when engaging reverse gear. This is where adjustment can help.
- Set the gear lever to first gear;
- Loosen the rocker clamp;
- Turn the rocker drive counterclockwise;
- Turn the drive until the selector is pressed against the plastic stopper for the reverse gear. You will feel this without any problems;
- Resting against the stopper, tighten the clamp under the bottom. That's it, the adjustment is done.
Fighting the ringing
In this case, the cardan from the new model is modified to be 20 mm longer than on the ten. This sound is directly related to the part itself; the Kalina rocker has no play, and all the vibration is transmitted into the car interior, to the gear shift lever itself. The easiest way to get rid of rattling is to install a spring.
- soft plastic, you can use a regular glass jar lid;
- file;
- scissors;
- screwdriver;
- keys for “10” and “13”.
The process itself will not be easy, since the hole is very small. The washers are inserted along the left and right sides of the bushing. It will have to be sharpened; the thickness of the washer is only 1.5 mm. Place oil-resistant rubber rings onto the bushing axle on both sides. The parts need to be slightly compressed. This repair will allow you not to hear the ringing noise for a long time, and the speeds will switch much smoother.
VAZ 2170 Adjusting the gearshift drive rod
Lada Priora Sedan Logbook Replacing valve seals
Adjusting the gear shift rod
Park the car, apply the handbrake and turn off the ignition.
Only for models up to 1994.
Only for models after 1994.
| Locate the locking hole on the top of the transmission housing adjacent to the nameplate. Remove the plug from the hole (indicated by the arrow). Place the gear lever in fourth gear, then take a screwdriver with a blade approximately 4mm in diameter and insert it into the hole; this will lock the gearbox in the fourth gear position - the screwdriver handle will not allow it to fall inside the gearbox. |
All models
| 1. Inside the vehicle, to gain access to the gearbox control lever housing, remove the control lever collar and mounting frame. Take a screwdriver with a blade approximately 4 mm in diameter and insert it into the locking hole in the side wall of the lever housing. |
| 2. If the screwdriver is inserted without difficulty, then the linkage is adjusted correctly and, therefore, is not the cause of poor gear shifting; Next, it would be best to remove the gear shift drive rod and inspect it for wear and damage (Section Removal, inspection and reinstallation of the gear shift drive). 3. If the screwdriver does not fit into the locking hole, the position of the rod is not adjusted correctly. |
| 4. At the point in the engine compartment where the selector rod passes through the bulkhead, loosen the selector rod pinch bolt (A) near the rubber coupling (B) to allow free play between the two halves of the selector rod. |
| 5. Move the gearbox control lever so that the tip of the screwdriver is inserted into the locking hole in the lever housing; Make sure that the lever is still in the fourth speed position. 6. In the engine compartment, tighten the pinch bolt on the gear selector rod to the required torque. 7. Remove the screwdriver from the locking hole and install the plastic plug. 8. Remove the screwdriver from the locking hole on the transmission control lever housing. 9. Reinstall the selector lever guard and mounting frame. 10. Before driving the vehicle, make sure that the gearbox control lever moves from the neutral gear position to all six gear positions. |
Possible signs of malfunction
A typical malfunction of the rocker for the VAZ 2110 model is:
- Some looseness in the shift lever.
- A very large free play of the handle also indicates a breakdown of the transmission thrust.
- The most typical example is the ability to change gears without squeezing the clutch. Some may decide that in this case it is even easier to drive the car - there is no need to use the third pedal, but this situation does not last forever and leads to major damage to the gearbox.
On video, the repair kit for the VAZ 2110 wings:
Malfunctions of the backstage also include:
- Difficulty engaging first or fifth gear . This condition is caused by mechanical failure of the components of the slide, which do not allow the lever to move in the required direction;
- Independently changing gears without selecting them . If the driver has chosen first gear, and it suddenly turns out that it is now reverse gear, there is an obvious malfunction of the rocker.
