Typical dimensions of the VAZ-2107 windshield are: length 1440 (mm), width 536 (mm).
Standard dimensions of the windshield on the VAZ-2107:
Windshield dimensions in length/width format:
The car was produced at the Togliatti AvtoVAZ plant from 1982 to 2012. Many modifications of the model were released: 21072, 21073, 21074, 2107-20, 2107-71 and so on. Windshields of all modifications have similar dimensions.
Important: all modifications of the VAZ-2107 model by the Togliatti manufacturer were equipped with a windshield 5.6 (mm) thick.
| General measurements of automobile glass |
| General parameters of VAZ 2107 windshields | |||
| Drawing General view of windshields | Length min (mm) Minimum windshield length for different modifications of VAZ 2107. | ||
The measurement is taken along the widest bottom part of the glass, on the outside.
The measurement is taken along the widest bottom part of the glass, on the outside.
| Length max (mm) Maximum length of the windshield for different modifications of VAZ 2107. | Modifications Number of modifications of the model in our database |
| Parameters of windshields VAZ 2107 | |
| Parameter Windshield Parameter | |
Caution: in the data after which a letter designation is indicated in brackets (for example: 'Upper length (AB)') the dimensions of the glass opening are indicated, in all other cases the data refers to the dimensions of the glass.
The maximum length of the windshield for VAZ cars is 1520 (mm), the maximum width is 861 (mm).
The main dimensions of windshields on a VAZ:
The Russian PJSC AvtoVAZ has been producing VAZ passenger and commercial vehicles since 1970.
The parameters of windshields on VAZ vary depending on the body type and year of manufacture of the car.
The size range of windshields for some models is presented in the “length/width” format:
- VAZ 1111 Oka 1260×620 (mm);
- VAZ 2101 1440x536 (mm);
- VAZ 21099 1378x680 (mm);
- VAZ 2110 1427x861 (mm);
- VAZ 2121 4×4 1420x575 (mm);
- VAZ 2123 1520x770 (mm).
A tape measure is used to measure the windshield. The main measurements are taken horizontally from the bottom and vertically in the center.
Important: to avoid inaccuracies when measuring, you should take into account the bending of the glass, i.e. If the glass has a curve, it is measured as the curve goes along the glass.
| Value (mm) Parameter value in (mm). | ||
| Years of production 1970 - 2019 | ||
| Length | 1440 mm | |
| Width | 536 mm | |
| General measurements of automobile glass |
| General parameters of VAZ windshields | |||
| Drawing General view of windshields | Models Total number of models presented | ||
| Modifications The total number of all modifications of all VAZ models presented in our database | ||
| (drawing) | 21 units | 17 units |
| Total windshield length for main modifications | |
| Modification Modification, model or year of manufacture | |
Caution: in the data after which a letter designation is indicated in brackets (for example: 'Upper length (AB)') the dimensions of the glass opening are indicated, in all other cases the data refers to the dimensions of the glass.
Glass is an integral element in the design of any car and the VAZ 2107 is no exception. Without this part, safe and comfortable driving would be impossible. Therefore, this body element must always be not only clean, but also free from defects. If such occur, it is advisable to replace the damaged glass.
Rear window
The rear window of the “six” is also a body element, through which rear visibility is provided, protecting the interior and the people inside from precipitation and other external influences. It is necessary to remove the part infrequently and this is done mainly for the purpose of replacing the sealing rubber, during repair work or replacing it with heated glass. The rear glass measures 1360 x 512 mm.
How to remove glass
The sequence of work for removing the rear window is similar to the procedure with the wind element, but there are some features that we will consider in more detail:
- Use a screwdriver to pry out the elements in the lower corners of the seal.
- We dismantle the corners.
- Use a screwdriver to pry up the edge of the central harness.
- Pull the harness up and remove it completely from the seal.
- At the bottom of the glass, remove the harness in the same way.
- We insert a screwdriver under the lower corner of the glass and, stepping back about 10 cm, insert another one so that the glass slightly comes out of the seal.
- Use a screwdriver to press the edges of the rubber under the glass.
- When the side of the glass comes out of the seal, grab the glass with your hands and gradually rock it, completely removing it from the rubber band.
The rear window is installed in the same way as the windshield.
Rear window tinting
The rear window is dimmed in the same sequence and using the same tools as the windshield. To make it easier to apply the tint film in bends, some car owners divide it into three longitudinal stripes.
Heated rear window
The sixth model of the Zhiguli, although equipped with a heated rear window, was only of the last years of production. This option is not superfluous at all, since it allows you to get rid of glass fogging in damp and frosty weather, thereby improving visibility. Therefore, many owners of “sixes” strive to install such glass on their cars. For such a conversion you will need:
- heated glass;
- terminals - wide and bolt-on;
- circuit breakers;
- wires;
- relay (PC527 or analogue) and a block for it;
- screw;
- rubber tubes;
- on/off button.
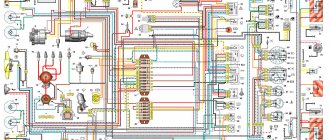
We install heated glass in the same way as regular glass, and then connect it as follows:
- Remove the negative terminal from the battery.
- We dismantle the instrument panel and embed a button into it.
- We place the relay in a convenient place, for example, behind the dashboard.
- We connect all the elements according to the given diagram.
- We connect the negative wire to the stud through which the fuse box is attached to the body.
- To lay the positive conductor, we dismantle the left threshold trim, as well as the decorative element of the pillar and the bolt holding the seat belt.
- We remove the back seat.
- We lay the wire through the entire interior, as well as under the rear trim trim.
- We fix the mass from the glass onto the bolt securing the trunk lid.
Rear window grille
Sometimes you can find classic Zhiguli cars with bars on the rear windows. Previously, this element was more popular, but even today some owners seek to install it on their cars. The main goals pursued when installing such a part are as follows:
- glass becomes less dirty;
- on sunny days the interior heats up less;
- the likelihood of being blinded by traffic moving behind is reduced.
Installing a grille on the rear window prevents it from getting dirty and reduces heating of the interior from the sun
. As for the shortcomings, they are also present and boil down to the problem of cleaning the glass in the corners from debris, dirt and snow. Installation of the grille consists of the following steps:
- We dismantle the glass.
- We place the grate under the seal.
- We thread the cord and install the glass in place.
Labeling Standards
Manufacturers of car glass typically use two types of markings:
Replacing the windshield of a VAZ 2107
The American type of marking must be made in accordance with the FMVSS 205 standard. All auto glass, such as OE, which is supplied to the conveyor of car factories, as well as spare parts, must be marked with appropriate information that confirms the safety of the product. There is a marking in the form of a monogram, which is known as “beetle”. Different manufacturers put different markings, but regardless of this they carry the same information.
43R-00346 - Compliance with the European safety standard ECE R43 (European Rejuvenation)
DOT-376 Manufacturer certification meets US Department of Transportation standards
European type of marking. Europe has safety standards that apply to auto glass installed on vehicles sold in its territory. Since they apply the laws of different countries, a single standard has been developed, adopted by all EU member countries. According to the standard, the letter E must be inside the monogram. Some automotive glass components sold and installed in the United States also contain AS and European markings.
And in Russia, as a rule, according to the GOST standard (5727-88), markings must be indicated by a digital-alphabetic code, which encrypts information about the type of product, type of glass, thickness of glass and film, grade of product and technical conditions for a specific product.
Replacing car glass
Replacing car windows yourself, what is needed for this and is it really possible to change the windshield yourself in 10 steps. How does the replacement procedure occur and what tools and materials are needed. More details
How to get rid of cracks in glass? DIY windshield repair
To repair a windshield yourself, you will need a photopolymer, an injector (plastic/metal) for applying it, and a drill, which can be used to prevent the crack from spreading. More details
Glass for VAZ 2107: purpose and replacement
Windshield polishing
We will tell you when you need to polish your windshield, what you need for this, how to do the procedure yourself, and also what not to do. More details
Measuring the length of the brushes
In order for the wipers to clear the windshield from one edge to the other, it is important to choose the right length. If your car has factory wipers, simply measure them with a tape measure. Take the time to measure both wipers, as some car models have different lengths. Typically, the driver's side has a longer brush. If the lengths are different, you will have to buy windshield wipers individually of different sizes. They are the same for many models. For example, the wipers on the Lada Priora are both 51 cm long. You can buy a set of two pieces. By the way, manufacturers indicate the length in centimeters and inches. For example, 17 inches is 43 cm.
What to do if your car has non-factory wipers? This happens when the previous owner of the car installed products that are not suitable in size. For example, if they are too long, then the edge of the rubber gets on the body and rides up - the brush does not fully adhere to the glass and does not clean it at all. And there are also short rubber bands that do not reach the edges of the windshield - dirty stains remain there and dry out with a gray frame. In such cases, it is better to find out the factory parameters of the brushes.
Based on the most popular requests from car enthusiasts, we have compiled two tables in which we have collected examples of car models with recommended parameters for windshield wiper blades. For convenience, we divided them into Russian-made cars and foreign cars.
Front door side glass
Dismantling the side glass of the front door on a VAZ 2107 may be required during repair work. The front sliding glass has dimensions of 729**421*5 mm.
How to remove glass
To dismantle the glass you will need to prepare:
- flat and Phillips screwdrivers;
- set of open-end wrenches.
We carry out removal in the following order:
- Use a flathead screwdriver to pry the plastic plugs out of the armrest.
- Replacing the window regulator on a VAZ 2107
Door glass seal
To prevent scratches on the sliding glass, the doors are equipped with a special element - velvet covers, which also serve as a seal. Over time, the velvet layer wears off and the seal is broken, causing water to get inside the door and the glass to become loose and scratched. In this case, the seal needs to be replaced.
To do this, just pry with a screwdriver and remove the worn elements, and install new ones in their place.
How to replace the front windshield and rear windshield on a VAZ 2106
Replacing the front windshield and rear windshield on a VAZ are, in principle, very similar processes. Why the glass is being replaced is completely clear. Let's look at what else glass removal can be used for. This process is carried out when it is necessary to tint these windows, or when body work is being carried out for which the glass is a hindrance (for example, painting).
To replace the front windshield and rear windshield we will need:
- Assistant;
- Unnecessary blanket or blanket;
- Screwdriver;
- a 5-meter piece of rope with a diameter of about 0.5 cm;
Having found all this, you can begin the repair process.
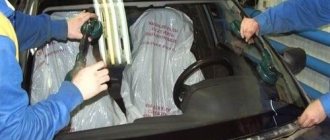
We free the interior from absolutely all interfering decorative interior details. The front side pillar trims are removed first. Then we dismantle the internal rear view mirror, also remove the sun visors and the decorative trim on the ceiling;
Now that nothing interferes with us, and we do not risk damaging anything during the process, we move on to the main part of the work. Start the subsequent work from one of the upper corners. Use a screwdriver to pry up the edge of the seal and push it past the body flange. Then, maintaining constant uniform pressure on the glass, squeeze out the seal. In this process, you need to gradually move the corner of the glass (top, of course) along with the seal outside the body;
Having carried out this operation along the entire perimeter, you will already be holding the glass and the seal in your hands;
We begin to remove the seal from the glass itself. We do this in several stages
First, we pry it in the middle with a screwdriver and begin to carefully separate it from the middle to the edges. We inspect the seal for contamination and mechanical damage.
If you find even one of these, the seal must be replaced with a new one, and the seal is also replaced if the rubber hardens. We clean the edge of the glass and the seal itself from dirt. Also check the sealant grooves; quite often they may contain debris, sealant residues, etc.;
Clean the moisture drainage holes, which are also present in the seal;
Take a new car glass and install a seal on it. Start installing it from the bottom corner, moving first along the bottom side, then along the side, then along the top, and again along the side; Place the cord that you prepared in advance in the groove of the seal, in the one that fits onto the body flange. After you have inserted the cord around the entire perimeter, pay attention to whether one end overlaps the other. It is necessary that such an overlap be at least 20 cm;
Prepare a soap solution of sufficiently high concentration. Cover the seal and the body opening where the new glass will go. you need to coat it in sufficient quantity;
Together with your partner, install the glass so that the seal groove sits on the flange of the opening where the cord exits. In this case, the ends of the rope should be located strictly in the cabin;
Now you and the assistant must separate. One of you is inside the car, and the other is outside it. The person who is in the cabin begins to slowly pull out the rope, making sure that the edge of the seal gets behind the flange of the opening, but if it doesn’t get there, then you need to pry it off with a screwdriver. The participant in the process, located outside, applies light pressure to the glass by tapping, exactly in the place from which the rope is pulled out. Thus, the glass sits in place;
After the glass is installed, reinstall all removed parts in the reverse order of removal.
Now let's talk about replacing the rear windshield. It changes in exactly the same way as the front one, but it must be removed starting from the lower corners.
In addition, before removing the glass, you need to remove the trim trim. It is located in the lower corners and can be easily removed by prying it off with a screwdriver.
This completes the replacement of the front windshield and rear windshield. If you have basic skills and an intelligent assistant, it will not take much of your time and effort.
Facing panel (apron) and front bumper
The facing panel or front apron on the “seven” plays more of a decorative role. But besides giving a stylish appearance, an apron also provides many benefits. In particular, thanks to it, during rain, water does not fly directly onto the windshield, but is cut off by this element.
The apron is located directly under the bumper and is a flexible shield that also serves to prevent damage to the front of the car from splashes from under the wheels.
This structural element of the body has special holes for the front bumper brackets and the radiator grille (the latter is attached to it). The apron, due to its “extreme” location (bottom and front), becomes vulnerable to impacts and corrosion. Connected to the body by spot welding.
The design of the "seven" apron must be thought out carefully and correspond to the shape and geometry of the entire car body, otherwise it will simply vomit at high speed. In addition, non-compliance with geometry and design will lead to increased fuel consumption at high speed.
The price for a front apron for a VAZ 2107 individually starts from 600 rubles. The part may be of different workmanship, have a different color and different design features.
Front aprons, sold as a separate element of body decor, come with special mounts to the bumper. As for the original Semerovo ones, they are welded, as mentioned above, to the car body.
The rear apron is also required and must have special fastening plates that ensure its immovable condition and prevent it from coming off on the road.
Front bumper
The bumper is not only designed to retain the energy of a frontal impact first, but also plays a significant role in the exterior design of the Seven. In other words, this is a beam located in front and protects the body from damage in minor collisions.
Thanks to modern synthetic-based materials, bumpers have become much lighter and more beautiful than they were before. Thus, elegant bumpers with bent edges also serve as spoilers, increasing the downforce of the car.
The front and rear bumpers on the VAZ 2107 are made of plastic or thin metal and have chrome trim. They are mounted using special brackets.
The front bumper is equipped with a platform for attaching a license plate and for this reason is 5 cm wider than the rear one.
Today, the owner of the “Seven” is offered three options for bumpers for the VAZ 2107: plastic, plastic with chrome lining, and with brackets for fastening. The price starts from 600 rubles.
Front bumper tuning
Modernizing the front bumper of the “Seven”, first of all, means improving the appearance. To be honest, the factory bumpers of the VAZ 2107 family look, to put it mildly, fake. They do not carry any visual, or even more importantly, high-quality functionality.
The implementation of the idea of tuning the bumper on a VAZ 2107 (the rear one is also possible) consists in strengthening it with a metal profile of an L-shaped section. In addition, to give a more aesthetic appearance, the part moves slightly from the body.
You need to work with the bumpers removed. Here's what to do:
- Place the pre-prepared reinforcing corner to the bumper and mark the mounting holes, and then drill them in the profile;
- The lower part of the profile bends forward. This creates a fastener for the lower bumper bolt;
- First, the amplifier is attached to the body, then the bumper is attached to it.
As a result, we get a massive bumper that is not afraid of light and medium impacts and looks much more impressive in appearance than the factory one.
Correct selection of wipers by size for VAZ 2114
To avoid unwanted problems during vehicle operation, experts recommend annual maintenance and, if necessary, replacing the brushes on the VAZ 2114 with ones compatible with the specific brand of car.
Factory symmetrical VAZ 2114 auto wipers have a standard length on each side of the windshield - 51 cm.
But it is possible to supply brushes of other sizes:
- driver's side – 53 cm;
- and on the passenger side - 51 cm.
But if you install 53 cm brushes on both sides, water flows in a thin stream in the middle of the windshield.
On the rear window of this model, the blade size is 30 cm, although some car enthusiasts install 33 cm and this does not create any additional problems. Installing a rear wiper 40 cm long will require expanding the stroke limit. But to ensure that the windshield wiper does not go too low, and also does not run into the glass seals: the motor is removed, then put back, with the obligatory displacement of a couple of teeth.
see also
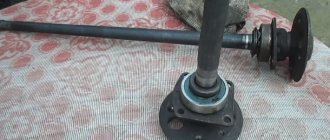
Functions of the steering knuckle VAZ 2107
The steering knuckle holds the front wheel hubs and is fixed to the upper and lower arms of the front suspension on ball joints. When the steering wheel is turned, the gear lever through the tie rods pulls the steering knuckle in one direction or another, allowing the front wheels to turn and the vehicle's course to change. The part is made of durable cast iron and can withstand heavy loads. Often, car owners change the VAZ 2107 swing arm assembly, along with the hub and wheel bearing. The “life” of the swing arm under normal conditions (in the absence of an accident) is much longer than that of the wheel bearing. Therefore, it is better to immediately change their assembly and forget about this unit for a long time.
About light transmission standards for tinted glass
Nobody forbids tinting the windows of a VAZ 2107. However, if this is done without regard to the law, problems with traffic police officers are guaranteed for the car owner.
The higher the percentage of light transmission, the more transparent the tint film
From January 1 of this year, the Legislative Assembly intends to seriously increase fines for improper tinting of a car to 1,500 rubles. The requirements for glass for light transmission according to GOST 32565 2013 are as follows:
- there are no restrictions on light transmission for the rear and side windows of cars;
- the light transmission rate for the windshield is 70%;
- it is allowed to stick strips of colored film on the upper part of the windshield; their width can reach 14 cm;
- finally, the current GOST says nothing about so-called mirror tinting, and their use is not regulated in any way.
Front door side glass
Dismantling the side glass of the front door on a VAZ 2107 may be required during repair work. The front sliding glass has dimensions of 729**421*5 mm.
How to remove glass
To dismantle the glass you will need to prepare:
- flat and Phillips screwdrivers;
- set of open-end wrenches.
We carry out removal in the following order:
- Use a flathead screwdriver to pry the plastic plugs out of the armrest.
- Unscrew the fasteners and remove the armrest itself.
- We move the rosette away from the facing, and then move the facing itself along the handle and remove the rosette.
- Use a flat-head screwdriver to pry up the door handle trim and remove it.
- We insert a screwdriver between the door trim and the door itself, snapping off the plastic clips.
- Remove the sealing element from the front and top of the door frame.
- Unscrew the front gutter fasteners.
- We remove the guide element from the door along with the seal.
- We unscrew the cable fastening to the glass frame, lowering the glass itself down until it stops.
- Use a screwdriver to pry up and remove the facing elements from the inside and outside.
- We remove the glass from the door.
- If further disassembly of the door is required, remove the seal from the rear part.
- Unscrew the fastening of the rear guide element and remove it.
- We perform assembly in reverse order.
Door glass seal
To prevent scratches on the sliding glass, the doors are equipped with a special element - velvet covers, which also serve as a seal. Over time, the velvet layer wears off and the seal is broken, causing water to get inside the door and the glass to become loose and scratched. In this case, the seal needs to be replaced.
If the velvets are damaged, they should be replaced
To do this, just pry with a screwdriver and remove the worn elements, and install new ones in their place.
To replace glass seals, simply pry out the old elements with a screwdriver and then install new ones
Rear door side glass
The glazing of the rear door of the VAZ 2107 consists of two parts - a sliding glass and a fixed one. The first has dimensions of 543 * 429 mm, the second - 372 * 258 mm. Removal of these door elements may also be necessary to repair the door.
How to remove glass
We dismantle the rear door glass in the following sequence:
- Raise the glass to the top position.
- We remove the door trim.
- Disconnect the lock drive rod from the guide element.
- Unscrew the fastening of the guide bar.
Most often, glass in a car has to be removed, replaced, or removed during repair work. However, sometimes dismantling can be caused by the installation of tuning elements, the need for tinting, etc. Therefore, every owner of a Zhiguli should be able to remove and install the windshield, rear or door glass with his own hands. In addition, the procedure does not require special tools or skills.
I'm going to restore the body according to my mind, so I'm collecting and studying information. Maybe it will be useful to someone... Basic dimensions for checking the attachment points of units
Reference linear dimensions of the openings of the wind and rear windows
To check the geometry of the attachment points of the chassis units shown in the figure. Main dimensions for checking the attachment points of the units and Fig. Check points for checking the body floor, as well as for performing complex repairs with simultaneous monitoring, a body repair and control unit is used in combination with straightening devices (see figure Body repair and control unit with a straightening device).
The straightening device is fixed to the frame on the side of the deformed part of the body.
Damage to the body can be very different. Therefore, the repair rules in each individual case must be their own, most suitable for these damages.
In almost all cases of damage, it is necessary to remove some parts in order to detect damage, straighten and align the frame. In cases of severe damage, remove all easily removable interior upholstery parts to facilitate measurement, control and installation of hydraulic or screw jacks to correct distortions and deflections.
By editing it is necessary to restore the original linear dimensions of the body frame.
The diagonal dimensions of the window openings should be 1375±4 mm for the wind window (see figure Reference linear dimensions of the openings of the wind and rear windows), and 1322 4 (1322–2) mm for the rear window. The distances between the flanges of the window openings along the axis of the car must be equal to 537 3 mm for the wind window and 509 3 mm for the rear window.
The difference in the diagonal dimensions of the wind window opening, as well as the openings of the rear window, hood, and trunk lid of one body must not exceed 2 mm.
Purpose of tinting on VAZ 2107
Gluing tint film to the windows of a VAZ 2107 allows you to solve several problems at once. Here they are:
- Window tinting on a VAZ 2107 allows you to protect the car interior from scorching sun rays. This simple measure will significantly extend the life of the dashboard, and other elements of the interior upholstery will also be protected from fading;
- in a tinted car, the driver is better protected from being dazzled by both oncoming and behind cars;
- the interior of a tinted car is better protected from unwanted prying eyes;
- if tinted glass breaks during an accident, the fragments will not fly into the driver’s face, but will remain on the tinting film;
- finally, the tinted “seven” looks more stylish.
Content
2 3 Improvement of the VAZ 2107 stove. 4 Caring for the VAZ 2107 stove.
- 4.0.1 Operating procedure.
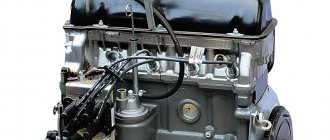
Despite a decent number of shortcomings, VAZs remain loved by our compatriots. Today, we will tell you how to improve the operation of the stove on the classic. The heater and ventilation provide a favorable atmosphere inside the car. In the VAZ 2107, air is supplied from the street. Air, through gaps in the hood of the car, enters the inside of the car. At the same time, depending on the setting, it heats up or cools down.
The air intake box is located in the rear part of the engine block; the air is purified from moisture. The box is protected from the engine by special (rubber) gaskets. Moisture comes out, and the air flow enters the heating system. The gaps in the box are closed with a special partition (lid). When driving, part of the air flow exits through devices located above the dashboard.
Dependence of driving characteristics on dimensions and weight
A classic method of improving the traction and dynamic characteristics of a vehicle is to properly distribute the weight of both the vehicle itself and the luggage it carries. Speed tests have shown that rear-wheel drive cars (which is the VAZ 2106) when accelerating, shift part of the weight from the center of the car and the front axle to the rear. The latter leads to a greater load on the rear side of the chassis, which is an auxiliary effect when driving. This is due to an increase in the contact patch and an increase in the coefficient of adhesion of the tire to the road surface.
The standard dimensions and weight of the vehicle allow you to transport up to 150 kilograms of luggage or any other cargo. Weight up to 400 kilograms does not affect the dynamic performance of the car in any way. Achieving a maximum speed of 152 km/h is possible when fully loaded with luggage, driver and passengers. With the previous parameters, reaching the speed mark of 100 km/h is achieved in 17.2 seconds. If you have luggage weighing up to 150 kilograms, the amount of gasoline consumed per 100 kilometers at a speed of 90 km/h is ten liters and one hundred grams.
But no matter how much you reduce the weight of a vehicle, it will not be possible to increase power. Reducing the weight of the VAZ 2106 car and modernizing its body components will help improve dynamic characteristics. This can be achieved without changing the design of the body, power or traction units in the following ways.
- Do not drive a car with a full tank of fuel, do not add fluid to the windshield washer reservoir. The weight of a full fuel tank is more than eighty kilograms, and the windshield washer tank weighs up to ten kilograms.
- Forged wheels lead to the loss of 10–20 extra pounds.
- Upgrading the suspension, replacing steel levers with aluminum ones, the overall dimensions of which are suitable, will reduce the weight by another couple of kilograms.
- How much will replacing the muffler cost? About 25–30 kilograms.
- Modernization of non-load-bearing streamlined parts of the car body will help to improve the aerodynamic properties of the car, provided that the dimensions of the car remain unchanged.
The above methods for making a car lighter are not the only or unique ones. How many are there? Yes, a lot. However, the fact that the VAZ 2106 weighs less affects not so much the speed indicators as the braking characteristics, handling, etc.
How much does the VAZ 2106 body weigh and what are its dimensions? People often ask on forums and car portals. Indeed, interest in the most popular car in the post-Soviet space was and remains incredibly high. Find out more by reading useful information on the body of this car. A lot depends on how much the body of the VAZ 2106 weighs, including the condition of the main parameters of the car.
How to choose a tint film
Speaking about tinting a VAZ 2107, one cannot help but touch on the most important question: how to choose a tinting film? The main rule when choosing film is this: savings are unacceptable here.
Yes, there is a great temptation to buy cheap Chinese film. But the throughput of such film leaves much to be desired. When driving at dusk, the driver may no longer be able to distinguish obstacles located only fifteen meters from the car. And the service life of Chinese film is very short: a car owner will be very lucky if it lasts at least a couple of years. And when the driver finally decides to get rid of the cheap film, another unpleasant surprise awaits him: a dark layer of paint remaining on the glass. The fact is that on cheap tinting, the paint layer is usually mixed with the adhesive layer (it is precisely because of this feature that visibility deteriorates at dusk). After removing the film, the sticky paint simply remains on the glass and is not so easy to remove.
Expensive and high-quality tinting does not have this drawback, which is why you should pay attention to the products of the companies listed below
- Sun Control.
- Llumar.
- SunTek.
- Sun Gard.
Article: 2101-5206010, additional articles: 6960286/4029084
Order code: 003187
- Buy with this product
- show more
- Buy analogues
- Passenger cars / VAZ / VAZ-21012 drawing
- » href=»/catalog/vaz-3/legkovye_avtomobili-30/vaz_2101-3/okna-20/#part411″>Wind glass Window and rear window / Windows
- » href=»/catalog/vaz-3/legkovye_avtomobili-30/vaz_2101-3/okna-31/#part732″>Wind glass Window and rear window / Windows
- Passenger cars / VAZ / VAZ-21031 drawing
- » href=»/catalog/vaz-3/legkovye_avtomobili-30/vaz_2103-106/okna-10/#part9097″>Wind glass Window and rear window / Windows
- Passenger cars / VAZ / VAZ-21051 drawing
- » href=»/catalog/vaz-3/legkovye_avtomobili-30/vaz_2105-6/stekla-18/#part15853″>Wind glassWind and rear window / Glass
- Passenger cars / VAZ / VAZ-21071 drawing
- » href=»/catalog/vaz-3/legkovye_avtomobili-30/vaz_2107-8/okna-12/#part22162″>Wind glassWind and rear window / Windows
- Passenger cars / VAZ / VAZ-21022 drawings
- » href=»/catalog/vaz-3/legkovye_avtomobili-30/vaz_2102-4/okna-20/#part4895″>Wind glass Window and rear window / Windows
- » href=»/catalog/vaz-3/legkovye_avtomobili-30/vaz_2102-4/okna-31/#part5216″>Wind glassWind and rear window / Windows
- Passenger cars / VAZ / VAZ-21041 drawing
- » href=»/catalog/vaz-3/legkovye_avtomobili-30/vaz_2104-5/stekla-18/#part12747″>Wind glassWind and rear window / Glass
- Passenger cars / VAZ / VAZ-21061 drawing
- » href=»/catalog/vaz-3/legkovye_avtomobili-30/vaz_2106-7/okna-15/#part18893″>Wind glassWind and rear window / Windows
There are no reviews for this product yet.
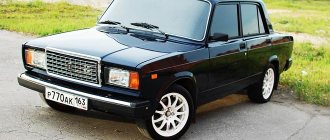
Today, the next article in the series “Crystal VAZs or typical breakdowns of domestic cars” is dedicated to the “classics”: VAZ-2101, 2103, 2104, 2104, 2105, 2106 and 2107. These cars have been driving along our roads for decades and, despite Despite all the shortcomings that we will talk about, their popularity is still high.
Glass is an integral element in the design of any car and the VAZ 2107 is no exception. Without this part, safe and comfortable driving would be impossible. Therefore, this body element must always be not only clean, but also free from defects. If such occur, it is advisable to replace the damaged glass.
Windshield
A windshield is a body element that is a kind of shield mounted in the front of the car’s cabin in order to protect the people inside from damage, as well as eliminate discomfort from oncoming air flow, dirt and other factors. In addition, the windshield is an element that directly affects the aerodynamics of the car. Since the element in question most often absorbs a large amount of contaminants and is often damaged by stones from oncoming or passing traffic, which leads to its cracking, it is this element that has to be replaced more often than others
If there is a need to replace the windshield, it is important to know its parameters. The size of the windshield of the VAZ "Seven" is 1440 * 536 mm
How to remove glass
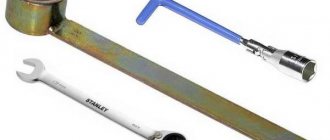
To dismantle glass, you will need a minimum list of tools:
- flat and Phillips screwdrivers;
- hook made from a bent flat screwdriver.
We remove the glass as follows:
- Move the wipers away from the windshield.
- Using a Phillips screwdriver, unscrew the 3 screws on the side trim of the front pillar.
How to install glass
Installation of new glass is carried out using the following list:
- degreasing and cleaning agent;
- clean cloth;
- cord with a cross-section of 4–5 mm and a length of at least 5 m;
- molding.
Before installing the glass, we check the seal. If there is no damage on it, no signs of rubber cracking, then the element can be reused. If defects are detected, the sealing element should be replaced to avoid leaks. We install the new glass in this order:
- Remove the seal and trim from the old glass.
- Thoroughly clean the area where the seal meets the body. If there are traces of corrosion on the frame, we clean them, treat them with a primer, paint them and wait until all the layers dry. We also clean the old windshield seal well to remove dirt.
Which manufacturer's glass should I install?
Today there is a huge selection of car glass manufacturers, and for a car owner who is not so often faced with replacing this body element, it is not so easy to decide. Therefore, you should consider several of the most popular manufacturers, whose products have proven themselves to be of high quality:
- BOR (Bor Glass Factory) is the leader of the glass industry in Russia. The plant is part of the Asahi Glass Company concern. Products are supplied to PAZ, UAZ, KAMAZ, GAZ, VAZ and Ford plants;
- KMK is one of the leaders in the production of auto glass in the secondary market;
- Benson (China) - the company has special permission to sell its products in the Russian Federation. This means that when purchasing such glass, the buyer can receive the necessary documents confirming the quality and safety of the product;
- Olimpia (Great Britain) – produces high-quality glass not only for cars, but also for architecture and various industries. Glass production is carried out using high-quality equipment, which significantly reduces the influence of the human factor on the manufacturing process.
How to replace your windshield yourself. Replacing the windshield of a VAZ 2110 Cutting off a broken windshield Preparing for gluing in the windshield
Which glass manufacturer is better?
In order to choose the rear or windshield of a VAZ 2107, you should familiarize yourself with all the offers of major manufacturers. A new body element must be strong and reliable in order to serve the car owner for several years. In addition, high-quality glass from a reliable manufacturer will accurately repeat the shape of the factory part and fit perfectly into place.
VAZ 2107 owners have a choice of glass from popular and reliable manufacturers:
BOR is a glass factory in the city of Bor. It is part of the large concern Asahi Glass Company. This manufacturer is known for being a supplier of automotive parts for the UAZ, PAZ, GAZ, KamAZ, VAZ and Ford plants;
Benson is a Chinese manufacturer that has received special permission to sell body parts in the Russian Federation. When purchasing these products, VAZ 2107 owners will receive quality certificates that confirm the safety of the finished glass;
KMK is another good manufacturer of glass elements for cars;
Olimpia is a British manufacturer that produces not only auto glass, but also glass for the construction of buildings and structures. The production uses modern technologies that allow us to maintain high quality glass products. Moreover, special equipment is used that minimizes the likelihood of errors due to the human factor
When choosing auto glass, you need to pay attention not only to their cost, but also to the documents that confirm the quality of the product. As for Zhiguli cars, for the most part, VAZ-2107 owners prefer the BOR plant as a replacement for factory auto glass.
When purchasing, you must carefully check the glass element and the documents that come with it.