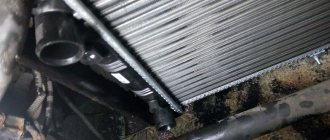
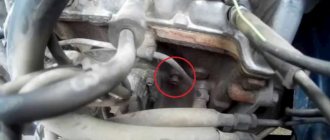
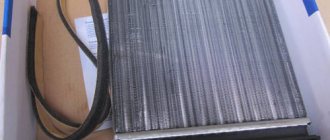
Two weeks passed after ordering the radiator, I called the salon to find out, two weeks passed where the radiator was. There was no person for spare parts, they said they would call me back as soon as they showed up, but they called earlier and said that the radiator had arrived and what date we would make an appointment for a replacement. At the beginning, as usual, the temperature was measured, photo for AvtoVAZ. Who did it, said two cars already had this problem, they all had the radiator replaced. They do not deal with purging or changing the direction of radiator flow and return. The whole thing took 1 hour 40 minutes, the worker knew his job and walked around the car himself. Upon replacement, everything was disassembled to a minimum in order to remove the platinum behind which the radiator is located. The plastic from which the air blows into the feet was also removed. The tool was used long and with a hinge) Antifreeze was not drained or added. Just removed the hoses in the engine compartment. And in the cabin they put rags under the radiator and pulled them out. First, they brought out a new radiator with all the petals crushed at the edges, they probably noticed my dissatisfaction, it turns out they had another one, they brought it, it was not so bad.
When everything was assembled, they began to check, it began to fry heavily both on the passenger side and on the driver’s side. Hot air actually began to blow into the passenger’s legs. I remembered Kalina 2, in which my legs were burning from the heat on the driver’s side.
Have you noticed that your car's heater is blowing cold air and not heating up like it used to? One of the reasons for this malfunction is the radiator of the interior heating system. On Vesta and XRAY it is located in the housing of the heating and air conditioning ventilation unit on the left side (driver's side). Let's look at the instructions for replacing the stove radiator in detail.
You will need: disconnect the negative terminal of the battery, drain the antifreeze, remove the dashboard trim (frame), prepare tools, screwdrivers, Torx, etc.
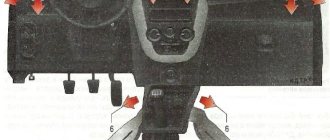
- Remove the driver's foot air duct (No. 1) by removing two screws (No. 4).
- remove the stand (No. 2) by unscrewing: two bolts (No. 5) and two nuts (No. 3).
The Lada Vesta car has a stove heater…
...designed to heat the car interior. The stove is also actively used during rain or cold weather.
The heater is also activated if necessary to quickly remove fogging from the windows or warm up passengers. In the “Lux” configuration, the car is additionally equipped with air conditioning, which creates a favorable temperature for a person.
The most common malfunctions of the Lada Vesta heater radiator: leakage, fan noise, engine vibration. The replacement process is not complicated, but requires care on the part of the repairman.
Brand name – LRh – Luzar Radiator heater
Heating radiators (also known as heater radiators, also known as heater radiators) are heat exchangers that use the heat generated by the engine to heat the vehicle interior. They allow you to maintain a comfortable temperature and prevent the car windows from fogging up.
For reference: different names of this node have equal rights of use. For example, “heating radiator” and “stove” come from the function of this heat exchanger, “heater radiator” and “stove radiator” - from the installation location.
LUZAR manufactures hundreds of heater radiators for a wide range of cars presented on the Russian market. They can be purchased in partner stores throughout Russia or online.
Many models of heater radiators are supplied to car factories in Russia and Ukraine - both for passenger cars and for trucks and buses.
The production range of manufactured stoves is constantly increasing; New types are being developed for the most popular cars in Russia.
Powerful R&D allows us to conduct research in the field of improving heat exchangers and create new designs that provide increased performance properties of heater radiators. Main areas of research:
- use of different types of tubes
- changing the location of the tubes
- change in the “fillability” of the core
- use of turbulators-swirlers
- use of various aluminum alloys
- testing of solders with different characteristics
- improving the corrosion properties of metal
- ... and many other R&D areas.
How the stove works on Lada Vesta. Device
- The heater radiator is connected to the system main via rubber pipes. The heat emitted by the internal combustion engine is transferred to the heating system.
- The heating system radiator distributes heat throughout the car interior using an electric fan.
- A preset resistor online regulates the fan rotation speed.
- The air flow is circulated and cleaned by a mesh and cabin filter (see diagram).
- With the help of installed dampers, the driver and passengers regulate the air flow flowing to them.
- The gearmotor rotates the damper based on the readings of the regulator and heater sensors.
WHY DO GLASSES FOG?
The car windows should not fog up while the heater is operating. If this happens, then the cause may be:
- heater core leaking
- cabin filter is clogged
- The electric recirculation air damper actuator is faulty
No matter what AVTOVAZ PR people say, the LADA Vesta, in accordance with the traditions of the Soviet automobile industry of the last century, turned out to be a “crude” car - with a lot of design flaws and quality defects. One of the global “jambs” that causes a lot of complaints - the clutch and manual gearbox - AVTOVAZ has already begun to change it to “more different ones”. It is not yet known whether this step will remove the claims of car owners about their reliability and smooth operation. It’s good that the company, although a year late, is trying to make its car better.
Sources
- https://vesta-lada.com/pechki-otopitel-lada-vesta-ustrojstvo-i-otzyvy/
- https://xraycars.ru/ploxo-greet-pechka-lada-vesta-i-xray-chto-delat/
- https://www.avtovzglyad.ru/avto/avtoprom/2016-10-28-chem-lada-vesta-razdrazhaet-vladeltsev/
Typical stove malfunctions
The most common problems with the stove on Lada Vesta are the following:
- the actual temperature does not correspond to the set one - low level of antifreeze (antifreeze), clogged radiator pipes or the formation of an air lock, which causes cold air to blow;
- vibration appears during operation - the electric motor is loose;
- insufficient air flow from the deflectors - clogging of channels and air ducts;
- the heater is inactive when it is activated on the dashboard - failure of the fuse (No. 14) of the mounting block.
Checking the stove fan
During the circulation of the air flow, dust particles settle on the surface of the impeller, as a result of which it begins to make noise and extraneous sounds appear.
To clear the fan blades of debris, it is necessary to provide access to the unit.
- Unsnap the glove box.
- Remove the filter element.
- On the right is the furnace mechanism. We press the plastic clips and turn the impeller counterclockwise.
- We remove the motor.
- We wipe the drive with a rag.
- Install the parts in reverse order.
Checking the stove dampers
Dampers are installed in the area between the deflectors and the fan. During operation, they fail, become deformed, and become damaged. Checking the serviceability of the damper on your own is quite simple: you need to activate the stove at maximum speed. If it doesn't blow well, it means the air duct is clogged. Change the damper positions. If you hear squeaking or noise, lubricate the moving parts with silicone grease.
Foggy windows when the heater is activated is the first sign of a ventilation problem. This problem provokes a sharp decrease in visibility on the road and an increase in the risk of an emergency. As soon as fogging is detected, check the condition of the ventilation; most likely, the air ducts are clogged.
Checking heating efficiency
Carry out prevention before the onset of winter. Be sure to check:
- heating the air;
- changing speed modes when switching the control lever, if necessary, replace the brushes of the stove motor;
- absence of extraneous noise, whistling in fan operation;
- the need for a time interval to warm up the air ducts.
Dismantling
To remove the radiator of the Lada Vesta stove, you first need to prepare the car. It will be more convenient to carry out work in an inspection hole or with a lift. If such an opportunity exists, then you should not miss it. After this, you can proceed to dismantling the radiator mechanism.
- Disconnect the negative terminal from the battery pack.
- We remove the engine protection and the front bumper.
- Now you can move on to the front bumper beam, which also needs to be dismantled.
- We press out the clamps.
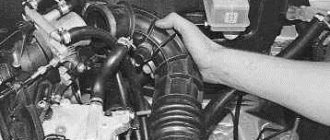
- Disconnect the pipe from the air intake from the air deflector.
- We release the clamps and disconnect the temperature sensor from the air deflector mechanism.
- We press out the latches that make it difficult to dismantle the air deflector panel.
- We drain the coolant that fills the heater radiator of the Lada Vesta.
- We open the fastening clamps to be able to disconnect the supply hose from the thermostat pipes and the pipe that supplies the water pump. And it is also worth disconnecting the steam removal hose, which connects to the pipe on the expansion tank. You will need pliers here.
- We cut the clamps that secure the hoses to the upper cross member on the radiator frame.
- Disconnect the connectors on the wire bundle in front from the connectors on the fan, sound and radiator fan relay unit.
- We cut the clamp of the front bundle of wires, which is attached to the fan casing.
- Owners of cars with an air conditioning system should release the locking elements, turn it off and move it to the side. This is the only difference in replacing the radiator of models with air conditioning from conventional cars.
- Rotate the radiator mounting clips, which then need to be removed from the brackets.
- We remove the radiator along with the fan and hoses.
- We press out the clamps that hold the cooling system fan of the power unit.
Replacing a stove radiator with your own hands on a Lada Vesta
Preparation of the workplace, necessary tools:
- rags;
- Phillips head screwdriver;
- flashlight to increase visibility;
- new radiator.
How to remove a radiator. Replacement sequence:
- We turn off the engine, turn off the ignition, and squeeze the parking brake.
- Open the hood and remove the terminal from the battery.
- We grind off the antifreeze from the system. The plug is located at the bottom point of the radiator (key 17).
- We remove the decorative trim on the instrument panel.
- Remove the top decorative trim above the glove box. Let's take it out.
- We dismantle the metal dashboard support on the driver's side.
- Remove the air pipe.
- Open the stove lid.
- We remove the heater.
- We install a new heater radiator.
- We assemble the structure in reverse order.
Design of heating radiators from LUZAR
LUZAR heating radiators are available in three types:
- Tubular-plate, prefabricated, aluminum. It consists of aluminum plates through which aluminum tubes pass, inside which coolant runs. The tanks on such radiators are made of plastic. Heater radiators of this type are used for heating small-sized salons due to limited heat transfer; have the best rigidity and light weight, as well as the lowest price.
- Tubular-tape, non-assembled (brazed), aluminum. The corrugated aluminum tape in such a radiator is located between aluminum flat-oval tubes. Radiator tanks of this type can be made of either plastic or metal. The design of non-assembled (brazed) aluminum devices is the most universal, allowing the creation of heat exchangers with any specified characteristics. Aluminum stove radiators are light in weight and relatively high rigidity, as well as at optimal prices.
- Tubular-tape, non-assembled (soldered), copper-brass. The design is very close to type 2 - between the copper flat-oval tubes there are copper strips folded in the form of an “accordion”. At the same time, the tanks on such heating radiators are made of brass - in order to increase the overall rigidity of the structure. Copper heating radiators - due to the high specific heat capacity of copper - have excellent heat transfer rates. However, due to the high softness of copper, heating radiators made of this metal are forced to have a narrow tube and a large interval (step) between the tubes, which imposes serious limitations on maximum efficiency. Also, copper heater radiators have the highest cost and the lowest rigidity to torsion, fracture and internal pressure. In this regard, copper heater radiators are “outdated” and are gradually falling out of use.
LUZAR: time-tested and road-tested
LUZAR radiators have been awarded the “Radiator of the Year” award several times. For several reasons:
- Our products are not inferior to the original ones in quality and durability.
- Often it is our products that are “original”.
- We provide a warranty of 2 years or 125,000 kilometers.
- We check each model for leaks, and several models of each batch for corrosion and vibration resistance.
- You can buy stove radiators in all possible ways (more details in the “Where to buy?” section)
- We answer all customer questions openly and quickly
Make sure of this by calling 8-800-555-8965.
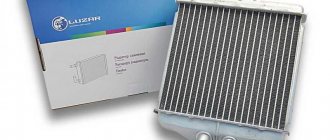
Product code: 51399
The price is specified when ordering
Manufacturer: Luzar / Russia
Model: Lada Vesta sedan, Lada Vesta SW, Lada Vesta SW Cross
Engine: VAZ-21129 (1.6 16V), VAZ-21179 (1.8 16V)
Provides heat exchange of engine coolant (antifreeze or antifreeze) with the air inside the car.
Review of Manufacturer Prices
Dimensions: 184x133.5x26 mm.
| Serial number/item | Price in rubles |
| LUZAR 271153553R (original) | From 5000 |
| STELLOX 10-35126-SX | From 4500 – 4700 |
| FENOX RO0004C3 | From 4500 – 4700 |
| RO0003O7 | From 4500 – 4700 |
| AVA QUALITY COOLING RTA6398 | From 4500 – 4700 |
| VALEO 812374 | From 4500 – 4700 |
| NISSENS 76512 | From 4500 – 4700 |
| MAGNETI MARELLI 350218221003 | From 4500 – 4700 |
| *prices are as of May 2022 | |
Lada Vesta MMC shortcuts can be dragged and dropped
The heater should be checked before the start of the winter season, and also several times in winter. Then troubles will not take you by surprise. To do this, you need to check the operation in all modes and evaluate:
- Does the air heat up and how quickly?
- Does the flow of air masses change with a change in command;
- Are there any extraneous noises?
- In general, are you satisfied with the operation of the heater?
Particular attention should be paid to the same temperature of the pipes. If the difference in the heating of rubber pipelines is significant, this means a serious problem. She's worth finding
In the worst case, this means replacing the Vesta radiator; in the best case, airing or a low level of antifreeze
It's worth finding. In the worst case, this means replacing the Vesta radiator; in the best case, airing or a low level of antifreeze.
Hello again. I often, very often come across posts here on VK about how the stove in Vesta doesn’t heat well. Such complaints appeared almost immediately after the sedan entered the market. And recently, various modifications to the heater and dampers have appeared (for example, a spring on the damper).
10.30. The thermometer does not show below zero. No divisions. It is quite accurate, but indoors. It's about -10 in the car.
10.38. Traveled 1.5 km. The engine temperature is already about 70, warm air is blowing from the deflectors. It's still cool in the cabin.
10.45. I drove exactly 6 km. I arrived in the yard. From the moment of launch 15 minutes. The thermometer shows 10 in the cabin. It turns out that the heater has heated up by 20 degrees.
Mileage: 24000 km
You should start with the fact that the stove body is located under the dashboard frame. What parts does the system consist of?
- Air filter.
- Stove radiator.
- Fan.
- Damper regulating gearbox.
- Additional resistor.
- Air flow distributor.
The radiator of the LADA Vesta heater produces and releases heat into the cabin. The fan is designed to supply air to the vehicle interior. Using a part such as a resistor, the speed is adjusted.
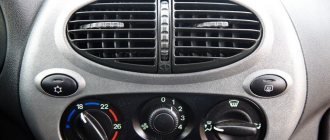
You can work with the stove using the SAUKU or “heater and air conditioning control unit”. The AvtoVAZ company installs three control units on its cars on various trim levels.
The LADA Vesta heater fan directs air to the feet of the passenger and driver, to the windows and directly into the passenger compartment. With the help of deflectors, the driver can regulate the direction of air flows and their strength.
A function has been added to LADA Vesta with which the driver or passengers can easily cool a bottle of mineral water or Coke. The refrigerated glove compartment will comfortably hold your favorite soft drinks and keep them cool even on the hottest day.
The main screen of the Lada Vesta multimedia system (MMS) contains shortcuts, the location of which can be changed to your liking. Hold the shortcut for a few seconds, then drag it to the desired location. It is noteworthy that nothing is said about this in the car's operating manual.
To turn on the heated windshield without maximum windshield blowing, turn on the “Defrost MAX” mode (button No. 24), and then simultaneously press buttons No. 24 and No. 21. As a result, the windshield heating will work, and the climate system fan will remain running at the same speed.
Few people know that Vesta’s standard multimedia system has a secret service menu. It contains the following functions:
- Software - software version, firmware, etc.
- System status - system status.
- Data save - saving data.
- Key test - key test.
- Fan test - fan test.
- Decoction test
- Initialize - initialization.
- RVC test
- Diagnostic - diagnostics.
- Screen Adjust - screen adjustment, calibration.
- GPS test - GPS test (satellites).
- Activation Mac - Mac activation.
- Screen test - test the screen (you can make it dark so it doesn’t glare).
- Backlight test - backlight test.
- Can test - Can test.
The trunk of the Lada Vesta station wagon pleases with its good organization of space. When designing its interior space, the company took into account the opinion of car enthusiasts. For comfortable placement, it has various niches, hooks and pockets. However, this is not the limit of possibilities. One of the Lada Vesta SW owners found another hidden place in the trunk of their car where they can store rags and other soft items. More details.
Self-replacement of the heater in a VAZ 2106
- 1 Procedure for replacing the VAZ 2106 heater 1.1 Replacing the VAZ 2106 heater radiator
- 1.2 Replacing the heater radiator on a VAZ 2106
- 1.3 Replacing the heater cable of a VAZ 2106
- 1.4 Replacing the heating motor of a VAZ 2106
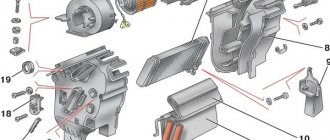
Parts of the interior heater of the VAZ 2106
- 1 — air distributor cover.
- 2 — fan housing.
- 3 – additional resistor.
- 4 — fan impeller casing.
- 5 — heater radiator housing.
- 6 – housing cover gasket.
- 7 — air supply hatch cover.
- 8 – clamping bracket for fastening pipes.
- 9 – spring holder for fastening the fan casing.
- 10 – radiator gasket.
- 11 — heater radiator.
- 12- heating tap.
- 13 – fan impeller.
- 14 – electric fan motor.
- 15 — spring bracket for mounting the electric motor.
- 16 – rubber cushion of the electric motor.
- 17 — bracket for fastening the air distributor cover.

