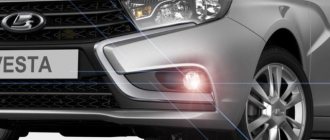
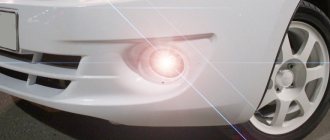
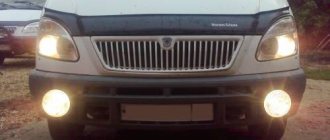
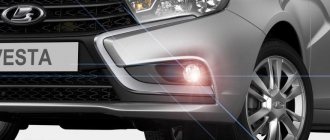
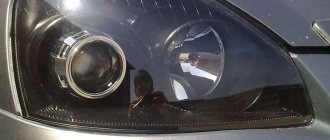
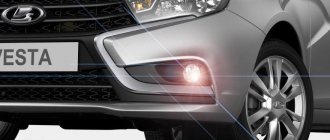
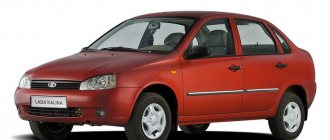
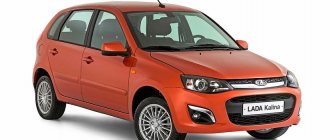
Fog lights are designed to provide more intense illumination of the roadway in poor visibility and bad weather conditions. Such optics are sometimes used during the day when the car is moving outside the city. It should be noted that a feature of fog lights is a wider angle of direction of the light flux. These headlights produce a flat and wide horizontal beam. Fog lights are not standard installed on Kalina in all trim levels. Therefore, the issue of choosing and installing this optics is very important for owners of these cars.
How to choose fog lights
The manufacturer equips the PTF car with only one configuration - this is the maximum “Lux” equipment. Owners of other versions are forced to install fog lights on the Kalina with their own hands.
But first you need to know what these headlights are. They are distinguished according to three criteria:
- Manufacturer.
- Quality of production of optics.
- Equipment.
If we take these factors into account, then the best option is considered to be several headlights from different brands. Thus, Bosch optics are equipped with flat glass of high quality. Standard fog lights for the car in question are manufactured in Ryazan. The optics are equipped with flat glass.
A more affordable analogue is the Kirzhach product. This optic features convex glass. In it, through the use of a convex lens, the light flux is concentrated and directed where it is needed. According to the owners, this is a solid design. Luch produces high-quality fog lights for Kalina. But the headlights are not equipped with a defogging valve. This is an analogue of Bosch, which is produced by a domestic manufacturer.
If you need to install a PTF, but at the same time want to save money, there are a lot of Chinese products on the market. Among these products you can find quite high-quality headlights. One of the Chinese brands is ProSport. It is impossible to say anything about the quality of Chinese products. One copy may be good, but another will fail in just a few days. If you choose good foglights for Kalina, then it is either Bosch or Kirzhach. These are the most popular manufacturers whose products are in great demand among car owners. They will last quite a long time.
Main design options and criteria affecting quality
The following types of products can be found in the retail chain:
- Products under the Bosch brand are always sold as a set (2 pieces) and are distinguished by fairly durable glass and good quality luminous flux. We can say that this is the most reliable option, but its price is noticeably higher than all other analogues.
- Production PTFs are in many ways similar to those described above, but in fact their quality is noticeably inferior to the first option. The only advantage is lower cost.
- Kirzhach fog lights on Kalina have lens-shaped convex glass, which allows you to concentrate the light flux and direct it exactly where it is required. Quite a good and reliable solution.
- Products under the ProSport brand and other similar brands are produced by Chinese factories. It is difficult to judge their reliability and quality, since one option can be excellent, while the second one will fail in a very short time.
Bosch products also play leading roles here.
The question of which fog lights are best for Kalina raises a number of disputes, so the decision is yours. As practice shows, the most popular options are Bosch and Kirzhach.
Important! All of the above options are excellent for installation, and you do not have to make any alterations to the design.
It is difficult to imagine a simpler connection diagram
How to install fog lights on a Kalina car?
Installation is carried out without the need to dismantle the bumper. In order to perform installation, you only need to unscrew and remove the front parts of the fender liners. The bumper plug can be removed using a flathead screwdriver. The manufacturer often includes a special frame mount in the kit. It is installed instead of a plug in the bumper. The optics themselves are installed and secured last.
But there is an installation method where it is necessary to dismantle the bumper. To do this, first unscrew the screws and the mounting bolt, and then remove the sides of the bumper from under the wheel arches. Next, the plugs are removed and fog lights are installed. "Kalina" continues to stand still. From the inside, the PTF is secured to the bumper with three self-tapping screws. Outside, until it clicks, a decorative frame is installed in place of the plug.
Replacing the bulb in the fog lamp. General leadership
Using the example of Kio Rio 3
1). We install the car on the overpass and provide convenient access to the lower part of the front bumper.
https://www.youtube.com/watch?v=https:accounts.google.comServiceLogin
2). Access to the rear part of the fog lamp is blocked by the front part of the fender liner, so use a Phillips screwdriver to unscrew the two fastening screws.
3). We bend the fender liner.
4). We put our hand into the opened hatch and disconnect the block with the power supply wire. To do this, squeeze the side clamps.
Connecting fog lights
First of all, the wiring harness is carried out under the hood and connected using the supplied connectors to the left and right headlights. The “mass” is fixed to the body. “Plus” is connected to the battery terminal according to the diagram supplied by the manufacturer (one of them is shown in the photo below).
Next, the harness, which is located under the hood, is pulled into the cabin. It is better and more convenient to do this along the standard wiring harness, which is located in the left wing. It is more convenient to do this if you first remove the fender liner. Further all work will be carried out in the salon. The ashtray needs to be removed. To do this, remove four screws. The button covers are pushed through the opening.
There are two more screws under these plugs. They hold the trim on the instrument panel. Then remove the temperature control knobs. They can be easily removed by pulling them towards you. Next, carefully move the cover on the panel and at the same time push out the plug for the air conditioner button. A button that controls the fog lights will be installed in place of the plug.
Replacing a light bulb in a fog light on a Mazda 6
1). We crawl our hand under the bumper and remove the protective cover with our hands. Unscrew the light bulb counterclockwise.
2). Remove the wire from the lamp.
3). We remove the wires with the latch.
4). Unfasten the lamp itself.
5). We replace it with a new one.
https://www.youtube.com/watch?v=upload
1). To get to the plastic protection, remove or turn the right wheel to the left.
2). Carefully pry up the clip with a screwdriver and remove the protection.
3). Unscrew the top plastic nut securing the mudguard and pull it out of the fender liner.
4). Using a Torx T-20 wrench, unscrew the two screws securing the protection to the bottom of the bumper.
5). Another one on the wheel arch.
6). We bend the protection and see the fog light in front of us.
7). We press and remove the block going to the lamp.
. Take the lamp and turn it half a turn counterclockwise.
9). We install a new lamp and perform the installation in the reverse order.
PTF adjustment
To get the most out of your fog lights, you need to adjust the light. This is a simple procedure that even beginners can easily handle. Before you start setting up, you need to place the car on the most level surface possible. We need a wall or a solid fence in front of this area. It is in this place that the fog lights installed on the Lada Kalina will be adjusted. First of all, experts recommend checking the tire pressure. It is important that it is the same in all wheels. This is the only way the car will stand perfectly level. Then check the distance from the center point of the headlight to the ground. A line is drawn on the wall at the same height. According to GOST standards, it is necessary that the driver’s seat have a load of 75 kg.
The settings are performed in the dark. The machine is placed on a platform at a distance of 5 meters from the wall. Then the headlights are turned on. The setup process itself is performed using a special screw. It is located at the bottom of the plug. The process requires a Phillips screwdriver. Cover one of the headlights with any opaque material, and then use a screwdriver to adjust the luminous flux so that its center is on or below the drawn line. Then the same operation is carried out for another headlight.
Replacing the light bulb in the fog lamp on a Niva Chevrolet
1). We dismantle the front bumper mudguard (we will show you how to perform the work on a car manufactured after 2009).
2). Using a Torx T-20 wrench, unscrew the two screws at the bottom of the bumper.
3). Using the same tool, unscrew the four screws inside the wheel arch.
4). Using a 10mm socket, unscrew the two nuts securing the shield.
5). Remove the mudguard.
6). We press out the two clamps of the wire block.
7). Disconnect the wire block from the lamp.
. Turning counterclockwise, remove the lamp and replace it with a new H11 lamp.
On a car manufactured before 2009, the design of the fog lamp is slightly different.
1). Remove the rubber protective cap.
2). We disconnect the negative (black) wire from the socket contact, and also disconnect the positive wire block and the lamp wire tip.
https://www.youtube.com/watch?v=ytdeven-GB
3). Squeeze and disconnect the antennae of the lamp holder.
4). We take out the lamp and replace it with a new H3 lamp.
Preparing to install fog lights
PTFs have a longer and more directional range of luminous flux. Almost all the light from such headlights is directed only directly, which allows you to identify the cars of other drivers in advance without shining them in the eyes.
The Lada Kalina car is equipped with PTF “Lux”, however, there is a huge variety of models of such headlights on the spare parts market, so every car enthusiast will be able to install fog lights on the Lada Kalina that he likes best. Depending on the class and quality of parts, several types of foglights are distinguished.
In the process of replacing old headlights with new ones, you do not need to drill or cut anything. Included with the PTF for the Lada Kalina are special trims in the shape of the bumper cutout. All that will need to be removed are the plugs. After this, you can begin installing the parts.
In order to quickly and efficiently replace old fog lights with new ones, you will need to prepare or buy some spare parts and tools. So, for the work you will need:
- fog lights (set);
- relay, wires and button kit for connecting headlights;
- fuse and fuse holder;
- tape measure - necessary for adjusting the light;
- wrenches with heads 8 and 10;
- iron steel wire (small piece) - in order to stretch the wires;
- screwdrivers - Phillips, large flat;
- nylon ties - to secure wires;
- wire cutters;
- soldering iron;
- insulating tape;
- hexagon, which is needed to adjust the direction of the light.
Having all the above materials and tools available, you can safely get to work, of course, having first studied the instructions for replacing the PTF.
Preparations before installation
How to install headlights is one thing, and you need to prepare thoroughly before it. The peculiarity of the light beam of fog lamps is its straightness, which allows you to clearly identify other road users in conditions of poor visibility. In the Lada Kalina, the manufacturer installs “Lux” optics, although today’s market is represented by a variety of offers, among which any owner will be able to choose analog PTFs to suit his taste.
These products are divided into types depending on quality indicators and class.
Replacing fog lights with new analogs does not involve performing auxiliary work related to sawing or drilling the bumper surface. The manufacturer adds specialized plates to the optics kit, the shape of which exactly follows the contours of the cutouts in the bumper. All that is required is the removal of the standard plugs. Now is the time to start installing the headlights.
To quickly and efficiently carry out installation work, the owner will need to know how to install headlights and acquire the following set of materials and tools:
- a set of selected optics;
- relay, wiring and button for connecting new products with the on-board network;
- fuse together with its holder;
- tape measure to adjust the direction of the light beam;
- keys whose size is “8” and “10”;
- a piece of wire for pulling wiring;
- screwdrivers with different profiles;
- nylon clamps for fixing the cable line;
- wire cutters, electrical tape and soldering iron;
- hex wrench to adjust the direction of the light beam.
Armed with instructions and having taken possession of the entire designated list of available tools, we begin the process of installing headlights.
Types of PTFs and methods of installing them on Kalina
Stylish headlights for Kalina
There are a large number of fog lights that can be installed on a Lada Kalina car. PTF can be of the following types.
- Twin.
- Round.
- For outdoor installation.
- Square.
- Recessed.
- Oval.
However, in fact, not all of the above models can be installed instead of factory fog lights on Kalina. When making a thoughtless purchase, car owners have to redo the fastenings. If you want to avoid this, it is best to purchase one of the PTF kits produced by the following manufacturers.
- Bosch fog lights. A German copy, which is distinguished by high quality glass and light range. They are only sold as a pair.
- Fog lights “Luch”. One of the analogues of German products, the cost of which is significantly lower than the original. However, their quality is far from being the same as German foglights.
- ProSport fog lights from a Chinese manufacturer that produces spare parts for Russian cars.
- PTF “Kirzhach”. They have lens-shaped glasses that allow you to concentrate the range and brightness of the light stream.
It should be noted that all fog lights from the above manufacturers are ideal for Lada Kalina cars and will not require any additional manipulations. All you need to do is remove the old plugs and install new PTFs in their place. The new fog lights come with 4 plugs, which can be painted a different color if necessary to give the car more style.
PTF connection diagram
There are two common ways to install anti-fog lights.
- With the removal of the front bumper (a method that will be described).
- Without removing the bumper - the method is used by experienced craftsmen who have been repairing cars for many years.
Beginners are recommended to replace the PTF by first removing the front bumper. In the photo you can see what is included in the fog light installation kit.
Selection of PTF for Lada Kalina
The market offers original PTFs and analogues for Kalina. Good manufacturers provide a warranty of a year or more. Their products are distinguished by the use of durable glass in manufacturing. Original light bulbs are marked with article number 11180374301000 for easy searching by consumers when buying online or offline and by sellers when selling goods.
From the Kalina factory, 1 PTFs are installed on luxury trim levels, so many car owners are afraid to change or add light bulbs themselves. However, fog lights from the companies listed below are installed in their standard places without major alterations or additional tuning. You will need a minimum of tools and experience to install the PTF.
List of domestic and foreign manufacturers of PTFs that are ideally mounted on the Lada Kalina 2 or Lada Kalina 1 configurations:
- from Bosch. The manufacturer uses flat glass to improve the direction of the light flux. Such PTFs are sold in pairs;
- The domestic company produces headlights with lenticular glass. Experienced mechanics place Kirzhach bulbs in second place after the German ones;
- PTF "Luch". The domestic organization produces a complete analogue of Bosch foglights. They are inferior to the German company only in price;
- light bulbs from China from ProSport. The car owner will be able to save money, but some may have a long service life, while others will burn out within a month after installation.
Experienced car owners purchase LED headlights. They are more expensive, but consume less electricity and shine brighter. The car owner has the opportunity to choose the color and brightness.
Installation instructions for fog lights on Lada
This instruction is step-by-step, so it is imperative to follow the sequence of actions. Failure to comply with the installation steps may lead to installation errors and lack of the desired result.
- First you need to remove the front bumper. To do this, you need to first unscrew the fasteners. The screws are located at the bottom of the bumper under the grille. In addition, you need to unscrew the fasteners in the wheel arches, which are used to secure the edges of the bumper. The sides of the bumper must be removed from under the arches of both wheels. After this, the bumper is completely removed.
- Next, you should pull out the plugs, and the latches can be bent using a flat-head screwdriver. Now you need to screw the foglights using self-tapping screws. Each PTF is attached to 3 self-tapping screws.
- The following steps are carried out inside the car. Looking under your feet, or more precisely, under the clutch pedal, you can see a bundle of wires. At this point you need to push out the seal, and then use a metal wire to pull out the wires from the fog lights that run next to the main ones.
- The wires from the PTF must be connected to the main ones, and the entire bundle must be tightened using plastic clamps.
- Opposite the fog lights themselves, you need to leave wires of such length with connectors that they can be easily secured with zip ties. As for the negative terminals, they should be attached to screws on the car body.
- Since the total power consumed by PTFs is 110 W, they need to be connected only through a relay with a control button. The button itself can be installed on the dashboard or next to the lighter. In order to supply power to the headlights, you need to connect the pink wire, which is located in the fuse box, to the relay.
- The fuse to which the PTF is connected must be rated at 15 A. Power contacts of relays 30 and 87 are connected to the wires for the fog lights.
- After completing the work, you need to check the correct connections by connecting the battery terminal. Now the button in the cabin is pressed. If everything is in order and the headlights work, you can proceed to the final stage. For more unusual “cold” lighting, you can install xenon in the foglights.
- When installing the bumper on the car, the steps are performed in the reverse order. Now you need to check again that the entire system is working correctly.
What is needed for installation and connection
Standard PTFs are included in some Kalina configurations; they are installed on the lower bumper. The lighting quality of standard optics is not always optimal - many mechanics recommend purchasing a higher-quality kit and installing it on the car. The designers have provided for the possibility of replacing such headlights; repairs do not require completely removing the front bumper.
Which PTF is better to install?
Manufacturers offer different sets of optics in terms of price and quality. It is worth noting the most suitable options for Kalina:
- Bosch optics have flat glass and are sold in a set of 2 devices. Has high build quality and long service life.
- Kirzhach headlights can be purchased one at a time - they use convex glass in the shape of a lens.
- Luch foglights are of good quality, but the design does not include a fogging valve.
- ProSport headlights, despite the manufacturing country of China, are of good quality at a low price.
PTFs from different manufacturers differ in price and quality
Advice: It is worth noting that domestic manufacturers are practically not inferior in quality to foreign companies. They also offer a good warranty on their devices.
Tools and materials
Besides the optics itself? you will need to purchase a mounting kit for connection. It includes:
- relay;
- headlight switch;
- several wires with connectors;
- connectors;
- self-tapping screws;
- instructions with installation diagram.
Everything you need is included in the installation kit for connecting PTF
The kit must have a special marking 1119. This means that all parts are intended for installation in the prepared location of the mounting block.
PTFs can be sold with or without external frames. Before installing the frame, you need to paint it to match the body color or purchase ready-made ones in a suitable color scheme. The tool you will need is a standard 8mm wrench and a good screwdriver. Work can be carried out both with the front bumper installed and with it removed.
Adjusting headlights yourself
After installation, you need to adjust the direction and brightness of the fog lights. To do this, the car is placed on a flat surface at a distance of 5 meters from the wall. Next, one headlight is covered, for example, with cardboard or a tin. By rotating the adjustment screw, you need to make sure that the boundary of the outgoing light is 0.5 m below the luminous flux level of the main headlights.
For the most precise adjustment, a special regloscope device is used, but you can do without it. This completes the process of installing new fog lights. If all steps were completed correctly, the new PTFs will serve for a long time and reliably.
Fog lights (FTL) are an additional source of light. The flat and wide horizontal beam of these headlights extends directly above the road, which improves road illumination in foggy conditions. PTFs were not installed on the Lada Kalina in all modifications, so the question “how to install fog lights on Kalina” is still relevant.
Which fogs to choose for Kalina?
1). Using a Phillips screwdriver, unscrew the two self-tapping screws securing the fog lamp trim.
2). We remove the headlight from the bumper niche.
3). Disconnect the headlight wire connector.
4). Remove the dirt cover.
5). Disconnect the ground wire tip (4) from the terminal (1), and the wire connector (3) from the lamp wire tip (2).
6). Having released the spring clamp (1), remove the lamp.
https://www.youtube.com/watch?v=ytcreatorsen-GB
7). We install the fog lamp and headlight in the reverse order.
Before installing fog lights on Kalina 2 or 1, you need to decide on the type of optics and its manufacturer. Every car enthusiast who has ever connected a PTF knows that a lot depends on the manufacturer and type of optics. For Lada Kalina cars of the first and second generation, you can find many types of headlights on sale. Moreover, they differ from each other not only in type and manufacturer, but also in the efficiency of the glow, as well as in the configuration.
Connection diagram of optics with relay and button
The most common manufacturers of PTF for Kalina:
- the domestic company Kirzhach is one of the most trusted manufacturers, which boasts decent quality fogs;
- Luch is another domestic brand that has earned the trust of our compatriots;
- Bosch is a world-famous company that produces not only PTF, but also many other types of parts and components for cars;
- Prosport is a Chinese brand that entered the domestic market not so long ago.
As for the varieties, the optics may differ in appearance:
- headlights can be double;
- round shape;
- in the shape of a square;
- oval lanterns.
And also a diagram (photo on the left). The circuit can be modified (photo on the right) by adding another relay, which will not allow the fog lights to light up after the ignition is turned off.
Pinout of contacts of MUS Lada Kalina:
- Contact 1 - to the CPTO
- Contact 2 - control button
- Contact 3 - indicator (LED) of PTF status (on or off);
- Contact 4 - PTF relay enable pin
- Contact 30 - 12V (constant coming from the battery)
- Contact 31 - General minus (ground).
- Contact 56 - To low and high beam headlights.
- Contact 58 - To side lights.
- Contact 58b is an output (regulated voltage) for the illumination of knobs, buttons and instrument panel.
- Contact XZ - ( ) from ignition switch
Let us remind you that you can find other photo reports in the Tuning Lada Kalina section.
Keywords: fog lights Lada Kalina | bumper Lada Kalina | Lada Kalina accessories | external lighting for Lada Kalina | headlights Lada Kalina
https://www.youtube.com/watch?v=channelUCVOiJIYQyCbXwkrKYXw8Thg
Found an error? Select it and press Ctrl Enter..
Connecting Kalina fog lights
In addition to fog lights and mounts, the kit should include wiring, which is often missing. We recommend that you purchase several meters of wire with a cross-section of at least 0.75 sq. mm. We pull the wires from the engine compartment into the passenger compartment using a piece of wire on the starboard side through the hole above the clutch pedal. To gain access you will need to remove the front left wheel and fender liner.
The most practical places to install the PTF button are in the tunnel, or on the panel instead of the air conditioner button.
A less popular method is to connect the PTF to the light control module (LCM). We fix the relay with a hinged mount in the mounting block.
Replacing lamps in standard Kalina foglights
It is better to change bulbs in standard fog lights in the inspection hole. Sequencing:
- Fix the car and remove the wheel above which you need to replace the lamp.
- Unscrew the fastenings of the fender liner and dismantle it.
- Move the protective boot and disconnect the connector with the wires.
- Turn the PTF counterclockwise and remove it.
- Install the new one by turning it clockwise.
- Put on the connector and boot.
After replacing the lamps, all that remains is to check and adjust the fog lights.
Which low beam lamps to choose for Kalina
As we already indicated above, H7 lamps are installed in the low beam. Today a large number of lamps of varying quality are offered with this type of base. We recommend installing only high-quality and proven lamps that have already proven themselves.
- PHILIPS H7-12-55 LONGLIFE ECO VISION (4x lifespan) lamp price from 400 rubles (lamp installed from the factory)
- PHILIPS H7-12-55 +30% Vision lamp price from 300 rubles (with increased brightness)
- PHILIPS H7-12-55 +130% X-TREME VISION 3700K set price from 1500 (considered one of the brightest halogen lamps)
- OSRAM H7-12-55 Ultra Life (3x resource) price from 400 rubles (just like Philips was sometimes installed from the factory)
- OSRAM H7-12-55 +30% Super lamp price from 300 rubles (lamp with increased brightness by 30%, similar to philips)
- OSRAM H7-12-55 +110% NIGHT BREAKER UNLIMITED set price from 1500 rubles (110% more light than a regular lamp)
- BOSCH H7-12-55 Pure Light lamp price from 250 rub.
- MAYAK H7-12- 55 price per lamp from 90 rubles (inexpensive Chinese equivalent)
- GE H7-12-55 (PX26d) (General Electric) price per lamp from 180 rub.
If you want your low beam lamps to last as long as possible, you should choose
- PHILIPS H7-12-55 LONGLIFE ECO VISION
- OSRAM H7-12-55 Ultra Life
These lamps have an extended lifespan and therefore last longer than regular or high-brightness lamps. However, we note that some owners do not have enough light in a car with these lamps.
If there is not enough light, you can install lamps with increased brightness +30% or +110, +130% - but you must be prepared for the fact that they burn out faster than simple lamps. We do not recommend using them as DRLs.
- OSRAM H7-12-55 +110% NIGHT BREAKER UNLIMITED
- PHILIPS H7-12-55 +130% X-TREME VISION 3700K
When installing such lamps, it is better to install running lights and drive on them during the day, so as not to “burn out” expensive lamps with increased brightness.
Principle of operation
Before you do it yourself and install the purchased PTF kit on your car, you should understand the principles of operation of fog lights, and also find out what the car manufacturer recommends on this issue.
Advice: it would be useful to order the production of stickers for the headlights when purchasing foglights. They will protect the glass from branches and plant stems, as well as from stones flying from under the wheels.
Technical requirements
Current rules stipulate that fog lights should only work with side lights or low beam headlights (see also the article VAZ 21099 wiring diagram: carburetor with “Euro” panel). This is primarily due to current road safety requirements.
The second point that you should pay attention to is the installation location, determined by the provisions of GOST 8769-75:
- From the road - not lower than 250 mm;
- From external dimensions - no closer than 400 mm.
Note! In addition, clause 2.3.4. it was determined that PTFs should emit only white or only selective yellow light. But it must be the same for both headlights mounted on a given vehicle.
Technical features
Currently, there are two main types of PTF used on Lada Kalina, in which:
- The formation of a light spot is carried out on the headlight glass due to the marks applied to it. Such PTFs are considered classic and are commonly called a headlight with a reflector;
- The light spot is formed in a convex (parabolic) lens installed instead of glass. It is considered more progressive because it is equipped with halogen or xenon lamps. In everyday life they are called lensed.
Tail lights and lamps
The following elements are used as brake light lamps in Kalina-2: lamps with a P21W socket and a transparent bulb. Replacing such an element will not be difficult.
Brake light bulb, VAZ-2192/2194
The rear turn signals are equipped with the same bulbs as discussed above. Their bulb is colored yellow (type PY21W).
The reversing light in the hatchback is provided by a lamp of the following standard size - R10W. If we talk about the station wagon, they use lamps of a different type - W16W. They do not have a metal base.
These are the reversing lamps
In conclusion, we note the following: the light of the side and fog lights in the rear lights is provided by a combination lamp. Its standard size is P21/4W. Good luck with your choice!
It is important to know! When performing any actions with electrical equipment, you must first disconnect the negative terminal of the battery. The terminal fastening is unscrewed with a 10 mm wrench.
Other lamps in the station wagon and hatchback
To illuminate additional equipment in Kalina-2, lamps of standard size C5W are used. They are:
- In the license plate light socket ;
- In the trunk light;
- In the glove compartment lighting module.
The interior is illuminated by a C10W lamp, and additional side lamps are equipped with T4W lamps.
Light bulbs and body turn signals
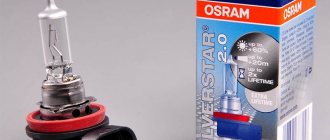
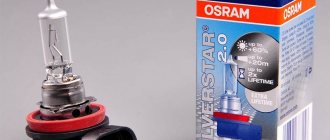
The side turn signals are equipped with incandescent lamps without a socket (W5W). And H11 lamps can be installed in the front fog lights. Successful replacement.
What causes lamps to burn out in Lada Kalina
There are three reasons why lamps in a car can burn out. And here is each of them:
- Life time. It is worth noting that any lamp is designed for certain operating hours. Once the operating time exceeds its limits, the light source begins to dim, and then the filament melts and the light source stops working. The operating time of the lamp may be affected by the voltage of the on-board network.
- All automotive light sources are designed for a voltage of 12 Volts, but not more than 14.7V. If this parameter is exceeded, the incandescent device begins to operate in overheating mode, which leads to its failure ahead of schedule. Overvoltage can occur due to a breakdown of the voltage regulator relay.
- Quality. A lot depends on the quality of the light source - from illumination to service life. To prevent the lamp from burning out prematurely, try to choose light sources recommended by the manufacturer.
