Anti-lock braking system ABS: types, types
Depending on the type and type, ABS is classified into:
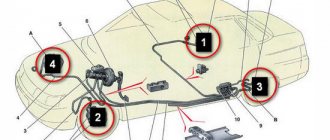
- One scheme of operation of the ABS system is when all the devices that make up the ABS are located in one unit. That is, the hydraulic valve block, hydraulic accumulator and pump are located in one unit.
- The second ABS scheme is when the component devices (hydraulic valve block, hydraulic accumulator and pump) are located in different places. In this type of braking system, in addition to the ABS module, there is also an ESP module and an SBC module.
Whether you can bleed the brake system yourself depends on what type of brake system is in your car.
If the car has a system of the first type, then it is easy to properly pump the ABS.
If the car has a system of the second type, then one cannot cope without a scanner; it needs to be pumped to a service center for maintenance.
The ABS system consists of:
- Sensors (installed on the hubs). When replacing rear wheel hubs, as well as some front ones, you may notice special recesses for sensors. They are engaged in transmitting data about the speed of movement.
- Control valves (installed in the brake system). Serve to change the pressure in the system.
- The electronic unit. Receives speed information from sensors and adjusts control valves.
FAQ
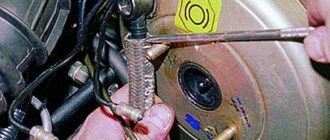
One of the most common problems among motorists is the lack of effect from pumping the brakes. After the procedure, the pedal remains sluggish, and no improvements in the operation of the system are observed.
Two factors lead to this situation:
- lack of tightness of the system or any individual element;
- incorrect replacement of the master cylinder.
If all the air has not been removed from the cylinder during installation, it will subsequently be quite difficult to squeeze it out through the fitting.
Drivers are also interested in how much it is possible to bleed the brakes on their own, without the assistance of an assistant. To do this, purchase a special device that will make the procedure of bleeding the brakes easy and convenient without outside help.
You can bleed brakes with an ABS system at home without taking the car to a service station. The main thing is to follow all the basic rules of the procedure to prevent system breakdown.
Issues relating to motorists' rights are often more important than they appear at first glance. A driver may lose his license or suffer other severe penalties due to ignorance or misinterpretation of laws and regulations. Do not be lazy to dive deeply into the essence of the issue being studied, do not hesitate to ask advice from professionals.
Source
ABS bleeding sequence
- First, we look for and remove the fuse in the fuse block that is responsible for the operation of the anti-lock braking system.
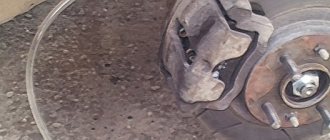
- Next, we jack up and remove one front wheel, and look for the brake wheel cylinder (BWC) fitting.
- After this, we put a hose on the fitting (from a hydraulic level, for example).
- Open the fitting one turn.
- One presses the brake pedal all the way and holds it in that position.
- Now turn the ignition key to turn on the hydraulic pump (the ABS indicator lights up on the instrument panel).
- The second person watches how air is removed through the hose and, after removing the air, tightens the fitting.
- We release the brake pedal only after tightening the fitting.
- Now, how do you know that all the air has escaped from the ABS? This shows the ABS icon on the dashboard, if it goes out after removing the air and tightening the fitting, then all the air has escaped.
Features of work on the VAZ-2121 Niva
As for the VAZ-21213 Niva, this car has its own characteristics. And although the system on this car is dual-circuit, it is different from other VAZ cars.
On this SUV, one circuit combines all 4 brake mechanisms, and the second - only the front wheels. To ensure that the circuits are independent, the Niva uses a block caliper in front, to which two brake hoses fit; accordingly, there are two fittings for bleeding.
Bleeding the brakes on a Niva is done in the following sequence: first, air is expelled from the rear right mechanism, then from the rear left one. Next, the general circuit on the front brakes is pumped - first the right, then the left (the principle of the distance of the wheel from the master cylinder). In this case, it is important not to confuse the fittings - the upper one is responsible for the general contour, and it is this that should be used.
Only then is the front brake circuit pumped, for which the lower fitting is used. Here the pumping sequence does not matter; you can start with both the left and the right mechanism.
But the Chevrolet-Niva does not use such a brake design. A conventional diagonal dual-circuit system is installed there, so the pumping sequence is identical to the process on VAZ-2108 and higher cars.
Conclusion
After carrying out repair and maintenance work on critical components of the car, before driving, you must first check the tightness of the system and the operability of the vehicle components.
ABS - Anti-lock Braking System is a system against wheel locking during heavy braking. Thanks to the fact that ABS prevents the car from skidding along the road, safety increases in emergency situations. The anti-lock braking system will operate correctly if the system is not air-filled.
Watch this helpful video. Tests show that even a working ABS system turns off at the end of the braking distance, so you still need to modify it with your foot.
The Lada brake system is responsible for the safety of the driver and passengers of the vehicle, so it needs to be checked regularly. The serviceability of the brake pads should be checked at least once a month.
Replacing brake fluid
To complete the work, you will need an assistant, as well as a rubber bulb.
1. We prepare the car and the necessary equipment to perform the work.
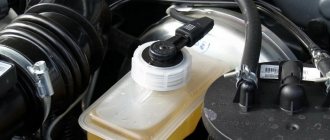
2. Remove the tank cover
To prevent air from entering the hydraulic drive of the brake system, when replacing the brake fluid, make sure that its level in the reservoir does not fall below the MIN mark.
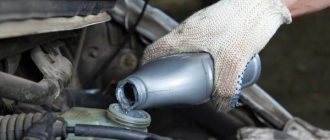
3. Use a blower to remove the working fluid from the master brake cylinder reservoir.
4. Fill the tank with new fluid up to the top edge of the tank.
5. We pump the circuits of the hydraulic drive system, starting with the rear wheels of the car.
6. We pump each wheel cylinder until new (lighter) brake fluid begins to emerge from the fitting.
7. After replacing the fluid in both circuits, we check the operation of the hydraulic drive and bring the fluid level in the master brake cylinder reservoir to normal.
Braking system design Grants
Before you start adjusting and checking, you should find out what the Lada brake system is like and what its features are. The design includes the following parts:
- brake regulator;
- pipelines;
- brake pads and cylinders;
- amplifier.
To ensure efficient and safe braking, Grant has a double-circuit (diagonal) pipeline system. The tasks of the first circuit include blocking the left rear and right front wheels. The second circuit is designed to block the left front and right rear wheels. The front wheels have disc brakes, and the rear wheels have drum brakes.
The process of controlling the master cylinder on the Lada Granta is carried out using a vacuum amplifier. This device is designed to improve controllability of the brake system. To do this, you need to press the appropriate pedal. It is necessary to take into account that an anti-lock braking system may be included in the Lada Granta, or ABS will be absent. The Lada Granta system under consideration is equipped with a hand brake that blocks the rear wheels by spreading the corresponding pads in the drums. These parts are moved through levers and by moving a steel cable located inside the vehicle.
The vacuum amplifier is a diaphragm. This element shares the rarefied atmosphere of the vacuum booster with external pressure. The pressure difference helps to reduce the effort exerted on the corresponding pedals. When the brakes are released, the atmospheric and vacuum chambers are connected to each other using a special valve.
Step by Step Actions
The nuances of pumping depend directly on the ABS model. The location of individual components and the presence or absence of additional modules affect the order of the procedure.
The preparatory stage is the same regardless of the car brand. Turn off the ignition and press the brake pedal intensely several times.
Pumping using the example of Lada Granta
The car is placed on an overpass or driven into a pit. This is necessary so that you do not have to remove the disks for free access to the working surface. Next, turn on the ignition to open the solenoid valves. Start the procedure with the right rear wheel.
To bleed the brakes you need:
- Disconnect the wires from the tank cap;
- pour brake fluid into the reservoir (as much as will fit);
- remove the cap;
- use a spanner wrench to loosen the tension on the fitting;
- the prepared hose is connected to the tip of the fitting;
- place the second end of the hose in a container for waste liquid;
- press the brake pedal several times;
- fix the pedal in the lowest position and hold it;
- use a key to open the fitting;
- wait until the liquid has completely drained (at this moment the brake pedal will “fall” to the floor);
- close the fitting;
- pump the pedal again and repeat the procedure until the liquid flowing from the hose no longer contains air bubbles;
- tighten the fitting;
- remove the hose;
- reinstall all parts.
The process is repeated on each wheel in order of priority.
Bleeding the brakes of Lada Priora
The process of bleeding the ABS brake system for the Lada Priora is similar to the previous one. When bleeding the front wheels, the discs are removed, providing better access to the working surface.
After completing the process, you should not immediately drive out onto the road. First, they check the functionality of the system in a safe area, eliminating leaks and failures of the pedal.
Bleeding the hydraulic brakes of Lada Granta (VAZ-11183, 21116)
We pump the brakes to remove air from the hydraulic drive after it has depressurized when replacing the master cylinder, brake cylinders, hoses, tubes, as well as in case of replacing the working fluid or when the brake pedal becomes “soft”.
It is more convenient to carry out the work on an inspection ditch or overpass.
When the engine is not running, we remove air from the system, first from one circuit and then from the other in the following sequence:
– brake mechanism of the right rear wheel;
– brake mechanism of the left front wheel;
– brake mechanism of the left rear wheel;
– brake mechanism of the right front wheel.
If air gets into one of the circuits, it is enough to bleed only this circuit, and not the entire hydraulic drive.
We bleed the brakes with an assistant. If the rear wheels are hanging...
...insert a screwdriver between the lever and the push lever of the pressure regulator in the hydraulic drive of the brake mechanisms of the rear wheels, fixing the regulator piston in the recessed position. We check the level of working fluid in the hydraulic brake reservoir and, if necessary, add fluid (see “Checking the fluid level in the hydraulic brake reservoir, replacing the fluid”).
We clean the brake bleeder fitting of the right rear wheel from dirt...
...and remove the protective cap from it. Use a spanner wrench or an “8” socket to loosen the tightening of the bleeder fitting.
We put a hose on the fitting, and immerse its free end in a container partially filled with working fluid.
An assistant should vigorously press the brake pedal all the way 4-5 times and keep it pressed.
Using the “8” wrench, unscrew the bleeder fitting 1/2–3/4 turn. In this case, liquid with air bubbles will flow out of the hose, and the brake pedal will move forward.
As soon as the liquid stops flowing out of the hose (the pedal should be pressed all the way), tighten the fitting, and only after that can the assistant release the pedal.
We repeat pumping until air bubbles no longer appear in the liquid coming out of the hose.
We remove the hose, wipe the bleeder fitting dry and put a protective cap on it.
We pump as described above...
...brake mechanism of the left front wheel. Similarly, we bleed the brake mechanisms of the other circuit.
When pumping, you need to monitor the fluid level in the tank and add fluid if necessary.
If, when you press the brake pedal, you feel its “softness” and increased travel, it means there is air left in the system. In this case, we repeat pumping until the pedal becomes “hard”, i.e., when pressed, go no more than half the distance to the floor. If air cannot be removed, check the tightness of connections, pipelines, hoses, master and working cylinders. We tighten leaking connections, replace faulty main and working cylinders (see “Brake system”).
Diagnostics and repair
All electrical equipment of a Lada Granta car must be diagnosed using multimeters and test benches. If damage is detected, the element is replaced exclusively with a known good one. The use of used parts can lead to unexpected breakdowns and incorrect operation of equipment and devices.
The electrical circuit of the Lada Granta is a complex part of the car's equipment. Diagnostic work and repair of on-board circuits must be carried out with the required tools and necessary knowledge. In the absence of the above, it is recommended to contact qualified professionals for help.
- Granta sedan
- Granta liftback
- Granta hatchback
- Granta station wagon
- Granta Cross station wagon
- Granta Drive Active sports sedan version
The electrical circuits are almost the same, with some minor differences, that is, the circuits offered here are suitable for any modification of the Grant.
