Depending on the modification, the modules differ significantly in design and purpose. Hence, Webasto standard errors will also vary. Autonomy fault codes and explanations are listed below. Among buyers, gasoline versions of the interior air heater are most often in demand. The design solves the problem of overcooling the internal space and is distinguished by its versatility. Heaters often do not exceed a power of 1-2 kW. Long-distance drivers are in demand for more powerful 3 and 4 kW models operating on 24V and powered by diesel fuel.
Due to such a variety of modifications, many questions arise regarding their repair and maintenance. We will deal with this further.
Webasto malfunctions and their elimination
The main malfunctions include the following prerequisites:
- The heater does not start;
- Refusal to work;
- After starting, the heater stops.
Webasto does not start depending on the properties of the equipment, as well as the properties of the fuel. It is necessary to start from the fact that either there is nothing to set fire to, or there is nothing to burn, and in some cases it may be both.
Fuel of disgusting quality clogs the filter mesh of the fuel pump, resulting in a poor dose of it, and eventually a complete lack of supply. Also, bad fuel has a negative effect on the spark plug, which becomes very coked and stops heating to the appropriate temperature, and then becomes unusable.
We remove the Webasto error, a quick way without a computer and ELM!
This video shows how to diagnose it yourself, reset errors and blocking from the standard settings.
Self-unlocking and resetting Webasto errors on Freelander 2
Using the PALFINGER SANY SRC550C short base crane as an example.
In case of failure, it is better to contact a service center for diagnostics with special software.
Webasto malfunctions on diesel engines are similar to those for cars with gasoline engines. On a diesel engine, Webasto may not start due to the fact that in most cases it is difficult to find diesel fuel of good quality, and the sulfur content is higher than normal, polluting the spark plug even more than gasoline. Accordingly, on a diesel engine it fails faster.
Also, with a diesel engine, Webasto does not start in cold weather due to thickening of the fuel, which may simply not reach the supply system into the combustion chamber through the pipeline. Because the fact that Webasto does not start in cold weather is a common problem on cars specifically with diesel engines.
Another problem with Webasto is that the fuel pipe is bent; because of this, fuel will also not be able to flow into the heater. And the most common reasons why Webasto may not work are: clogged fuel grid and unusable glow plug.
If Webasto does not turn on, then the prerequisite may be a control failure. And when Webasto starts up at first, then stalls after some time, it could also be an issue with the electronics. In these cases, you need to contact a service center, where the heater will be connected to a device with special software and diagnostics will be carried out.
Device Features
Design and characteristics of Binar engine preheaters
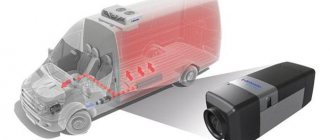
Before understanding Webasto error codes, you need to understand what kind of device it is, how it works and why it can fail. Having understood the principle of operation and studied the potential weaknesses of the preheater, it will be easier for the car owner to look for the cause of the Webasto failure, as well as find ways to solve the problem. Preheaters of the famous Webasto brand consist of:
- heat exchanger;
- combustion chambers;
- circulation pump;
- fuel priming pump;
- electronic control unit.
These are 5 main elements, the work of which is aimed at heating the engine before starting it. Due to preheating, it is possible to ensure minimal damage to the engine, which suffers very much from a cold start. The oil is not heated up; it remains extremely viscous due to the low ambient temperature. This results in increased friction between metal parts, chips are produced, and the correct geometry of the elements is disrupted. At first it is not noticeable, but each subsequent cold start has an even more destructive effect.
To keep the engine intact, as well as to avoid costly repairs, preheaters were developed. Among them, Webasto devices are especially popular. Their fuel priming pump begins to supply fuel from the car’s fuel tank to the combustion chamber of the heater in a certain amount. It ignites, which is due to the presence of a spiral spark plug in the Webasto design.
Inside the combustion chamber there is a heat exchanger element, which is washed by the cooling liquid. This heat exchanger, when connected to a vehicle heater, is connected to a small circle of the vehicle's cooling system. This is where the circulation pump comes into play, moving the coolant through the jacket of the automobile cooling system. This warms up the engine before starting it directly.
The electronic control unit, which is provided by the design of the preheater, connects directly to the car engine ECU, which allows you to control the operation of Webasto. The result of the operation of preheaters amazes many with its efficiency. In severe frosts, such an assistant in the car turns out to be indispensable. Some complain about the fact of fuel consumption, although in reality it is insignificant, plus it is still more profitable than constantly starting a cold engine, and then eliminating the consequences of frequent cold starts.
General signs of malfunction of Webasto engine liquid heaters
| Malfunction | Recommendations for elimination |
| There is no combustion after the first and restart, or combustion stops during operation. | Turn off the heater for a short time and then turn it on again. |
| The engine is overheating and the operation indicator is flashing. | Check the air duct for permeability, cool the heater, turn it off briefly, then turn it on again. |
| The heat limiter has tripped: overheating due to a coolant leak. | Fix the leak, add coolant to the level prescribed by the vehicle manufacturer, and press the heat limiter button. |
| The on-board voltage is too low for more than 20 seconds. | Charge the battery. Turn off the heater for a short time and then turn it on again. |
| The combustion air line or exhaust line is clogged. | Check the combustion air and exhaust pipes for leaks. |
If these measures do not resolve the malfunction, the heater must be sent to a Webasto service center.
Option No. 2
Why won't the hydronic heater start?
This is the most “inconvenient” option - you not only need to remove the glove box, but also find the required wire on the connector above the central computer block (CJB). You won't be able to pull out this connector, so warm up before starting work. The sequence is:
a.remove the glove box;
b. move the curtain to the side and up;
c.Locate the large connector above the Central Processing Unit (CJB);
In order for the connector to be in your hands, you need to pull it to the right until it is removed from the mount. For even greater convenience, I recommend removing the right (from the connector) part of the wiring from the clamp.
d.Find the W-Bus wire on the connector and connect to the W-Bus wire (wires under the arrows, connect to any) with a K-Line adapter;
— at the bottom left (according to the picture) it can be yellow (if Telestart is installed under the OD promotion) or blue-white (for cars with Telestart installed at the factory);
- on the top right, as a rule, there is a blue-white wire, between the orange-blue and blue-orange wires.
Webasto Thermo 50/90S/90ST/230/300/350
If a malfunction occurs, an electronic lock is activated and the heater issues a fault code. Check the fuses and plug connectors for their serviceability and tightness.
The blockage can be removed by restarting the heater or by briefly removing the blue 15 A fuse on the heater cable harness when the heater is on.
After installing the fuse, the heater turns on. If the blockage is not removed, you need to determine the cause of the malfunction.
Note! Wesasto heater blocking is a special operating mode. The blocking is activated if the self-diagnosis system detects a malfunction (one or more), further work with which may be unsafe, both for the heater itself and for the vehicle on which the heater is installed. The blocking itself is not a malfunction, but is a consequence of one or more malfunctions. Moreover, the cause of the malfunction may not be in the heater at all.
Webasto timer 1531
If the heater is equipped with a 1531 timer (with alarm), after an emergency lockout, the following error codes are displayed on the timer display.
| Code | Malfunction |
| F01 | There is no start. |
| F02 | Flame break (repeated more than 5 times). |
| F03 | Voltage drop below permissible or increase above permissible. |
| F04 | Premature flame detection. |
| F05 | Open circuit or short circuit of the flame sensor. |
| F06 | Open circuit or short circuit of the temperature sensor. |
| F07 | Open circuit or short circuit of the dosing pump. |
| F08 | Open circuit, short circuit, or incorrect air blower motor speed. |
| F09 | Open circuit or short circuit of the glow pin. |
| F10 | Heater overheating. |
| F11 | Open circuit or short circuit of the circulation pump. |
| F12* | Emergency blocking due to repeated malfunctions or flame failure: such blocking is removed by turning on the heater again and disconnecting it from the vehicle battery during the starting process. |
* – only for preheaters Webasto Thermo 230/300/350
If the heater as a control element is equipped with a switch or timer 1529 (without an alarm clock), then error codes are transmitted in the form of light signals (flashing). Turn off the heater, after short 5 flashes, long pulses are issued.
The number of pulses corresponds to the number after the letter F given in the table above.
Webasto HL32 Heater Room Thermostat
Heater control with standard or combi timer
General instructions
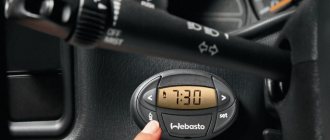
The heater can be precisely programmed to turn on at any hour - from 00.01 to 24.00 throughout the week. It is possible to configure up to three trigger points, but only one will be activated. By pressing the direct start button ( ), the heater begins to operate continuously until the button is pressed again.
When the ignition is turned off in continuous operation of the system, the heater automatically turns off after 15 minutes (the display begins to display the remaining operating time).
The heater timer has an alarm clock and is used simultaneously with the switch. The combi-timer is equipped with the ability to adjust the temperature (as in the switch).
When the ignition is turned on, the timer displays the day of the week and the current time. The buttons and display of the heater are illuminated when the heater is switched on. When connecting power to an unconfigured timer (vehicles for the transport of dangerous goods are an exception), all buttons and images begin to flash on the display (time and day of week must be set).
The flashing symbols are adjusted by pressing the » « buttons. If you do not press the button for about 5 seconds, the entered time is recorded. When you press the » » button for more than 2 seconds. The fast time counter starts.
Manual: Activate the button ( ).
Manually: by pressing the button ( ).
Automatic: Ends a programmed operation by timer or (during operation) by setting the remaining time.
Press the button (for at least 2 seconds), the symbol starts flashing, use the » » buttons to set the required value. Next, the day of the week setting begins to flash - you need to set the necessary data.
When the ignition is on: reflected on the screen
With the ignition off: press the button ( ).
Pressing the “ P ” button causes the program number to flash; use the “” buttons to set the heating start time. Then the day of the week starts flashing: set the desired day. Next, press the “ P ” button again (enter program 2, the next time you press “ P ” you enter program 3, the third time you return to the set time mode).
Press the " " button for 3 seconds.
The installation is performed only with the ignition off and the system running in the range from 1 to 120 minutes. using the » « buttons.
Only the required response time is programmed, but not the day of the week. Press the “ P ” button several times until the bell symbol appears. Use the » » buttons to program the desired time. The alarm signal turns off after 5 minutes or by pressing any key.
Press the “ P ” button until the bell symbol appears on the screen - the alarm period appears on the screen. To erase it, you need to press the “ P ” button until the bell icon “ S ” disappears from the display.
Press the power button installed in any convenient place, for example, in the sleeping compartment (additional option).
The start time is not programmable (even if there is a timer); The heater is turned on directly by the power button. The display shows the completion time. It is possible to set the current time and alarm clock.
Ventilation mode
Webasto Air Top 2000ST (diesel) heaters also operate in ventilation mode, passing air without heating. An additional special switch is used for this mode (additional option). Without this option, heaters work only for heating. The ventilation mode is adjusted using the rotary knob.
Webasto Thermo Pro 90
Flashing of the switch indicator light while the heater is purged indicates the type of heater malfunction. After five short flashes, long pulses are displayed. The number of long pulses corresponds to the error code from the table.
| Code | Malfunction | Possible reasons | Recommendations for elimination |
| 0 | The heater does not work (only five short pulses). | Circuit breakers. Electrical harnesses. Heater blocking. The control unit is faulty. | Check fuses F1, F2 and F3. Check the connections to the battery: + to pin 12, – to pin 9 and + to pin 3 (power-on signal) connector X8. Remove the lock. Replace the control unit as part of the supercharger assembly. |
| 1 | No startup (after two attempts). | Fuel system. Air supply lines for combustion and exhaust gas removal. Burner. | Check the fuel level. Check the condition of the fuel filter. Check the fuel intake and fuel lines for leaks. Remove air from the fuel system. Check the combustion air and exhaust gas lines for blockages and clean if necessary. Clean the burner and replace if necessary. |
| 2 | Flame break. | Fuel system. Burner. | Check the fuel level. Check the condition of the fuel filter. Check the fuel intake and fuel lines for leaks. Remove air from the fuel system. Clean the burner and replace if necessary. |
| 3 | Low or high voltage. | Electricity supply. | Check the battery. Check electrical connections. |
| 4 | Premature flame detection. | The exhaust gas temperature sensor is faulty. | Functional check of the exhaust gas temperature sensor, replace if necessary. |
| 5 | Not specified. | Not specified. | Not specified. |
| 6 | The coolant temperature sensor is faulty. | Electrical harnesses. The coolant temperature sensor is faulty. | Check electrical harnesses for damage, breaks or short circuits. Check the resistance of the coolant temperature sensor, replace if necessary. |
| 7 | The fuel pump is faulty. | Electrical harnesses. The fuel pump is faulty. | Check electrical harnesses for damage, breaks or short circuits. Functional check of the fuel pump, replace if necessary. |
| 8 | The blower is faulty. | Electrical harnesses. Supercharger safety lock. The blower is faulty. | Check electrical harnesses for damage, breaks or short circuits. Functional check of the blower, replace if necessary. Replace the blower. |
| 9 | The glow pin is faulty. | Electrical harnesses. The glow pin is faulty. | Check electrical harnesses for damage, breaks or short circuits. Functional check of the glow pin, replace if necessary. |
| 10 | Overheat. | The heater is overheated. The coolant temperature sensor is faulty. The overheating sensor is faulty. | Check the coolant level and bleed air from the coolant circuit. Check the functionality of the circulation pump. Check electrical harnesses for damage, breaks or short circuits. Functional check of the coolant temperature sensor, replace if necessary. Check electrical harnesses for damage, breaks or short circuits. Functional check of the overheating sensor, replace if necessary. |
| 11 | Circulation pump malfunction. | Electrical harnesses. The circulation pump is faulty. | Check electrical harnesses for damage, breaks or short circuits. Replace the circulation pump. |
| 12 | The mains switch is faulty. | Electrical harnesses. The mains switch is faulty. | Check electrical harnesses for damage, breaks or short circuits. Replace the electronic mains switch. |
| 13 | Malfunction of the cabin heater control. | Electrical harnesses. The relay for turning on the interior heater is faulty. | Check electrical harnesses for damage, breaks or short circuits. Functional check of the relay, replace if necessary. |
| 14 | The overheating sensor is faulty. | Electrical harnesses. The overheating sensor is faulty. | Check electrical harnesses for damage, breaks or short circuits. Functional check of the overheating sensor, replace if necessary. |
| 15 | The set resistance value of the glow pin is not reached. | Electrical harnesses. The glow pin is faulty. | Check electrical harnesses for damage, breaks or short circuits. Functional check of the pin, replace if necessary. |
| 16 | Exhaust gas temperature too high. | The exhaust gas temperature sensor is faulty. The heater is coked. | Check electrical harnesses for damage, breaks or short circuits. Check the resistance of the exhaust gas temperature sensor, replace if necessary. Visual inspection and cleaning of the burner, flame tube and heat exchanger, replace components if necessary. |
| 17 | The exhaust gas temperature sensor is faulty. | Electrical harnesses. The exhaust gas temperature sensor is faulty. | Check electrical harnesses for damage, breaks or short circuits. Functional check of the exhaust gas temperature sensor, replace if necessary. |
Attention! Improper installation or repair of Webasto equipment may cause a fire or result in the release of toxic carbon monoxide. This could result in serious or fatal injuries.
Breakdowns
In case of any abnormal situation, it will show an error code (in numbers on the display or using a switch light). Abnormal operation of Webasto is most often caused by an oversight by the driver himself (for example, the fuel level in the tank dropped below the permissible level and the device did not start), but it happens that the signal is sent due to a serious malfunction.
Most often, Webasto stops working due to carbon deposits inside. Sensors may also fail.
A fairly common problem is the situation when it blows, but does not heat.
In this case, the circulation pump is most likely faulty. That is, the heater turns on, runs for several minutes and turns off due to overheating, because... liquid does not circulate in the cooling circuit. The problem is solved by replacing the pump.
The malfunction must be repaired only at a service center where workers have completed a special training course.
Operation of a faulty device is prohibited.
The Webasto autonomous heater is a very reliable device, but a breakdown can still happen. In most cases, failure occurs due to improper installation, improper operation or lack of maintenance.
Most often, the Webasto autonomous heater simply does not turn on in the event of a malfunction, however, in some malfunctions, abnormal operation of the device is simply observed.
The Webasto battery has the following typical faults:
- flame breaks;
- overheat;
- unstable operation (for example, difficulty starting).
In the event of a breakdown, the heater will indicate its malfunction by showing an error code (a table with codes is presented at the end of the article).
An inscription in the form of the letter F and two numbers will appear on the timer display (this is the error code).
If there is no timer and there is only a switch, then the switch light will give a certain signal (blink code). The light bulb will give 5 short signals and a number of long ones. The number of long beeps is an error code. If the error code is 0, then the light bulb will simply give 5 short signals.
Also, abnormal operation of the heater may be indicated by extraneous noise during operation of the device.
The car owner can only check the condition of the fuses on his own, as well as visually assess the condition of the heater.
Therefore, if visually all the fuses are intact and all the plugs are in place, then you must immediately contact a specialized service center
. To fully diagnose and read errors, you must have special Webasto Thermo Test software, as well as a special programmer and adapter plug. All this is available only in a specialized service center.
Self-repair may result in damage to the heater or vehicle!!!
Webasto Autonomy may show the following error codes:
Webasto is an indispensable thing in the modern world. Happy owners of such a device avoid serious problems in winter. But as soon as the system disappears, the question arises, why does Webasto not turn on? In the article we will try to analyze the possible causes of the breakdown, but first we will look at how to use the mechanism correctly so as not to experience further problems with the heater.
Webasto system in a car
Today it is difficult to find a car enthusiast who does not dream of integrating Webasto into his car. Webasto is an autonomous German-made one. A compact mechanism weighing 5 kg is installed inside the cooling circuit of the vehicle’s on-board network and fuel system. The main function of Webasto is to warm up the engine before starting the power unit. An autonomous heater pump drives antifreeze throughout the cooling network through the radiator. Essentially, the device is a small combustion chamber connected to the vehicle’s cooling system. Today the manufacturer is bringing to market two types of devices - Thermo Top Evo-4 and Thermo Top Evo-5
. They differ only in power.
Webasto is also connected to the standard interior heater and starts the fan. Thus, in the cold season, the driver does not need to wait for the engine to warm up. The motor reaches the required temperature with one press of the remote control button. The owner does not need to approach the car; Webasto can be launched from the apartment window. In addition, during a cold start, engine wear is equal to a mileage of 100 km
. The heater works autonomously, heating and starting the engine for a long time does not take up a large battery charge. The only obvious downside is that the battery life is reduced by a year. If we take this as a price for convenience and comfort, then changing the battery is not decisive.
Webasto operation in winter
Webasto DBW 2010/2012/2020/2022/300/350
Preliminary diagnostics of faults in engine pre-heaters for Webasto DBW 2010/12, 2020/22 and Webasto 300/350.
| Malfunction | Check and repair or replace if necessary |
| After switching on, the heater does not work. | Electricity supply. Circuit breakers. Electrical wires and connections. Switch. Control block. |
| The operating mode display goes out after approximately 25 seconds. | Temperature fuse or heat limiter. Flame detector. Control block. Ignition electrodes. Ignition spark source, ignition cable. Drive (motor). Fuel supply. Fuel pump. Fuel solenoid valve. Spray nozzle. |
| The motor in the heater does not work. | Electricity supply. Circuit breakers. Electrical wires and connections. Heating control thermostat or temperature sensor. Control block. Drive (motor). |
| Engine in a heater – absence of an initial phase preceding combustion. | Electricity supply. Control block. |
| The engine is in the heater - no purge after finishing work. | Control block. |
| Circulation pump does not work. | Electricity supply. Circuit breakers. Electrical wires and connections. Control block. Drive (motor). |
| There is no ignition spark. | Circuit breakers. Electrical wires and connections. Flame detector. Control block. Ignition spark source, ignition cable. |
| Combustion – does not start after 15 seconds. | Temperature fuse or heat limiter. Flame detector. Control block. Ignition electrodes. Ignition spark source, ignition cable. Fuel pump. Fuel solenoid valve. Spray nozzle. |
| Combustion – Combustion stops after 25 seconds. | Electricity supply. Electrical wires and connections. Flame detector. Control block. |
| Combustion – cannot be turned off. | Switch. Control block. Fuel solenoid valve. |
| Combustion – with light smoke. | Fuel supply. Fuel pump. Spray nozzle. |
| Combustion – with dark smoke. | Electricity supply. Electrical wires and connections. Drive (motor). Fuel supply. Combustion air supply. Exhaust gas removal. |
| The preheater is overheated. | Electrical wires and connections. Temperature fuse or heat limiter. Temperature fuse or heat limiter. Heating control thermostat or temperature sensor. Control block. Spray nozzle. Heating system. |
Errors from the Easystart Call remote control system
| Malfunction | Causes of malfunction and corrective measures |
| EasyStart Call does not respond to the request. | Mass air flow sensor signs and causes of malfunction No network. Your SIM card has expired or has been deactivated by your network operator. The SIM card has not yet been activated. Call the EasyStart Call system if there is no connection:
|
| The EasyStart Call system does not respond to SMS messages. | Call the EasyStart Call system, a connection is established:
|
| The heating device does not work, although a response has been received from it. | Carry out a survey of the status of the heating device. pin:1234_heater |
| The vehicle cooling fan is not started by the heater. | EasyStart Call is configured to operate in heating mode. Reset the EasyStart Call system to default settings. |
| There is a failure in communication between the EasyStart Call system and the heater. ErD:HeaterCom:lost,Heater:off ErD:HeaterCom:lost | The heater is configured as a stand-alone heater.
|
| ErD:HeaterCom:no_heater_found | The heater is not recognized when switched on (the heater cannot be switched on).
|
| ErL:DatCom:lost | Wiring fault. Contact the service center. |
| ErH:Heater:mode_not_supported | Incorrect data entered.
|
| Heating device malfunction. ErH:Heater:Error | Malfunction of the heating device.
|
| Temperature is not displayed. ErC:Temp:missing | The temperature sensor is not installed. |
| The temperature is not displayed when a temperature sensor is installed. ErC:Temp:short_circuit | The temperature sensor is faulty. Contact the service center. |
| Invalid day of the week and time in the EasyStart Call system. ErC:DeviceTime:time_not_set | The provider does not support the Automatic Time function. Set the day of the week and time manually. |
Related publications
Malfunctions of Webasto engine pre-heaters Webasto engine heaters make it easy to start the engine, warm up the interior and clear the windows of snow and ice before driving in frosty weather...
September 11, 2022 10248 1
Malfunctions of Planar air heaters Planar is the most popular domestic air heater, produced in the city of Samara. In this article we will look at possible...
September 16, 2022 16414 2
Malfunctions of Pramotronic air heaters Pramotronic air heaters are an excellent solution for heating the vehicle interior. During operation, like any other equipment, I can...
September 2, 2022 7524 0
Malfunctions of Webasto air heaters Webasto air heaters are one of the best and most famous devices in their class. Heaters run on liquid fuel, there are also diesel...
September 10, 2022 10503 0
Malfunctions of engine pre-heaters Pramotronic Pramotronic is a modern domestic pre-heater that is not inferior in its characteristics to foreign analogues, however, this is not a claim...
July 25, 2022 18963 13
Malfunctions of engine heaters Teplostar, Binar Binar is the most popular domestic engine pre-heater, produced in the Samara region at. Production of both...
September 15, 2022 5420 0
Error codes Webasto Thermo 230, 300, 350
- F 01 – no start;
- F 02 – flame break;
- F 03 – voltage drop below permissible;
- F 04 – flame detection during preliminary or final purge;
- F 05 – flame sensor malfunction;
- F 06 – temperature sensor malfunction;
- F 07 – malfunction of the fuel solenoid valve;
- F 08 – malfunction of the air blower motor;
- F 09 – circulation pump malfunction;
- F 10 – overheating;
- F 11 – malfunction of the high-voltage ignition coil;
- F 12 – emergency blocking.
If the heater is equipped with only a switch as a control, a fault code is issued after the heater is turned off in the form of a flashing operating indicator light on the switch. After 5 short signals, long pulses are issued - the number of pulses, depending on the fault, corresponds to the number after the letter F in the above fault codes for the Webasto Thermo 230, 300, 350 autonomous heaters.
Webasto Air Top Evo 40/55 12/24
MultiComfort MC control panel
On control devices without a display, the error code is displayed in the form of a flashing indicator light. The number of pulses corresponds to the error code number.
The control unit is faulty.
The internal room temperature sensor is faulty.
Low voltage on-board network.
High or low voltage.
Charge the car battery. Turn off the heater for at least 2 seconds and then turn on.
The heater's configuration determines how the device can be controlled - from a switch or from a timer (see below). In vehicles for transporting dangerous goods - the method of activation is only from the switch. The timer is started manually. When the engine is stopped and when the loading and unloading device is started in such vehicles, the heater must be automatically switched off. After shutdown, restarting requires first turning off the heater using a switch or timer.
PLANAR D4 error codes
| Number of LED blinks | Description of the error |
| 1 | Overheat |
| 2 | The heater does not start (two automatic start attempts have been exhausted) |
| 3 | Flame failure |
| 4 | Glow plug malfunction |
| 5 | Flame indicator fault |
| 6 | Malfunction of the temperature sensor in the control unit |
| 7 | Fuel pump malfunction |
| 8 | The heater does not start |
| 9 | Shutdown, overvoltage over 30.8 V (15 V for 12 V heater) |
| Shutdown, undervoltage less than 20 V (10.8 for 12 V heater) | |
| 10 | Ventilation is insufficient to cool the heater combustion chamber |
| 11 | Blower motor malfunction |
Codes and interpretation of errors when diagnosing a Webasto heater
The Webasto heater is an extremely reliable unit, but, like any product, it can fail. There are a number of faults that can be diagnosed. It should be borne in mind that if a failure to turn on occurs several times in a row, the Webasto will be blocked and it will be possible to remove the blocking only in a car service center. If any breakdown occurs with the heater, the unit signals this by the appearance of an error code on the control panel. In a separate case, Webasto errors are indicated by flashes of the indicator lamp (blink code). All malfunctions that can occur with the Webasto heater can only be viewed using the special Webasto Thermo Test program. In addition to the software, you will need a special programmer with an adapter. This equipment is available at Land Rover service centers. You can find out that the Webasto heater is blocked by the complete lack of response to commands, as well as by clicks inside the heater when a start command is given. Below is a complete table of Webasto errors and their interpretation.
Option #1
Instructions for using Webasto on diesel and gasoline
Everything is simple here - remove the glove box, find the Telestart unit installed in the OD, as a rule, it is glued with Velcro tape on the back of the air duct at the front passenger's feet. There are three wires connected to the Telestart unit - ground, power and W-Bus. The W-Bus is an orange wire. There are two connection options - with disabling Telestart (simply connect the K-Line adapter to the corresponding contacts of the block removed from Telestart, while the W-Bus bus corresponds to the K-Line bus), and without disconnecting (you will have to break the integrity of the cable braid, pierce them, or another way - it's up to you). Power and ground can be taken from the cigarette lighter (rear) or battery.
