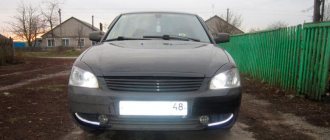
The Calina and Kalina 2 models have different headlight designs, so replacing the lamps in them has certain differences, and we will describe which ones in this article. Replacing light bulbs yourself will not cause you any problems. Therefore, there is no point in turning to the service for help.
On Kalina 2 from 2013, to replace the lamps in the left headlight unit, you need to move the air filter to the side so that it does not interfere. There will be nothing in the right headlight block that will prevent replacement.
Replacement process
The lamp replacement process lasts 5-10 minutes. Experienced motorists can do it in two. No tools are needed. Let's start the replacement process:
- Open the hood.
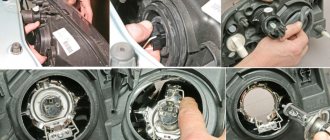
- We remove the plug from the headlight where the replacement will be carried out. It is not necessary to adjust the headlights after replacing the lamp.
The plug is marked with an arrow
- We remove the plus and minus wires for powering the lamp.
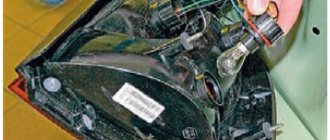
The plug is removed, the cartridge is close
- We move the latch aside.
Move the latch aside
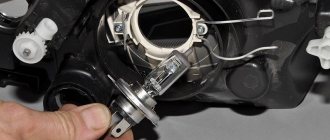
- We take out the lamp. This should be done carefully enough so as not to break the old light bulb.
Removing the lamp
- We carry out the assembly in the reverse order.
Thus, the lamp is replaced and the car is ready for further use.
Lamp selection
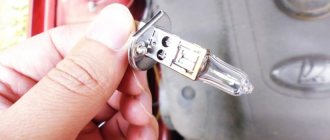
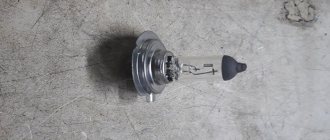
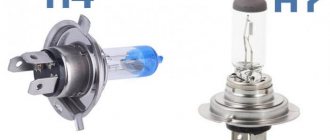
Bulb type H7, do not mix it up
The low beam lamp is marked - H7.
It is quite easy to find in the car market or in spare parts stores. The most common manufacturer remains OSRAM.
On the left is a Chinese lighthouse, on the right is a domestic OSRAM
These are domestically produced lamps that have gained popularity due to the price-quality ratio.
Other good manufacturers are:
- Bosch,
- Hella,
- Koito,
- Philips,
- Valeo.
These are already higher quality lamps, which are also more expensive than the popular OSRAM. Thus, the choice of lamps is quite wide, and every car owner will have something to choose from.
LED lamps for low beam
Controversial issue. It is difficult to choose the optimal ones in terms of quality.
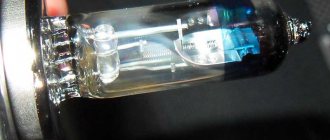
Appearance of diode lamps
Light diode lamps view of the hood
Light diode lamps view from the hood
2302-18-10-02 (Copy)
By pressing the spring clamp of the lamp, we disengage it from the hooks of the reflector and move it to the side.
By pressing the spring clamp of the lamp, we disengage it from the hooks of the reflector and move it to the side.
By pressing the spring clamp of the lamp, we disengage it from the hooks of the reflector and move it to the side.
How to replace the low beam lamp Kalina hatchback, sedan, station wagon
The replacement is absolutely easy. You don't need any special knowledge or skills to do this. Even an inexperienced car owner can cope with this task. The only thing is that you need to act consistently and clearly. So, replacing a lamp consists of the following steps:
- First you need to open the hood.
- Then turn off the power by removing the terminal from the battery.
- The washer reservoir should also be removed for convenience.
- Next, remove the rubber cover-cover.
- Then you need to pull out the light bulb by squeezing the latch with your fingers.
- Then the light bulb is pulled out and the terminal is disconnected from it.
This completes the procedure. It is very important to remember how the lamp was located and what wires were connected to it.
Otherwise, you may connect the new headlight incorrectly, which will require you to contact a professional. If you feel that this work is beyond your capabilities, it is better to immediately take the car to a technical service, where all the procedures will be performed for you. Of course, you will have to pay for this, but the result will be maximum.
DRL control unit
The most reliable and simplest option is to connect DRLs without a relay, but using a special running lights control unit. It ensures that the DRL turns on after starting the engine, guarantees safe operation, protects against overloads and can be installed on cars with any type of lamps, including LEDs.
Unfortunately, among the variety of industrially manufactured DRL units, the vast majority do not comply with GOST and have mediocre build quality.
This applies, first of all, to products from AliExpress, which do not meet the requirements in almost all respects.
Among all the diversity, only 2 options can be noted: the Russian DayLight+ DRL control unit and German products from Philips and Osram. The DayLight+ control unit was developed by Russian radio engineer Fedor Isachenkov, taking into account all the features of the vehicle’s on-board network and has a number of positive aspects:
- there is built-in voltage stabilization;
- full compliance with GOST;
- the maximum long-term load power is 36 Watts (significantly less is required for DRLs);
- simplest connection diagram.
In addition to the points described above, the DayLight+ unit is universal and is suitable for all cars with an on-board 12-volt network, and also has good build quality and a high degree of protection from moisture and dust.
German products from Philips and Osram also have all the above-described advantages of the DayLight+ unit, however, German control units are supplied only together with daytime running lights and are more expensive.
The daytime running light bulbs have burned out. They served for 2.5 years, I think this is a good period. For comparison, I have already changed the low beam several times. It so happened that 2 lamps burned out with an interval of a week. So, I bought 2 Philips W21/5W W3x16d (12V 21/5W) light bulbs for 115 rubles each. The right lamp is much easier to change than the left one, since the ABS control unit does not interfere there.
We turn off the engine and remove the ignition keys. We put our hand in here, as shown in the picture, and rotate the lamp counterclockwise (top towards the motor) 45 degrees. Since I changed it in the cold (most likely because of this), the base was difficult to turn.
Replacing the right DRL Kalina 2
Then we proceed to the left DRL, it becomes more and more difficult, since there is not enough room to crawl. There are videos on the Internet where people remove the air filter, but this is not necessary. In addition, in the cold, plastic becomes brittle and can be broken.
We put our hand under the antifreeze return line.
Replacing the left DRL Kalina 2
Be careful not to damage your hand or wires or get burned if you decide to change the lamps when the engine is hot over 90 degrees.
After jumping around in the cold for 15 minutes, I tried to adjust the key to 10 so that I could turn the base using a lever.
Using a 10mm key, the base turned instantly.
By the way, the base with the new lamp fit into place normally.
Daytime running lights (DRLs) are designed to improve visibility of the vehicle from the front during daylight hours. On modern cars, for example, Lada Granta, Kalina, XRAY DRLs are installed from the factory. Other models Lada Priora, Vesta, Largus or Niva do not have DRLs, but you can install them yourself..
Replacing low beam lamps on Lada Kalina
Before starting work on replacing low beam lamps, it is worth clarifying that the Lada Kalina is equipped with two types of engines, eight- and sixteen-valve, which have different designs, and, therefore, all dismantling/installation manipulations with equipment are somehow related with an engine, will have a slightly different character.
On a sixteen-valve engine, it is more difficult to change the lamps; on the right side, if you do not have sufficient flexibility in your hands or it is large, you need to remove the washer reservoir.
And one more point needs to be clarified: when replacing one lamp, it is very advisable to change the second one (that is, both left and right), and in no case should you take the lamp by the base , since in this case dark spots will remain or it will quickly burn out.
First you need to remove the rubber plug behind which the lamps are located.
Next, the wire contacts from the lamp are disconnected.
The next step is to release the lamp from the spring.
The defective lamp is carefully removed and replaced with a new one, fixed with a holder.
The wire blocks are put in place and the tightness is checked. After replacement, it is better to adjust the headlights.
2302-18-10-08 (Copy)
In this case, two protrusions, located asymmetrically relative to the axis of the lamp, must fit into the corresponding grooves of the socket.
In this case, two protrusions, located asymmetrically relative to the axis of the lamp, must fit into the corresponding grooves of the socket.
In this case, two protrusions, located asymmetrically relative to the axis of the lamp, must fit into the corresponding grooves of the socket.
To replace the daytime running light lamp and side light, turn the lamp socket counterclockwise...
Reasons for loss of low beam
There are several reasons for the low beam to malfunction, some of which lead to the usual burnout of the lamps. It should be noted that there is a likely tendency for a similar malfunction to recur on Kalina with an enviable frequency - one and a half to two months. Reasons for this:
- Lack of tightness of the headlight (dust or moisture entering the bulb settles on the reflector mirror and the lamp bulb, which leads to its overheating. You can learn more about the reasons and ways to eliminate fogging of headlights at the link);
- An upward change in voltage in the vehicle network (a voltage surge also causes the halogen headlight bulb to burn out).
There are other possible problems that cause the lack of low beam:
- failure of the fuse responsible for the proper functioning of optical devices;
- violation of the connection of the lamp plugs (oxidation or burning of contacts).
Which lamps are best to use in low beam headlights?
As a rule, on the Lada Kalina, halogen type H7 lamps from the German company OSRAM (12-volt, 55 Watt) are installed in the low-beam headlights. You can replace it with an equivalent lamp from a German manufacturer or choose, for example, a halogen light source from Philips Extreme Vision, which is distinguished by its brightness and exorbitant price. But you can approach this issue from a less expensive side, purchase, for example, lamps from GE SportLight or even simpler: buy domestic halogens. Despite the low cost, the products are in no way inferior in lighting brightness to their famous competitors.
Despite the low cost, the products are in no way inferior in lighting brightness to their famous competitors
Replacing the low beam lamp on Kalina is quite easy and simple. The main thing is to choose the right lamp, which must be marked H7 . The most common manufacturers chosen by motorists are OSRAM and Philips.
2302-18-10-05 (Copy)
By pressing the ends of the spring clamp of the lamp, we disengage them from the hooks of the reflector and move them to the side.
By pressing the ends of the spring clamp of the lamp, we disengage them from the hooks of the reflector and move them to the side.
By pressing the ends of the spring clamp of the lamp, we disengage them from the hooks of the reflector and move them to the side.
Installing a new one: sequential instructions
The procedure for removing and installing a headlight, which is located on the right or left side, is not particularly different from each other. It is only important to act strictly according to the instructions. When installing a new light bulb, you must only hold it by the base and do not touch it with your hands. When removed, you can completely hold it in your hands.
Note that for the Lada Kalina (16-valve engine) a lamp with an H7 socket is required. Install the new one as follows:
- Determine the seat so that the protrusion in the base coincides with the groove on the headlight. It must be firmly fixed. Only then will it be clear that the protrusion has fallen into the groove;
- press the latch against the lamp so that the center of the base is between the antennae of the latch;
- snap the latch into place;
- connect both wires to the clamp and close the lid tightly.
After completing this procedure, you need to turn on the headlights at close range and check their operation. If everything is fine, then the installation was completed correctly. Otherwise, you will have to take the car to a car service center and pay money for it. Lamps should only be purchased in special stores. It is advisable to give preference to well-known manufacturers and models with a guarantee. Osram H7 12V 55W headlights for the Lada Kalina Cross are very popular today.
2302-18-10-07 (Copy)
...remove the lamp socket from the headlight housing.
...remove the lamp socket from the headlight housing.
...remove the lamp socket from the headlight housing.
Pressing the lamp, turn it all the way counterclockwise and remove the lamp from the socket.
The cartridge is sealed in the headlight housing with a gasket. If the gasket is torn or has lost elasticity, replace it with a new one.
Install the new PY21W lamp in the reverse order.
Low beam lamps, their types and malfunctions
Lada Kalina is a budget project of the domestic AvtoVAZ plant, and as befits an economy-class car, it cannot please you with high-quality components that can last at least a couple of years without interruptions. Most often, low beam lamps fail. There may be several reasons for malfunctions. This:
- The headlight is not sealed, which leads to its clogging. Dust settles in the lamp and leads to destructive overheating.
- Increased voltage in the on-board network, which is directly related to the operation of low beam headlights. In order to find out what voltage the generator produces, you need to diagnose it using a tester. The voltage should not exceed 14.4 V.
- Overvoltage causes the fuse to overheat.
- Violation of the electrical circuits of the right and left lamps.
- Oxidation of contacts.
There are other reasons, but these are the most common.
In order to find out whether the lamp needs to be replaced, or whether the breakdown lies in other parts, for example, in a defective fuse ( F12 and F13 ), you must first check it with a multimeter, put it on a continuity test and touch the parallel contacts on the fuse or lamp if it rings Either it works properly, it is silent, then you need to change the faulty part.
It is important to find out whether voltage is supplied at all to all terminals. If voltage is not supplied, then you need to ring the wire until the cause of the breakdown is discovered .
Here it is worth clarifying that driving without low beam lamps is categorically unacceptable, since in the dark, such an omission can lead to a serious accident.
At the moment there is a wide range of lamps. Experienced motorists put the following on the Lada Kalina:
- Lamps from Osram, which cost about 310 rubles.
- Narva, which cost a little less, 290-300 rubles.
- An excellent option for the Lada Kalina are Philips H7 halogen lamps, costing 290 rubles. a piece.
There are also all kinds of modifications: all-weather lamps, improved visual effect, heavy-duty, designed for round-the-clock operation, etc.
Before you start repairs
Before changing the low beam lamp on Kalina, you need to check the integrity of the on-board network:
- When understanding the causes of failure of any component of electrical equipment, you should first make sure:
- the fuse is in good working order;
- look at the circuit connectors, which should be well secured;
- Often the causes of electrical equipment malfunctions are the oxidized ends of the pads; their terminals should be cleaned.
- Take a good look at the places where the car is connected to ground. Often, due to the lack of reliable fastening, disturbances in the functioning of electrical equipment occur, so replacing low beam lamps on Kalina may not always help with the problem.
- the equipment will help to find faulty places in the electrical circuit;
- is a combined electrical measuring device.
There are several types of such devices:
- digital, equipped with a liquid crystal display;
- analog;
- universal models, characterized by the presence of a liquid crystal screen and a dial indicator.
Multimeter
During repairs, we recommend using a digital device (in other words, a multimeter), which is small in size.
To check de-energized circuits, the device should be switched to ohmmeter mode:
- if you need to measure very low resistance (for example, within a few Ohms), you should enter a clarification - from the obtained indicator we subtract the internal resistance, the electrical resistance of the probes and multimeter wires (within 0.07 Ohms);
- to determine a more accurate value, the device is switched to the mode for measuring low resistance values (up to two hundred Ohms), then the ends of the probes should be short-circuited.
To check live circuits, the multimeter should be switched to voltmeter mode (the limits of permissible measurements are up to twenty volts). The device is capable of measuring the current consumed by electrical equipment of vehicles (up to ten amperes).
In cases where the task is to find out whether or not there is voltage in a certain section of the circuit, without resorting to measuring the value, you can use a special indicator light designed for twelve volts. You can also use a test lamp.
You can make it yourself:
- you will need a car lamp with a power of up to 4 W;
- take 2 two wires, the length of which is from 500 mm;
- solder them to the lamp.
The car is equipped with 2 headlights, in which halogen lamps are mounted. There are two screws on each to adjust the light beam. They make it possible to change its direction in the vertical and horizontal planes.
The headlights have an electric corrector, which, taking into account the vehicle load, allows you to change the vertical direction of light directly from the cabin. There is also space on the block for the turn signal lamps (orange) and the parking light. Some Lada Kalina cars are equipped with fog lights, which are installed in the holes of the front bumper.
Replacing the relay and fuse
Before repairing the fuse, you need to clarify and correct the cause of the blown.
Work instructions:
- Prepare the vehicle for the process and disconnect the wire from the negative battery.
- Pull the tab located on the left side of the instrument panel to open the mounting block.
- Find the required fuse for the damaged electrical circuit on the housing of the mounting block, following the sequential numbering.
- Take tweezers and pull it out of the socket.
- Squeeze the body of the fuse with tweezers. A damaged thread will indicate a used part.
- Install a new fuse, which is inexpensive, keeping the same rating as the old one.
- If you need to replace the relay, there is a puller in the mounting block that will help carry out this task. Please note that a part of the same type should be installed.
- Close the mounting block, connect the battery.
Replacement process
It's time to find out how to replace the low beam lamp on Kalina yourself. Due to the fact that it is not so easy to get to, some of the work will have to be done only by touch.
Replacing the left low beam lamp in a Lada Kalina occurs as follows:
- Prepare the vehicle for the list of work to be carried out by placing it in first gear, applying the handbrake, and placing a shoe under the wheel.
- Remove the negative terminal from the battery, or, as a last resort, turn off the outside lighting.
- Remove the rubber plug from the low beam section.
- Remove the block with the machine wires from the lamp output.
- Pull the ends of the spring clip out of the grooves to remove the latter.
- Remove the damaged lamp from the socket.
- Replace it with a new one, following the reverse order of work.
How to replace the lamps yourself
Changing a light bulb in Kalina yourself is not difficult. The time spent on the work depends on the skill of the driver and the size of the hands. Some owners change light fixtures in 15-20 minutes without removing the headlight, while others suffer for more than an hour and ultimately dismantle the optics.
When replacing, cloth gloves are used. This helps protect the skin on your hands and also prevents contact with the bulb. When touched, fingerprints remain, which heat up when the light is turned on and after a while burn through the thin glass.
During work, the battery terminal is unscrewed to avoid a short circuit, which will lead to burnout of the fuse link in the fuse box.
Far module
Replacing the high beam lamp is easier than in the low beam module, since the cover is located closer to the radiator grille.
To perform the operation you will need:
- Turn off the Kalina engine.
- Open the hood lid.
- Remove the protective boot on the back of the flashlight.
- Carefully disconnect the plastic chip.
- Open the latch.
- Pull out the lamp.
Assembly is carried out in reverse order. When installing the terminal, you need to check the contacts and, if necessary, clean them using a flat-head screwdriver, sandpaper or a special chemical spray.
Low beam
Replacing a low beam lamp on a Lada Kalina depends on the experience of the owner and is divided into two types:
- Without removing the headlight.
- With module dismantling.
Most Kalina owners cannot replace the lamp in the left headlight due to limited space. In this case, you will have to ask a more dexterous friend or dismantle the lighting device yourself for convenience.
To change lamps on installed optics:
- Unscrew the filter housing near the left headlight and move it towards the engine.
- Disconnect the washer motor terminal, remove the screws and move the reservoir to the side.
- Open the light module seals.
- Remove the block with wires.
- Remove the spring clip.
- Remove the part.
Audio system for lada priora overall dimensions // Bishkek house sale
Parameters Car Lada Priora Body type 4-door sedan. Number of seats 5. Overall dimensions, mm length 4350 width 1680 Audi A6 2002 windshield wipers sometimes do not work
Lada Priora hatchback car reviews from car owners (VAZ, sedan, Lada Priora station wagon photo of the Lada Priora salon: overall dimensions A car with air conditioning and a CD audio system is estimated at 380,000
The history of the creation and development of the VAZ-21728 Lada Priora hatchback. You will forget about many of your difficulties, worries and problems in transporting people and large cargo, get a front-wheel drive type. Dimensions. Length, mm, 4330. Width, mm, 1680 Standard audio system (without CD), no
LADA 4×4 5-door Sign up for maintenance; Sign up for a test - Lada Priora Coupe Overall dimensions, length, width, height, mm, 421016801435
reporting mother siberia farm car loans sims
Bishkek house sale
Lada Priora Sedan; |; Lada Priora Hatchback; |; Lada Priora Wagon; |; Lada Kalina Hatchback; |; Lada Kalina Wagon; |; Lada Granta; |; Lada Niva 4×4 5-dr
tester hut start racing buy bishkek house sale audio systems for opel vectra c dimensions, lada priora, overall dimensions, lada priora, audio system, overall dimensions, overall, audio system for lada priora, overall, lada kalina, priora, audio system for lada kalina, overall, kalina, lada, audio system, dimensions, overall dimensions, audio system
massages couriers
The history of the creation and development of the VAZ-21723 Lada Priora hatchback. in a ratio of 2:1), makes it possible to transport luggage of non-standard sizes. transport impressive luggage with significant overall dimensions. Reliable Standard audio system (no CD), no a6 bdv engine audi tails how to check the oil in the automatic transmission
"RosAvto" - Offers to buy a LADA Priora - VAZ 2170 car in Kyiv. LADA 2170 - configurations and prices. LADA 2170 Dimensions and weight: Length 4350 Audio system (FM+CD+MP3+USB+Bluetooth), 4 speakers
Bishkek house sale
Technical characteristics of Lada Granta sedan and full Comparison of overall dimensions of Lada Granta and Lada Kalina (enlarge)
5 Sep 2012 It is worth noting that the luxury version of the Lada Kalina 2 will have these options and looks very impressive - this is the audio system
Bishkek house sale
fun playpens lift
drag block headlight sofa mudguards support
Lada Kalina Universal (Lada Kalina Universal) side lights not turned off, reverse gear engaged, vehicle diagnostics
The ergonomics of the driver of the Lada Priora sedan are provided by: power window control unit, electric power steering, standard audio system, air conditioning system, central Dimensions and weight airport in Chelyabinsk how to get there on the map
DRL connection
How to connect daytime running lights so that they meet GOST requirements? There are many such connection methods. We decided to publish the simplest of them, which uses only one 5-pin relay. The general connection diagram for DRLs is as follows:
It is worth noting that using the connection points from the diagram, all connections are made in the engine compartment; it is not necessary to lay wires into the car interior. Electrical diagrams may also be useful (Lada Priora, Lada Kalina, Lada Granta, Lada Largus)
Lighting control modules MUS 50.3769, 521.3769, 522.3769, 58.3769, 582.3769 are designed for switching electrical control circuits for external lighting, front and rear fog lights, adjusting the level of illumination of controls and instruments, and controlling the angle of the light beam of automobile headlights.
Lighting control module MUS 50.3769 for Lada Granta, VAZ-2190, Lada Kalina FL, VAZ-2192, VAZ-2194, characteristics, contact assignments.
The lighting control module MUS 50.3769 is connected to the electrical equipment system of Lada Granta and Lada Kalina FL using block 1118-3724500.
Main characteristics of the lighting control module MUS 50.3769 for Lada Granta, VAZ-2190, Lada Kalina FL, VAZ-2192, VAZ-2194.
Rated voltage, V: 12 Rated load: - Inductive: 110 mH; 0.5 A contact 56, 50 mH; 0.25 A contact 1 - Lamp: 10 A contact 58 and contact 3, 5 A contact 4, 2.5 A contact 2 Color of the viewing surface: black Color of symbols: white Color of symbol illumination: light green Dimensions, mm: 70x110x64 Weight, no more, kg: 0.2
Numbering and assignment of contacts of the lighting control module MUS 50.3769 for Lada Granta, VAZ-2190, Lada Kalina FL, VAZ-2192, VAZ-2194.
G - not used. 56b - not used. 58b - not used. 31 - Mass. Xz - +12 Volts from terminal “15” of the ignition switch. 56 - to low beam lamps. 1 - Ground (signal for turning on side lights from the central body electronics unit) (only for MUS 50.3769-01). 2 - to the rear fog lights. 3 - to the front fog lights (only for MUS 50.3769-01, -02). 4 - to daytime running lights. 58 - to side lamps and instrument lighting sources. 30 - +12 Volts from terminal “30” of the ignition switch.
Lighting control modules MUS 521.3769, 522.3769 for Lada Priora, VAZ-2170, characteristics, contact assignments.
Connection of lighting control modules MUS 521.3769, 522.3769 to the Lada Priora electrical equipment system is carried out using block 1118-3724500.
Main characteristics of lighting control modules MUS 521.3769, 522.3769 for Lada Priora, VAZ-2170.
Rated voltage, V: 12 Rated load: - Active: 2 mA contact G - Capacitive, not less than 0.1 µF: 1-16 mA contact 2 (PTF), 1-40 mA contact 2 (ZPTF), 1-16 mA pin 4 (“+” brightness), 1-40 mA pin 4 (“-” brightness), load is switched to pin 31 - Lamp: 10 A pin 56 and pin 58 Viewing surface color: black Symbol color: white Symbol backlight color: light green Indicator backlight color: ZPTF - yellow, PTF - light green Dimensions, mm: 155x73x60 Weight, no more, kg: 0.25
Numbering and assignment of contacts for lighting control modules MUS 521.3769, 522.3769 for Lada Priora, VAZ-2170.
G, 56b - to the gearmotor of the headlight range control. 58b - from sources of illumination of controls and instruments. 31 - Mass. Xz - +12 Volts from terminal “15” of the ignition switch. 56 - to the low/high beam headlight switch. 1 - from the rear fog lights. 2 - to the controller (turning on the rear/front fog lights). 3 - from the front fog lights (only for MUS 522.3769). 4 - to the controller (adjusting the backlight level of devices). 58 - to side lamps. 30 - +12 Volts from terminal “30” of the ignition switch.
Lighting control modules MUS 58.3769, 582.3769 for Lada Priora FL, VAZ-2172, characteristics, contact assignments.
Connection of lighting control modules MUS 58.3769, 582.3769 to the electrical equipment system of Lada Priora FL is made using block 1118-3724500.
Main characteristics of lighting control modules MUS 58.3769, 582.3769 for Lada Priora FL, VAZ-2172.
Rated voltage, V: 12 Rated load: - Active: 2 mA pin G, 0.0005-0.05 A pin 56b - Inductive: 0.25 A pin 2 and pin 4 - Tube: 10 A pin 56, 5 A pin 58, 2.5 A contact 58b Viewing surface color: black Symbol color: white Symbol backlight color: light green Indicator backlight color: ZPTF - yellow, PTF - green Dimensions, mm: 155x73x60 Weight, no more, kg: 0.25
Numbering and assignment of contacts for lighting control modules MUS 58.3769, 582.3769 for Lada Priora FL, VAZ-2172.
G - to the gearmotor of the headlight range control. 56b - to the controller of the automatic lighting control system (only for MUS 582.3769). 58b - to sources of illumination of controls and instruments. 31 - Mass. Xz - +12 Volts from terminal “15” of the ignition switch. 56 - to the low/high beam headlight switch. 1 - from the rear fog lights. 2 - to the rear fog lamp relay. 3 - from the front fog lights (only for MUS 582.3769). 4 - to the front fog lamp relay (only for MUS 582.3769). 58 - to side lamps. 30 - +12 Volts from terminal “30” of the ignition switch.
Wiring diagram for the driver's door VAZ 1117, VAZ 1118, VAZ 1119
Wiring diagram of the right front door VAZ 1117, VAZ 1118, VAZ 1119
Rear door wiring diagram VAZ 1118
Tailgate and license plate wiring diagram
Wiring diagram for headlights VAZ 1117, VAZ 1118, VAZ 1119
The low beam headlights are turned on using switch 5 and the ignition switch. So the current from contact “A” passes through the ignition switch, through switch 5, through the distribution block fuses F12 and F 13, the low beam fuses of the right and left headlights, respectively, and is supplied to the headlight block. The high beam headlights are turned on through the ignition switch, switch 5, then the current flows to switch 4, where through contact 56a the blue and white wire going to the contact relay coil K7 is fed. When relay K7 is turned on, current flows through its contacts (contacts 3 and 5 of the mounting block) then through fuses F14 and F 15, the high beam of the right and left headlights, respectively, and is supplied to the headlights. At the same time, the control LED indicating that the high beam 2 is on is also powered.
Wiring diagram for connecting the headlight range control
The voltage from the battery, through the ignition switch 4, through the fuses in the mounting block F 12 and 13, is supplied to the headlight range control units. The displacement of the corrector rod depends on the voltage difference between pins 6 and 7. That is, due to the resistor in the corrector control unit 3, the voltage to the corrector is limited. In this case, the corrector rod moves, which in turn sets the rotation angle for the reflector.
Wiring diagram for connecting fog lights
I searched for a long time on the Internet and electrical diagrams for the pinout of the MUS block, but I never found it...
I'm tired of constantly turning my headlights on and off while wandering around the city.
If you constantly forget to turn your headlights on or off, and the PTF or DRLs are not installed, then there is a simple way out to solve this problem.
Next, I drew the main pinout of the MUS block under the light.
Option 1 To automatically light up only the low beam without the sidelights, place a jumper on pins 10 and 12. This option is good in the summer.
Option 2 To automatically light up the side lamps in the rear and front lights, place a jumper on pins 9 and 10. This option is good in winter. During the operation of this option, an interesting feature was revealed: if you turn the ICU to the parking position or low beam, the ignition key can be pulled out and the car will continue to run. By the way, I found it convenient, I start the car, take out the key, lock the car with the alarm and go home to warm up.
Personally, in winter I use option 2. And in summer, since side lights in the taillights are not needed, I use option 1.
Both of these options are good even when the ICC is broken and you really need light to drive. The MUS block can be completely pulled out and a jumper installed, but other functions of the MUS, such as adjusting the brightness of the instrument panel and the angle of the headlights, will not be available when the block is removed.
When one of the jumper options is installed and the block is connected to the MUS, all other functions of the MUS remain operational.
If you need the jumper to be disabled, you can display a separate button. I don’t recommend making jumpers directly to contacts 9+10+12! I don’t know what will happen with this option!
Connection diagram for PTF or DRL on the MUS block using a relay. A button to turn on the PTF or DRLs after turning on the headlights, because when the headlights are turned on, the PTFs or DRLs are turned off as expected.
By the way, does anyone know how to make the American version, when when you turn on the low-range PTF, the PTF goes out and then when you turn on the turn signals, the PTF turns on only from the direction from which the turn signal was turned on?
Connection of DRL according to GOST. When the headlights are turned on, the low or high beam DRLs go out.
People who know about the pinout of the remaining ICC contacts, write.
Osram
This is a leading manufacturer of lighting equipment with a worldwide reputation, which was founded just over a hundred years ago - in 1906 in the city of Munich (Germany). Osram products are widely distributed among most car manufacturers, including the popular Renault concern. The high reputation of the company allows us to once and for all close the question of which H7 low beam lamps are the best for Ford Focus 2. The lamps produced have both standard power and there are models with increased light output. By purchasing light sources for low-beam headlights with the Osram marking, you can be confident in their durable and high-quality operation.
Xenon solutions
In appearance, one can notice the almost complete similarity of gas-discharge lamps with their halogen counterparts. However, both light sources use different technology. In this case, a characteristic feature is the complete absence of an incandescent filament, since a different principle is used.
What are the best H7 low beam lamps for the Duster? Perhaps this is exactly the case, since they have a special operating principle. The luminous flux is created due to the glow of the inert gas xenon, hence the name of the lamps themselves. It is under pressure in a glass flask. There is also a small metal plate located here, which heats the inert medium. Due to the absence of an incandescent filament, such lamps are vibration-free, which is confirmed by many tests. Compared to the classic halogen counterpart, the glow from xenon is three times brighter. This becomes especially important when driving a car in the evening and at high speed.
Narva
Among the candidates under consideration, this is the youngest, but this does not mean at all that the company produces low-quality products. The manufacturer began mass production of halogen light sources in 1969. Since then, the Narva brand has become quite popular and recognizable all over the world, largely due to the optimal price-quality ratio. True German quality - this is exactly the phrase that is fashionable to hear from the mouths of many car enthusiasts, both among professionals and beginners.
Philips
An equally world-famous company specializes in the production of a wide variety of products, including halogen and gas-discharge lamps. Few people know, but this particular manufacturer is involved in the production of energy-saving lamps, which are currently very popular.
In the automotive industry, Philips is the main supplier of lighting sources and optics to the assembly lines of many factories. In addition, the company supplies its products to the secondary market, significantly expanding its range with halogen, xenon and LED lamps.
Requirements for DRL according to GOST
Functional electrical diagram:
- DRLs should turn on automatically when the engine start/stop control is turned to the “on” position.
- It must be possible to activate and deactivate the automatic DRL operation without the aid of a tool.
- DRLs must turn off automatically when the headlights are turned on, except when the headlights are turned on for a short period of time to signal road users.
Self-installation of DRLs is considered as making a change to the design of the car. If the vehicle is not equipped with DRLs, either low beam headlights or fog lights should be used instead during the daytime.
Design Features
Kalina's light is not technologically advanced, since the optics use classic halogen elements. From the factory, the modules contain parts from Philips or Osram with the Long Life prefix, which means an increased service life.
The Kalina lighting system in the old and new body differs in the location of the modules, shape, and size. The elements used in optics are:
- turn signals – PY21W;
- low beam – H7/55 W;
- high beam – H1/60 W;
- fog lights – H11/55 W;
- Dimensions – W5W.
In modifications of Kalina since 2013, running lights have been added from the factory, which use parts with the index W 21/5 W.
Some car owners cannot fit their hand into the cramped space between the TV and the air filter housing. In this case, the Kalina intake system is dismantled or the radiator grille and headlight are removed.
LED alternative
When deciding which H7 low beam lamps are the best for a Nexia, Ford or any other car, many experts unanimously agree that the future lies with LEDs. Moreover, this applies not only to the automotive industry, but also to most other industries where there is a need for high-quality lighting.
Such lamps are the most economical among all other analogues. Compared to incandescent elements, energy consumption is 10 times lower. As for the service life, there is an opinion that LEDs can work up to 100 thousand hours. They also withstand vibrations and shocks, and the luminous flux meets many requirements. Due to the absence of mercury, such lamps are completely harmless, so they can be safely disposed of. There is only one important detail here - their use requires special optics. Due to their characteristics, LEDs cannot shine at a point, which imposes certain difficulties, since conventional optics do not allow you to adjust the luminous flux.
What are the best H7 low beam bulbs in the rain? The choice fell on LEDs, but it is worth knowing about a number of disadvantages. The most important of them is the very high cost, due to which this market segment is not so widespread. Another equally important point is that the stated deadline is completely refuted by practice. Instead of 11 years, the manufacturer itself guarantees good performance for 3-5 years. This is due to one phenomenon called LED degradation. That is, the crystals gradually die off - first they lose their brightness, and then they become completely silent. Another drawback is the unpleasant spectrum. As experts in the field of psychology note, approximately 80% of respondents have a negative opinion regarding the use of such lamps at home.
Standard
As a rule, high-strength glass or quartz material is used to make the lamp bulb. In its inner part there is a filament and gas with the inclusion of halogen additives. Currently, such lamps are deservedly popular due to their wide distribution. The use of such products does not require any additional equipment. They create the correct lighting and, most importantly, high-quality lighting.
There are also a number of other advantages that allow you to immediately answer the question of which H7 low-beam lamps are the best for a Priora or other car:
- compact dimensions;
- long service life;
- for the light of the quartz shell they have high strength and heat resistance;
- high light output;
- wide scope of application.
However, there is a significant drawback, which is the strong heating of the lamps during operation and poor tolerance to voltage changes. When replacing lamps, you should absolutely not touch the glass bulb with your hands. Fortunately, there are not many disadvantages, and for this reason, today more than a million cars are driven with such low beam lamps.
