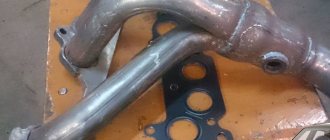
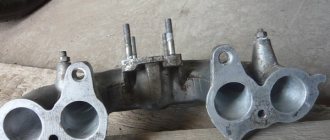
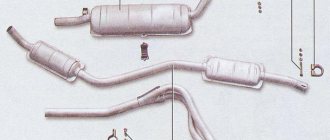
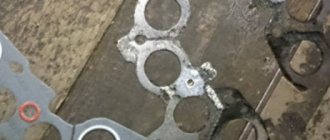
Replacing the exhaust manifold and gasket
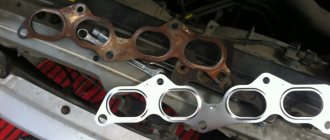
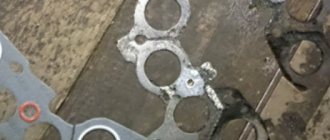
When dismantling the manifold, the gasket is destroyed in almost any case. Therefore, it is worth removing its remains from the parts. Replacing the Kalina exhaust manifold gasket is a simple process. The use of sealants and other third-party substances is not recommended. They may later get into the crankcase.
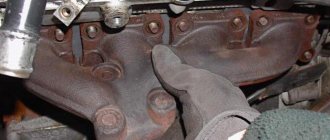
Replacing the manifold itself is simple - just take a new part and install it according to the principle in which it was attached. Assembling the system is simply the reverse order of the steps outlined in the last section.
Advice! Don't forget about cleanliness. This is an important factor in long and trouble-free operation of the car.
The main reasons for replacing the catalyst gasket
One of the main reasons for catalytic converter failure is that the exhaust channels become clogged. The formation of plugs leads to the deposition of soot, soot, and other solid deposits. Sources of clogging can be:
- low quality fuel;
- the use by the owner of the technical equipment of all kinds of chemical additives in the combustible mixture (these reagents only have a detrimental effect on the performance of the fuel system);
- possible mechanical damage to the housing or internal connections;
- long-term operation without replacement or prevention;
- faulty engine ignition system;
- unstable operation of the oxygen sensor, due to which the combustible mixture is lean or enriched, which also has an extremely detrimental effect on the performance of the entire system.
Untimely gasket replacement: dangers and risks
The main danger lies in the excessive formation of carbon deposits and its deposition on the exhaust system channels. The second point: ceramic honeycombs are destroyed over time, their fragments are spread under pressure throughout the entire system. This is very dangerous, since the particles block circulation and contribute to damage to internal mechanisms: timing belt, spark plugs. The most dangerous option is when fragments of ceramic honeycomb penetrate the oil pan and mix with the engine oil. Subsequently, this mixture damages the surface of the cylinder walls. The car loses compression, breaks down, and needs partial or major repairs.
Gasket for Kalina manifold 8 valves
These are: fuel system, exhaust gas recirculation system. After a run of 80-100 thousand km, the metal housing of the exhaust manifold begins to crack at the seams.
Flange connections are torn away from their seats.
Replacing a catalyst with a spider, as a process, is divided into several stages.
This does not take into account the fact that the catalyst itself needs to be changed due to burnout of internal parts due to systematic contact with a hot flame flow. The average gas temperature reaches 600℃.
So, division into stages: collecting data on the number and location of catalysts in the car; preparation of spare parts in each specific case for modification;
When should the Kalina catalyst gasket be replaced?
Most vehicle owners mistakenly think that the catalytic converter, even if in good condition, is the reason for the reduction in power of the power unit.
In view of this, owners of budget car models deliberately exclude this part from the exhaust tract. However, the power of the power unit is reduced solely due to a violation of the throughput of the exhaust gas converter, due to damage to the honeycombs inside it.
Our car service specialists identify the main reasons for premature failure of parts and wear of gaskets:
- Low fuel quality;
- Use of various additives;
- Mechanical damage to elements;
- Incorrect operation of the ignition system;
- Failure of the lambda probe, as a result of which the process of formation of the fuel mixture is disrupted.
If the catalyst fails, the following symptoms are observed:
- If the throughput of the neutralizer is completely impaired, the vehicle's power unit will start and immediately stall, or not start at all. You can diagnose catalytic converters as quickly as possible in our service center. But you can also perform an independent check, however, it is not always highly accurate. To carry it out, unscrew the lambda located in front of the catalyst, and then start the engine. If it starts, the catalyst is faulty.
- The acceleration dynamics of the car are noticeably reduced, the speed of the power unit drops.
- Fuel consumption increases significantly. However, this evidence of a catalyst malfunction only applies in the event of a noticeable decrease in the power and acceleration dynamics of the vehicle. To put it simply, if the vehicle begins to become “stupid” and fuel consumption increases, therefore, the converter needs to be replaced.
- The “CHECK ENGINE” indicator on the dashboard came on. But this is not always direct evidence of a catalyst failure. In this case, you need to contact a car service for detailed diagnostics.
Reasons for removing and replacing the exhaust manifold Lada Kalina
The exhaust manifold is made of cast iron, which is very resistant to temperatures. However, a critical temperature - 800-900 degrees - can render the distributor unusable. In addition, there are many other factors that negatively affect it. This list can include:
- Mechanical damage;
- Loss of tightness at the junction with the cylinder head (cylinder block);
- Inoperative condition of the gasket between the BC head and the manifold;
- Due to constant overheating, cracks or warping may occur.
Sometimes replacing the exhaust manifold on Kalina 8 valves is necessary in order to install a more advanced and high-quality part.
Important! The exhaust manifold gasket is created from pressed reinforced asbestos and is necessary to create a tight connection between the BC head and the distributor. The fact is that the BC head is made of aluminum, and the manifold is made of cast iron. Therefore, under the influence of temperature, these two elements expand and contract differently. And asbestos allows you to coordinate the difference in thermal expansion. The main threat to the gasket is constant exposure to high temperatures.
There are a number of symptoms that will tell you that you need to replace the exhaust manifold of your Lada Kalina:
- In any operating mode, the engine makes an unpleasant characteristic sound;
- Exhaust gases enter under the hood or even into the interior of your car;
- The engine loses power due to a mismatch between the BC head and the manifold.
Required tools and materials
The list of what is needed is, in principle, standard: a standard set of tools, an extension cord with various heads, WD-40 or other similar lubricant. If you know that the problem is broken studs, then a stud extractor, taps, drill and drill bits will be added to the above list. In addition, a bucket or basin, possibly an old canister, should be at hand.
Advice! A few days before replacing the exhaust manifold, you can begin to lubricate all fasteners in the system. Can be lubricated several times a day. This will greatly simplify the task and make replacement quick.
Replacement of the intake pipe gasket and catalytic collector
The intake pipe and catalytic collector are connected to the cylinder head through a common sealing gasket. The gasket also covers two channels of the cylinder head cooling jacket, which extend into the plane of the junction of the head with the intake pipe and catalytic collector. We carry out the work on an inspection ditch or overpass. Drain the coolant from the engine (see “Checking the level and replacing the coolant”). We remove the receiver (see “Removing the receiver”) and the fuel rail with injectors (see “Checking the injectors, removing the fuel rail and injectors”). Disconnect the engine management system wiring harness block from the oxygen concentration sensor wiring harness block (see “Removing the control oxygen concentration sensor”). Having unscrewed the three nuts securing the pipe flange of the additional muffler to the flange of the catalytic collector, we disconnect the additional muffler from the catalytic collector (see “Removing the additional muffler”).
Using a 13mm socket, unscrew the two nuts of the bracket securing the catenary collector.
. and remove the bracket from the bracket studs.
Using a 13mm wrench, unscrew the two bolts securing the catalytic converter bracket to the cylinder block.
. and remove the bracket.
Using a “13” wrench, unscrew the nut of the upper fastening of the right support bracket of the intake pipe. Remove the ground wire tip from the intake pipe stud.
Using a 13mm socket, unscrew the bolt of the lower fastening of the right support bracket of the intake pipe.
. and remove the bracket.
Remove the spacer bushing from the intake pipe stud.
Using a 19mm wrench, unscrew the nut securing the clutch housing to the cylinder block, which also secures the lower end of the left support bracket of the intake pipe.
Using a 17mm wrench, unscrew the nut of the upper fastening of the left support bracket of the intake pipe.
. and remove the bracket. On the left rear side of the engine...
. Using the “13” head, loosen the tightening of nut 1 securing the coolant pump pipe bracket, unscrew nut 2 securing the catalytic collector and nut 3 of the general fastening of the catalytic collector and intake pipe to the cylinder head (for clarity, shown on a dismantled engine).
Move the coolant pump pipe bracket aside.
Remove the heat shield from the cylinder head studs and the washer from the top stud. On the right rear side of the engine.
. Using the “13” head, unscrew the two nuts securing the heat shield and the eye.
Remove the heat shield and ring from the cylinder head studs. ..using the “13” head, unscrew the nut for fastening the catalytic collector and the nut for the general fastening of the catalytic collector and inlet pipe, located on the same studs. Remove the washers from the studs.
Using a “13” socket, unscrew two nuts 1 of the upper fastening of the intake pipe and one nut 2 of the upper fastening of the catalytic collector. Remove the washers from the studs.
Using a “13” socket, unscrew the two nuts of the common lower fastening of the catalytic collector and the intake pipe to the cylinder head. Remove the washers from the studs.
Remove the inlet pipe.
Remove the sealing gasket of the intake pipe and catalytic collector.
After each removal of the intake pipe or catalytic collector, the gasket must be replaced with a new one. Before installation, we clean the mating surfaces of the cylinder head, intake pipe and cathode from remnants of the old gasket and carbon deposits. Apply graphite lubricant to the cylinder head studs. We carry out assembly in reverse order. At the four common fastening points of the intake pipe and the catalytic converter (their joints), it is necessary to install thick washers with a large outer diameter on the studs.
Common mounting points for the intake pipe and catalytic collector (shown on a dismantled engine for clarity).
Replacing the Kalina exhaust manifold gasket
on the injection engine of a VAZ 2107 car
2. For the convenience of replacing the manifold gasket, remove the battery (see “VAZ 2107 - removal and installation”).
3. Drain the coolant from the cooling system of the VAZ 2107 car (see “Coolant - checking the level and replacing”).
5. Unscrew two nuts and a bolt securing the starter shield and remove the starter shield from the exhaust manifold studs (see “Starter of a VAZ 2107 car - removal, installation”).
6. Using a 13 mm socket wrench, unscrew the bolts of the upper fastening of the front and rear braces to the intake manifold of the VAZ 2107 pipeline.
7. Loosen the tightening of the lower nut securing the front brace to the stud of the bracket of the right support of the unit and move the brace to the side.
8. Loosen the bolt of the upper fastening of the starter (see “Starter of a VAZ 2107 car - removal, installation”) and move the rear brace to the side.
9. Using a 13 mm socket wrench with an extension, unscrew the nut securing the ground wire tip and disconnect it.
Replacing the gasket under the manifold 2108, viburnum, grant
Thank you very much for watching my videos, tell your friends, leave comments and subscribe.
I disassembled the Viburnum exhaust manifold. We'll take a new one)
Lada Kalina
catalyst.
substitution
for spider 4-2-1. nothing complicated.
11. Using a 13 mm socket wrench with a deep head, unscrew two nuts A of the joint fastening of the intake manifold of the pipeline with the exhaust manifold and two nuts B of the fastening of the intake manifold of the pipeline.
12. Using the same equipment, we unscrew two nuts A for the joint fastening of the intake manifold of the pipeline with the exhaust manifold and nut B for fastening the exhaust manifold.
13. On the VAZ 2107 car engine, unscrew the exhaust pipe clamp to the bracket and remove the exhaust pipe from the exhaust manifold studs (see “Muffler exhaust pipe - removal and installation”).
14. Using a 13 mm socket wrench with a deep head, unscrew the nut of the front fastening of the exhaust manifold.
16. Remove the washers from the studs. Under the nuts of the joint fastening of the intake manifold of the pipeline and the exhaust manifold, washers of increased thickness are installed.
17. Moving the exhaust manifold away from the cylinder head, remove the intake manifold pipeline from the studs.
18. Remove the sealing gasket of the intake manifold of the pipeline and the exhaust manifold. We replace the manifold gasket with a new one.
We install all the removed parts on the injection engine of the VAZ 2107 car in the reverse order. And we fill the cooling system of the VAZ 2107 car with coolant.
Dismantling
There is only one difficulty in this process - the inaccessibility of some fasteners. It is best to carry out this “operation” in a viewing hole or on a lift. Of course, this is not necessary, but it is much more convenient.
Work order:
- First you need to remove the negative terminal from the battery or turn off the mains switch.
- Next, it is recommended to drain all the antifreeze into a container prepared in advance.
- Next, you need to disconnect the fuel pipes. If the coolant is not drained, at this stage it will go into the cylinders.
- Now you have to find the throttle position and idle speed sensors, and then remove the wires from them.
- We first remove the crankcase ventilation from the hoses, then the brake booster.
- Remove the intake manifold (receiver) together with the throttle assembly.
- Then remove the fuel rail (without disassembling) and the wires from the injector.
- There's not much left. Now you need to remove the heat reflecting screen. The exhaust pipe of the muffler is unscrewed from the manifold.
- We remove the exhaust manifold Kalina 8 valves from the BC head studs, to do this we unscrew the fastenings shown below in the figure
Lada Kalina (8, 16 valves): replacing the catalyst with a spider or flame arrester
LADA Kalina has been produced since 2003, when the first copies rolled off the assembly line.
Before this, prototypes of future production models were repeatedly tested. The process of creating the model itself turned out to be quite difficult and lengthy.
The first developments began back in 1999 and lasted until 2003.
During its existence, the model has undergone repeated updates. There were four in total:
- 1.4 liter engine, 16 valve mechanism, Euro standardization – 3, 4;
- 1.6-liter engine, 16-valve mechanism, Euro standardization – 3, 4 (production started in December 2009);
- 1.6-liter engine, 8-valve mechanism, Euro standardization – 2, 3 (subject to the “Basic” package);
- 1.6-liter engine, 8-valve mechanism, Euro 4 standardization (Lux+ package from November 2011).
Despite the many positive aspects of the car and the brand as a whole, it is necessary to highlight a number of weak points. These are: fuel system, exhaust gas recirculation system.
After a run of 80-100 thousand km, the metal housing of the exhaust manifold begins to crack at the seams. Flange connections are torn away from their seats. This does not take into account the fact that the catalyst itself needs to be changed due to burnout of internal parts due to systematic contact with a hot flame flow. The average gas temperature reaches 600℃.
Technical features of the insert for Lada Kalina 8V
The industry offers two types of tuning inserts, the design of each of them depends on the location of the pipes. Moreover, each design is designed for a specific power unit:
- Insert 4-1 is installed on forced engines with a speed range from 5,000 to 10,000 rpm. structurally suitable only for 16-valve engines.
- The 4-2-1 insert operates over a wider range and is considered a "low-end" insert. It is possible to increase engine power by about 3-5%. This is the model most often installed on the VAZ 1118.
Since it will not be possible to install a preliminary flame arrester on this VAZ car, you will have to carefully approach the issue of choosing an insert. The installation process of the part will not take much time if you follow all the recommendations.
How to install a 4-2-1 spider in place of the standard converter on a Lada Kalina 8V
In a car exhaust system, a catalytic converter is needed to burn harmful elements in the exhaust gases to the level of H2O and CO2. It is quite difficult to predict its service life, since it depends on many factors. But many owners of VAZ cars prefer to get rid of the collector before the end of its service life. For these purposes, they use special inserts, which are an inexpensive alternative to a neutralizer.
Contents Some car enthusiasts are sure that even a working neutralizer prevents the engine from developing the power it needs. This is not true. As for clogged or melted honeycombs, this phenomenon is the result of careless handling of the vehicle and its operation with a faulty fuel supply and ignition system.
The main reasons for device failure:
- Unbalanced fuel-air mixture due to a broken oxygen sensor.
- Unsatisfactory fuel quality.
- Incorrect ignition operation.
- Mechanical damage to the collector.
- Use of fuel additives.
For the most part, replacing the catalyst on Kalina 8 valves is done as a result of using low quality fuel. Its slow combustion occurs partly in the exhaust. The detonation of gasoline destroys the ceramic structure of the honeycomb, which over time begins to crumble and clog thin passages.
The engine begins to overheat and loses traction. An obstacle to the free passage of gases contributes to an increase in their pressure.
Technical features of the insert
Installing catalyst replacements can eliminate the problem of a clogged exhaust filter and return the car to its previous performance - power and gas mileage. But what are these substitutes? This insert is a hollow pipe that does not have filters. It is made in the form of a catalyst and in most cases there are no problems with its installation. After installing the insert instead of the factory exhaust gas filter, drivers observe:
- acceleration of warming up of the car in the cold season;
- the car picks up speed better;
- fuel consumption is reduced.
In some cases, there is a change in the sound volume when the car is running. The sound becomes more bassy. The Lada Kalina computer can display “Check” on the dashboard when driving with the insert. To prevent this, use a lambda probe or oxygen sensor. This sensor is an integral part of the exhaust system with a catalyst. The sensor analyzes the level of oxygen and harmful gases in the exhaust and transmits the information to the on-board computer. Based on the data obtained, the computer determines the performance of the catalyst. The lambda probe cannot be repaired; if it breaks, the part must be replaced.
Since the insert does not reduce the level of toxic substances in the exhaust, the lambda probe will constantly transmit information about a catalyst malfunction. To avoid this, special devices are used - decoys. They come in two types: mechanical and electronic.
Lambda zone deception
Mechanical blende is a bronze spacer of a certain size, filled with ceramic chips coated with a catalytic layer. Exhaust gases pass through the small holes of the device, interacting with the crumbs, due to which the CO2 concentration is reduced. Electronics analyzes the changes and sends information to the computer about the normal operation of the catalyst.
Electronic snag is a high-tech device based on a single processor. Such a device analyzes the operation of the exhaust gas purification system and transmits information about the serviceability of the catalyst. The electronics understand that smog filtering is not happening, but generates a signal corresponding to the correct functioning of the system.
You can replace the catalyst with an insert in many car repair shops. Self-replacement is recommended only if you have the appropriate tools, skills and experience. You can install electronic deception yourself, but you need to have a good understanding of the principles of computer operation and have the necessary software. Otherwise, the car owner risks making the situation worse.
Content
Actions in emergency situations Daily checks Operating instructions Warnings and technical rules Basic instruments, measuring Engine and its systems Transmission Chassis Steering Brake system Vehicle electrical equipment Body Interior ventilation and heating system Applications Fault codes Electrical diagrams
Sources
- https://expertvaz.ru/2110/premer-komplektatsii-tsena.html
- https://videoremont-mashin.ru/remont-kpp-vaz-21108/ustanovka-konditsionera-v-vaz-2110-ot-priory-svoimi-rukami/
- https://monolith.in.ua/predohraniteli-lada-2110/
Replacement of intake manifold gaskets VAZ 2114 8 cl (Kalina, 2110)
21.03.2019 2095
It is recommended to replace the gaskets on the VAZ intake manifold after each removal. But I had to do this prematurely, as I discovered a significant air leak, which mainly manifested itself on a cold engine. Every cold start was accompanied by a terrible tripping.
In addition to the tripping when cold, there was a slight drop in speed when sharply pressing the gas pedal. This applies to both a cold and a hot engine.
A homemade smoke generator made from a cigarette helped me detect the air leak. A very simple and primitive contraption that has helped me out more than once.
My car (Kalina 1.6 8 valves) has a plastic intake manifold (receiver). The same will be installed on all VAZ family cars with an 8-valve 1.6-liter engine (2114, 2110, etc.). 4 rubber rings act as gaskets. According to reviews, black rings last much longer than white ones. And I was convinced of this personally - these gaskets lasted for about six months and began to let air through. They felt like plastic to the touch. Unfortunately, I didn’t find black ones, so I’ll install white ones again. I hope these last longer.
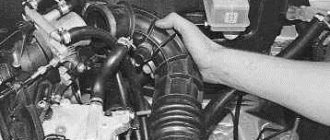
To remove the intake manifold (receiver), you must first unscrew the corrugation from the air filter, the throttle cable, and the small crankcase ventilation hoses. I will not remove the throttle and its heating.
The intake manifold is attached to 5 studs - one in the center, two on the sides. To unscrew them you will need a 13mm socket. After unscrewing the nuts, you need to remove the receiver itself from the studs and move it to the side. Remove the old gaskets and wipe the seats from oil and dirt. You also need to wipe the seat on the engine.
The manifold has special grooves for guides on the gaskets. The gaskets must be installed with the higher side in the plastic manifold. It is the guide that will prevent you from making mistakes.
I additionally coated the areas near the guides with sealant on the outside of the gasket. Because it felt like that was where the ring entered the groove the deepest. In addition, there was a place for air leaks on the old gaskets.
After all procedures, the intake manifold can be installed back. I couldn't find any information on how tightly to tighten the mounting nuts. I delayed it at my own peril and risk. The main thing is not to overtighten, as the manifold is plastic and can crack.
This is how I replaced the old intake manifold gaskets on my Kalina with new ones. There is no more air leakage, the engine stopped stalling when cold and began to behave much better when warm.
Sources
- Sochivko D.V. The subconscious of a terrorist; Cogito-Center - M., 2006. - 907 p.
- Maria Sergeevna Shlyuter Administrative responsibility for offenses in the field of subsoil protection and subsoil use. Monograph; Prospect - M., 1994. - 500 p.
- Polezhaev Oleg The rights of the developer to the land plot and the building erected by him. History of formation and foreign experience: monograph. ; Justitsinform - M., 2016. - 931 p.
- Potapova A. A. Cheat sheet on municipal law. Educational literature: monograph. ; Prospect - M., 1980. - 868 p.
- Sablin Maxim Career of a lawyer. Tutorial; Prospect - M., 1991. - 915 p.
Restoring the tightness of the intake system on the editorial Kalina
There is nothing criminal about this.
Over time, the tightness of its joints is broken and liquid can seep out. In addition to the aesthetic aspect, this is also reflected in the operation of the motor. Through the cracks not only oil presses, but also air leaks.
Most often, this leads to uneven engine operation (slight tripping) at idle speed. Intake manifold
The tightness of the intake system is very important for the proper operation of the engine. The tightness of the intake system is very important for the proper operation of the engine. Oil traces at the manifold joints are visible to the naked eye, and air leaks can be calculated using a simple technique.
While the engine is running, spray any suspicious areas with brake system or carburetor cleaner.
If after some time the engine speed “floats” or it begins to choke altogether, then there is a significant suction in these places.
The purifier, as a flammable substance, entering the intake, enriches the air-fuel mixture, which causes the engine speed to fluctuate. The intake of additional air, not taken into account by the sensors on the intake side, causes a constant leaning of the mixture. The control system tries to adjust the fuel supply based on the output readings of the front lambda probe.
