Exhaust system VAZ 2107 (carburetor)
Let's figure out what the muffler consists of. In the photo above:
- pillow bolt (1)
- cushion securing the muffler (2)
- main muffler (3)
- belt on which the muffler is suspended (4)
- clamp bolt (5)
- clamp securing the main muffler (muffler) to the resonator (6)
- bolt of the second clamp (7)
- clamp securing the resonator to the “pants” (8)
- nut securing the exhaust pipe to the exhaust manifold (9)
- locking plate (10)
- “pants” gasket (11)
- exhaust pipe (pants)(12)
- resonator (13)
- bolt of the clamp securing the exhaust pipe (14)
- clamp securing the exhaust pipe (15)
Each owner of a VAZ 2107 car has to replace one or more parts of the exhaust system over time. The cost of replacing one spare part is not high, but you can save money by doing the job yourself. Repairs do not require special tools or special skills; an angle grinder and a “liquid wrench” (WD-40 or its equivalent) will come in handy . The figure above shows how the VAZ 2107 muffler works; replacement is the next step. For your information:
- The exhaust system of the VAZ 2107 with a carburetor consists of a downpipe (pants), main and additional mufflers;
- The flange of the pants on the VAZ 2107 is attached to the exhaust manifold using four studs. They are screwed with brass or copper-plated steel nuts. They are unscrewed in pairs and secured with special locking plates;
- The junction of the collector with the receiving pipe is sealed with a reinforced gasket made of metal asbestos. The pants are additionally attached using a clamp to the gearbox bracket;
- The VAZ 2107 resonator consists of front and rear mufflers. The front muffler pipe is put on the trousers, and the rear muffler is inserted into the main muffler pipe. At the joints they are fixed with clamps;
- The main muffler is suspended from brackets on the underbody by two rubber straps and a cushion.
It is not difficult to understand which part has failed - we drive onto an overpass or inspection hole and start the engine. Usually, the muffler itself most often burns out, because it is inside it that moisture accumulates and it rots. The resonator breaks down less often because water condensation does not occur in it, since the vapors are blown into the main muffler. The service life of the exhaust pipe exceeds the service life of other parts of the exhaust system by several times.
Attention: Any work related to the replacement or repair of the exhaust system must be carried out only after waiting for all its parts to cool completely.
List of tools:
- Key 13 (rozhkovo - cap);
- Driver or ratchet;
- Heads for 10 and 13 (deep);
- Wide flathead screwdriver or chisel;
- Hammer;
- Pliers.
Necessary tool
Replacing the exhaust pipe on a VAZ 2101-VAZ 2107
Welcome! The exhaust pipe of a car's exhaust system - not many, but still most people who have an idea of what a car is, know that its exhaust system is divided into three parts, which includes the exhaust pipe, as well as a resonator and the most important rear part of the muffler, its By the way, you see it on the street, you can even say every day (If you pay attention to it), because it sticks out from the back of the car, usually on cars of the VAZ family, this part of the muffler is located under the bumper, on expensive foreign cars such as Mercedes, etc. .
This part is located in the bumper itself, so that you at least have some idea about this part, then in this case, look at the photo below and you will understand what we are talking about, but still, now we are not talking about that, but about replacing the exhaust pipe on cars of the classic family, therefore Let's return closer to this topic. Note! To replace the exhaust pipe (by the way, it is also called the pants of the car exhaust system), you will need to stock up on: A basic set of wrenches, which should also include a “13” wrench, and if possible, then stock up on an extension cord with a “13” coupling head, because the intake pipe is attached very inconveniently and it is not so easy to get to it, so immediately take with you (If you have these tools) a wrench and it would be best to choose the so-called cardan joint, then the work will be done more or less easier!
By the way, we also recommend that you stock up on either a caliper or a straight (without bends) metal ruler, since the intake pipes at the moment are not always made with high quality, for example, there are counterfeits, etc. And with the help of these things, it will be possible to determine how smooth the mating surface on your pipe is, thereby it will be possible to determine in advance whether there will be a tight connection between the pipe and the exhaust manifold or not, in general, you will learn about this a little later!
And in conclusion, let’s note one nuance: when replacing this pipe with a new one, always buy a gasket for the exhaust pipe of the muffler (that’s what it’s called) while standing in the auto shop, because the old gasket burns out and shrinks over time, and therefore when you start putting it on the new pipe, then you will no longer get a normal connection for this pipe, thereby the system in this place where the old compressed gasket will be located will be depressurized!
Summary:
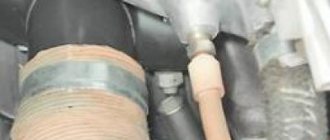
Where is the exhaust pipe located? It can be seen in two places: namely, its beginning can be easily seen in the engine compartment of the car, and you can see the continuation and tip of this pipe only by looking under the bottom of the car in the front part; for a more detailed location of this pipe under the bottom, see the photo:
When do you need to change the exhaust pipe? It is replaced in different cases, but basically it needs to be changed when it burns out badly (through), when air begins to leak through the formed hole in a given pipe, and the changed sound of the engine will tell you about this, because as a rule, if one of the parts of the muffler If it burns out, the engine starts to work louder than it was before, over time it even starts to irritate.
This pipe also needs to be replaced if it is deformed, because due to its deformation, the exhaust gases do not have time to completely exit the car’s engine, as a result of which all that part of the exhaust gases that did not have time to exit returns again to the engine and ends up in the cylinders themselves, because of this, the car loses its speed characteristics because the exhaust gases go back into the engine.
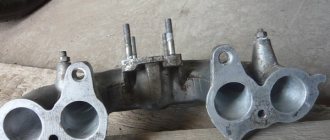
How to check the exhaust pipe for so-called defects? In fact, there is nothing complicated about this, firstly, let’s clarify one detail, we will check this pipe not for defects (Although you can say so) but for the evenness of the mating surface of this pipe, because as we already mentioned a little earlier when -the rolling surface of the receiving pipe must be perfectly flat, and bending it can ultimately lead to the system losing its tightness and, as a result, the sound of your engine increasing when driving.
In general, to check it, pick up a caliper or a metal ruler and, applying the caliper or ruler to the mating surface of the receiving pipe, check it for evenness in at least two places, a deviation of more than 2 mm, or no traces of rough surface treatment are allowed.
Lada 2107 › Surprises, replacement of manifold gaskets
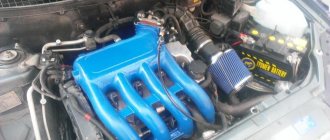
Having completed the plumbing work, I decided to check the condition of the inlet pipe and exhaust manifold. Several reasons prompted me to do this: — engine tripping when warming up; - a gradual drop in engine speed when warming up (rarely - up to a complete stop) and then a spontaneous sharp increase in speed; - steam from the exhaust pipe when warming up (perhaps it’s condensation, but I’m paranoid :)) - engine shaking when starting - almost imperceptible when cold and intensifying as it warms up (as with a crooked clutch disc); — excessive heating of the carburetor body; — traces of either oil or coolant with soot at the junction of the intake pipe and the cylinder head.
In general, a number of symptoms could indicate a burnout of the head gasket, but at the same time: - there are no traces of oil in the expansion tank and the antifreeze is clear, like new; — there are no bubbles in the expansion tank either during or after warming up the engine; — there is no emulsion on the MZG cover or on the dipstick; — the oil is simply dark, with no signs of coolant getting into it.
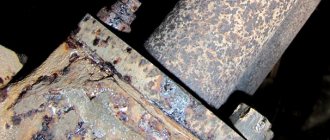
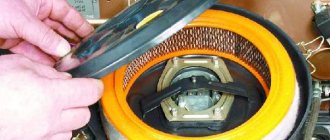
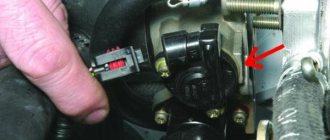
Therefore, I decided to check these gaskets first, buying 2 pieces for 54 rubles. Moreover, the operation as a whole is simple. I unscrewed the starter shield mounting nut and the M6 bolt of the shield from the exhaust manifold studs (it’s inconvenient to turn, especially when putting everything back together). The heater tube was not yet screwed to the water pump and manifold after replacing the pump. I removed the air filter housing, disconnected all the hoses from the intake pipe and carburetor and crawled under the car to unscrew the clamp securing the exhaust pipe to the gearbox bracket. The first surprise awaited me there:
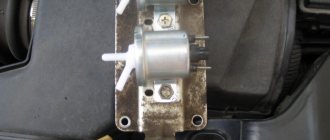
The speedometer drive seal no longer holds
Okay, we'll deal with this problem later...
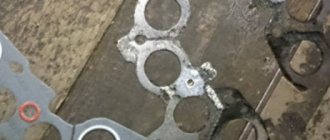
I disconnected the exhaust pipe from the exhaust manifold flange and removed the old gasket. More precisely, there were 2 gaskets there. Apparently, last time I put together an issue this way due to inattention - here’s another surprise