Plastic and wire clamps
Plastic clamps are not used to secure the boot.
This is due to low strength and reliability of fastening. Such a clamp is not able to withstand dynamic loads, and is also prone to damage from high and low temperatures. A correctly installed wire clamp does not differ in fixation strength from the factory one. Despite this, its use is not recommended for the following reasons:
- too much tightening leads to cutting the boot;
- the wire may not be rigid enough, which will lead to loosening of the fastening;
- lack of strength causes the wire to break during operation.
Unlike plastic, a homemade wire clamp can serve as a temporary replacement for the original. At the first opportunity, you should replace this mount with a more reliable one.
Cost of anthers
The price range is quite wide: from approximately 150 to 1000 rubles. and higher. It all depends on the make of the car and the manufacturer of the part. Non-original spare parts are cheaper. However, it also happens that the cost is unreasonably high: for example, because of the brand. Thus, the price of covers for a Toyota Land Cruiser reaches 8,000 rubles. The same can be said about other prestigious car brands. But not all car owners are eager to pay that kind of money for essentially an ordinary rubber band, albeit of high quality. Therefore, many simply select covers from other cars that are suitable in size and cost.
Causes of boot rupture:
- constant driving through water and mud;
- high torsional load (regular sharp turns);
- careless (unprofessional) repair of suspension parts.
Is it worth making clamps yourself, and what mistakes can be made?
The clamp is, at first glance, a simple device that does not differ in any characteristics that are difficult to understand. The presence of risk associated with the manufacture of homemade clamps depends on how confident the person is in his abilities, and whether the clamp can be used in the given conditions.
For example, a fairly rusty heating pipe leaked. The area of corrosion in the damaged area has a fairly wide area. If the clamp is made incorrectly and does not correspond to the required size, then after attempting to install it the situation can only get worse.
Rust streaks from under the clamp
Based on this, naturally, it is better to always have factory-made clamps of various modifications and sizes on hand, or if problems arise with the pipeline, immediately contact the repair service. Unfortunately, neither the first nor the second options are often feasible. No one plans for a leak, the time of its occurrence is not regulated, and it is not possible to have clamps of all configurations available.
If a leak occurs, immediate action must be taken. And it is for this purpose that you can make a clamp with your own hands, which will give you time to solve the problem in full.
The simplest clamp
In the absence of specialized tools and materials, such as an angle grinder, drill, sheet metal, etc., you can resort to the simplest, but temporarily problem-solving option - making a clamp from a piece of wire. It will help you eliminate the leak as quickly as possible and calmly wait for the help of specialists:
Pipe leak
- The first thing to do is find tape or insulating tape, a piece of wire soft enough to bend but strong enough, and a piece of rubber (for example, a tourniquet).
- Next, you should place a piece of rubber on the pipe in the place where the leak occurred, after which it is pressed as tightly as possible with the wire by winding it.
Important! When winding with wire, special attention should be paid to the edges of the future clamp.
- The resulting patch, for greater reliability, is tightly wrapped with adhesive tape (duct tape or tape).
Such a handmade product will not require much time and will help to avoid possible big problems.
The CV joint crunched. Do-it-yourself CV joint repair
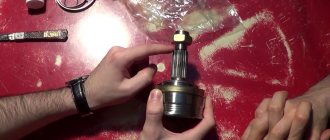
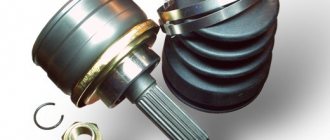
CV joint (Constant velocity joint, or simply “grenade” in common parlance) is a device that provides torque transmission with a rotation angle of about 70 degrees relative to the axis. CV joints are used in passenger cars, more precisely in drive systems with steered wheels, usually paired with independent suspension, sometimes found on the rear wheels.
What to do if the CV joint crunches, and what does this mean?
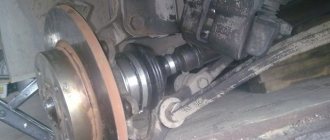
As a rule, the CV joint has a fairly large margin of safety, sometimes its life exceeds the life of the vehicle itself. Often, premature failure of this mechanism is associated with rupture of the protective cover, as a result of which dust mixed with sand and moisture gets onto the rotating parts of the hinge. Because of this, increased wear of all parts begins in the CV joint. It also happens that the boot is intact, but the cracking sound is very strong. This may indicate obvious problems that are caused by aging of the lubricant inside the mechanism. Sometimes when buying a foreign car with “decent” mileage (from 250 thousand km), owners interested in selling stuff the CV joints with pieces of rags or paper mixed with lubricant. All this “vinaigrette” will make itself known after 2-3 thousand km. If you ignore the crunching of the CV joint, then over time it will intensify, as a result of which wear will increase and the CV joint will simply need to be replaced with a new one, since parts with a large “wear” cannot be restored.
In order, as they say, to get to this ingenious mechanism, you should dismantle the axle shaft, loosen the boot clamps a little, and then pull it towards the axle shaft. In order to remove the CV joint from the axle shaft, you will need a hammer, but without fanaticism, please. And also a drift made of soft material (aluminum, copper, or wood). A CV joint is a rather complex product, despite the fact that it consists of only four elements: a knuckle, balls, a separator and a housing.
Signs of boot failure
As mentioned in one of the previous sections, the boot has become something of a consumable item for car enthusiasts. If he “walks” for at least a year, this can already be called an excellent result. It is very easy to identify a defect in the boot - just inspect the boot properly. A sign of product failure is:
- Rupture in one or more places;
- The presence of grenade lubricant on the outer surface of the boot;
- The appearance of a large number of small cracks.
Although it is recommended to inspect the boot every 10-15 thousand kilometers (and even more often in the case of a cheap consumable), often the car owner receives a signal about the need to replace it without a visual inspection - when a grinding and crunching sound begins to be heard in the lower part of the car.
Instructions for replacing the outer CV joint boot
Before changing the boot of the outer CV joint, you need to ensure that you have an inspection hole, as well as tools from the following list:
- Mount;
- Jack and stops;
- Lubricant;
- Metal brush and hammer;
- Gasoline for washing;
- A set of keys (standard or with a rotary head).
Replacing the boot of the outer CV joint begins with driving the vehicle into the inspection hole. It's best to put it in 1st gear. Next, you should loosen the fastenings on the wheels, remove the cover and unscrew the hub nut. However, before this you will need to remove the bends that fit into the groove. After placing the car on a jack, place chocks under the wheels and perform the following steps:
- Remove the crankcase protection, if present;
- Unscrew the ball joint fasteners;
- Minimize the length of the CV joint by turning the steering wheel all the way;
- Move the steering knuckle to the side and remove the CV joint from the hub;
- Remove the clamps and pull out the damaged boot (it can be cut);
- Clean the CV joint from old grease;
- Knock the grenade off the shaft (you should hit the inside of the CV joint with a hammer through the soft metal spacer so as not to damage the CV joint, while simultaneously pulling the joint towards you).
If dismantling is successful, it is necessary to inspect the retaining ring for damage. Also, use a metal brush to clean the drive from rust and other substances. Next, grease is filled into the grenade, after which a new boot is put on the shaft. Using a wooden or rubber spacer, you need to hammer the grenade into its original place and secure the boot with clamps.
How to tighten a band clamp on a CV joint - manual method
Installing such a device is not difficult, and its fixation is quite reliable. When choosing a device, look at the quality of the steel from which it is made. To fasten it, you will have to use a device for tightening the ribbon clamps. You can use pliers to tighten the device.
- We place the clamp on the boot, and grab its tip with pliers.
- Next, pull the tip towards you, applying effort. During the procedure, we ensure that tightening occurs without distortion.
- We move the tip up a little and bend the antennae.
- Fasten the end of the ribbon. Upon completion of installation, check the uniformity of fit.
Here's how to properly carry out the procedure using a tightening machine:
- We place the tape on top of the boot. We insert its tip into the holder (there is a cut for this).
- We press the holder to the clamp lock.
- We wind the tape onto the tool using rotational movements. When the tension is normal, bend the tape.
- We monitor the installation. Consider the tension force. After tensioning, no lubricant should come out. If you overtighten, the boot will burst.
Design features of the product
A clamp is a simple and effective device that has a lot of standard variations, but, in essence, they all have similar design characteristics. The difference is presented in the form of shapes and fastening devices. Their use is most common in the field of installation and repair of pipeline systems; this determines another characteristic feature of the design. For better fixation and tightness, the product often has a rubber gasket.
Regarding the practical benefits of the products in question, we can say that without them it is almost impossible to carry out high-quality fixation of the pipeline, both horizontal and vertical.
The line of types of this device begins with the simplest one-sided products, which are a threaded pin. It then continues with variations that differ not only in the greater complexity of the design, but also in size (this should be understood as the maximum diameter of the pipe for which a particular product can be used) and intended purpose.
Clamps
The most common problems that clamps help solve:
- Repairing cracks in pipeline systems. Depending on the type of product, even fairly large damage can be covered.
- Pipe fracture is not a common but serious problem. For the most part, it is encountered by those who professionally install and repair pipelines.
- Also, if it is necessary to eliminate “fistulas” in water pipes, clamps are again widely used. In such a situation, it is necessary to use a soft substrate.
Note! If the pipe being repaired is used to transport corrosive liquids, then it is necessary to use a type of fastener that can withstand these specific operating conditions.
- Specifically for steel pipes, the product can help reduce the risk of leaks caused by corrosion. Situations often arise where it damages the metal so much that a leak can occur at any minute.
The market is saturated with all sorts of configurations of clamps from different manufacturers. Factory production, in addition to professional manufacturing, also provides a guarantee of quality. After all, the products are manufactured in accordance with GOST. Such government quality regulation is associated with the high degree of role of clamps in maintaining the integrity of the structures in which they are used. Based on this, the question arises whether it is worth making a clamp for a steel pipe with your own hands.
Question of material selection
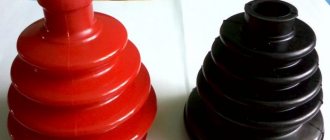
Although experts say that when choosing a boot you should be guided primarily by the manufacturer and price, in reality it is also worth considering the material of the product. For example, the most common rubber boots have many disadvantages that a competent car enthusiast should know about. Further we will talk only about non-original anthers and their most common “diseases”. Here are the main problems with rubber boots:
- Small operational resource. It is 6 months on average and up to 18 months at best;
- Low frost resistance. The anthers quickly “tan” in severe frosts.
Rubber products have an affordable price tag and are easy to change. This is partly why rubber boots are considered one of the automotive consumables along with brake pads, windshield wiper blades and filters. True, it is far from necessary to change the boot, but it is highly advisable - this will prevent the grenade from quickly failing. Regarding the disadvantages of thermoplastic products:
- Geometry problems. This applies to non-original boots - they simply jump out of place or do not fit tightly enough to the hinge, allowing water and dirt to pass through the gap;
- Installation problems. Band clamps do not always hold the boot well enough, and if they are not installed and tightened correctly, they will loosen after just a few months of use.
If the original equipment of the car includes thermoplastic boots, you can be sure that the seal will last a long time - up to 10 years. But its clamps can quickly become loose. In the case of non-original boots, problems with clamps are almost always observed. The manufacturer is trying to solve the problem of gaps between the product and the grenade using special sealants, but special chemical compounds do not last long enough on thermoplastic-metal vapors - the sealant quickly becomes ineffective. Ideally, a thermoplastic product should be blown with a construction hairdryer before installing it on the CV joint. Regarding the disadvantages of silicone anthers:
- Excessive flexibility of the material and low strength when twisted and when hit by small sharp stones when driving on poor roads/off-road;
- High softness, affecting the fit of the boot. Even tightly tightened clamps after a while stop holding the boot and it jumps off, which is why small gaps form between it and the grenade.
When looking for a suitable boot, you can take both original and non-original ones. If you decide to take a non-original, then the choice will be very rich. Exception: new car models for which there is not yet a large range of spare parts from the secondary market. After a while, it will be possible to take a boot for them from a non-standard material, such as polyurethane or silicone. You can search for a spare part by:
- Parameters of your vehicle;
- Boot code;
- Boot parameters.
In the third case, specialized sites simplify the search. But if you are looking for a spare part based on vehicle parameters, then it is best to turn to online catalogs of large marketplaces that have an advanced search system. For example, to, where a full-text search system is also implemented. You should consider the following:
- It's not worth saving. It is better to take not the cheapest rubber or plastic product, but if you use the car exclusively in the city, then a silicone one. You can also experiment with polyurethane anthers, but we do not recommend taking them “in a circle”, i.e. 4 pairs of internal and external anthers at once;
- In theory, a worn hinge can be restored. It needs to be disassembled and cleaned of old grease, paying special attention to the cage and balls. Then the hinge needs to be filled with new lubricant - usually 250-350 milliliters is enough;
- When choosing an inexpensive CV joint, it makes sense to additionally order a good boot. We have already written that cheap hinges are often equipped with low-quality anthers - this problem can be easily solved, albeit for additional money.
Do not forget that when selecting a non-original boot, it is important to pay attention to the manufacturer. The best option would be a manufacturer that is also a supplier to the conveyor belts of large automobile concerns. In the vast majority of cases, it supplies fairly high-quality products to the secondary market. It is worth highlighting the following companies:
- Maruichi (Japan);
- SKF (Sweden);
- GKN, Loebro, Spidan (sub-brands, Germany);
- RBI (Taiwan);
- Jakoparts (Germany).
You should be careful with the latter company - recently the quality of its products has not been stable. If you decide to take a classic rubber boot, we recommend that you carefully examine and touch it. If you bend the edge of the boot, even small cracks should not be visible inside.
Band metal clamps
Most often, this type of fastener comes standard at the factory. This is due to reliable fixation and ease of installation. In order for the CV joint clamp to be used for a long time, the following conditions must be met:
- when making the tape, the manufacturer used high-quality steel;
- installation on the boot was carried out using a device for tightening CV joint band clamps;
- To install fasteners, you must have skills in using the tool.
To tighten the CV joint clamps, you can use improvised means, but the quality in this case will depend only on the experience of the craftsman. The only tool you need is pliers. Sequence for tightening the clamp:
- The clamp fits onto the boot;
- The tip is grabbed with pliers;
- Pull with a little force and make sure that the clamp tightens the boot without distortion;
- Create maximum force and bend upward;
- Bend the antennae;
- Fasten the end of the ribbon.
Upon completion of installation on the constant velocity joint, it is necessary to check the uniform fit of the clamp and the absence of distortions.
What to do if the boot breaks on the road
It happens that when changing a wheel, a crack or break in the cover is discovered. In this case, you need to take some action to maintain the condition of the joint and protect yourself on the road. To do this, follow these steps:
- Place the vehicle on a jack;
- If possible, remove all the old grease and fill the boot with new grease until it stops;
- Wrap the entire cover with a plastic bag and tighten it at the recesses in the corrugation with a rope;
- It is advisable to go over the top with insulating tape or regular tape.
This solution will allow you to travel about 500 km without any problems. However, it is recommended to periodically check the integrity of the boot to avoid problems with the hinge. If the vehicle is driven on a dirt road or during rainy weather, it is best to visit the nearest service center and get the help of specialists.
If you don’t know how to replace the boot yourself, this video will give comprehensive answers on changing an integral element of the hinge and tips on repairing and maintaining the CV joint.
What to do if the boot ruptures on the road?
If the boot ruptures on the road, it is necessary to jack up the car body, and then remove the old lubricant through the hole and introduce a portion of fresh substance. The damaged area is covered with a plastic bag or wrapped with insulating tape or stationery tape. Such protection is designed for a range of up to 500 km on dry roads. If driving in wet weather, it is recommended to check the condition of the package every 30-40 km, since dirt getting into the lubricant leads to accelerated wear of the hinge.
vote
Article rating
Spring clamps.
This type is used on objects undergoing linear expansion, when, due to temperature fluctuations, the system contracts and expands. Withstands temperature fluctuations from -40 to +200 degrees Celsius.
The simple design of such a clamp: a solid spring steel strip with two curved ends for hooking. However, they provide very strong fixation and sealing of hoses and pipes. It is very simple to secure such a clamp: you need to bring the bent ends together using pliers, put it on the hose and release it. The steel will spring back and take on the required diameter. A large range of diameters (10 – 60 mm) will allow you to choose the one you need.
Spring clamps.
Using special devices when installing a band clamp
To simplify tightening the tape and improve the quality of fixation of the boot, a special tightening machine is used. Its design includes:
- pen;
- holder;
- pinwheel.
To use the device, you should follow the plan:
- Place the tape over the boot;
- Insert its end into the cut of the holder;
- Place the holder against the clamp lock;
- Using rotational movements, begin to wind the tape onto the tool;
- With sufficient tension, bend the tape;
- Check the fastened clamp for correct installation.
To ensure high-quality installation, the final force must be correctly determined. The tightening force should not allow the grease to come out, but it should not allow the boot to cut.
How to make a wire clamp - step by step diagram
Step 1: Measure the required wire length
First of all, let's cut off as many wires as the diameter of our connection requires. We don’t need measuring instruments, just wrap the edge of the wire around the pipe and estimate the ends for twisting by eye, usually 50-60 millimeters is enough. Then fold the wire in half and use pliers to bite off the excess. We bring the ends together so that they are on the same level.
Step 2: Correct clamp arrangement
Now that you have a wire bent in half in your hands, you need to make the correct “eye” at the bend, and the diameter of the “ear” should coincide with the screwdriver, which should fit freely into it. To maintain this size, just straighten the ends, insert a screwdriver between them and bring them together again. Of course, a Phillips screwdriver is best suited for such purposes; it is even along its entire length and does not have an extension, unlike a flat one. Next, you need to bend the resulting “ear” to the side, relative to the length of the wire, it will serve as a lock.
Step 3: Detailed installation of a homemade clamp
You’ve just made a wire clamp with your own hands, it’s okay if it looks unsightly, the main thing is that it performs its functions efficiently. All that remains is to install it in its place of honor and twist it tightly. To do this, bend it around the pipe, always in the form in which it is, namely twice, and cross the ends together. Then we insert a screwdriver into the “ear”, hook the other end and turn it clockwise several times until a tight connection appears. Remember that when clamping you should not be too zealous, you should feel when to stop so that the wire does not break. If the ends of the newly installed clamp are too long, we recommend cutting them off with wire cutters.
It is possible that the first time you will not be able to install a wire clamp made by yourself, perhaps you will not get the twist, or you will overtighten it, but do not despair, repeat the procedure for making the fastener again. We are confident that after several attempts you will get a high-quality and tight connection, and this simple technology will always help you out in difficult times. Patience and a little effort! But still, for the future, keep several clamps of different diameters in your household, they will definitely come in handy!
Procedure for replacing outer CV joint
It is much more convenient to work with the drive (half shaft) when it is removed and secured on a workbench in a vice. But you don’t have to perform unnecessary operations to dismantle and drain the oil from the gearbox by removing the outer grenade directly under the car, working from below or in the wing arch.
Without removing the axle shaft
The complexity of the task lies in the fact that when knocking down the outer CV joint, it is important not to transfer unnecessary forces through the shaft to the inner one. It may sort itself out or pop out of the box
Therefore, you need to act carefully, preferably together with an assistant:
- the bolts or nuts of the wheel fastenings are loosened, as well as the nut that tightens the wheel bearing;
- the machine is jacked up from the desired side and secured on a reliable stand;
- the wheel is removed, the hub nut is unscrewed;
- further actions may differ depending on the car model, but in the most common case of MacPherson type suspension, it is necessary to disconnect the steering knuckle from the ball joint with the lever or braces, for which the ball joint pin is uncoupled or its body is unscrewed from the lever;
- the stand is moved to the side, while the shank of the outer CV joint comes out of the splined connection of the hub;
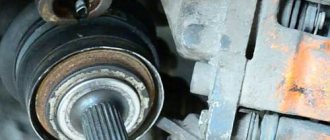
- The clamps and cover are removed from the grenade boot, excess lubricant is removed, which interferes with working with the inner race;
- the most crucial moment is to hold the shaft and apply a sharp blow with a heavy hammer through the spacer to the end of the inner race; if done correctly, the grenade will move along the splines or even separate from the drive;
- The boot, clamps, nut, CV joint assembly and retaining spring ring must be replaced, usually all this is included in the repair kit along with a tube of special lubricant; ordinary multi-purpose lubricant is not suitable here;
- first of all, a new boot is installed on the shaft;
- a new lubricated hinge is put on the shaft and moves with a sharp movement until the locking ring clicks; sometimes you have to apply a light blow to the end of the shank, protecting it from deformation with the old nut;
- The suspension is assembled in the reverse order, the hub nut is tightened according to the repair documentation for the specific machine.
It will be useful to also change the boot of the inner CV joint while the outer one is removed. The resource of the unit fundamentally depends on the condition of the covers.
With axle shaft removed
Removing the drive assembly is useful for greater ease of operation, especially in severe cases of a stuck retaining ring. Usually, this will require draining the oil or part of it from the gearbox, not forgetting to fill it back in, or even better, combine the procedure with an oil change.
The drive in the box is held by a similar retaining spring ring of circular cross-section, which is compressed after a sharp blow to the outer race of the hinge through a spacer.
Sometimes it is possible to press out the drive with a pry bar. Removing the hinges from the shaft is carried out in a vice similar to the procedure already described.
Do not try to pull the axle shaft by the shaft. This will end with self-disassembly of the internal hinge; the thrust ring present there will not withstand it.
How to tighten a clamp on a CV joint - mechanical method
Some cars from Europe have switched to using clamps made in the form of clamps. The clamps are simple and durable. They are usually installed using pliers, but craftsmen also make do with ordinary pliers.
Before installing the clamp, you need to select the diameter. After this, the clamps are installed on the CV joint boot. It is important to avoid distortions. Installation is best done using crimping pliers. If they are not available, we use pliers. The work is not difficult; upon completion, you need to check the quality of the clamp. The main advantage of this option is that you do not need to use special tools. If you use regular pliers when installing the device, the quality of the clamp will not suffer.
A screw type device can be used. It is clamped with a screwdriver. This type of clamp is the easiest to install, but it has its drawbacks:
- The “grenade” (slang for a hinge) is subject to vibration, which can cause the bolt to come loose. Therefore, you need to tighten the device as much as possible.
- A protruding lock looks unsightly. In addition, when driving, it may hit something.
- Such clamps are often of poor quality.
Drive – install clamps on the rear CV joint boot
I decided to write a short article about the clamps that secure the CV joint boots in place. Since the ATV is used in mud, it is very important to monitor the condition of the anthers themselves, and of course, to ensure that they are securely fixed and prevent swamp-clay slurry from getting into the assembly.
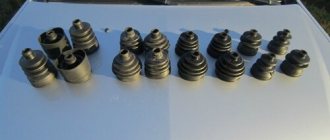
I came across three suitable clamps, two of them came with anthers, the third I just bought in a store for comparison. And of course, each clamp has its own tool for work.
The most convenient and reliable clamp is the standard one. Firstly, it fastens as tightly as possible, and secondly, it is reusable, and if it is not specially broken in some way, it can withstand many removals and installations.
To remove or put on a standard fastening collar, you do not need any special tools, you only need adjustable pliers.
The clamp has two special protrusions, and it is these that need to be squeezed with pliers until the clamp is completely fastened (or unfastened). I’ll note right away that pliers are not suitable, since the force required is significant.
I even work with pliers, pressing on the very ends of their handles, otherwise the lever force is simply not enough. And of course, their lips must be sharp.
This is what a fastened standard clamp looks like, both of its locks are fixed. In general, take care of the standard clamps - they are the best.
If you buy a non-standard boot (for example, Maruichi 1-56), then a band clamp may be included in the kit. This clamp is tightened with pliers. You need to stretch it out as much as possible and then bend the tip.
The clamp is fastened. The excess part of the tape needs to be cut off. Unfortunately, this type of clamp is difficult to reuse. And you won’t be able to tighten it as tightly as the standard one.
Well, if you don’t have a single special clamp at all, and you need to put the boot on something, then you can buy a worm clamp (for the wide side of the boot - size 60-80). It is tightened with a screwdriver or a socket wrench with a 7mm head.
It can be tightened very well, which is a plus. But such a clamp has two disadvantages. Firstly, it is slightly wider than the groove in the boot (this applies to the large clamp).
- Secondly, a large worm-type clamp is absolutely not suitable for use on an external CV joint, since its screw mechanism will rest against the knuckle element.
It would seem that it would be more difficult: install a clamp on the boot, or, for example, rebuild the gearbox? I don’t know, maybe I did something wrong, but it seemed to me that I had more problems with the clamps than with other, more complex work.
No clamps were included with the boot. In addition, I needed another clamp - for that CV joint that disassembled itself when removing the gearbox. I had to drive around and look for clamps. The tape ones available in all stores did not suit me.
Somehow I don’t believe that a simple smooth strip of metal, even if properly tightened and secured, will hold the boot.
The original clamps came with teeth and slots for them, and in all stores with slots there were only screw-tight clamps.
Alternatives
There is an opinion among car enthusiasts that standard CV joint clamps are unreliable. We will not find out the reasons for such notoriety; there can be many of them: from violation of production technology and savings on quality raw materials to incorrect installation. Let's consider which alternatives to standard clamps have become the most popular when securing CV joint boots.
The first and most obvious substitute is a screw clamp. The one that everyone is used to seeing on hoses. This element is tightened by screwing in the bolt. It looks like this:
In principle, this element should provide a sufficiently strong fixation and prevent dust or water from getting into the pad.
The second most popular substitute was plastic clamps (ties). According to reviews from car owners, clamps made of good plastic last a really long time. As for fixation, it is definitely not inferior to standard CV joint clamps. The problem here is to find a good plastic tie.
Worm Clamps:
These clamps have a special screw with a worm thread. The rotation of such a screw leads to tightening of the tape. The tape contains through or non-through, pressed, notches at a certain equal distance. The type of notch determines the strength of the clamp. Thus, clamps with through notches or pressed inwards are less durable, and when tightened they can damage the rubber of the hose. The most durable and effective worm-drive clamps are those with a smooth inner surface of the belt and pressed outward notches. The screw head is specially made with slots for a slotted and (or) Phillips screwdriver, which allows it to be used even in the most difficult to reach places. Worm gears are produced in accordance with GOST 28191 and DIN 3017.
An important nuance: when choosing a worm-drive clamp, pay attention that the lower band of the clamp is welded to the screw mechanism. Clamps with unwelded tape, if handled carelessly, may unexpectedly open up.
These clamps are made from:
- galvanized steel – used at low humidity.
- stainless steel – suitable for use in aggressive environmental conditions, high humidity (even under water).
Worm-worm clamps with notches pressed outwards.
Tool for installing band clamps
To make a tool for clamping CV joint clamps, the author uses a 14x14 mm square profile. The length of the workpiece is 75 mm.
First of all, we cut off the upper part of the aluminum profile so that the result is a U-shaped part. One of the sides of the workpiece will need to be cut at an angle.
In principle, you don’t have to bother so much and buy a ready-made U-shaped profile.
Next, we retreat 25 mm from the back of the U-shaped part and drill a hole with a diameter of 4 mm.
The author makes the next part of the homemade clamp from a cotter pin and a furniture tie for door handles.
We insert the resulting part into the hole in the profile. The homemade clamp for clamps is ready. Now you can try the device in action.
How to tighten a clamp on a CV joint boot
We put the factory band clamp on the boot, making sure that there are no distortions.
We insert the end of the metal tape into the clamp, as shown in the photo below. The master cuts off the excess part using scissors.
After this, turn the knob on the clamp and tighten the tape. When the tape is tightened, we wrap it.
We cut off the excess end of the metal strip with scissors, and bend the remaining “stub” with a finger or a hammer. The installation of the clamp on the CV joint boot has been successfully completed.
You can view the step-by-step instructions for making a homemade clamp for tightening CV joint boots in the video below. The idea was shared by the author George Kosilov.
Subaru B4 NOBLE BACHER › Logbook › photo report on replacing CV joint boots (front axle)
Hello everyone! I don’t know if this report will be useful to anyone:
It was necessary to change the internal anthers as they were already on the verge! everything is in very deep cracks... the outer ones would probably last for a long time, but I think I’ll go in there and change everything at once))) and it wouldn’t hurt to update the lubricant...
I bought anthers for the front axle: External original ones for 430 rubles per piece (they are plastic, in general they will definitely be more reliable) and a pair of clamps from 9ki for 35 rubles for a large + small set))) Internal Maruichi companies for 300 rubles per piece I bought in a Subarovsk store (via autodoc is even cheaper) - Japanese, of very good quality and with tape clamps included (in general, there is no point in splurging on the original. I heard that they are suitable from Niva, but I didn’t bother with collective farming like that - why bother going there again))))) Lubricant for CV joints-100r pcs (3 pcs) I bought in a Subarovsk store... A snap ring puller is a cheap thing and will save you a lot of time and nerves! 60 head for scrap for 32 from the Zil-rub store 120 I think
We unscrew the hub nut... - the assistant presses the brake and rejoices - he is sitting behind the wheel of a Subaru))) (it didn’t work with a simple wrench with a head - the wrench bent like a rubber one - maybe it’s a threshing floor! Here a 32-piece head for scrap from the Zil store came in handy)) )) 10 minutes of angle grinder work and it fits perfectly into the hub)))
head from the Zil store
unscrew the hub nut
Then we go to the salon and press the magic button on the automatic transmission to unlock and set it to N and turn the shaft until the hole for the pin on the inner grenade is at the top, set it to P
jack up the brake disc and unscrew the link...
We unscrew the bolt from the ball and turn the jack higher under the brake disc until the ball comes out of the steering knuckle
Using a screwdriver, we knock out the pin from the internal grenade; on the right side, for convenience, we remove the air duct; on the left, it is more convenient to do this from below...
We knock out the ball and the shaft is free!
make marks on the shaft and on the grenade (just scratch)
Then we move the boot down and pry it up with a screwdriver and pull out the retaining ring... and now the most interesting thing is to carefully pull out all the giblets to freedom))) so that the loose rings do not fall off and everything remains in their place... - this must be done very carefully!
using a brush and gasoline, carefully wash one of the needle bearings, make marks using women's nail polish))) let it dry a little... (it will not be washed off with gasoline during further washing with gasoline), remove the ring and move on to the next of the three bearings...
Wash thoroughly and scratch the marks on the shaft and tripoid - what a word))) (in the photo below you can see the mark on the shaft) and using a snap ring remover, remove the stopper...
remove both boots from the shaft and wash everything thoroughly...
wash the offal until the cat's eggs shine)))
also to the shine of the cat's eggs))))
We put the boot on the outer grenade - after filling the CV joint with new grease and slightly lubricating the boot itself inside... and it is very important that the inside of the boot where it will sit on the CV joint is dry and WITHOUT lubrication, just like the CV joint where the boot will sit
We crimp miracle VAZ clamps with pliers for 35 rubles))) (yes, it’s important that the clamps are like in the picture! with the same principle as the original... the tape ones don’t scan here - they’ll fly off in one fell swoop!), when everything is crimped, we check that everything is tight - sharply from side to side we pull the CV joint to one side, if you can hear the air coming in and out, then we push harder, clamping the clamp, aka VAZ))))
we crimp the VAZ clamp
We put the inner boot on the shaft, lubricating it inside. We collect the giblets according to the marks, lubricating them well. We fill the inner race of the CV joint with lubricant; don’t hesitate to put your finger in there and smear it everywhere))) We put the inner race on the shaft along the scratched mark))), lock it with a ring and move it back and forth so that the lubricant is evenly distributed...
We clean the grease from the inside of the boot, where it will sit on the holder and the holder where the boot will sit. We put on a large ribbon clamp, and through the seat of the boot on the shaft, use a screwdriver to tighten or release the required amount of air... put on the clamp and rejoice!
we put everything as it was filmed))))
After changing the anthers, I replaced them and the steering wheel began to turn much easier! new lubricant solves it)))
The detailed report is ready))) thank you if you read this to the end... I think someone will find it useful someday!
Issue price: 2,000 ₽
almost four years ago Mileage 169,000 km Tags: self-repair
Clamp fastener
Some European-made cars have switched to using clamp clamps, as they combine reliability and simplicity. To install them, special pliers for CV joint clamps are used.
Placing the clamp on the CV joint occurs in the following order:
- The required diameter is selected;
- The clamp is located on the boot. It should be installed without distortions;
- To perform crimping, clamp pliers are used. If they are unavailable, you can use pliers of a suitable size;
- Upon completion of work, you should check the reliability of fixation of the clamp.
The main advantage of clamping fasteners is that there is no need to purchase expensive special tools. Carrying out the work with conventional pliers will ensure high reliability and long service life.
Why attach a clamp to a CV joint?
The CV joint is a reliable mechanism that can travel more than 150,000 km without problems, but over time it becomes unusable. An unpleasant crunch indicates problems with the part. Not only used cars, but also brand new cars can crunch. The ability of a hinge to serve faithfully for a long time depends on 2 conditions:
- complete lubrication;
- protection from negative environmental influences (pollution or water ingress).
The hinge needs to be lubricated - and the more often the better. And it is protected with the help of a boot, which is put on the shaft and reliably covers the elements of the assembly. The boot is secured with clamps. When they weaken, an unpleasant sound is heard. Therefore, from time to time the driver is faced with such a task as tightening the CV joint boot clamps.
There are several ways to attach a CV joint:
- belt mechanism;
- clamping fastener;
- U-shaped mounting option.
CV joint clamp. What is this?
A CV joint boot clamp is a special fixing element , usually made of metal; it is installed on the device to prevent depressurization, which can subsequently lead to leakage of lubricant.
The CV joint clamp solves the problem of sealing the space between the rubber base of the part and the mounting location.
The boot is a rubber part that is attached to the CV joint to protect it from dirt, dust and water. To attach the CV joint boot you will need a special clamp, as well as a fixing device.
A clamp, or hand-held tool for installing clamps, is used when working with vehicle drive elements. Some car enthusiasts prefer to do without this important tool, but its presence contributes to high-quality and reliable fastening.
Power clamps.
These are high-strength clamps designed for use in aggressive environmental conditions: strong vibration, temperature and pressure changes, high humidity. They are resistant to corrosion and strong mechanical stress. Produced in accordance with GOST 28191 and DIN 3017.
When using them, the tightening pressure is evenly distributed throughout the clamp, which guarantees the strength of the fixation. And the high breaking moment makes it possible to resist strong mechanical loads.
Produced in different diameters (from 19 to 140 mm) from:
- of stainless steel
- galvanized steel
- brass
Power single-bolt clamps for the intake system.
How to inspect the case
This can be done without removing the wheel: just turn it all the way in any direction and shine a flashlight on the part for better visibility. Also feel it with your hands: you will feel the tears immediately. The best inspection option is to remove the wheel (for example, when you are repairing a tube, a tire at a tire shop, or doing a seasonal tire change). Everything will be more noticeable here. Also, for one reason or another, you probably have to put the car in the inspection hole: for example, when changing the oil, adjusting the hand brake, etc. Here, also take the opportunity and inspect the CV joint covers: this can be done more carefully than in previous cases.
You can tell that the cover needs to be replaced by the appearance of thick grease on the suspension parts and on it itself.
Instructions for replacing the inner CV joint boot
Replacing the boot of the inner CV joint involves completely dismantling the drive shaft. First you need to remove the outer CV joint (the whole process was described above). Next, you need to drain the oil from the box and unscrew the fastening of the internal hinge, then insert a flat device between the CV joint and the gearbox - a mounting bracket, which should come out of its socket. Then the following steps are performed:
- Removing the retaining ring;
- Dismantling the internal hinge and balls in the separator;
- Removing the clip and its stopper;
- Washing components in gasoline;
- Installing a new cover with complete assembly in the reverse order;
- Installing the drive and pouring oil into the box.
This method can also be used in cases where it is impossible to shoot down a grenade. It is enough to use a vice and get the desired result.
Alternative options
You can also secure the CV joint boot clamp using a screw clamp. You can use a wrench or a screwdriver to tighten it. It practically does not require any skills to fix it, but it has a number of disadvantages that do not allow it to occupy the niche of clamps for CV joints:
- the grenade is susceptible to parasitic vibrations, which causes the bolt to unwind, especially if the clamp is installed without sufficient tightening;
- the design feature in the form of a protruding lock is capable of clinging during operation;
- frequent cases of loose fixation due to poor quality of clamps.
A temporary alternative placed on the CV joint can be a screw clamp with a key. Its installation can be done on the road to ensure that the lubricant is not contaminated when traveling to a service station.
When choosing between a band clamp and a clamp clamp, you should be guided by your preferences and the manufacturer’s recommendations. They both can last a long time if installed correctly. Care and accuracy when installing any of the fasteners will allow the lubricant to remain clean for a long time.
CV joint boot clamp, pliers, pliers and other devices and tools for installation, crimping and tightening of tape and plastic types
If you have any questions, leave them in the comments below the article. We or our visitors will be happy to answer them
m_homutov
The article was published on the page https://axle.com.ua/articles/stati-o-pylnikah/homut-pylnika/Very often we hear such questions and discussions from motorists: “Is it possible to use a plastic one instead of a metal clamp?”, “Which is the best clamp for a CV joint?”, “Is it possible to use wire?”..., “Is it possible to install screw clamps on the boots of CV joints?” Let's discuss this issue in order, according to the order of questions received.
Is it possible to use a plastic one instead of a metal clamp?
Firstly: in practice, we have not seen manufacturers of original or non-original spare parts complete boots, CV joints or drive assemblies with plastic clamps.
Secondly: plastic clamps can be of different quality (fragile, very soft, unreliable lock, etc.), but metal is metal! And most importantly, the clamps used to fix the CV joint boot must not only hold the boot on the axle shaft and prevent displacement, but also ensure tightness. If the plastic more or less copes with the “retention”, then there may be questions with the “tightness”.
Is it possible with wire?
Regarding the wire... It's like reinventing the wheel... You need to select the appropriate wire in diameter. So that it is not too soft - does not stretch too much, not too “steely”, otherwise, when pulled together, it will cut through the boot. Also, it is necessary to have “appropriate skill.”
Is it possible to install screw clamps on CV joint boots?
When using screw (worm) clamps, we are talking mainly about two points: whether the “screw” will cling to something, and whether vibration from imbalance will appear at high speeds.
The answer to all these questions is the same: if there are special “CV joint boot clamps” designed for attaching and fixing boots, then they should be used!
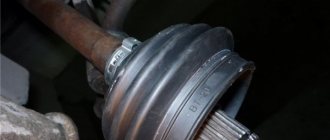
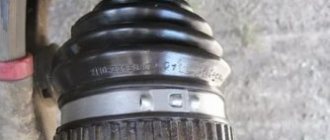
There are two types of CV boot clamps. This is what they look like.
photo 1.
Photo 1 shows a clamp with a so-called U-shaped lock. This clamp is easily installed on the boot and pressed either with special crimping pliers or ordinary pliers. Reliability guaranteed.
Photo 2 shows a “tape-type” clamp with its installation. For beginners, the question usually arises: “how to tighten it, and what degree of tightening should be created?” There are several possible answers to this question.
photo 2.
Professional (photo 2): tightening is carried out using a special device. With its help, the necessary tension is created on the CV joint boot band clamp, followed by cutting off the excess clamp. The fixation reliability is high.
photo 3.
Homemade-professional (photo 3): also, a special device made from scrap materials. The principle of operation is the same. The tightening quality is excellent.
photo 4.
Amateurish (photo 4): stretch, bend, fix. With this method, it is almost impossible to properly tighten the CV joint boot clamp.
But nevertheless, there are quite a lot of service station technicians who like to work with “tape” clamps.
Both of these types of clamps are made from properly selected materials and provide the necessary rigidity and the possibility of plastic deformation when tightened.
Both U-shaped and band clamps are universal. Having only two standard sizes, we can use them to fix boots with an internal diameter from 18 mm to 110 mm. For diameters less than 20 mm and more than 110 mm, it is still advisable to use “tape” clamps.
Notes World of Clamps LLC We do not recommend the U-shaped clamp with perforation. It is also not recommended by anther and car manufacturers. The fact is that the design of this clamp provides hooks for fixation directed downwards towards the rubber boot. Damage to the boot is very likely. The ideal solution for a boot made of synthetic rubber and thermoplastic elastomer are U-shaped clamps with 3-4 holes, while the hook of the clamp should bend upward, in the direction opposite to the rubber pipe. These clamps are compressed by pliers and cannot be tightened. For thermoplastic elastomer boots, thicker and wider clamps are used, usually up to 10 mm wide and 1 mm thick. For natural rubber boots, tape clamps with a buckle are better suited. The fact is that these clamps are much more elastic than synthetic rubber boots and cannot be damaged even with very strong tightening.
How to tighten the boot clamp of a U-shaped CV joint
Now covers have begun to be made from a harder material than ordinary rubber. They can be difficult to tighten using ordinary band clamps. Therefore, many car enthusiasts prefer modernized devices. There are different options, among the inexpensive ones are fasteners with U-shaped ears. They are tightened with pliers, most often of the Licota ATC-2190 brand.
These pliers are quite expensive - up to 20 euros, but there are cheaper options. It is better to use pliers with a 1/2 square cutout. The handles on them can be extended using knobs. The principle of operation of the device is simple: it compresses the U-shaped tubercle on the clamp, and the fastener is tightened well. Tools with long handles are especially effective. They even compress well covers made of dense material.
Installing a clamp allows you to avoid leakage of the embedded lubricant. During operation, the CV joint clamp may become loose and debris trapped under the boot will soon cause a crunch and the need to repair the joint, so at the first release of lubricant, measures should be taken to prevent depressurization.
Sources
- https://TeamsPro.ru/transmissiya/kak-zatyanut-homut-na-pylnik-shrusa.html
- https://rip-up.ru/transmissiya/prisposoblenie-dlya-zatyazhki-homutov-shrusa.html
- https://koreec73.ru/korobka/kak-snyat-homut-s-pylnika-shrusa.html
- https://FokSevmash.ru/dvigatel/kak-zatyanut-lentochnyj-homut.html
- https://sdelairukami.ru/kak-sdelat-homutatel-3-raznyh-varianta-ispolneniya/