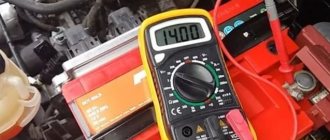
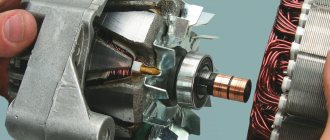
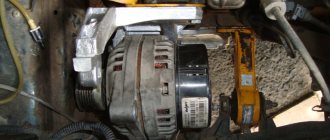
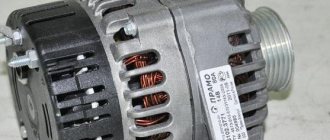
As you know, additional equipment is often installed on a car, which draws additional voltage from the on-board network. Thus, the voltage indicator on a VAZ-2114 can drop to a critical level of 11 volts . If you also install additional air conditioning or heated seats, this may result in the starter not having enough power to start the engine. How to fix the problem? Make sure that the voltage in the on-board network increases.
Video about increasing the voltage in the on-board network on VAZ cars:
The video will tell you how to increase the voltage of the generator and on-board network with your own hands, and will also tell you about some of the nuances and subtleties of the process
We increase the voltage - all options for solving the problem
Voltage in the on-board network after modification
So, many motorists may decide that the way out of this situation is to install a high-power generator, but at the same time they will have to replace the battery with a more capacitive one. This is done in order not to “kill” the battery that is installed on the car, since a voltage overload will lead to the destruction of the internal cells. This option is not suitable because it is too expensive.
The second option is to install an additional diode from another diode bridge or marked KD202V . This is much cheaper than changing the generator and battery, but you will have to tinker a little. To begin with, it is recommended to study automobile electrical circuits and the operation of the generator, as well as the charging circuit.
Installing the KD202V diode into the generator
When everything is ready, we proceed directly to installing the diode in the generator to increase the voltage in the on-board network. Let's consider the sequence of actions:
- Remove the back cover of the generator.
Remove the back cover from the generator
Wires and diode to increase voltage
Installing heat shrink for male and female wires
Installed heat shrink for the soldered part
We install a voltage regulator with a diode in the generator
We put the back cover on the generator and take out the wires
As the measurements showed, after such an improvement, the voltage in the loaded network was 12.2-12.5 volts.
Electrical diagrams and indicators
To increase the voltage even more, at least to 14 volts, it is necessary to install a diode in circuit D, the voltage regulator. Any diode with a breakdown voltage of 20V and a current of at least 5A is suitable. The voltage drop is preferably no more than 0.6-0.7V. The 2D219B diode is excellent.
| Urev(V) | Ipr(A) | Upr(V) | Irev(mA) | Frame | |
| 2D219A | 15 | 10 | 0.6 (10A) | 20 (15V) | KD-11 |
| 2D219B | 20 | 10 | 0.6 (10A) | 20 (20V) | KD-11 |
| 2D219V | 15 | 10 | 0.45 (10A) | 20 (15V) | KD-11 |
| 2D219G | 20 | 10 | 0.45 (10A) | 20 (20V) | KD-11 |
Let's look at the circuit diagrams of diodes:
Manufacturing and installation of a diode in a VAZ-2114 generator
Now that everything is ready, we install an additional diode, more powerful than the previous one. You will need half a meter of wire 2*0.75mm. We solder the ends to the female and male terminals No. 4. We dress them in cambric, or better yet, in heat shrink. By the way, the old one must be removed from the system. Let's take action:
- Now, solder the following circuit to the diode: mother to the cathode, folder to the anode.
Remove the back cover from the generator
Connect the wires going to the diode
Now, everything is ready for the final check and measurements.
What determines the shelf life of a battery?
Each manufacturer, after manufacturing a battery, sets a warranty period for its operation.
In addition to this parameter, there is an actual period that depends on many factors - timeliness of maintenance, compliance with operating rules, condition of electrical wiring and other points.
Due to the fact that battery maintenance conditions differ, the shelf life of the product also differs.
Car owners who use their car only in the warm season have the longest battery life. It's another matter when you need a car all year round, regardless of the outside temperature.
In such a situation, the battery life is reduced. This is also due to the fact that in the second case the driver can cover more kilometers.
The battery life is also affected by:
- Serviceability and correct operation of the generator and voltage regulator.
- Connecting additional equipment with a large rated current to the vehicle's electrical wiring.
- Operating mode. The batteries that last the least are those in taxis that travel a long distance throughout the year. In addition, such cars operate in frequent engine starting mode, which puts a load on the battery and generator. If the vehicle is actively used, the service life of the power source does not exceed 1.5 years.
Under normal operating conditions, when the car owner regularly checks the battery and carries out maintenance, the battery life is 4-5 years with a total mileage of 60-80 thousand kilometers during this period.
To avoid problems, it is advisable to periodically check the voltage of the generator and battery.
But the mentioned service life is not the highest, because with careful maintenance the battery can last up to eight years.
But you should know that sooner or later the battery will need to be replaced, because from the moment you start using it, the working plates gradually wear out. The more charge and discharge cycles a battery goes through, the faster it breaks down.
Practice shows that the key role is played by the generator, its serviceability and current voltage
That is why this aspect needs to be given key attention
conclusions
Increasing the voltage of the VAZ-2114 generator with your own hands is real and quite simple. At the same time, the cost amounted to 500 rubles . It is worth noting separately that if you do not have the necessary skills or abilities to work with automotive electronics, then you should contact a car service center, where everything will be done quickly and efficiently, and of course, at the expense of the car enthusiast.
Many motorists have encountered the concept of low voltage in the network. The culprit of the situation was the generator, which produced an insufficient amount of current. Is there any way to increase the voltage produced by the unit? How to increase the power of the generator without damaging the circuit and the overall system.
The best way to increase tension with your own hands
How to increase the voltage of the VAZ 2114 generator? There is one option that can be called the simplest. Its main disadvantage is its high cost. In particular, you will have to part with a large sum of money just to purchase a generator with increased power.
You will also have to purchase and replace the battery. It should be more capacitive. Otherwise, a voltage problem may occur. As a result, this will cause the complete destruction of the internal cells.
Additional Information. Despite the effectiveness of this method, it is very expensive, so it is unlikely to be suitable for most car owners.
Diode in the circuit
Installing a diode with a toggle switch is the easiest way to increase the voltage. There is no need to bother, look for a lot of information in books, etc. Everything is as accessible as possible, no special difficulties.
This option of increasing the voltage, despite its simplicity, gives the most reliable result. Ideally suited for domestic and VAZ car models.
The purpose of this method of increasing the voltage in the vehicle's on-board network is to deceive the regulator, which is located inside the generator. As you know, on old domestic car models (kopek, VAZ 2105, etc.) the voltage drop sometimes reaches critical values - sometimes it drops to 12.5 volts. The battery, of course, will not be charged at this voltage.
A voltage regulator is the same brushes, a tablet, a chocolate bar - there are many names, but it is the same element that is responsible for regulating the voltage in the generator. On our domestic cars, mostly older ones, the tablets are of poor quality. They do not regulate voltage well, and as mentioned above, sometimes the current value drops below the baseboard.
So, what you need to do is insert an additional diode into the circuit. By this we will achieve the following: by how much the voltage on the diode is reduced, the regulator will increase the total current in the circuit.
There are several ways to integrate a diode. One of the best - remotely. Take a simple toggle switch and install it somewhere convenient.
Obviously, the toggle switch should be routed through the wire to the generator. You can insert the diode into the slot in the generator bridge, in the place where the wiring runs from the excitation winding to the regulator. That is, we simply insert the diode into the wiring between the bridge and the regulator.
We connect a separate toggle switch to the diode through two wires, as shown in the photo below.
When the voltage in the on-board network is sufficient, for example, in the summer, the diode is simply installed and not used. If the current is low, just turn on the toggle switch by activating the diode. In this way, we deceive the regulator.
The following diodes can be used.
Their analogues, for example, imported ones, are also suitable. They are much more compact, made of plastic (body). Domestic - metal.
Using a diode, you can provide a voltage drop of 0.9 or 1.2 volts. Thus, if the drawdown reaches 13-13.6, then approximately 1 volt will be added by the regulator. This is normal for winter loads. The standard drawdown of the regulator should be up to 13.8 volts, not lower. At this value, the battery can still charge, but if the voltage is lower, it won’t.
Flashing process
At first they wanted to install the Euro 0 firmware, but then they found out what the difference is between Euro 2 and Euro 0 and the choice became obvious. The fact is that firmware Euro 0 completely disables engine regulation from the catalyst sensors, and the engine’s adaptation to changes in gasoline, wear, etc. is also lost. Euro 2 still has one working catalyst sensor and engine adaptation is not lost, while Euro 2 does not choke the engine as much as, say, Euro 3 (two DCs). By the way, the native firmware is adapted for Euro 3.
So, we decided on the firmware for chip tuning the car, but there was one small problem. The basic configuration did not include a loader or a module that would allow sewing M73 blocks. I had to buy it separately. After this, the ECU was flashed.
We flashed it directly in the car by connecting to the car outlet. Since a special program for flashing came with the equipment, we flashed it using it. The whole process took no more than 5 minutes. After the firmware, we turned off the equipment and went to test and see the results.
About regulators
Structurally, tablets that control the voltage in the generator are capable of increasing the current to 13.6 volts. It is known that there are two schemes for connecting the regulator: old and new.
The old circuit is a more reliable option, which does not increase the voltage too much, but also does not allow it to drop to critical values. But the new one - although it is completely copied from the old one, has many shortcomings.
Chronic undercharging of the battery is precisely the drawback of the new scheme. Starting the engine becomes problematic in the cold season. Owners have to install preheaters or come up with something else.
Poor quality regulators force the battery to absorb energy only in the summer, i.e., at above-zero temperatures. In winter, especially if you make short trips by car, the battery does not have time to warm up, at least to 0, and periodically discharges.
Experienced motorists recommend driving for at least 20-30 minutes in winter to restore the battery.
So how is the problem solved? Obviously, the best option is to increase the voltage in the on-board network, but how to do this? It is necessary to make the tablet “believe” that there is supposedly low voltage in the network. Thus, we will ensure that the gene produces the missing voltage.
Low voltage in the vehicle's on-board network can be caused by the presence of a large number of consumers. For example, if you use a powerful speaker system with a subwoofer and amplifier, voltage dips are inevitable.
Instead of a diode, you can also use special regulators that produce three voltage values, depending on the air temperature: 13.2, 13.9 and 14.5 volts. There are three modes: summer, spring/autumn and winter.
We recommend viewing the table, which shows data on the normal charge of the battery and the standard operation of the generator.
| Battery charge level | Charge the battery with a charger | Generator operation |
| 12.72 volts - 100% | If the EMF is less than 12.6 V | norm - from 13.6 V - to 14.4 V |
| 12.50 volts - 75% | Uload - less than 9 V (load fork) | less than 13.6 V – undercharge (bad) |
| 12.35 volts - 50% | Electrolyte density—less than 1.25 g/cm | more than 14.4 V – overcharge. (also bad) |
| 12.10 volts - 25% |
The effectiveness of the diode, which increases the voltage in the on-board network, is beyond doubt. Almost all experienced motorists and owners of domestic models do this. After this, the car will be easy to start not only in summer, but also in winter. High current – accurate charging.
Recommendations
Comments 22
Maybe I can take a look at the disassembly and weld fish soup from my own?
For what? this bolt into bolt, practically. minimum modifications
This bolt to bolt and $300. And a Mercedes ruble will become three rubles and a ruble for your ears.
I don’t argue that this option is cheaper and partly good, but when you install Merc’s at 250A, then we’ll talk more constructively. First, read how these generators differ from conventional automobile ones.
Well, what? What they give out like crazy, so what? It's very individual. For some it’s music, for others... what else besides music can eat so much?! The whole problem with Zafira and Astra is that there is a glitch when it drains the entire battery overnight. Where it costs 120 a/h, there is almost no such problem.
the fact that it gives almost 200a. If your battery is being drained, look for where it is leaking. Maybe go through the integral, which only means that the gene needs to be repaired. The leakage current does not depend on the generator power.
So I changed the integral and still the same. I'm wondering why the generator says 14V and 100amp? And so I think the sun sucks.
not everything is so simple, I say again that before you say that DC will light a cigarette, you should read what their design differences are.
Well, this is already too much. I think 150 would be enough.
For my tasks this is not enough, 300 would be normal. Simple arithmetic 250 * 14.7 (on-board voltage) = 3675 watts, the amplifier is 8 kilowatts, on a daily basis it consumes about 5 kilos in centimeters. So draw your own conclusion. This generator was installed not to replace the standard one for the sake of simple operation of the amplifier, but to enable the normal functioning of a very powerful speaker. Plus participation in various competitions
So stick an additional one in place of the air conditioner. And that's the end of it.
Then I won’t be able to get into classes)) there are too many nuances
Hello. and if there are two batteries, one under the hood for 70 amps, , , and the other in the luggage for 70 amps, it will be normal or something will catch fire
Hey, it's no big deal. At first I drove with a stock gene and two 90 batteries and everything was fine. What batteries will there be?
As you know, additional equipment is often installed on a car, which draws additional voltage from the on-board network. Thus, the voltage indicator on a VAZ-2114 can drop to a critical level of 11 volts . If you also install additional air conditioning or heated seats, this may result in the starter not having enough power to start the engine. How to fix the problem? Make sure that the voltage in the on-board network increases.
Read also: How to remove a tap from a cooler
Video about increasing the voltage in the on-board network on VAZ cars:
The video will tell you how to increase the voltage of the generator and on-board network with your own hands, and will also tell you about some of the nuances and subtleties of the process
Diode introduction
Observe polarity. There is no crime here, it’s just that if the polarity is not observed, charging will not happen. The diode must be designed for a current of at least 5 A. By the way, it will get very hot, so it is better to install it on a radiator. What should you consider when selecting the type of diode? Voltage drop on diodes: germanium - 0.3...0.7 V, silicon - 0.8...1.2 V. I.e. This is the voltage by which your on-board network will increase. Therefore, by selection we can achieve the “right” voltage in our network.”
Gasoline generator device
The principle of operation of a gasoline generator is the same as that of most any power plants, based on the conversion of mechanical energy into electrical energy. An external force rotates the generator armature, and an electrical voltage is induced in the stator windings. In the case of a gasoline generator, the armature rotates the gasoline engine.
So, what is included in a gasoline generator? Main parts:
- Gasoline engine (two- or four-stroke);
- Generator;
- Monitoring, protection and management circuit;
- Speed stabilization device;
- Fuel tank;
- Frame for attaching all components.
On the generator
In the second picture you can see how the diode is installed, but with such a length of wiring it is not very convenient - everything is tight. It is better to make the length of the wire about 2 cm from the diode - this way, in my opinion, it will be easier to insert into the RN connector of the generator. As far as I remember, I have a K223 diode, i.e. it's silicon. Raises the voltage by about 1.3 V.
I’ll correct myself - I checked using reference data on the Internet what the K223 diode is - I must say that I was very mistaken in indicating exactly that name. In fact, there are diodes KD223 and D223, but their housings are completely different.
However, in the photos I provided, most likely diodes D214 or D242 are wrapped in electrical tape (there may be different letters after the numbers), here is the case (M6 thread):
Gas tank
As a gas tank, you can use a metal sealed container with a filler neck with a lid and a fitting for supplying fuel to the carburetor. It is best to use the fuel tank from any vehicle. The main thing is its good condition and suitable dimensions.
Plastic containers must not be used:
- Plastic becomes brittle in the cold;
- Some types of plastic are gradually broken down by gasoline;
- Plastics tend to become electrified and accumulate static electricity, which can cause the fuel to ignite.
Assembly of the structure and adjustment
The gasoline generator is assembled on a suitable platform. During assembly, the main thing is to ensure strict parallelism and location of the generator and engine pulleys in the same plane. Otherwise, the belt may slip off and cause increased wear. The distance between the pulleys is chosen so that the belt is tensioned and does not slip during operation.
Important! Don't overdo the tension. This will cause a decrease in efficiency and wear on the belt and pulleys, and most importantly, the bearings of the engine and generator shafts.
Having another pulley, even if it is of small diameter, you can make a belt tensioning device using a spring of the required elastic force.
The gas tank is placed in the highest part of the structure so that gasoline can flow by gravity into the carburetor. It is important to prevent the tank from heating up with the heat of a running engine. If necessary, provide thermal insulation using asbestos pads.
Important! Asbestos dust is not toxic, but it can be harmful to the lungs, so you need to wear a respirator when working with asbestos.
Don't forget the fuel filter.
The assembled structure should ensure ease of starting the engine and access to all elements: carburetor, spark plugs, voltage regulator.
The adjustment consists of setting the required voltage using the generator's standard regulator. Some generators, for example, from Samara and newer cars, have a built-in regulator that does not allow adjustment.
If the voltage is below the permissible level, the uninterruptible power supply will not start, giving a signal that the battery is severely discharged. A high value may cause damage to circuit elements.
As you can see, assembling a home gas generator is quite feasible. A self-assembled gas generator can work no worse than a factory one, but you should know that this can only be done if you have at least some of the components. Manufacturing a power plant from scratch in the complete absence of parts will lead to costs exceeding the purchase of a finished structure.
All structural elements must be secured to a rigid base. For the base, the easiest way is to make a frame from steel corners 50x50 mm. The frame must have mountings for the engine, generator, converter and gas tank.
To reduce vibrations, all elements must be secured through shock-absorbing pads made of thick rubber.


