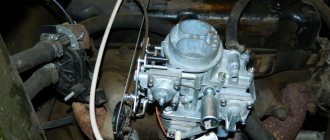
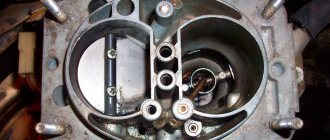
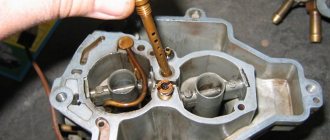
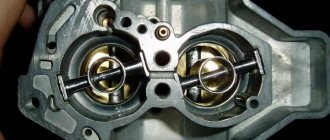
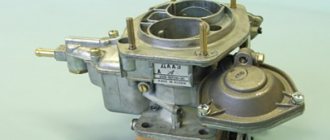
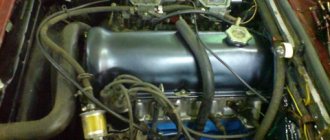
Most of the VAZ-2107 cars that came off the production line were equipped with a carburetor power system, although injection versions were produced for export. “Sevens” with an injector appeared on the domestic market only in the last years of production. Therefore, most VAZ-2107s have a carburetor power system, which is already outdated.
But outdated does not mean bad; according to some criteria, the carburetor “bypasses” the injector. Positive qualities include a minimal amount of electronics, which affects the reliability of the power system, high maintainability, and unpretentiousness to the quality of gasoline.
But in order to maintain the VAZ-2107 power system in working order, some of its components require periodic maintenance. This primarily concerns the carburetor. The VAZ-2107 uses an Ozone carburetor, unlike, for example, the Solex carburetor of the VAZ-2109. The Ozone carburetor is distinguished by a relatively simple design and unpretentiousness, which allows you to carry out maintenance of the unit yourself, without resorting to the services of a service station. But we note that on the VAZ-2107 of various years of production, which were equipped with a carburetor power system, modifications of “Ozone” were used, although the difference between them is insignificant and it comes down to the use of auxiliary components that are different in design, but the general design is the same.
Types of carburetors
The technology for flushing and adjustment after repair depends on the design. Therefore, the first thing you need to do is determine which model of device is installed on your car.
Throughout the history of the existence and production of the VAZ 2106 and VAZ 2107, 3 types of carburetors were used:
Good to know: Regardless of the model, the carburetors used on the VAZ 2106 are two-chamber and consist of 3 main parts: the device cover (protects the fuel fittings from dirt), the housing (it contains chambers, diffusers, from which the mixture is transferred to the engine), lower part (the float chamber and throttle valves are located).
It is the small parts of the carburetor that play a very important role. Thanks to them, fuel enters the cylinders in certain proportions and is correctly mixed with air to form a high-quality fuel mixture.
But during operation, due to contamination with small particles or dirt, especially with regard to the accelerator pump and jets, the operating modes of the carburetor are disrupted, which leads to malfunctions and failures when pressing the gas or “sneezing” of the carburetor. Flushing consists of removing dirt from all channels and jets, thereby ensuring their stable operation.
Do-it-yourself carburetor cleaning
Most new gasoline cars are equipped with fuel injection systems. However, on our roads there are a sufficient number of cars with carburetor engines. They often have weaker performance characteristics, but remain popular due to their high self-repairability.
Most systems in carburetor cars can be put in order in a garage with a minimum set of auxiliary tools. The list of available operations also includes carburetor cleaning.
- 1 Why do this
- 2 Preparatory activities
- 3 Cleaning
- 4 Conclusion
How is a carburetor repaired and flushed?
Many problems can be eliminated by flushing the carburetor, but for it to be effective, the unit must be removed from the car. After which you will need to disassemble it to the required level so that you can gain access to absolutely all elements of the mechanism.
Parts of the carburetor body 2107-1107010 in the diagram: 1 - rod of the pneumatic drive of the second throttle valve; 2 — pneumatic drive housing; 3 - diaphragm; 4 — pneumatic drive cover; 5 — fuel jet of the transition system of the second chamber; 6 — fuel nozzle body; 7 — small diffuser of the second chamber; 8 — accelerator pump nozzle; 9 — screw valve of the accelerator pump; 10 — main air jet of the second chamber; 11 — emulsion tube of the second chamber; 12 — main air jet of the first chamber; 13 — emulsion tube of the first chamber; 14 — main fuel jet of the second chamber; 15 — main fuel jet of the first chamber; 16 — accelerator pump adjusting screw; 17 — fuel jet of the idle system; 18 — fuel nozzle body; 19 — return spring of the accelerator pump; 20 — accelerator pump diaphragm; 21 — accelerator pump cover; 22 — small diffuser of the first chamber; 23 — lever return spring; 24 — three-arm air damper control lever; 25 — connection rod with the throttle valve; 26 — throttle valve return spring bracket
Repair consists of the following steps:
- Dismantling the device.
- Flushing, which includes cleaning and purging of carbon deposits and adhering dirt.
- Replacement of faulty parts.
Important: You need to remove the carburetor if you are 100% sure that the problem is in the carburetor, because the problem in other components of the car’s fuel system is also possible.
Where does carburetor repair on a VAZ 2106 car begin?
Do-it-yourself repair of a VAZ 2106 carburetor begins with its removal. To do this, you will need to remove the air filter, which will still have to be replaced with a new one, and dismantle its housing.
It is recommended to first seal the openings in the chambers with rags to prevent small objects from getting into them. After this, the hose going to the brake vacuum is removed from the pneumatic valve, the choke installation cable is unscrewed and the rod is removed from the gas pedal lever that controls the throttle valve.
What's the result?
Taking into account all of the above, it becomes clear that even with the relative simplicity of the design, the carburetor still needs timely additional care. To maintain the cleanliness and performance of the device, some experts recommend cleaning and adjusting the carburetor at least twice a year. It is recommended to do this in the off-season, that is, before the onset of severe frost or heat. This measure allows you to maintain fuel consumption at an optimal level.
If noticeable dips are noted when pressing the gas pedal, then, in parallel with cleaning the carburetor itself, remove the carburetor cover, after which you need to pay attention to the accelerator pump nozzle. This element should be thoroughly cleaned using a carbicleaner; additionally, you can blow it with air under pressure from a compressor.
In other situations, it is better to disassemble and clean the dosing device at the first opportunity. This statement is also true if the carburetor is very dirty for some reason or has never been cleaned before.
Various types of available carburetor cleaning products and compositions, advantages and disadvantages. How to properly clean a carburetor, which cleaner is better.
What does the color of carbon deposits on a spark plug indicate, and why does carbon deposits of one color or another form? How to clean spark plugs from carbon deposits with your own hands, tips.
Why do you need to clean the throttle valve periodically? How to clean the throttle valve, training and adaptation of the throttle valve after cleaning, useful tips.
Refinement and modernization of the carburetor. The main disadvantages of the carburetor injection system and how to eliminate them, settings. Intake manifold tuning.
The main reasons that lead to a lean mixture. A lean mixture on carburetor and injection internal combustion engines, as well as on engines with gas equipment. Diagnostics, repair.
Why is it necessary to clean the fuel pump mesh? When is it better to change and how to clean the fuel pump mesh? How to properly remove the fuel pump, subtleties and nuances.
How to clean a VAZ 2106 carburetor without removing it
The first cleaning method is to do it without disassembling the mechanism. The fact is that not every car enthusiast is able to disassemble and reassemble the unit. A special technique was developed for its washing. For this purpose, a special aerosol product in cans is used. Common cleaners include “ABRO”, “Mannol”, here I made an overview table of carburetor cleaners, perhaps it will be useful to you when choosing.
To clean, you will need to perform the following steps sequentially:
- Warm up the engine and turn it off.
- Remove the filter and its housing.
- To effectively flush, remove the solenoid valve by unscrewing it from the housing.
- Special nozzles are sold with the cans, which effectively distribute a powerful stream of product. All visible parts are treated with the substance.
- Afterwards, process the external parts of the device.
- Next, you need to wait from 5 to 8 minutes, which depends on the manufacturer. During this time, the product dissolves carbon deposits, after which it is easily washed out with gasoline and the dirt burns in the cylinders along with the fuel.
Cleaning a VAZ 2106 carburetor is usually accompanied by replacing the gasket, which is located between the carburetor body and the manifold. The manufacturer produced several types of gaskets made of paronite, metal and heat-resistant special cardboard. If you are not sure about modifying your carburetor, then take it to the market with a real material example.
To replace the gasket, the seating area should be thoroughly cleaned of dirt and wiped with a rag. Lay the new one in the same way as the old one was laid, install the mechanism on it and tighten the fastening nuts.
How to clean the carburetor on a VAZ 2106 using a solvent
One of the most accessible ways to flush the carburetor on a VAZ 2106 is to flush the carburetor with a solvent. The washing process is clearly shown in this video:
How to quickly blow out a carburetor with your own hands
If you do not have a compressor or any other specialized equipment for purging, you will need a regular car compressor, which can be bought in a store for pennies. How to blow through a carburetor on a VAZ 2106 with a car compressor in this video:
Tools and equipment for work
To carry out maintenance work you will need:
- A set of standard keys;
- Screwdrivers;
- Pliers;
- Rags;
- Carburetor cleaner (“Carb Cleaner” or equivalent);
You will also need a repair kit for the carburetor. Various types of repair kits are available, some of which include only gaskets, while others include all parts (jets, screws, emulsion tubes, etc.). It is better to purchase a complete set.
Since the carburetor consists of many small parts, disassembling it into its component parts, washing and troubleshooting and tuning is carried out in stages so as not to lose sight of anything.
Carburetor settings
After flushing and disassembling the VAZ 2106 carburetor, you will need to adjust the engine performance characteristics.
There are several points for this:
- Float mechanism tongue - when the float stroke is less than 8 mm, consumption and toxicity increase, power decreases.
- Quality screw – allows you to adjust the amount of incoming air to prepare the mixture.
- Quantity screw – adjusts the amount of the finished mixture.
These two screws adjust the idle speed according to the manual. But initially they are both screwed all the way and unscrewed 3 turns.
To adjust the thrust, you will need to set the thrust; there should be a distance of 80 mm between the guides. With these settings, the throttle should open fully when the gas pedal is pressed to the floor. If this does not happen, then the throttle assembly must be cleaned.
Idle speed adjustment
After installing the carburetor on the VAZ-2107 engine, adjust the idle speed. This is done with the “quality” and “quantity” screws. The adjustment technology is as follows:
- We set the screws to the initial position, screwing them in until they stop, and then unscrewing them a certain number of turns (for a “quality” screw - 2-3 turns, and for a “quantity” screw - 3-4);
- We start the engine and warm it up to operating temperature (85 degrees);
- With the engine running, rotate the “quality” screw to set the maximum crankshaft speed at idle (without pressing the gas pedal);
- By rotating the “quantitative” screw, we further increase the speed as much as possible (it will not increase much);
- By rotating the “quality” screw in different directions, we check whether the highest speed is set (they should not increase);
- By tightening the “quality” screw, we lower the speed to the level of 800-900 rpm;
After the adjustment, we check that it was carried out correctly. To do this, sharply increase the speed with the gas pedal and release the accelerator. If the adjustment is done correctly, there will be no dips when the throttle valves are opened sharply, and the speed increase should be fast. After releasing the pedal, the speed will drop to the idle level (800-900 rpm), the power plant should not stall.
Preliminary work
In order to properly maintain the carburetor, you will need to rinse the strainer, which is located in the float chamber at its inlet. Clean all carburetor parts, including air jets, from dirt. Clean the float chamber itself from deposits. And only after that can the VAZ 2107 carburetor be adjusted, which includes adjustments:
- idle systems;
- float mechanism;
- starting device;
- the level of fuel located in the float chamber;
- adjusting the air damper opening gap.
Signs of carburetor problems
Dust, contaminants and foreign particles that enter the carburetor with fuel and air settle on the internal walls of the channels, of which there are many in the design of the unit, which leads to malfunction. The carburetor design includes a number of components, the components of which wear out and become damaged over time, which affects its performance. Signs indicating a carburetor malfunction:
- Difficulty starting the engine;
- Decrease in acceleration dynamics;
- Jerks, failures during acceleration;
- Unstable idle speed;
- Unauthorized stop of the engine;
These signs are also given by other engine systems (the same ignition system), but if the carburetor has not been serviced for a long time, then the reason for poor engine performance lies in this unit.
Plaque on carburetor parts
If you disassemble the carburetor to service it, you may notice a dark brown tarry coating on its internal parts, do not be alarmed. This plaque is a natural formation. It is formed as a result of the operation of forced crankcase ventilation.
And the older the engine, it has more wear, and as a result, the amount of these gases that rise in the cavity of the air filter increases, while more contamination of carburetor parts occurs. This is the relationship.
Plaque on carburetor parts and the walls that are located near them must be cleaned. But it is not necessary to clean the deposits on the walls of the neck, the walls of the dampers, and diffusers, since this deposit does not significantly affect the overall operation of the carburetor.
So don't waste your time. Although if you are a pedantic person and you have time, you can clean the carburetor to perfect cleanliness, in any case it won’t make it worse and in the future it will have a better effect on the adjustment of the VAZ 2107 carburetor.
Due to the fact that the secondary chamber of the carburetor is in operation for a short time, its secondary jet and the main air jet do not become very dirty. However, it is still necessary to check the degree of contamination.
It is recommended to do this every time you remove the carburetor cover.
It is recommended to clean the jets with either gasoline or solvent. You can use a thin wire for this.
To ensure that you do not encounter any troubles related to the operation of the carburetor along the way, every 50 - 80 thousand kilometers, check the condition of the mesh filter, which is located in the float chamber of the carburetor at the inlet.
The fact is that thanks to the effective operation of the fuel purification system of the VAZ 2107, this filter rarely becomes clogged. However, if you do not change the fine fuel filter in a timely manner, then there may be problems along the way, since this mesh filter will quickly become clogged.
All parts and cavities of the carburetor must be washed carefully. Let's say the float chamber, where there are resin deposits, it is advisable to wash it with a solvent or other effective means.
But, for example, you should only wash the diaphragms themselves and gaskets with pure gasoline, since all solvents can seriously damage them, and for this they must be washed separately.
Cleaners have become the most popular
| Name of carburetor cleaner | Pros + | Minuses - | Price at the time of writing |
| MANNOL 9970 Carburetor Cleaner | Cleans very well and is convenient to use. Read the reviews: 1 → 2 → 3 → 4 → 5 → 6 → 7 → 8 | When stored, the tube taped to the cylinder constantly tends to get lost. | 150 rub. for a volume of 400 ml. |
| XADO JET100 ULTRA | Probably one of the best penetrating lubricants and its lubricating properties are excellent, and it also has a pleasant smell. Read the reviews: 1 → 2 → 3 → 4 → 5 → 6 → 7 | It ends quickly. Small volume. | 342 rub. for a volume of 250 ml. |
| Hi-Gear Carburetor Cleaner | Cleans perfectly. Effectively restores carburetor characteristics without disassembly. Read the reviews: 1 → 2 → 3 → 4 → 5 | The bottle is enough for 2 times. Bad smell. Toxic. | 522 rub. for a volume of 510 ml. |
| Liqui Moly Vergaser-Aussen-Reiniger | Gently cleans the fuel system. Using this composition, you can remove not only carbon deposits and tar deposits from the surface, but also clean channels and throttle valves. Read reviews: 1 | A little expensive. | 527 rub. for a volume of 400 ml. |
| Carburetor cleaner 3ton | Quality, price, carburetor cleaning 5+ Read reviews: 1 | Not found. | 114 rub. for volume 354 ml |
It's quite a difficult choice
You should pay attention to the reputation of each manufacturer. At the same time, it is possible to study reviews of each product
It is necessary to find additional information based on the experience of friends or other people. In the age of computer technology, this process will be the simplest and fastest. In addition, on the Internet you can search for tests of the most popular brands.
To help you choose, let’s look at cleaners from popular companies in more detail:
Based on the tests, the Liqui Moly product takes the leading place. It effectively cleans various heavy contaminants, cleans channels, jets and valves. Removes even stubborn paints. Sold in aerosol cans. This allows you to clean even the most difficult places. One of the popular brands is Mannol. The cleaner effectively removes carbon deposits and washes away dirt well from the carburetor, dampers and jets. Experienced people advise using this cleaner at regular intervals.
In this case, the performance of the fuel system will improve. If car enthusiasts are looking for a manufacturer who has developed a modern formula, then they should pay attention to the Hi-Gear brand. The composition helps remove any carbon deposits
The company offers various types of cleaners. Each differs in the method of use and exposure to pollution. The product of the ZM brand has collected numerous reviews. It was loved because it can be used not only as a cleaner, but also to lubricate mechanical components. The cleaner consists of organic compounds that are harmless to the environment. The product is universal, as it is used not only for the carburetor, but also for cleaning other elements. Among the large selection, the Jet 100 Ultra cleaner is not inferior to the championship. The product is used to clean all surfaces of the carburetor. Jet is an active product, so it quickly and efficiently removes all possible contaminants. At the same time, it has a lubricating effect, which can be useful in any emergency situations.
It should be remembered that often flushing the carburetor with cleaner does not help. In this case, you need to contact a car service.
To avoid this, you should use some simple rules:
• clean the carburetor every 5-10 thousand kilometers; • disassemble and clean the carburetor every 20-30 thousand kilometers; • periodically check the fuel system; • refuel with high-quality fuel; change filters.
From the above, we can conclude that you should not get hung up on one price of the cleaner.
It is necessary to pay attention to the properties of the product, features of use, degree of efficiency and contamination of elements, degree of purification and many other factors
Author of the article: Yuri Veselov
How to wash the strainer
Washing the strainer is a recommendation.
- Before you start washing the strainer, pump fuel into the carburetor using a fuel pump; naturally, this is done manually. This is done so that the required amount of fuel enters the float chamber and the closing valve closes.
- Next, unscrew the plug that holds the mesh filter, remove it, wash it (you can wash it with a solvent) and be sure to clean it with compressed air, to be sure.
- Also note that it is not recommended to clean the float chamber with a rag, since fibers from the rag can remain inside unnoticed by you and clog the fuel jets, including the idle jet.
- For cleaning, use a rubber bulb, which sucks out all the contaminants that are located at the bottom of the float chamber. Try to act carefully so as not to lift dirt from the bottom.
- After you have washed all the carburetor parts and jets, blow out all the holes and the float chamber itself with pressurized air.
- Next, check the tightness of the locking needle. To do this, connect an ordinary bulb to the inlet fitting and, pressing it, check the tightness of the shut-off valve. In this case, a pressure of 0.2 to 0.4 kgf will be created, which corresponds to the pressure created by the fuel pump.
- We create pressure and listen to whether the shut-off valve allows air to pass through. If air passes through, the valve body and needle should be replaced.
Also, do not forget to check the sizes of the jets using special gauges. For such a check, you can use drills of the required sizes.
The specifics of servicing the VAZ 2107 carburetor are very similar to the specifics of servicing carburetors of other brands of VAZ cars. We also recommend reading the article about adjusting valves on the VAZ 2106.
Nail Poroshin presents.
Aerosols
It is convenient to work with them, since the aerosol comes out under pressure and additionally clears blockages with a flow of air with the mixture. Sprayers contain propane, acetone and a number of other dangerous components. Therefore, avoid getting them in your eyes and hands. They catch fire easily and can only be extinguished with carbon dioxide fire extinguishers.
Aerosol Abro for carburetor cleaning
Aerosols do an excellent job, but they cannot clean the float chamber.
The cleaning process is the same for all cars:
- Remove the air filter;
- Spray cleaner through the tubes outside and inside;
- After 3 minutes, start the engine at high speed and spray the product intermittently for 2 minutes.
This process will take you a maximum of 15 minutes.
As for manufacturers, today the following brands are in deserved demand: Abro, Hi-Gear, Mannol, Gunk, STP, Turtle Wax, Wurth.
