Main types of carburetors
The Seven engines are equipped with both a carburetor and an injector. The operation of the injector does not depend on weather conditions. But the carburetor is much simpler in its mechanical structure, which makes its repair and tuning more accessible.
Not all carburetors are designed to do the same thing. For example, there are models on the market that reduce fuel consumption or, on the contrary, increase fuel consumption, which in turn allows you to maximize the dynamics of vehicle acceleration. Such different models of carburetors were produced for different engine sizes, so it will not be possible to rearrange them so easily. If you suddenly decide on such an experiment, then you cannot do without alterations. And all this is true when it comes to standard models. But what if the car owner decides to install a non-standard carburetor?
However, first, let's turn our attention to the standard classic models.
Description of models
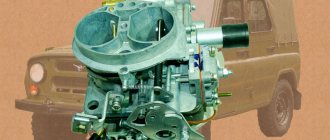
The first VAZ 2107 was standardly equipped with a DAAZ carburetor In Russia, they were modified to meet the needs of the local automobile industry. DAAZ products had simple assembly, which subsequently affected their price. The given carburetor model was characterized by maximum simplicity and made it possible to provide good acceleration characteristics to the car. Initially, the space in the engine compartment was created specifically for DAAZ.
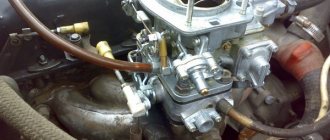
The VAZ 2107 carburetor is a complex, high-precision device, consisting of two chambers, one of which - the first is equipped with a special mechanical damper drive. It can be installed on any domestic rear-wheel drive car. The volume of the model in question is 1.5 and 1.6 liters.
Gasoline consumption when using DAAZ increases noticeably. But this is consistent with the car’s speed indicators, which are also increasing. And this is especially important when overtaking.
Drawing our attention to the model - “Ozone” - it is worth noting that this is a more modified version of the standard DAAZ. The new optimized mechanism had better environmental performance. Thanks to this, “Ozone” received its environmentally friendly name. In addition, it consumed much less fuel than the previous version, so for such an economical car as the VAZ 2107, the Ozone carburetor was considered the most optimal option of all possible.
Good maneuverability and speed of the car were given by a pneumatic valve located in the new carburetor and ensuring the efficiency of the second chamber. However, there was one “but” - even if the valve was slightly dirty, the second chamber stopped working. The speed of the vehicle immediately decreased. This was noticeable in the acceleration dynamics of the car and when the engine was running at medium speeds.
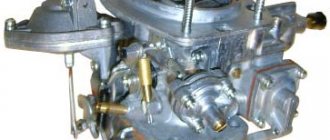
The Solex 21053 carburetor is no less popular among VAZ 2107 owners. At the moment, it is the latest development. Solex has a rather complex assembly, but at the same time it has a fuel reverse supply system, which makes this carburetor the most economical among the entire DAAZ line.
The carburetor mechanism has a larger volume compared to other models: 1.8 Solex versus 1.5, 1.6 other DAAZs. All these features tell us that this carburetor model is simultaneously designed for economical and fast driving.
Initially, Solex was created for cars with front-wheel drive. And yet, this carburetor can be installed on a VAZ 2107 without special modifications. Solex is picky only about the quality of fuel.
Important! The system may malfunction! In most cases, this is due to the fact that the air and fuel channels are clogged with dust. The solution to this issue will be timely maintenance of the carburetor.
All of the carburetors we list are installed on classic engines. If the size of your engine is not designed for the existing carburetor, then you will need to select and replace the jets. It is also worth adjusting the carburetor.
On the issue of non-standard carburetors, it is worth saying that in some cases, owners of “classics” resort to just such a solution. Without alterations and adjustments there is no question here.
“Solex” 21073 is a model designed for engines with a volume of 1.7 liters. The carburetor differs from previous versions by large channels and jets. Dynamic growth is guaranteed! But so does the subsequent expense.
The following non-standard model is installed on cars of the VAZ 2108 and 2109 series. “Solex” 21083 for installation on version 2107 will require certain modifications. Also, installing it will lead to the fact that at about 4000 rpm the engine will not be able to spin up any further. To install this carburetor model, you need to drill out the chamber diffusers. Then expand them. During the modification process, large jets are also installed. The result of such work can please you: fuel consumption will be lower, and the dynamics will exceed those of other models.
Introduction
The normal operation of a car engine directly depends on the quality of the fuel-air mixture. On modern cars, the task of properly preparing the mixture is successfully handled by the electronic control unit, collecting information from many sensors. Although the “injector” has practically replaced carburetor engines, there are still many cars on the roads that use this particular method of preparing the mixture.
Such carburetors are installed on VAZ-2107 series cars. Although their production has been discontinued for a long time, they are still very popular among car enthusiasts. This is especially noticeable in rural areas and small towns. The reason is clear: low cost of maintenance, quick repairs, availability of spare parts.
Design and principle of operation
Despite the fact that the carburetor performs a well-known function in a car, the structure and principles of its operation require detailed consideration. After all, the amount of fuel consumed by the machine, as well as its dynamic performance, depends on this mechanism. “Solex” are two-chamber carburetors with a balanced float chamber, with sequential forced opening of the throttle valves and heating of the coolant of the idle channels.
Carburetor design
The structure of the mechanism includes:
- float chamber. It is needed in order to maintain a given fuel level. The supporting device consists of floats and a valve;
- the idle and transition system works when the main dosing system can no longer work (cannot work due to low vacuum, since the throttle valves are either closed or slightly open);
- the accelerator pump injects fuel in order to smoothly transition to the increased load mode;
- starting system. For stable engine starting, an over-enriched mixture is needed. It occurs when the air damper closes and the throttle opens slightly. To prevent the engine from stalling from the resulting mixture, the air damper is opened slightly again due to the force of the diaphragm in the main dosing system;
- The econostat only works at high speeds, when fuel passes through the nozzle and delivers it to the nozzle hole, which is located in the low-pressure area;
- The power mode economizer saturates the mixture at full load to achieve maximum power.
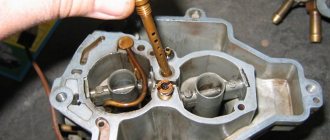
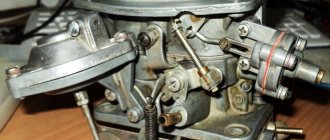
The two main parts that make up the Solex are the cover and the body. The cover is secured to the body with five screws. There is a gasket between the screws and the housing. The cover itself contains: fittings and studs for fastening the air filter, an EPHH solenoid valve, channels through which air is delivered to the main air jets, a needle valve, an air damper and an econostat sprayer.
The Solex carburetor body contains: emulsion wells, an accelerator pump, throttle valves, their drive mechanism, a starting device, an econostat, a float chamber, an economizer and an accelerator pump.
The design and operating principle of this carburetor are not fundamentally different from devices of a similar type.
How to remove the unit
Indeed, this question may take an inexperienced owner of a “six” or “seven” by surprise. But the dismantling procedure itself is not considered difficult. The main thing is to remember or write down the connection points of different hoses, since the reverse installation may cause difficulties during the first experience.
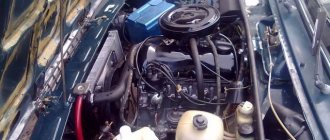
It is recommended to dismantle the DAAZ carburetor on a cold engine, since the device is located directly on the intake manifold.
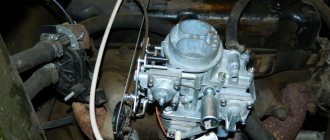
It is important to disconnect the fuel lines and wires in sequence
The preparatory stage includes removing the air filter box, since the filter will prevent free access to the carburetor. Further work takes no more than 10 minutes:
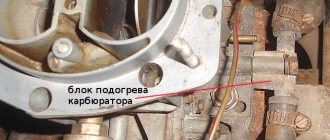
- First, two thin wires are disconnected from the carburetor body - the first ensures the operation of the air damper, and the second is connected to the throttle.
- The return spring and its retainer are immediately disconnected.
- The next step is to disconnect the forced idle economizer wire.
- Loosen the clamp connection on the wide gasoline supply pipe and remove the hose itself. After this, you can remove the fuel return hose.
- The ventilation and vacuum hoses can be disconnected from the fittings at the top of the housing.
- Next, it is possible to dismantle the carburetor block itself. To do this, you need to unscrew the four fastening nuts and carefully remove the carburetor along with the gasket from the studs.
- During work, it is recommended to close the open hole in the manifold with soft cloths or a special plug, which can be purchased at a car dealership. This will ensure the cleanliness of the engine and prevent dirt from getting inside the power unit.
Basic faults
Solex carburetors are the same technology as other mechanisms in a car, so even with proper operation, it can wear out and eventually fail. Some of the faults can be determined by the way the machine operates. But there may be something hidden from your eyes inside the carburetor body. In this case, diagnosing the breakdown will be much more difficult.
The owner of a VAZ 2107 can judge the incorrect operation of the Solex by the following signs:
- jerks and jolts when the vehicle moves;
- increased fuel consumption;
- problems starting the ignition;
- engine failures;
- decreased acceleration dynamics;
- idle failures.
Faulty operation of the VAZ 2107 carburetor when it wears out has a bad effect on engine power. Some things can still be cleaned, but somewhere else a full replacement of parts will be required. Any problems associated with misalignment of parts or associated with changes in the operation of the power unit are a clear knock on the door of the repair room.
Let's look at the most common problems that arise when a Solex carburetor wears out:
Gasoline is not supplied
The reasons that fuel does not enter the carburetor may be: lack of pressure in the fuel supply system, faulty fuel pump, dirt in the supply hose from the gas tank, or an outdated gas filter. In this case, it is recommended to try to blow out the fuel line or change the fuel filter.
Pouring gasoline
If you find leaks of gasoline (especially in winter they are very easy to notice - small puddles of gasoline in the snow), then be careful! This may cause a fire . Therefore, this problem must be resolved immediately! Most likely the solution lies in the depressurization of the hoses. The operation of the accelerator pump also needs to be checked, since if the problem is related specifically to it, then the cause of gasoline leaks may be excess fuel that is formed during accelerated operation of the pump.
Shoots
“Shooting” in the carburetor can be caused by a severe leanness of the fuel mixture, incorrect connection of high-voltage wires, a timing belt that is displaced by two or three teeth (when you change it completely, the belt must be tensioned well, and over time, tightened when displaced) and incorrectly installed ignition moment. The malfunction is detected when you press the gas pedal. As a result, you see the car jerking jerkily, after which it begins to stall.
The second camera does not work
Often the second chamber on Solex carburetors reminds of itself by breaking down. To eliminate it, we need to establish the cause of its occurrence. There can be as many reasons as with “shooting”. Here are all kinds of malfunctions: flooding of the carburetor chamber, incorrectly set gap, problems with opening the damper, lack of the proper amount of fuel, some components of the chamber have failed. You can determine the cause of the malfunction by unscrewing a couple of spark plugs. If the carbon deposits on the spark plugs are abnormal (black), this may indicate either a mixture that is too rich or too lean. Ideally, it is necessary to check the operation of all elements of the system.
Accelerator pump does not work
This problem can occur if the accelerator pump does not operate correctly. Because of this, the volume of fuel may be too large or too small, since the required pressure in the system is not provided. To solve this problem, you will need to remove the carburetor, disassemble the pump device and diagnose its operation. Most often, the malfunction may be due to wear of the rubber parts of the pump.
The engine stalls when you press the gas
One of the most common problems that VAZ 2107 owners face is the engine’s refusal to start. This can happen even after the car has been started. All this tells us that the fault lies in the float chamber. There may simply be no fuel in it or its level may be extremely low. Most often, engine starting problems occur due to the mixture being rich or lean. To deal with this problem, you will need to disassemble the carburetor and check the functionality of individual elements. (float, jets, dispenser)
If the car is only idling and the same problem occurs, then the malfunction may be hidden in such components as: control unit, solenoid valve mechanism, idle jets.
Regardless of what the problem is, you will need to inspect all parts of the idle system, adjust their quality and quantity with screws, tighten them, blow them and wash them.
Troubleshooting nodes
Measure the distance using a previously prepared piece of cardboard. The gap should be in the range of five to five and a half millimeters. If it is larger or smaller, make an adjustment. Using a flat-head screwdriver, you need to unscrew the plug on the adjusting bolt, which is located on the starter. Using a screwdriver, you need to rotate this adjusting screw to set the required gap
Please note that the width of the flathead screwdriver should be a maximum of 3.5 millimeters. But the tuning of the VAZ-2107 carburetor is not completed.
Then the damper gap in the first chamber is adjusted. To carry out this work, you will need to completely remove the carburetor. The lever, on which there are three arms, must be turned counterclockwise until it stops. In this position, it is necessary to measure the gap using a previously prepared wire. There should be no more than 0.8 millimeters from the chamber wall to the edge of the damper.
To make adjustments if necessary, you will need to rearrange the throttle and air damper drive rods. You can also bend the rod a little. All work that needs to be done on the starting device has been completed. Install the power system in reverse order. Then check the operation of the power system. But keep in mind that the VAZ-2107 ignition must be adjusted. The carburetor will function perfectly, but if the ignition timing is set incorrectly, you will not get efficient engine operation.
Carburetor adjustment and tuning
You will need to adjust the VAZ 2107 carburetor and configure its systems just when you begin to notice such defects in the operation of the mechanism. What to do if your car can barely start, even when the frost has not yet arrived and the temperature outside does not drop below zero, and the tachometer needle does not float, but jumps? Or when you press the gas, the engine stalls and stalls.
There are problems such as, for example, the problem of the ignition system, where when a spark is formed, the mixture in the cylinders ignites. In older “classic” models, the ignition coil breaker is responsible for this. In more modern cars, a contactless ignition system is installed, where the ignition switch (distributor) is responsible for the appearance of the spark. But even this seemingly complex problem can be resolved manually. Many carburetor problems can also be adjusted manually. Let's try to figure out some of them...
Adjusting the float system
Any carburetor adjustment begins with adjusting the float chamber. Fuel consumption and engine stability will depend on this part of the mechanism. It is important to follow technology! We start the engine for 3-4 minutes. Then turn off the power. We remove the air filter housing, as it interferes with access to the carburetor unit. Remove the supply pipe from the surface of the carburetor. Then remove the lid from it. We measure from the edge of the float chamber to the level of the remaining fuel. The distance between them should not be more than 25.5 mm. If you find that this is not the case, then it will be necessary to adjust the position of the float. Depending on whether you decrease the distance or, on the contrary, increase it, the bracket on which the float is held will need to be bent to one side. The float axis must be positioned so that it moves freely.
Idle speed adjustment
Adjusting the idle speed of the car is carried out without disassembling the carburetor. However, before making adjustments, you will need to warm up the engine to 90 degrees. Remove the air filter housing. Take a screwdriver and tighten the quality screw until it stops. Then unscrew the screw 4 turns. We start the engine and turn on everything at once to increase energy use. We use the quantity screw to set the optimal speed for the VAZ 2107 - this number does not exceed 800 revolutions. Next, use the quality screw to achieve the maximum value - 900 revolutions. Then we unscrew it in the reverse position until the motor jerks. At this moment we stop twisting and make 1 revolution back. At the end of the work done, turn off the engine.
Adjusting the starting system
We carry out the adjustment on a not warmed up engine. The carburetor is not removed from the engine. First we connect the tachometer. Then pull out the carburetor choke control handle all the way. Let's start the engine. Using a screwdriver, open the edge of the air damper by one third. Rotate the throttle position adjusting screw under the choke control lever with an open-end wrench to 7mm and set the crankshaft speed to 3200-3400 rpm. Release the air damper. We rotate the trigger screw with a slotted screwdriver, loosening its lock nut with an 8 mm wrench. Thus, we reduce the rotation speed to 2800-3000 rpm. Finally, tighten the locknut again.
Setting the “choke” (air damper drive)
To begin setting up the air damper drive, remove the air filter from the carburetor. Open the air damper. On the damper control lever, loosen the locking screw of the drive rod end. Loosen the screw with one key, and use another 8 mm key to hold the screw bushing. We also loosen the tension of the rod sheath clamp screw. The choke handle must be recessed all the way. After making sure of this, turn the air damper control lever all the way by hand. The distance we set between the edge of the rod shell and the angle of the lever should be 10 mm. Turn the air damper control lever back clockwise. Finally, tighten the shell locking screw and the rod locking screw. Don't forget to make sure that the damper opens and closes completely.
If you are clearly confident that you will undertake the repair of your carburetor yourself, then additional information about the problems associated with it will definitely be useful to you. Well-known carburetor expert Nail Poroshin can share advice on this topic on the Internet.
Carburetor filter
The carburetor strainer is responsible for the normal flow of gasoline from the fuel line into the float chamber. Therefore, in order to avoid the problems that its contamination can bring (and this means improper operation of the entire fuel system!), it is recommended to carry out periodic cleaning.
Cleaning the strainer
Using a 13 key, unscrew the filter plug and remove it along with the mesh filter. Then we clean the cells of the mesh filter (a toothbrush will do) and blow them with compressed air. In the same way, we clean the removed filter plug and its seat in the carburetor cover. And be sure to blow everything out with compressed air.
Repair manuals and parts catalog for VAZ 2107
Here you can download repair and operation manuals for passenger cars of the VAZ 2114, 2113, 2115 family and their modifications, as well as a parts catalog.
| 1 | Catalog of parts and assembly units for the VAZ 2107 car | 2005 year | 392 pp. | Size – 8,244 MB | Format - pdf |
| 1 | Operating manual for VAZ 2107 vehicles and its modifications. | 2011 | 77 pp. | Size - 0.965 MB | Format - pdf |
| 1 | Manual for repair, operation and maintenance of VAZ-2107, VAZ-21072, BA3-21073, VAZ-21074 cars | 1996 | 176 pp. | Size – 18,939 MB | Format - pdf |
Carburetor cleaning
Carburetor cleaning is carried out during a routine inspection of the car, which is done once a year.
Important! Before you begin cleaning, you must dismantle the device. Care must be taken to ensure that foreign particles and bodies do not enter the intake manifold. The cleanliness of the workplace must be ensured!
- First, clean the outer surface of the mechanism. Carefully remove adhered dirt.
- We disassemble the float chamber and wash it with clean gasoline. When doing this, we try not to disturb the setting of the float, otherwise they will have to be adjusted again.
- We disassemble the vacuum accelerator and remove the strainer.
- It's time to remove all the jets. Since they are made of soft metal, it is recommended to clean them using a stiff fishing line or soft wood chips.
- Provided that the carburetor is completely disassembled, you can completely purge all fuel and air passages. In this case, you will need a compressor with a thin nozzle.
It is not necessary to clean the unit with gasoline; there are also special products for washing carburetors for this purpose. If it is not possible to use a compressor, then we replace it with a conventional pump. Once you have completely cleaned the carburetor, you can begin assembling it and reinstalling it. It is worth drawing your attention to the fact that all metal components must be disassembled and washed separately. Special liquids for washing carburetors can damage them. Do not neglect all actions! First of all, they are aimed at maintaining the functionality of the system.
Removing the carburetor
However, before you start cleaning the carburetor, you need to disassemble it, following a sequential procedure.
Using an “11” wrench, unscrew the bolt securing the liquid chamber housing to remove the semi-automatic starting device. Remove it together with the sealing rubber ring. Using a screwdriver with a sharp tip, pry off the retaining ring of the air damper drive lever. Then we pry up and remove the locking wheel of the throttle valve of the first chamber. We press on the levers and rods, disengaging them from each other. Unscrew the three screws securing the starter housing with a Phillips screwdriver. Remove the starting device assembly. It is not recommended to disassemble this device.
You can disassemble the carburetor without removing the starter. To do this, you will need to disconnect the lower lever of the starting device, and then use a Phillips screwdriver to unscrew the five screws securing the cover.
Use a hammer to knock out the axle with a float using a drift. Remove the cover gasket. We turn out the needle valve body with a spanner “11”. We take it out and the copper o-ring. We unscrew the inlet fitting with a “15” wrench and remove it together with the sealing ring. Using a 13 key, unscrew the solenoid valve and remove the idle jet. Unscrew the screw securing the throttle body heating unit. We turn out the main air and fuel jets. Remove the accelerator pump nozzles. Fuel jets can simply be shaken out of the wells.
Using a Phillips screwdriver, unscrew the three screws securing the economizer cover. After removing the cover, take out the spring and diaphragm. Using a screwdriver, unscrew the economizer nozzle and remove it. Unscrew and remove the four screws securing the accelerator pump cover. Next, remove the diaphragm along with the return spring. Now you can unscrew the screw of the plastic wire holder of the EPHH screw sensor and remove the wire. Unscrew the throttle valve stop screw. Then unscrew the screw securing the sector and the damper control lever. We remove the unscrewed lever and, applying considerable force, the sector. We remove the rod by unscrewing the screw securing it. Using a narrow screwdriver, unscrew the mixture quality adjustment screw and remove it along with the rubber o-ring. Finally, remove the rubber o-ring from the fuel intake pipe of the idle system.
That's all! The carburetor is ready for cleaning, adjustment of individual parts and complete tuning.
Preventative work
There are quite a few components in 2107 that require attention. In order to prevent the operation of the carburetor, it is cleaned and all systems are adjusted. For ideal operation, the VAZ 2107 carburetor setting itself must be ideal! It is not surprising that the mechanism quickly becomes clogged. This occurs when dust particles passing through the air filter collide with oil droplets. This mixture very often settles on the carburetor body. Dirt flakes can get into the float chamber and also clog the jets. Try to check the carburetor from time to time.
To prevent this problem, they came up with one way. To prevent dirt from getting into the balancing holes, they need to be raised a couple of millimeters higher. For this you can use polyethylene tubes with a thickness of 1 mm and a diameter of 5 mm. They must be inserted into the holes so that their protrusion on the side of the floats reaches 2-3 mm. Using a soldering iron, you need to flare them. The second end of the tubes may coincide with or be higher than the cap.
This modification ensures that now large enough dirt particles will not be able to get into the camera. The jets will also not become clogged with them.
Repair kit
In order not to worry once again that your carburetor may be damaged in the most inopportune place, it is recommended to always have a repair kit with you. It will help you easily and cost-effectively repair a faulty element. Most often, problems can be caused by wear of gaskets, valves, and diaphragms. Many of the car parts are subject to wear: battery, timing belt, cylinder head parts, hydraulic compensator, generator (brushes), muffler, panel. Even if it is a miniature device, like the ignition relay, which is used to turn on the starter, it still plays an important role. And usually all repairs boil down to the fact that these parts are successfully replaced. In most cases, these kits contain everything you need.
Do-it-yourself design modification
One of the most common options for tuning the “seven” carburetor is a design modification that allows you to solve the problem of the power of the power unit not reaching the crankshaft speed specified by the manufacturer. To do this, you need to perform the following manipulations:
- Remove the connecting spring between the throttle valve and the vacuum pump. You should be prepared for the fact that fuel consumption will increase, but only slightly. About 0.5-0.6 liters per hundred.
- We repeat the operation with the secondary chamber shutter.
- We make a damper drive from thin wire, connected directly to the lever.
- We replace the diffuser of the primary chamber “3.5” with a large one – “4.5”.
- We install the accelerator pump nozzle with the value “40”. We hasten to reassure motorists who are afraid of an increase in fuel consumption - it will not be significant. But the starting acceleration of the car will become faster.
- The next action of the motorist will be to work with objects that the vast majority traditionally try not to touch. These are the main jets. Here, as in any matter, expediency and moderation come to the fore. It will be enough if you first install the “162” jet.
- Take a test drive and check the operation of the vehicle's engine.
If there is a desire to increase engine power more, it is necessary to modify the elements of the primary chamber. Install "GTZh -13" (for a power plant V=1.5 liters) or "GTZh-135" (for V=1.6 liters) jets.
Some “experts” recommend providing air “under pressure” by placing a hose on the air intake. We warn you, this is fraught with serious consequences, since in this case the air filter cannot cope with cleaning the air from dust, which shortens the life of the engine.