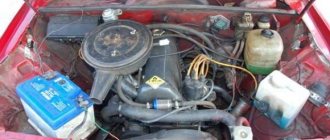
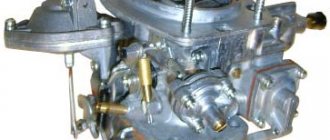
If you need to tune and adjust a Solex carburetor, then you will need calibration data and jet parameters. In this article, I tried to collect the necessary data that will help you easily set up a Solex carburetor. Here you will find jet tables, jet markings, find out which jets should be on the Solex 21083 carburetor.
These small parts have an impact on the performance of the car's engine. If you increase the fuel jet, you can make the car playful, but require a lot of fuel. By installing an air jet with a large cross-section, we get a machine that does not develop high speeds, but also does not require frequent refueling. It all depends on the wishes of the car owner.
Cleaning, setting, replacing and adjusting jets and adjusting the enrichment of the fuel-air mixture are carried out during maintenance and in the event of emergency situations.
Basic design of DAAZ parts for classic VAZ models
The operation of any automobile internal combustion engine directly depends on the quality and quantity of the mixture of fuel and air. This very mixture is prepared directly by the carburetor. In addition, this device evenly distributes the mixture throughout the combustion chambers.
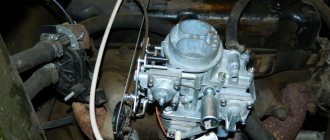
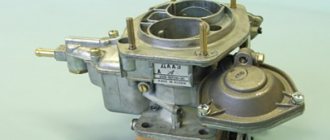
The carburetor (VAZ 2107 DAAZ) consists of several main parts. This is a diffuser, a throttle valve, as well as a jet and a float chamber.
Disassembling and cleaning the unit
Considering that the amount of impurities in our gasoline is simply off scale, cleaning the VAZ 2107 carburetor turns into a necessary procedure. It can be carried out without dismantling and disassembling, or it can be done with complete disassembly of the device.
Cleaning without dismantling, video.
Many car owners periodically treat the carburetor with special cleaning agents (carbocleaners). These aerosols do a good job of removing deposits in gaps, unless, of course, they are perennial “growths.”
- The engine must be turned off and cool before starting work;
- Remove the air filter housing;
- Using a wrench, unscrew the idle speed solenoid valve on the carburetor;
- Use a carb cleaner to treat the carburetor: external surfaces, jet channels (through a thin tube), chambers, air dampers, etc., as far as you can get;
- Leave for 10 minutes for the aerosol to dissolve deposits;
- Run the engine for a couple of minutes. A stream of gasoline will wash away the residue;
- If necessary, repeat the procedure, first waiting until the engine cools down.
If such cleaning does not produce results after twice use, the carburetor will have to be removed and cleaned “like an adult”, with disassembly.
Cleaning with removal, video.
How to remove the carburetor is already clear. Now the sequence of its disassembly:
- Remove the top cover by unscrewing the five mounting screws;
- Unscrew the jets and remove the emulsion tubes;
- Remove the accelerator pump nozzle - unscrew it, pry it off with a screwdriver and remove it;
- Remove the seal located under the valve;
- Remove the diffusers from the chambers using pliers or carefully knock them out with the handle of a screwdriver;
- Unscrew and remove the accelerator pump screw;
- Unscrew the adapter system nozzle holder and remove the nozzle itself;
- Unscrew and remove the idle fuel jet;
- Remove the accelerator pump cover: unscrew the 4 screws in the corners, remove the cover and the pump itself (diaphragm, pusher, spring);
- Remove the return spring from the pneumatic drive lever, then the rod clamp, after which remove the spring from the throttle valve drive lever;
- Remove the pneumatic drive by unscrewing the fasteners;
- Unscrew the 2 screws that secure the lower part of the carburetor to the body, remove the lower part; Remove the economizer and economizer microswitch with bracket;
- Unscrew the screws for adjusting the quantity and quality of the mixture.
This completes the disassembly of the carburetor. After this, you can start cleaning. The parts and body of the carburetor, including the jets, can be washed with kerosene, the seats of the jets and the jets themselves can be blown out with a compressor. It is advisable not to clean the jets with wire; it can damage the holes and then the jet will have to be replaced.
When the layers are washed off the metal, you can inspect it for corrosion, wear and defects. All parts that show signs of wear must be replaced with new ones. The carburetor is assembled in the reverse order, then adjustments are made and you can put it in place.
Device types
If the car has an old engine, then such cars are equipped with DAAZ 2107 - 1107010 carburetors. With new engines and a vacuum corrector, a new model or modification is used. This is the DAAZ 2107 1107010-20 model.
These products are produced at the Dmitrovgrad Automotive Units Plant. This company has been producing various equipment for classic VAZ models for many years. DAAZ 2107 (carburetor) has earned special trust among drivers as being quite reliable.
Complex and high-precision device
A carburetor is a complex device consisting of many different components. But the complete device is necessary only for those who professionally configure and adjust these devices.
However, despite all the difficulties and a large number of details, let’s take a closer look at how this device works.
So, what kind of device does the DAAZ 2107 1107010 carburetor have? This device consists of a float chamber into which fuel flows in limited quantities. The access to gasoline is closed by a needle valve, as well as a float, which in appearance resembles a barrel. Gasoline is mixed in a special mixing chamber. The carburetor also consists of a throttle valve as well as an air valve. In addition to them, the device also includes jets. The fuel is atomized through a sprayer. One of the important components of a carburetor is diffusers. They work like nozzles and create an air flow configuration.
Setting up Solex systems
Fuel level in the float chamber
Adjusting the fuel level. In factory conditions, adjustments are made using templates with a test float; in garage conditions, be patient; you will have to unscrew and tighten the carburetor cap several times.
You need to start and warm up the engine. Remove the hose from the carburetor. It is important to know! Gasoline here is under pressure, a little. So somehow be prepared for this. The main thing is to remove the hose, otherwise a small portion of gasoline, when unscrewing the cap, will spill into the float chamber and the level will not be accurate.
We unscrew the lid, VERY CAREFULLY, HORIZONTALLY remove it along with the floats.
We measure the distance from the Solex carburetor cover to the surface of the fuel. There are two chambers and two floats, you need to measure in each. The distance should be 25-35 mm. Adjustment is made by bending the float in one direction or another. The overflow must be drained from the float chamber.
IMPORTANT! It is necessary to adjust the fuel level while starting the engine to fill the float chambers.
Idle speed adjustment
IMPORTANT! Warm up the engine to operating temperature – 90 degrees.
We turn off the mixture and look for the mixture quality screw, it is located below, at the junction with the manifold. In the presented diagram it is numbered 11.
Tighten until it stops, but without tension. We start the car, the choke should be removed (air damper 4 is open). We unscrew the quality screw, achieving stable operation of the engine when the gas pedal is released. The speed should not exceed 1200 rpm.
Then we tighten it until the moment when it begins to twitch, giving out unstable revolutions. As soon as this starts to happen, make 1-2 turns back. GREAT! The engine runs steadily!
And now to each his own! We set fine settings to suit our personal requirements, who likes what speeds. Although according to the manufacturer's instructions 800-900 rpm. Optimal mode.
Force majeure circumstances of Solex
The engine does not change speed when turning the quality screw. This means that gasoline enters the carburetor and the quality screw does not close it.
- the plug is not tightened tightly;
- jet with a large hole diameter;
- jet deformation
We will perform test diagnostics. With the engine running, disconnect the wire connector for solenoid valve 21 . The engine will stall. If it stalls, it means the jet is too big.
If the engine does not stall, this means that gasoline is still coming from somewhere else. Most often, the idle mixture screw is overtightened. 8.
DAAZ 2107 carburetor: operating principle
When fuel enters the float chamber, the volume of fuel is regulated by the float. If it floats up, the needle mechanism will block the access of gasoline to the chamber. So, the camera in this case resembles a toilet cistern. Everything is the same here. But fuel is not supplied immediately. First it will go through a special filter to clean it.
Next, the device supplies flammable liquid to the first and second fuel chambers. The DAAZ 2107 carburetor (device) provides for the presence of main fuel jets through which fuel passes.
In addition to gasoline, air is supplied to the chambers through air jets, which has previously been cleaned in air filters. The air then forms a mixture with gasoline using special tubes and wells. Thus, a so-called emulsion is obtained.
But that is not all. Before entering the combustion chambers through a spray, the mixture passes through an econostat. Here the mixture undergoes additional enrichment.
Next, using sprayers, the mixture enters the diffusers. This is where the final preparation of the mixture takes place. The carburetor of the VAZ 2107 car (DAAZ produced by DAAZ) is designed in such a way that fuel droplets in the diffusers are drawn into a high-speed air flow. Thus, the air-fuel mixture enters the center of the mixing chamber.
The gas pedal on VAZ cars regulates the position of the throttle valve, which is designed to supply the mixture directly to the engine cylinders.
What else is special about the DAAZ 2107 carburetor? Its design includes idle jets. In this mode, the mixture is taken only from the first fuel chamber. The principle and scheme of operation of the fuel chambers activates the second chamber only when the engine reaches operating temperatures. Camera II also turns on if you need to quickly gain momentum and high speed.
Replacing the jet
The selection of carburetor jets is carried out according to the markings. The number of each part in the set must correspond to the diameter, according to the table. When choosing a set of carburetor parts, decide what power and take-off speed will suit you. If you are setting nominal dimensions, then everything is simple - you must first select a kit. This is the most important job when purchasing. It should be remembered that 80% of the parts on the market are from China. Pay attention to this when choosing them. Then you can make repairs.
Important. Engines for VAZ cars are produced with DAAZ carburetors. On almost all modifications, the primary chamber is equipped with a 4.5 atomizer. The main fuel jet is marked 135, the air jet is numbered 170. When installing atomizer number 4, 130 fuel and 150 air jets are installed in the first chamber. This ratio must be maintained.
To carry it out we will need to remove the carburetor from the engine. This will make further work more convenient. The carburetor removal diagram is described in other articles on the site; the only thing you need to pay attention to is the gasket between the carburetor and the engine body.
Differences in modifications
As you know, the latest models of VAZ 2107 and other versions are equipped with a new carburetor DAAZ 2107 1107010 20. Let's see what the difference is between this modification and the old carburetor 1107010.
According to information received from AvtoVAZ specialists, these two modifications are based on the same model. Here the fundamental difference between them is the economizer for forced idling. Model 1107010 has EPHH, and the new modification is not equipped with this unit.
Although the DAAZ 2107 20 carburetor was not equipped with an economizer, it is equipped with a special nozzle for supplying fuel. The difference is that here the idle speed is controlled by a solenoid shut-off valve. So, if the ignition is turned off, the fuel supply is cut off.
Adjusting the second chamber of the Solex carburetor
Let's start with the fact that when adjusting the carburetor, the second chamber is usually not touched, since often standard jets will be sufficient. The carburetor also has an econostat that can correct possible nuances. The econostat is a tube located in the second chamber at a slight angle.
The purpose of the econostat is that when the throttle is fully opened, the vacuum in the carburetor allows fuel to be sucked through the econostat. The econostat is activated when the engine is running at high speeds and allows the fuel-air mixture to be enriched. To refine the second chamber, which allows for “pick-up,” jets are installed to enrich the mixture. The selection of jets in this case is no different from the selection for the first chamber.
Basic faults
In order to make adjustments, you need to know several typical faults. Since this unit is responsible for dynamic characteristics, breakdowns include:
- Problems starting the engine, engine sneezing.
- Jerks, jerking, frequent failures on the accelerator pedal.
- Lack of overclocking options.
- Increased fuel consumption.
So, if while operating your car you were able to detect one or more faults from this list, then the part needs repair.
You need to know that the maximum adjustment of the DAAZ 2107 1107010 carburetor is possible only with the unit removed. The process does not involve cleaning this device with lint or woolen rags. You also won’t need any wires to clean the jets.
When making adjustments yourself, you must first remove the cover from the assembly. Then you can proceed to adjusting the float chamber. It's comfortable.
Main types of jets and their selection
The industry produces 2 types of carburetor jets, which are included in each repair kit:
They are made for each camera of the device. The choice of jet depends on the cross-section of the large and small carburetor diffuser. Repair kits are produced differently - for each model and brand of car. The parts differ in hole diameter. How to adjust the correct operation of the engine - information necessary for every vehicle owner.
Quite often, the Solex carburetor is installed on cars of other brands, with the most powerful engines. In this case, the machine will work intermittently, because the VAZ jets will not be able to do their job efficiently - due to the diameter being insufficient to supply the enriched mixture.
Often, car enthusiasts install a large fuel part for better acceleration and dynamic driving. In this case, one should not forget about the increase in fuel consumption. Also, increasing the diameter of the nozzle by several orders of magnitude will not always give a good result. The table can tell you how to choose jets.
If the engine capacity is 1.6 liters, you should not install a main jet from a powerful engine on it. If you are no longer satisfied with the acceleration of your car, you may need to look for another reason, for example:
- low compression level in one of the cylinders;
- the adjustment of the ignition system has gone wrong;
- one or more spark plugs are faulty;
- Replacement of high-voltage wires is required.
These are just some of the reasons and malfunctions, by eliminating which you will get a fast car again. Car enthusiasts have different opinions about altering jets, but most believe that it is not worth doing. Sometimes, those who like to save money install jets whose sizes are smaller than the recommended ones. In this case, you get an economical, but very weak car that will take a very long time to accelerate. Ozone carburetor jets should not be installed in a Ford carburetor. They should be on the classic Zhiguli.
Correctly tuning the carburetor can have a great impact on the acceleration and power of a vehicle.
Adjusting the float chamber
The float has free movement. The stroke size should be between 6.5 mm on one side and 14 mm on the other side. The stroke is adjusted using a special template.
If your chamber has a smaller distance, you will need to bend the needle valve tongue slightly.
Now you can adjust the operation of the needle valve. When the float rises, less fuel flows. If the throttle valve opens, the fuel consumption is higher and the float moves down. To adjust the float on the other side, you need to move the float back as far as possible and use the same template to check this parameter. If the distance is not 14 mm, then the fastening stop should be bent.
Adjusting the air damper drive
If you don't take care of the drive, the car may stall. To do this, you will need a simple Phillips screwdriver and a 7 mm open-end wrench.
The positions of the damper are shown above with the “suction” extended and recessed.
To adjust the drive, do the following:
- drown the “suction”;
- Unscrew the rod fixing screw with a screwdriver (the spring will push it out vertically)
- Tighten the screw;
- Check the valve stroke.
Setting up the launcher
Adjustment includes the process of adjusting the starting device. For older devices, it operates at a frequency of 1500 rpm. If you examine the DAAZ 2107 (carburetor for the “seven”) from the other side, you can see a special channel. If you remove the assembly and inspect it from behind, you can see the air supply channel.
To adjust, you first need to remove it. Then you need to turn the lever so that the air damper is completely closed. Next, you should turn the device over, and then measure the gaps between the damper and the wall. For our carburetor, the gap should be 0.85 mm. To adjust the gap to the required size, it is necessary to bend the drive rod.
Next you need to adjust the gap A. You can find it between the wall of the channel and the edge of the damper below. So, you need to close the damper and recess the starter rod. As a result, it will open, and the gap should be from 5 to 5.4 mm. To adjust, you need to turn the adjusting screw with a screwdriver.
Removing the carburetor
Sometimes the carburetor needs to be removed, for example, for replacement, repair or cleaning. For such work, you need to prepare a set of tools consisting of open-end wrenches, screwdrivers and pliers. If the damage is minor, then there is no need to remove the device.
For safety reasons, it is recommended to dismantle the carburetor on a cold engine.
Then we perform the following sequence of actions:
- In the engine compartment, loosen the clamp on the corrugated pipe and tighten it.
Video: how to remove the carburetor on the “seven”
Setting up idle speed
First, you should make sure that the ignition adjustment is correct. The engine must be at operating temperatures. To adjust, you need to rotate the fuel mixture quality adjusting screw until the engine speed reaches maximum.
Next, you need to rotate the fuel quantity screw counterclockwise. An even higher speed should be achieved.
Now it’s worth turning the quality screw to add a little more speed.
The point of these operations is to ensure that the quality of the mixture is minimal, and the idle speed is from 850 to 900. These are the most optimal values for carburetor engines of cars of the “Classics” family. You should not make revolutions more or less than this value, as they will be considered unstable and will entail increased wear of the crankshaft parts.
We looked at several possible adjustment methods that you can do yourself. But if you are not confident in your actions, it is better to entrust your DAAZ 2107 (carburetor from the “seven”) to a specialist who is well versed in them.
How to adjust the carburetor and when to do it
Do-it-yourself carburetor adjustment is done after using low-quality gasoline or when engine operation is no longer stable. For prevention, the manufacturer recommends flushing the carburetor with a special compound every 6-7 thousand kilometers.
Possible malfunctions in the carburetor:
- Fuel leaks on the carburetor. In this case, you need to measure the fuel pressure. This is done using a special pressure gauge. The operating instructions will tell you what the pressure should be. Typically it ranges from 0.2 to 0.3 atmospheres. If the pressure is normal, the problem is in the float chamber and the fuel level needs to be adjusted;
- Carbon deposits on spark plugs with the smell of gasoline. This clearly indicates a problem with adjusting the carburetor floats or a burnt valve;
- Rough engine idling may not only be due to the carburetor. This often happens due to incorrect adjustment of the throttle cable. To check, you need to disconnect the cable and turn the valve manually.
Before you adjust the carburetor correctly, you need to clean it thoroughly. It is recommended to use special liquids for cleaning. The jets cannot be cleaned with toothpicks or needles. Damage to the jets will lead to calibration failure. If the holes cannot be cleaned with aerosols, you can carefully clean them with a soft wire. When cleaning, do not use rags. Threads can clog the holes, which will lead to malfunction of the carburetor. If the aerosol does not remove all contaminants the first time, you need to repeat the procedure.
