Car enthusiasts today are increasingly choosing the Lada Granta liftback - a beautiful, affordable and practical car. Solid style and volume, a spacious interior have retained the classic features of a fast car. Any driver cares primarily about two things: the technical condition of the vehicle and comfortable movement on it. If the first criterion is strictly mandatory, then the second rule depends on the desires and capabilities of the car owner.
The internal state, namely the covers, reflect the driver’s “mood”, his wealth and taste. The Granta liftback has its own characteristics: the car can be called a novelty in the domestic automobile industry. Released quite recently, it claims to be an esthete. Car seat covers play a major role in interior tuning. Knowing the differences and advantages of the cover models, you can ensure long-term, flawless operation of the interior of your car. Types of materials for covers:
- modern material - eco leather;
- leather;
- upholstery fabric;
- fur.
Mounting features
To fasten eco-leather car covers, cord, Velcro, hooks, elastic, various latches, etc. are usually used. When attaching a cover, you need to know the following:
- In the process of putting the product on the seat, fasteners made of elastic bands with hooks can be pushed under the plastic decorative parts located on the side, using a thin wooden strip like a ruler for further threading them below.
- It is important to know that the fastener must be made exactly at the location of the fastener, therefore, when putting on the product, it is necessary to apply force to tighten it. The main thing is not to overdo it, otherwise you can damage the car cover.
- When you put the cover on the back, squeeze the side supports.
- Be sure to tuck the machined holes on the car cover under the plastic.
- The headrest cover is pulled on and secured with a tie near the riser.
Preparatory work
We unpack the purchased kit with covers and check the contents. We recommend laying out the coating on a flat surface for further quick access to the desired item. It is also worth checking the fastening elements and, if necessary, untie the laces and align the Velcro.
In addition, you must first thoroughly clean the interior of the car, paying special attention to the factory upholstery. There should be no crumbs or foreign objects left on it.
It is best to work with an assistant, as this will speed up the process of installing covers on Chevrolet, Daf and other cars several times. An extra pair of hands will be especially useful when installing covers on the rear seats of a car.
Shape Features
When purchasing car covers and putting them on, it is necessary to take into account the following features of seat shapes, which are determined by:
- Body type. For example, when sewing products for a sedan and a hatchback, different patterns are used. You can still somehow put covers from a “foreign” body on the front seats, but for the rear ones you will have to make cuts, otherwise the car covers won’t fit.
- The passenger and driver's seats are similar, but do not confuse the covers, the shapes of which are slightly different. They are distinguished by their tear seams; when putting them on, they must be on the door side, otherwise problems with the airbags may arise. That is why a special “AIRBAG” label is sewn into the seam side.
Removing the seats
Sometimes you can hear that changing the car covers of some car models is possible without removing them. This opinion is refuted by the following arguments:
- Before putting on the product, you will need to remove the plastic covers, which will be difficult to do in a salon.
- In order to put on the eco-leather cover, you will have to constantly turn the seat.
- At times there simply won’t be enough space to get the job done properly.
Therefore, in order to avoid the listed difficulties, it is recommended to put covers on previously removed seats, and it is advisable to have assistants.
Dismantling the seats can be divided into the following stages:
- you need to start from the front seats;
- move the chair all the way, unscrew the bolts on both sides;
- move the seat to the opposite side and repeat the steps;
- remove all the side trims from it, to do this, first pull out the plugs, then start unscrewing the bolts;
- start removing the cladding; to do this, press it out with a screwdriver.
DIY car covers patterns
Car seats are one of the calling cards of a car. When choosing a suitable brand, buyers pay attention not only to technical characteristics, but to the interior of the cabin. Unfortunately, time spares nothing, so even high-quality leather seats tend to scratch and wear out, which can later play a negative role in the resale of the car. In order to avoid this, special seat covers were invented. There is a very large selection on the market, but you can also make car covers with your own hands. This process is not easy, but with a lot of desire and basic cutting and sewing skills, anything is possible.
How to dress correctly
The entire dressing process can be broken down as follows:
- You need to start with the front seats.
- Carry out dismantling.
- Remove the headrest from the chair and cover it.
- First, the seat is put on. It is necessary to carefully straighten the eco-leather, only then place the chair on the side and secure the fasteners. It is important to tighten this part of the chair very well, since this is where the bulk of the load falls. If the tension is weak, wrinkles and folds will form on the chair.
- If the fastening is made from below, the upper part of the chair is put on like a sweater, but it is necessary to apply force, since the cut of the car cover is made exactly to size. Fasteners on the product made on the back of the seat are less preferred by drivers, as they do not look so elegant.
- The bottom of the car cover is secured under the seat, and it must be pulled tight.
- After the covers are put on, you need to install the covers on the previous areas and return the chair to its place.
- Putting on the eco-leather car seat cover for the front and rear seats is identical.
Before installation, be sure to read the included instructions. This will help avoid mistakes and avoid over-tightening the product.
The factory upholstery of the seats inside the car is subject to wear and tear. Eco-leather car covers will help protect the seats externally and significantly transform the car.
A big role here belongs to the correctness of putting on the cover. If you approach this work thoughtfully, it will take a little time, but the result will please you and your loved ones.
Publication date: February 27, 2022. Category: Automotive equipment.
Even after a short period of use of a new car, the standard seat upholstery (especially light colors) loses its neat and attractive appearance. Dust, moisture, food and drinks will certainly leave their “traces” on it, which will then be quite difficult to remove even in specialized services that deal with professional dry cleaning of car interiors. Covers, which are best purchased immediately after purchasing a car, will not only reliably protect the seats from all these troubles, but will also give the vehicle interior an elegant look. How to put covers on car seats: videos, photos and recommendations for installing them are presented in this article.
We sew car covers with our own hands: choosing fabric
The choice of fabric from which you decide to sew covers must be taken very seriously, because their service life, wear resistance and, most importantly, how they will look in the interior of the car will depend on the quality of the fabric. Auto studios like to work with synthetic materials, such as velor, neoprene, poly cotton, and artificial leather. These fabrics are distinguished by their low cost compared to natural fabrics and the fact that they are better cleaned from dirt. But it also has its drawbacks: synthetic fabric is not always pleasant to the touch, artificial leather gets very hot in hot weather, and such fabrics are easily flammable when exposed to an open fire. This fact should especially be of interest to all motorists who abuse such a bad habit as smoking.
As for natural fabrics, they are much more expensive than their counterparts, but they are comfortable, breathable, pleasant to the touch, non-flammable and look good. Covers made of velor and genuine leather will look very rich and practical. Your choice depends on your preferences and the money you are willing to spend on it.
Before you start sewing covers, you need to learn how to take measurements correctly and make patterns on the fabric. After all, how your product will ultimately look depends on these two components. If you don’t get the size right, the cover may either bulge, or may not fit at all, or will look sloppy and not fit the given chair.
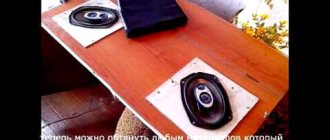
Below is a photo of an approximate drawing of car covers.
The easiest way to take measurements is using transparent polyethylene. Everything is done quite simply:
1) Take a piece of polyethylene the size of a seat;
2) We apply it to the seat and use a marker to outline each part of the car seat;
3) Then we cut out the parts and once again apply them to the source;
4) If everything fits, then transfer the patterns to cardboard and cut out a normal, convenient template;
5) Using templates, we cut out the material, not forgetting to leave a few centimeters for allowances.
Design features and dimensions of universal cases
Almost all models of modern protective devices worn on car seats (both front and rear) are made using the so-called separate technology. A standard kit usually consists of 11 parts:
- 2 – for the lower parts of the front seats;
- 2 – for the backs of the front seats;
- 1 – for the lower part of the rear seat;
- 1 – for the back of the rear seat;
- 5 – for head restraints.
The best (but also the most expensive) option is to purchase covers made specifically for a specific car model. Then you can be sure that they will fit the seats exactly and there will be no problems with their installation.
Universal car covers (the most popular option) are produced mainly in two standard sizes: S - for small cars (for example, Opel Astra, Volkswagen Golf and the like); M is a standard size suitable for most car seats.
The responsible manufacturer indicates in the instructions an approximate list of car models for which the products it produces are suitable. And an experienced sales consultant will tell you which set of car covers is best for you to purchase.
Car compatibility
Approximate list of compatibility of covers size S*
| Audi | A1, A2 |
| BMW | Episode 1 (04 - 07) |
| Chery | |
| Chevrolet | Lanos, Lacetti, Aveo, Spark |
| Citroen | C2, C3 |
| Daewoo | Tico, Matiz |
| Fiat | Panda, Punto, Albea, 500 |
| Ford | Ka, Fiesta, Fusion |
| Honda | Jazz, Civic |
| Hyundai | i20, i30, Atos, Getz, Accent |
| Kia | Rio, Picanto |
| Mazda | 2, 3 |
| Mitsubishi | Colt |
| Nissan | Note, Micra |
| Opel | Tigra, Corsa, Astra |
| Peugeot | 1007, 107, 206, 207, 306, 307, 308 |
| Renault | Logan, Symbol, Twingo, Clio |
| Seat | Ibiza, Leon |
| Skoda | Fabia, Roomster |
| Suzuki | Swift, Ignis, SX4, Jimny |
| Toyota | Aygo, Yaris, Vitz, Corolla, Echo |
| Volvo | C30 |
| VolksWagen | Lupo, Polo, Golf |
| VAZ | 1111, 2104—2109, 21099, 2110—2121, Granta, Kalina, Largus, Priora |
| UAZ | 3151 Hunter |
Methods for installing car covers
Some automobile “gurus” claim that it is possible to properly put covers on car seats only after they have been dismantled (they believe that this achieves the effect of completely reupholstering the seat upholstery). Let's not say that this is not the case. Moreover, dismantling, for example, the front seats does not take much time: it is enough to unscrew only four bolts (for each seat). If you remove the seats from the car, the process of installing the covers is greatly simplified:
- There is no need to put your hands under the front seat and feel for something to hook the mounting hooks onto.
- The covers are tightened more efficiently (they fit more tightly to the surface of the seats).
- You can quite simply dismantle the side plastic covers (if they are present and interfere with the installation of the covers).
On a note! If your car is equipped with side airbags or electric front seat adjustment (forward/backward and backrest tilt), then remove the terminals from the battery before dismantling. Then disconnect all electrical wires. And only then remove the seats from the car.
However, as practice shows, most cars can be fitted with seat covers without having to dismantle them. The main thing is to follow the manufacturer’s instructions (if available), carefully read our recommendations and familiarize yourself with the materials: “how to put covers on car seats video,” a selection of which is presented at the end of the article.
Choosing fabric
Before you begin, you need to decide on the choice of suitable fabric. Since covers wear out very quickly, the fabric must be selected carefully. There are several parameters when choosing a material:
- strength;
- stretch effect (so that the product fits perfectly on the seat);
- wear resistance;
- ease of cleaning.
The most suitable are:
- Leather. Thanks to this material, you can not only improve the appearance of the car's interior, but also increase the selling price. It is more resistant to various types of pollution, easy to clean and has always been considered a classic. But it is worth remembering that leather is very sensitive to temperature changes and, after numerous treatments, has a sliding effect, so it is not recommended for use in cars without air conditioning. It is also not a very cheap material.
- Neoprene. This material has deservedly won the attention of consumers. Although it is made of synthetic fibers, it also has a number of advantages: it is wear-resistant, protects from moisture and dust, is resistant to ultraviolet rays, and has non-flammable properties, which is very convenient for smokers.
- Velours. This material is also very often used when sewing covers. Thanks to the velor, the interior looks very impressive, it is also pleasant to the touch and at the same time very durable. The only negative is that they easily attract dust.
- Eco leather. This is one of the newest trends in the automotive industry. It has higher breathability than leather, is less susceptible to wear, easy to clean, and affordable.
Having decided on the choice of suitable material, you can begin sewing the covers.
Bottom of front seats
First we put on the lower part of the front seat cover. How to wear:
- Carefully lay out the element on the seat, straighten it into the gap between the seat and the back and forcefully pull it down.
- Next, we put fastening hooks on the elastic bands sewn around the perimeter of the lower part (they are included in the delivery kit). We put our hand under the seat (if we decided to install the covers without dismantling the seats). We find the technological elements of the car to securely hook all the hooks around the perimeter of the lower part.
Attention! Be careful and careful! Do not attach hook elements to electrical wires or other electrical wiring elements.
- After all the elastic bands are secured with hooks, we smooth out the installed part of the cover again and, if necessary, tighten it down in the necessary (or bristling) places. If in some places the cover is not secured tightly enough, put your hand under the seat again and rearrange the fastening hooks so as to increase the tension of the included rubber bands.
- Next, carefully cut a hole for the backrest tilt adjustment knob (if your car is not equipped with an electric drive) and place the edges of the fabric under the plastic plug.
After you put on the lower part, you can start arranging the back.
Variations of patterns
There are several ways to take measurements of your car seats:
- If you have old, unnecessary car covers, you can use them as the basis for the pattern. Remove the old covers, split them at the seams, and you will have ready-made patterns;
- When taking measurements directly from the seat, you will need regular greenhouse film (it will be more convenient to take measurements with it than with newspaper or any other paper).
The film must be placed on the seat and secured with pins. Using a marker or felt-tip pen, trace along the outline and cut with scissors. It is recommended to double-check the accuracy of the measurement using a ruler. We do the same with the back, sides, and pillows.
An approximate pattern for car seat covers looks like this:
We transfer the finished pattern to the selected material, not forgetting to leave 1.5-2 cm for seam allowances. Next we proceed to sweeping away all the details. It is advisable, after the product has been pre-swept, to try it on your chair, so you will see all the flaws and shortcomings that can be easily corrected. If the cover fits perfectly, then you can proceed directly to stitching the seams using a sewing machine. Also, don’t forget to use special ropes or hooks that will ensure a secure fit for your case.
Since our covers are made by hand, it would be appropriate to add individuality to them: add decorative elements, using additional decorative seams to create a unique ornament or design.
Front seat backs
Regardless of the design features of the front seats (and the make of the car), covers on the backs of the front row seats can be easily installed without removing the seats. How to wear it correctly:
- First, remove the headrest. Pull the cover over the back of the seat. Don't worry about the so-called "drum" on the front side. The fact is that the material of the cover does not follow the geometry of the seat back. Everything will be fixed later.
- We tighten the lower “tongue” so that the cover sits on the back “like a glove” (that is, the geometry of the seats and the elements of lateral support are fully outlined). Since the back of the backrest covers is made of a thinner, well-stretchable material, this will not be difficult to do.
On a note! Don’t be afraid to apply force when pulling - it’s almost impossible to tear the cover with your hands.
- Having achieved complete adherence of the cover to the back of the seat, we drag the “tongue” into the gap between the seat and the back.
- We fasten it with rubber bands and hooks to the bottom (again, by the technological holes or metal elements of the chair).
Selection of material for sewing
The peculiarity of sewing car covers is that almost any material can be used for the job. Thanks to the wide range of fabrics in specialized stores, drivers do not face difficulties when choosing a specific material or color for sewing future covers. Below are the materials that are most often used in the manufacture of car covers.
Table. Review of materials for car seat upholstery.
| Material, photo | Description |
| Velours | A slightly outdated type of material compared to analogues, but still very popular among motorists. To reupholster the interior, you need to use high-quality fabric, but, despite the promises of many manufacturers, it is very rare to find such material. |
| Alcantara | It is a non-woven ultramicrofiber with many advantages. This material is resistant to abrasion and burning, and it is also quite pleasant to the touch. |
| Carpet | Excellent upholstery material, which is carpet. In addition to its aesthetic appearance, carpet has a positive effect on the quality of acoustics in the cabin. The material is unpretentious, so it is often used for upholstering seats. |
| Leather | A widely used material that can be found in many car interiors. But leather is considered very capricious, so it is not recommended to use it for seat upholstery. It is better to entrust the matter to specialists. |
| Polycotton | Due to its water-repellent properties, polycotton is also used for car seat upholstery. Finished products made from this material can be washed in a washing machine, which is very convenient. |
| Neoprene | Excellent wear-resistant synthetic fabric that can stretch. It has become a favorite among smoking drivers who like to create smoke in the interior of their car. This is due to the non-flammability of the material (it cannot be burned through with a regular cigarette). |
On a note! There is no point in comparing these materials, because they are all different from each other. You need to settle on the most suitable option, and then choose the color of the material.
After choosing the material, you need to decide what kind of glue to buy. Of course, the choice must be made based on the qualities of the material used. You can use Moment as a universal adhesive. It has proven itself well when working with various types of fabrics. The main disadvantages of this glue include an unpleasant odor and difficulty in applying the product.
Bottom of rear seats
In some cars, the bottom of the rear seats can be put into covers without dismantling (for example, in the Renault Logan, it folds forward on mounting hinges), but for some cars it will still have to be dismantled. It's not that difficult to do.
The cover is put on similarly to the lower part of the front seat:
- First we stretch it over the entire lower part of the seat.
- Then we attach the cover using elastic bands and hooks.
- If there are no metal technological elements on the inside of the rear seat that could be hooked onto, then we tie the elastic bands opposite each other using a cord.
Attention! Do not hook the hooks onto the inner polypropylene filling. Such a mount will eventually fall off over time. And the cover will fit “like a saddle on a cow.”
Sequence of operations
It is generally accepted that in order to properly put covers on car seats, you need to start with the front seats. It is not necessary to remove them from their places. You can do the job without dismantling.
The procedure is as follows:
- the headrests are removed from both seats;
- the corresponding part from the kit is put on the vertical part of the chair , and the fixing rubber bands or “tongue” are passed into the slot under the “back” to secure it under the bottom of the chair; the tension should be sufficient so that the fabric straightens well;
- Now you can put on the lower part of the cover and secure it with hooks under the bottom, also ensuring tension;
- after that, we put the kit element on the headrest and tie it with braid to secure it;
- if the covers do not have holes for the headrest guides, then you can independently make cross cuts in the appropriate places with a construction knife , and then insert the headrest into place.
The same steps must be done with the second front seat.
Covers for the back row are usually put on from the bottom. Some people find it more convenient to dismantle the backrest to make working more convenient. Having packed the lower part, we fix it under the bottom with hooks or ties. Next, we put the upper part on the back, and attach the hooks at the back.
If the sofa has a division, then it is necessary to cover each part of the back one by one. We suggest watching a detailed video with step-by-step instructions.
Rear seat backs
The back of the rear seats in modern cars either folds forward or is attached quite simply (using special latches).
Typically, the back cover has three sewn-in vertical zippers. This is necessary in order to tilt forward only one part of the backrest (if this is provided for by the design). If the back is “monolithic”, then these fasteners are not used.
For seats consisting of two reclining parts:
- first we carry out preliminary fastening (with zippers fastened) on both parts folded forward using elastic bands and hooks (similar to the lower part);
- then unfasten the zipper opposite the line between the halves of the chair;
- Using additional elastic bands, we fix the edges at the junction of the parts of the backrest;
- Place both halves of the backrest in a vertical position and fasten the zipper.
Now, even with the cover on, both parts of the rear backrest can be folded forward independently of each other. To do this, you just need to unzip the zipper first.
Rules for choosing covers for Kalina
In addition to the material from which the car seat covers are made, the owner should take into account a number of other factors before purchasing a set, otherwise they will not be able to enjoy using it.
Leather upholstery
- Viburnum covers must have all openings necessary for installation, including headrests and armrests.
- Regardless of the base material, it is desirable that the end parts subject to abrasion are made of leather or leather substitute.
- Presence of edges. The edges of the covers not only provide a secure position on the chair, but can also stand out in a different color combination.
- The presence of lateral and lumbar support is not necessary, since both the Kalina hatchback and the Kalina station wagon have a normal seat profile. However, taking into account the individual characteristics of the driver, these characteristics can be slightly changed.
- The presence of additional pockets on the covers will relieve the load on the side door pockets or the glove compartment, which is especially important if there are often children in the car, as well as during long journeys.
Return to contents
Covers for front seats
For those who do not want to spend a lot of time installing protective devices for car seats, seat covers can be a good alternative to full-size products.
The undoubted advantage of such products is their ease of installation, which usually takes only a few minutes and does not require explanations or recommendations. The downside (and a very significant one) is that numerous parts of the seats remain unprotected. As a result, they can not only get dirty, but also fade on sunny days.
December 18, 2016
This review with video instructions will tell you how to put seat covers on correctly and quickly.
In the video, an Avtoprofi expert will show and teach how to correctly and quickly put on seat covers with a separate fitting pattern on car seats.
For those in a hurry, here are brief step-by-step instructions for installing covers on the rear and front rows. But we recommend watching the video anyway – it’s interesting.
For a car seat
Special craftswomen have learned how to crochet amazing car covers.
This kind of work will require time, perseverance and imagination, but the result is worth it. For knitting you will need the same film pattern.
Can be knitted as a whole fabric or in separate fragments.
Tie the entire seat or just the necessary part.
In fact, these cases are becoming very popular. They can serve as a wonderful, original, stylish gift for a car enthusiast. For clarity, we suggest you watch several videos.
Installing covers on the front seats
It is better to remove the seats - this way the tension will be as tight as possible and without wrinkles.
If the covers have a separate putting on pattern, then first put the cover on the chair cushion.
- Put on the cover;
- Tuck the tongue between the pillow and the backrest;
- Spread the material around the entire perimeter.
- We first fix it with long thin elastic bands - we put them under the seat, stretch them and tie them together.
- We finally fix the lower part of the cover using installation rubber bands with hooks at the bottom of the seat.
car owners were advised to purchase a strong nylon cord from a fishing store and sew it to the covers instead of ribbons. With the Avtoprofi models, such efforts are not required: all models are pre-installed with wide stitched elastic bands with stainless steel hooks.
- The tongue of the upper half of the cover also fits between the pillow and the back.
- Then the fabric of the cover should be pulled down with a slight movement and smoothed so as to pull the material down as much as possible, towards the tongue.
- The cover is pulled over a tongue on the back of the chair, like leather on a drum.
- With maximum tightening, the front part of the cover is literally imprinted into the shape of the chair.
- The tongue is inserted under the back of the cover and secured with Velcro.
A little trick: holes for the headrest rods in the cover can be made using a screwdriver or... A regular cigarette!
Getting started with the process
If you don’t want to put universal covers from the store on your seats, which can only spoil the appearance of the interior, then you can make this accessory yourself. The process is simple, but requires a lot of attention and accuracy. Conventionally, it can be divided into two stages: preparation and actual sewing. Let's consider each stage separately.
What tools will you need?
With the help of car covers, you can not only add individuality to your car, but also improve its interior. Before you begin, you need to prepare the following:
- scissors;
- special glue;
- sewing machine;
- roulette;
- ruler;
- sewing material;
- iron;
- hair dryer;
- a set of keys and screwdrivers for removing seats and old covers.
Tools for sewing a cover
Depending on the material used for sewing car seat covers, the list of tools may vary. Having prepared everything you need, you can begin.
Step-by-step instruction
By following these instructions, you can sew car seat covers with your own hands without much difficulty.
Step 1: Remove the car seats. To do this, you need to unscrew the mounting bolts (4 pcs.). After this, disassemble the seats - this will greatly facilitate further work.
First you need to remove the seats
Step 2. Release the seat mounting parts. In this case, these are special products that press the fabric part to a durable body.
Remove the fastening parts
Step 3. Unbend the special fastening spokes using a regular screwdriver. Try not to break them. Then remove the old cover.
To remove the cover you need to straighten special knitting needles
Step 4. Carefully remove all the knitting needles and secure the fastening tape to the case using special glue. For work, you can use any glue that is designed to work with the material of your choice.
Carefully remove all the spokes
Step 5. Transfer all marks to the surface of the case. This can be done with a regular pencil, but it is better to take a dark marker - it will not be erased so easily after application, and it is also more noticeable.
Step 6. Unfasten the bottom fastener so that it is not in the way. In the same way, you need to rip off the desired part of the car cover. The decorative seam must be opened approximately 5 cm from the edge of the part to be replaced.
Steam the bottom fastener
Step 7. Pull the top thread of the decorative stitch inward using the bottom thread. The threads of the decorative seam should be left, cutting it off at the root and leaving approximately 2 cm from the edge of the part to be replaced.
Pull out the decorative stitch thread
Step 8. After you have cut off the desired part of the cover, smooth it out using an iron or some heavy objects. The fact is that over many years of use, the fabric has taken the shape of a car seat and in order to successfully replace it, this part needs to be leveled.
Level the material with an iron or heavy objects
Step 9. Attach the aligned part to the new material and, after making the necessary marks, cut out a new cover element. Movements should be smooth and careful so as not to spoil the new material.
Cut out a new cover element
Step 10. Connect all parts of the product and sew them using a sewing machine. First, sew all the parts in those places where there will be a decorative seam. Try to follow the old seam location. This is quite difficult, so it requires certain skills to do the job well.
Sew all parts of the cover
Step 11. Connect the new and old seam by driving the needle into the old holes. Then tie the drawn thread of the decorative stitch to the bottom thread.
Tie the ends of the threads together
Step 12. After checking the quality of the work performed, carry out inspections. To do this, you need to reconfigure the machine. As before, you should try to push the needle into the old holes.
Sew a decorative stitch
Step 13. Don't forget about the fastening tape that was attached from the very beginning. Sew it and everything above it with one seam. After the back of the cover is sewn, peel off the fastening tape.
Remove the fastening tape, having sewn everything together first
Step 14: Reassemble everything in reverse order. The spokes can be aligned before installation if necessary.
Install the spokes and other elements in their places
Step 15. After the seat is decorated with a new cover, it needs to be installed in its place. After about 1-2 weeks, the replaced part of the cover will rub in and sit in its place. If desired, you can perform this operation with other parts of the case.
Secure the seat to its place in the car
Do it yourself or contact a specialist
If finances allow, and you do not have time to reupholster car seats yourself, then it is better to entrust this task to specialists. There are many reasons why this service is considered very popular among motorists.
The main advantages of using the service include:
- the client can always count on high-quality work done;
- a wide choice of design solutions appears without any fear of failure;
- the customer receives a guarantee for new covers;
- The deadlines for completing the work are significantly longer than the same process, but done manually.
Pros and cons of doing the work yourself
You literally have to pay for all these benefits, especially since the services of professional seat reupholsterers cost a lot. Therefore, you need to decide for yourself, weighing all your capabilities and strengths.
Installing car covers on the rear row
Now you need to install the covers on the back row of the car. We remove the pillows and the backrest. Leave the back in place.
The donning pattern here is exactly the same as with the first row:
- On the back of the rear seat, you need to remove the seat belts, if present, and then fold the backrest.
- The cover consists of two halves and is positioned so that its zippers coincide with the fault lines of the back.
- Once put on, the zippers are closed and the two separate halves of the cover become one.
Preliminary operations
When purchasing covers, you should choose not universal ones, but those for a specific car model. Their size will exactly correspond to the dimensions of the front and rear seats. Also, the headrest covers will be harmoniously placed in their proper places. After all, this safety detail has different overall dimensions in different brands of cars.
Scheme for assembling covers in a car
When choosing a set of capes or covers in a store, you need to pay attention to the attachment of these products to the chairs . It is desirable that the hooks or ties are placed on elastic bands or interspersed with rubber fibers, providing good tension when fixing.
High-quality covers do not have a pronounced unpleasant smell of paint. If one is present, then this may be a sign of counterfeiting.
Additional tips:
- The tighter the material adheres to the case, the longer they will last. Therefore, it is better to take the time to remove the seats before installation.
- If the seats have built-in side airbags, then choose the appropriate cover models.
- The unraveling seam must be placed on the side where the Airbag pillow is located.
- Remove the seats. At least the front row. The quality of planting will be higher, and it will take less time. Removing the seats is quite simple: turn off the electrics and unscrew the mounting bolts of the slide.
- Be sure to turn off the ignition before removing the seats and rear sofa!
- There is no need to remove the plastic on the sides of the seats. In principle, it is not suitable for removal and returning it to its place can be problematic. To better push the cover fabric between the seat and the plastic, it is good to use a smooth metal plate (about the same as what doctors use to examine the throat).
- Squeeze the seat upholstery while pulling the cover. This will make it easier to install the covers without damaging the fabric around the seams.
- It’s unlikely that anyone is going to install seat covers in the cold, but just in case, it’s worth pointing out that it’s best to install protective coverings at above-zero temperatures. Especially if the covers are made of natural or artificial leather (eco leather). These materials “tan” and lose elasticity at low temperatures, so if you don’t have a warm garage, then summer is the best season to install covers.
Important points
The front seats of many car models are equipped with airbags, which are located at the end of the backrests. If you put covers on the seats, this can prevent the pillow from opening at the right time. You can’t put your safety on the line, so these seats need to be cleaned periodically, but under no circumstances should you put on protective covers.
On a note! You can make special cuts in such cases. They are performed at the airbag opening site. When stitching, you need to use a regular thin thread, which can easily break in an accident.
Having carefully studied the material on upholstering car seats, even without experience, the driver can easily sew covers for cars on his own. Ultimately, the car's interior will acquire the beauty that you can enjoy forever. Neither a nail nor a rod, dear motorists!
Video – Sewing eco-leather covers for Lexus LX570
Car seats are an integral part of any car. Many car enthusiasts, in order to prevent chafing and wear of the factory fabric covering, purchase special car covers in the store, or have them sewn to order in special studios. You can also sew car covers with your own hands, having car seat patterns, your chosen fabric, a sewing machine and a little skill and patience. Below is a photo of an example of sewing car covers quickly and easily with your own hands.